
Poptart Cookie Bars
Oh my goodness, get ready to have your mind blown and your taste buds sing with my absolute favorite new creation: Poptart Cookie Bars! I’m so incredibly excited to share this recipe with you because it truly is the best of both worlds – a delightful mashup that takes two beloved treats and fuses them into one unbelievably delicious dessert. Forget choosing between a classic Poptart and a warm, chewy cookie bar; with this recipe, you get to have it all!
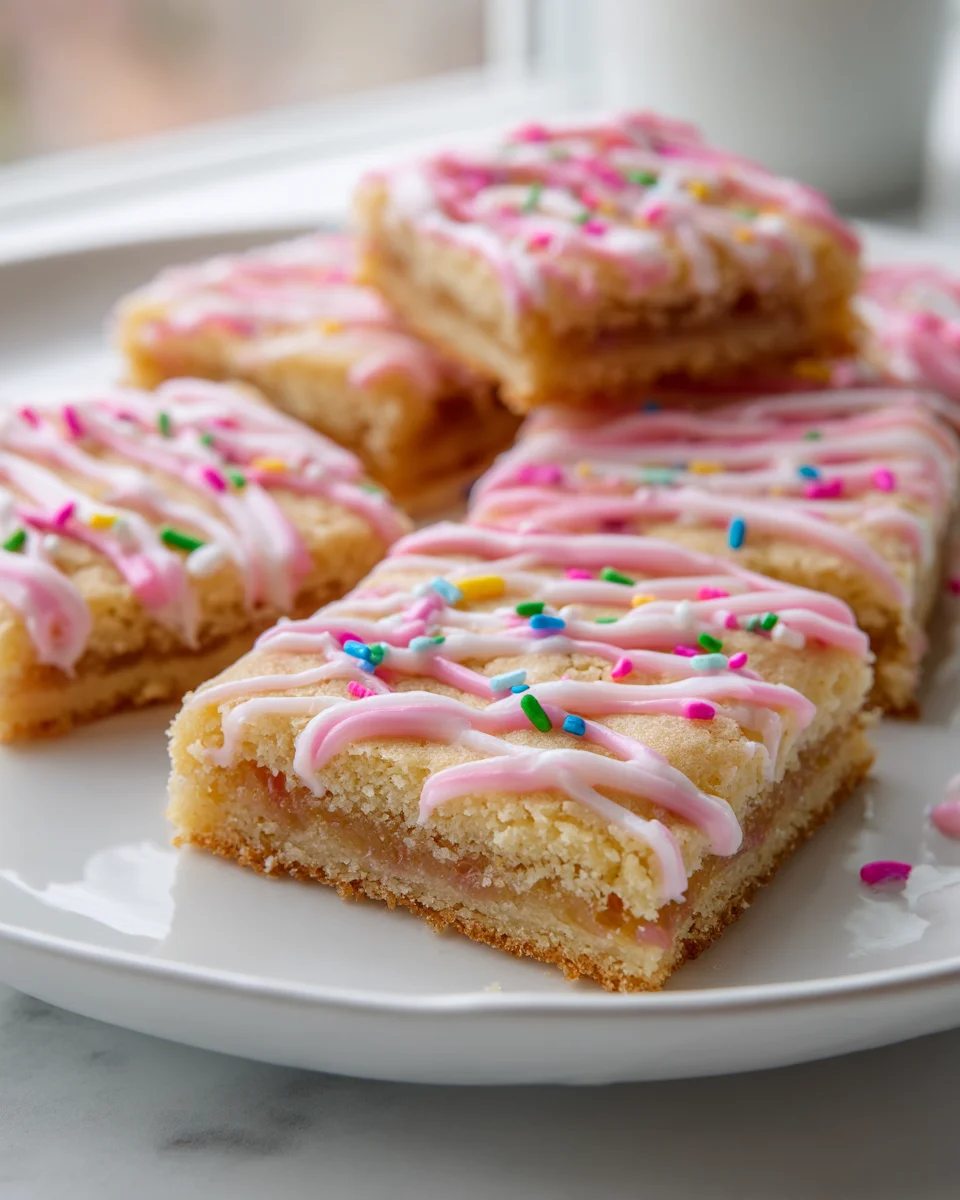
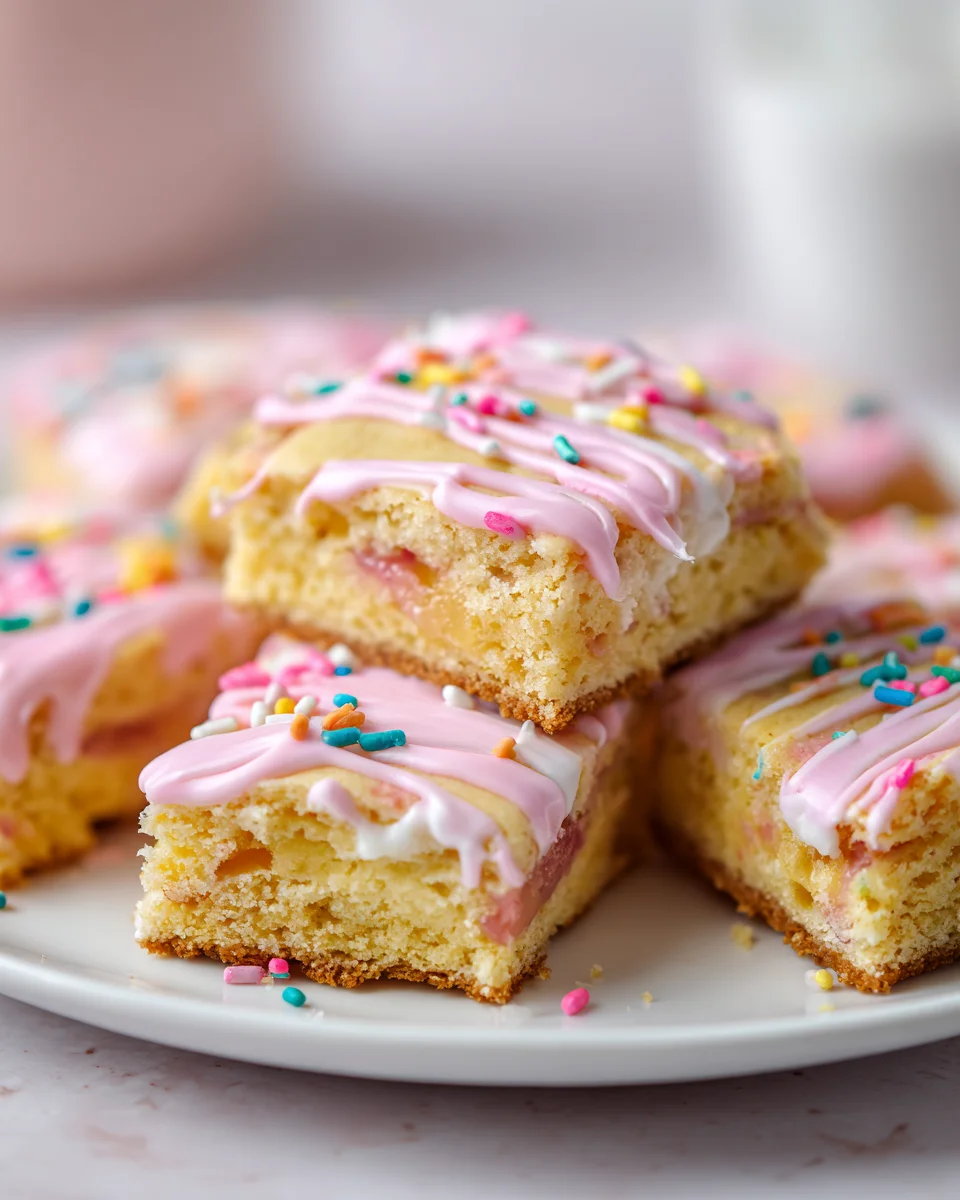
What makes these Poptart Cookie Bars so special, you ask? Well, imagine the nostalgic joy of biting into a frosted, fruit-filled Poptart, but instead of a flaky pastry crust, it’s nestled within a soft, buttery, and utterly irresistible cookie bar base. It’s a texture party – the chewiness of a perfect cookie bar combined with that familiar sweet fruit filling and the iconic sugary frosting and sprinkles on top. Honestly, it’s pure genius!
I know you’re going to absolutely adore these because they’re not just a dessert; they’re a conversation starter, a guaranteed crowd-pleaser, and a trip down memory lane all in one. Whether you’re making them for a party, a potluck, or just a cozy night in, they bring a huge smile to everyone’s face. They’re surprisingly easy to whip up, too, making them perfect for bakers of all skill levels. So, prepare yourself for a treat that’s sweet, fruity, chewy, and topped with that irresistible Poptart glaze. You’re welcome!
Ingredient Notes
Crafting the perfect Poptart Cookie Bars starts with understanding the role each ingredient plays. These bars are a delightful mashup, and getting the components right ensures that gooey, crumbly, and sweet perfection you’re aiming for!
- Unsalted Butter: I always opt for unsalted butter in my baking so I can control the salt content. It provides richness and helps create that tender, melt-in-your-mouth cookie base. Make sure it’s softened to room temperature for easier creaming with the sugars. If you only have salted butter, just reduce the added salt in the recipe by about ¼ teaspoon. For a dairy-free option, a good quality vegan butter substitute will work wonderfully here, just ensure it’s suitable for baking.
- Granulated Sugar & Brown Sugar: The combination of both sugars is key for the cookie base. Granulated sugar provides crispness and sweetness, while brown sugar adds moisture, chewiness, and a lovely caramel note that complements the Poptarts beautifully. Light brown sugar is my go-to, but dark brown sugar will deepen the flavor even more.
- Eggs: Large eggs act as a binder, provide structure, and contribute to the richness and rise of our cookie bars. Make sure they’re at room temperature for the best emulsion with the butter and sugars. If you need an egg-free alternative, a flax egg (1 tablespoon ground flaxseed meal mixed with 3 tablespoons water per egg) or commercial egg replacer can often be used successfully in cookie bar recipes.
- All-Purpose Flour: This forms the primary structure of our cookie base. I don’t typically measure by volume, but rather by weight for accuracy. If you’re measuring by cup, make sure to spoon and level the flour to avoid a dense, dry bar. For a gluten-free version, a 1:1 gluten-free baking blend that contains xanthan gum should work as a direct substitute.
- Baking Powder & Baking Soda: A little bit of both helps give our cookie base a soft lift and a tender crumb. Baking soda reacts with the brown sugar, while baking powder provides consistent leavening.
- Salt: Essential for balancing the sweetness and enhancing all the flavors in the cookie dough. Don’t skip it!
- Vanilla Extract: Pure vanilla extract brings warmth and depth to the cookie base. It’s truly a secret weapon in most desserts.
- Poptarts: Ah, the star of the show! You’ll need a standard box, typically containing 8 Poptarts. My absolute favorite flavors for these bars are Strawberry, Brown Sugar Cinnamon, or Blueberry. Feel free to experiment with your favorites!
- Optional Glaze: Powdered sugar and a splash of milk (or water/cream) and a tiny bit more vanilla extract create a simple, sweet glaze that perfectly mimics the frosting on a classic Poptart. I sometimes use a non-dairy milk alternative if I’m making a dairy-free version.
Step-by-Step Instructions
Get ready to create some magic! These Poptart Cookie Bars are surprisingly simple to assemble, and the results are always a crowd-pleaser. Follow these steps for gooey, delicious success.
- Prepare Your Pan: First things first, preheat your oven to 350°F (175°C). Then, grab a 9×13 inch baking pan. I like to line mine with parchment paper, leaving an overhang on the sides. This creates “handles” that make it incredibly easy to lift the entire batch of bars out of the pan once they’re cooled, making for much cleaner cuts. Lightly grease the parchment paper for extra non-stick insurance.
- Cream Wet Ingredients: In a large mixing bowl, using an electric mixer (or a sturdy whisk and some elbow grease!), beat together your softened unsalted butter, granulated sugar, and brown sugar until the mixture is light, fluffy, and pale in color. This usually takes about 2-3 minutes. Make sure to scrape down the sides of the bowl periodically to ensure everything is well combined.
- Add Eggs and Vanilla: Crack in your eggs, one at a time, beating well after each addition until fully incorporated. Stir in the vanilla extract. The mixture might look a little curdled at this point, but don’t worry, it will come together once the dry ingredients are added.
- Combine Dry Ingredients: In a separate medium bowl, whisk together the all-purpose flour, baking powder, baking soda, and salt. Whisking them separately ensures that the leavening agents and salt are evenly distributed throughout the dough, preventing any pockets of unmixed ingredients.
- Combine Wet and Dry: Gradually add the dry ingredient mixture to the wet ingredients, mixing on low speed until just combined. Be careful not to overmix the dough once the flour is added, as this can lead to tough bars. A few streaks of flour are perfectly fine.
- Form the Base Layer: Take about two-thirds of the cookie dough and press it evenly into the bottom of your prepared 9×13 inch pan. I find it easiest to lightly flour my fingertips or use the back of a greased spoon to get an even layer. Make sure to get into the corners!
- Layer the Poptarts: Unwrap your chosen Poptart flavors. Arrange them in a single layer over the cookie dough base. Depending on how you arrange them, you might need to break some pieces to fit snugly around the edges. I usually aim for a pattern of 3×3 Poptarts, breaking some to fill gaps.
- Top with Remaining Dough: Take the remaining one-third of the cookie dough and crumble it evenly over the layer of Poptarts. You don’t need to completely cover the Poptarts; leaving some peeking through adds to the charm and texture of these bars.
- Bake to Perfection: Place the pan in your preheated oven and bake for 25-30 minutes, or until the edges are golden brown and the center is set. The Poptarts will soften slightly and mingle beautifully with the cookie dough.
- Cool Completely: This step is crucial for clean cuts! Let the bars cool in the pan on a wire rack for at least 1-2 hours, or until completely cool. I often even pop them in the fridge for 30 minutes once they’re mostly cooled to speed up the process.
- Glaze and Slice (Optional): If you’re adding a glaze, whisk together the powdered sugar, milk, and vanilla extract until smooth. Drizzle it over the cooled bars. Once the glaze is set (or if you’re skipping the glaze), use those parchment paper “handles” to lift the entire slab out of the pan. Place it on a cutting board and slice into squares or rectangles using a sharp knife. Enjoy!
Tips & Suggestions
Making Poptart Cookie Bars is a blast, but a few insider tips can elevate your baking experience from good to absolutely fantastic. I’ve learned these through trial and error, and I’m happy to share them with you!
- Poptart Flavor Exploration: Don’t be shy – experiment with different Poptart flavors! Strawberry and Brown Sugar Cinnamon are timeless classics that work exceptionally well, creating that nostalgic taste. However, don’t limit yourself! Blueberry, Raspberry, or even Chocolate Fudge can offer delightful variations. Consider mixing a few flavors in one batch for an interesting surprise in every bite. Just make sure the Poptarts are fresh, as stale ones won’t provide the same soft texture once baked.
- Achieving Clean Cuts: This is a game-changer for presentation. After your bars have completely cooled, transfer the pan to the refrigerator for about 30-60 minutes. Chilling the bars makes the cookie dough and Poptart filling firm up, resulting in much cleaner, less crumbly slices. When you’re ready to cut, use a large, sharp chef’s knife. For extra neatness, wipe the blade clean between each cut, especially if you’ve added a glaze.
- Avoid Overbaking: Poptart Cookie Bars are best when they’re soft and slightly gooey in the center, with chewy edges. Overbaking can lead to dry, crumbly bars. Keep a close eye on them during the last 5-7 minutes of baking. The edges should be lightly golden brown, and the center should look set but might still have a very slight wobble. Remember, they will continue to firm up as they cool.
- Pan Size Matters: While I suggest a 9×13 inch pan for these bars, using a different size will affect the thickness and baking time. If you use a smaller pan (e.g., 8×8 inch), your bars will be thicker and require a longer baking time. Conversely, a larger pan will result in thinner bars that bake more quickly. Always adjust your baking time accordingly and use visual cues (golden edges, set center) rather than just relying on the clock.
- Customization is Key: Feel free to get creative with your cookie base! You can add a handful of chocolate chips, sprinkles, or chopped nuts to the cookie dough before pressing it into the pan. For an extra touch, consider a different type of drizzle – perhaps melted white chocolate or a cream cheese glaze instead of the simple powdered sugar glaze. The possibilities are endless!
- Serving Suggestion: While these bars are fantastic at room temperature, a quick zap in the microwave for 10-15 seconds can warm them slightly, making the Poptart filling even gooier and more irresistible. Serve them with a scoop of vanilla ice cream for an indulgent dessert experience!
Storage
Once you’ve baked up a batch of these delightful Poptart Cookie Bars, you’ll want to make sure you store them correctly to maintain their freshness and deliciousness for as long as possible. Here’s how I typically handle storage:
- At Room Temperature: For immediate enjoyment, your Poptart Cookie Bars can be stored in an airtight container at room temperature. Make sure they are completely cooled before placing them in the container to prevent condensation, which can make them soggy. They will stay fresh and soft for up to 3-4 days this way. If you’ve added a glaze, ensure it’s fully set before stacking the bars or covering them tightly. I often place a piece of parchment paper between layers if I’m stacking them.
- In the Refrigerator: If you want to extend their shelf life a bit, or if your kitchen is particularly warm, you can store the bars in an airtight container in the refrigerator. This will keep them fresh for up to a week. The texture will become firmer when chilled, but they’re still incredibly delicious straight from the fridge. If you prefer a softer texture, simply let them sit at room temperature for about 15-20 minutes before serving, or warm them up slightly in the microwave for a few seconds.
- Freezing for Longer Storage: These Poptart Cookie Bars freeze beautifully, which is fantastic news if you want to make a big batch or save some for later.
- Preparation: First, ensure the bars are completely cooled. If you’ve glazed them, make sure the glaze is fully set.
- Individual Wrapping (Recommended): For best results, I highly recommend wrapping individual bars (or small portions) tightly in plastic wrap, then placing them in a freezer-safe zip-top bag or an airtight freezer container. This prevents freezer burn and makes it easy to grab just one or two at a time.
- Container Method: Alternatively, you can place a whole slab or pre-cut bars in a single layer in a freezer-safe container. If stacking, place parchment paper between layers to prevent them from sticking together.
- Freezer Life: When properly stored, Poptart Cookie Bars can be kept in the freezer for up to 2-3 months.
- Thawing: To thaw, simply remove the desired number of bars from the freezer and let them sit at room temperature for an hour or two. You can also pop them in the microwave for 30-60 seconds for a warm, gooey treat!
Final Thoughts
And there you have it, my friends! I truly believe these Poptart Cookie Bars are more than just a dessert; they’re a delightful adventure for your taste buds. This recipe is an absolute must-try because it perfectly marries the comforting chewiness of a classic cookie with the nostalgic, fruity surprise of your favorite Poptart. The layers of texture and that burst of flavor make every bite a pure joy. If you’re looking to impress, delight, or simply treat yourself to something truly unique and incredibly delicious, these Poptart Cookie Bars are your answer. Get ready to experience a new level of baked bliss!
Poptart Cookie Bars: The Ultimate Sweet & Easy Dessert

Get ready to indulge in the delightful fusion of classic Poptarts and chewy cookie bars with these Poptart Cookie Bars! This easy-to-make dessert is perfect for any occasion and is sure to impress your friends and family.
- Prep Time: 15 mins
- Cook Time: 30 mins
- Total Time: 45 minutes
- Yield: 12 servings 1x
- Category: Dessert
- Method: Baking
- Cuisine: American
Ingredients
- 1 cup Unsalted Butter, softened
- 1 cup Granulated Sugar
- 1 cup Brown Sugar
- 2 Large Eggs
- 2 teaspoons Vanilla Extract
- 3 cups All-Purpose Flour
- 1 teaspoon Baking Powder
- 1 teaspoon Baking Soda
- 1/2 teaspoon Salt
- 8 Poptarts (Strawberry, Brown Sugar Cinnamon, or Blueberry)
- Optional Glaze: 1 cup Powdered Sugar, splash of Milk (or water/cream), and a tiny bit more Vanilla Extract
Instructions
- Preheat your oven to 350°F (175°C) and prepare a 9×13 inch baking pan lined with parchment paper, lightly greased.
- In a large mixing bowl, cream together the softened unsalted butter, granulated sugar, and brown sugar until light and fluffy, about 2-3 minutes.
- Add the eggs one at a time, beating well after each addition, then stir in the vanilla extract.
- In a separate bowl, whisk together the all-purpose flour, baking powder, baking soda, and salt.
- Gradually add the dry ingredients to the wet ingredients, mixing on low speed until just combined.
- Press about two-thirds of the cookie dough evenly into the bottom of the prepared pan.
- Unwrap the Poptarts and arrange them in a single layer over the cookie dough base.
- Crumble the remaining one-third of the cookie dough evenly over the layer of Poptarts.
- Bake for 25-30 minutes, or until the edges are golden brown and the center is set.
- Let the bars cool in the pan on a wire rack for at least 1-2 hours, or until completely cool.
- If adding a glaze, whisk together the powdered sugar, milk, and vanilla extract until smooth, then drizzle it over the cooled bars. Slice into squares or rectangles.
Nutrition
- Serving Size: 1 bar
- Calories: 250
- Sugar: 20 g
- Sodium: 150 mg
- Fat: 10 g
- Saturated Fat: 6 g
- Unsaturated Fat: 4 g
- Trans Fat: 0 g
- Carbohydrates: 35 g
- Fiber: 1 g
- Protein: 2 g
- Cholesterol: 40 mg
Keywords: Experiment with different Poptart flavors for unique variations. For cleaner cuts, chill the bars in the refrigerator for 30-60 minutes before slicing.
Leave a Comment