
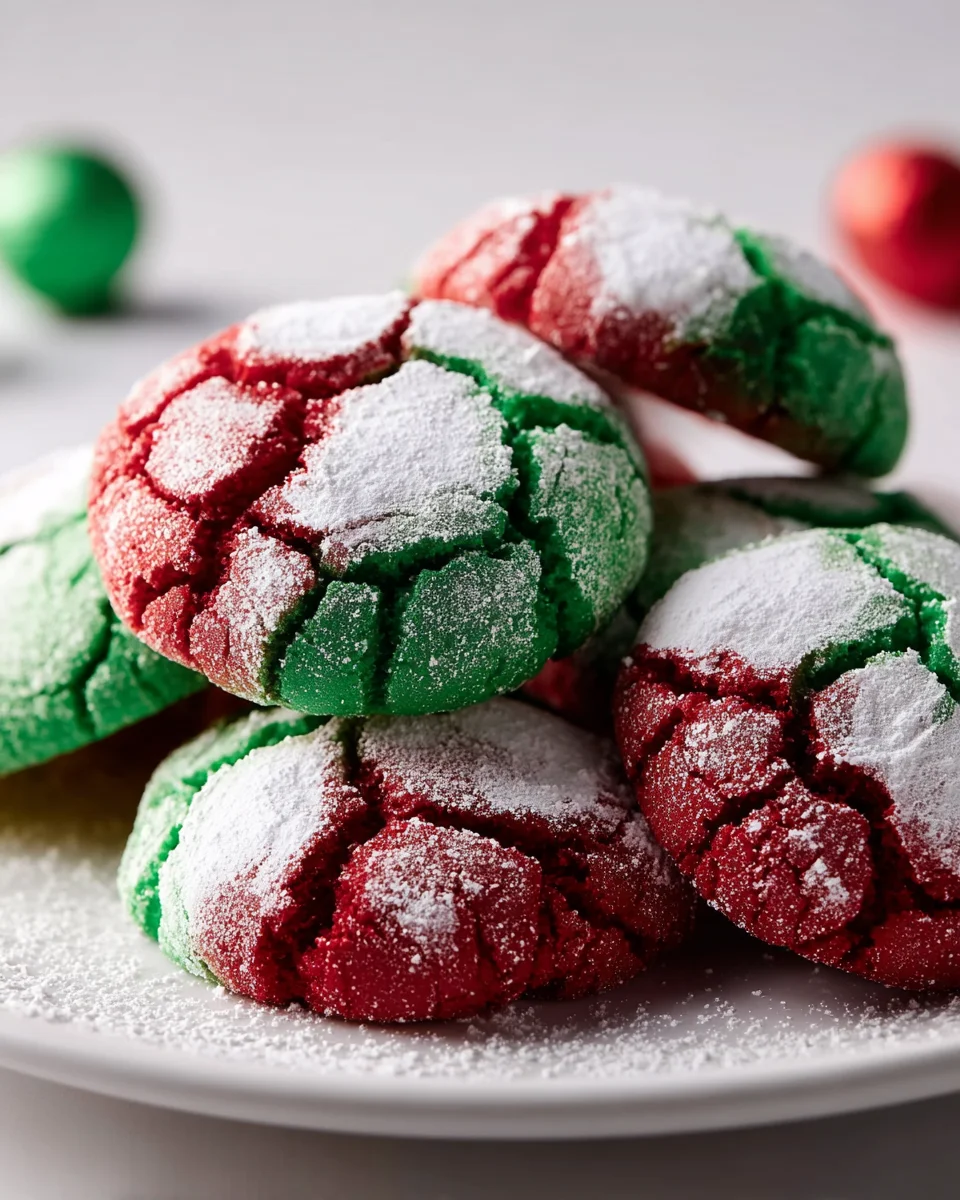
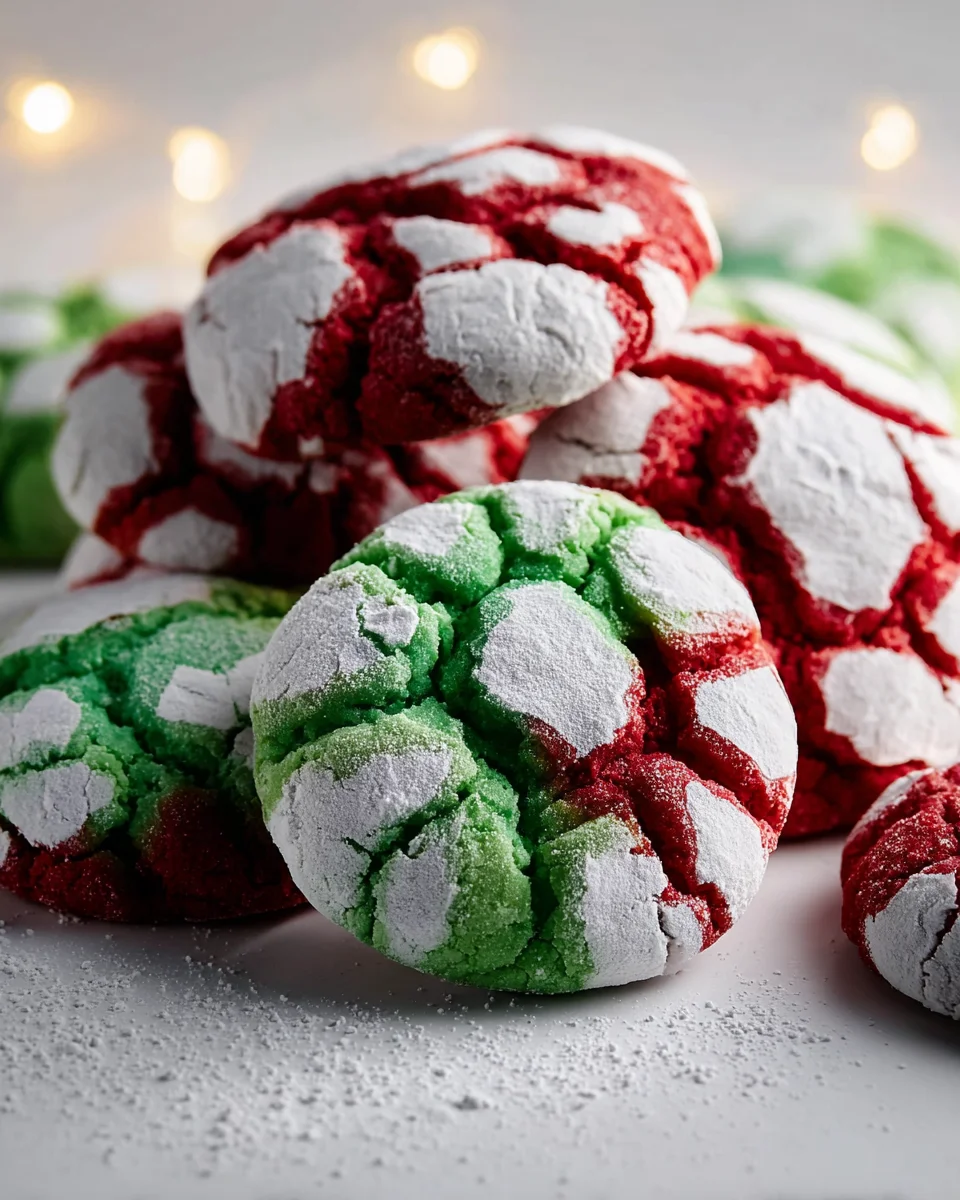
Festive Red And Green Crinkle Cookies Recipe
Oh, prepare yourselves for some serious holiday magic! When I think of festive baking, the first thing that often comes to mind are these stunning Festive Red And Green Crinkle Cookies Recipe. Trust me, these aren’t just any cookies; they are little bursts of joy, perfectly capturing the spirit of the season in every single bite. What makes them truly special, you ask? It’s that incredible visual appeal – those vibrant red and green hues peeking through a snowy blanket of powdered sugar, creating that signature crinkled effect. They look like they’ve just tumbled out of a winter wonderland!
You, my dear reader, are absolutely going to adore making and sharing these. They’re surprisingly simple to put together, but they deliver such a ‘wow’ factor that everyone will think you’ve been slaving away in the kitchen for hours. Picture this: soft, chewy centers with a delightful hint of vanilla, surrounded by a delicate, sugary crust that literally crackles with deliciousness. They’re perfect for holiday cookie exchanges, a show-stopping addition to your dessert platter, or just a cozy treat to enjoy with a warm mug of your favorite non-alcohol alternative hot chocolate. Get ready to spread some serious cheer with these beauties!
Ingredient Notes
Creating these delightful Festive Red and Green Crinkle Cookies starts with understanding the building blocks. Each ingredient plays a crucial role in achieving that perfect balance of chewiness, sweetness, and of course, those signature vibrant colors. Here’s a closer look at what we’ll be using and why, along with some helpful substitution notes.
- All-Purpose Flour: This forms the structure of our cookies. I always use unbleached all-purpose flour for consistent results. If you’re making these gluten-free, a 1:1 gluten-free baking blend that includes xanthan gum can work, though the texture might be slightly more delicate.
- Granulated Sugar: Not just for sweetness, sugar also contributes to the cookies’ tenderness and helps them spread beautifully, which is vital for the crinkle effect.
- Vegetable Oil: For classic crinkle cookies, neutral vegetable oil (like canola or sunflower) is my secret to an incredibly moist and chewy texture that stays soft for days. You could substitute with melted unsalted butter for a richer flavor, but expect a slightly cakier, less chewy result.
- Large Eggs: These are essential binders, adding richness and moisture. Always use room-temperature eggs, as they emulsify better with the other ingredients, leading to a smoother dough.
- Baking Powder: Our leavening agent! This helps the cookies rise and spread, contributing to the distinct crackled surface. Make sure your baking powder is fresh for optimal results.
- Salt: A pinch of salt balances the sweetness and enhances all the flavors. Don’t skip it!
- Vanilla Extract: Pure vanilla extract provides that comforting, classic cookie flavor. For a festive twist, a tiny dash of peppermint extract (especially in the red dough) or almond extract (in the green dough) can be wonderful additions.
- Red and Green Gel Food Coloring: This is where the magic of “festive” comes in! I highly recommend using gel food coloring over liquid. Gel colors are concentrated, providing vibrant hues without altering the dough consistency. You’ll need separate red and green colors.
- Confectioners’ Sugar (Powdered Sugar): Absolutely critical for the “crinkle”! This thick, snowy coating prevents the dough from spreading too quickly, and as the cookies bake and expand, the sugar cracks, revealing the colorful dough beneath. Have plenty on hand for generous rolling.
Step-by-Step Instructions
Let’s get baking! This process is straightforward, but paying attention to a few key details will ensure your Festive Red and Green Crinkle Cookies turn out perfectly chewy, vibrant, and beautifully crinkled every time. Follow these steps for holiday cookie success!
- Prepare Your Workspace: First things first, line two baking sheets with parchment paper or silicone baking mats. This makes cleanup a breeze and helps prevent sticking.
- Mix Wet Ingredients: In a large mixing bowl, combine the granulated sugar and vegetable oil. Whisk them together until they are well blended. Next, beat in the eggs one at a time, ensuring each egg is fully incorporated before adding the next. Stir in the vanilla extract until the mixture is smooth and slightly airy.
- Combine Dry Ingredients: In a separate, medium-sized bowl, whisk together the all-purpose flour, baking powder, and salt. Make sure these dry ingredients are thoroughly combined.
- Form the Dough: Gradually add the dry ingredient mixture to the wet ingredients. Mix on low speed, or by hand with a sturdy spatula, until the ingredients are just combined and no streaks of flour remain. Be careful not to overmix, as this can lead to tough cookies. The dough will be soft and quite sticky.
- Divide and Color the Dough: Now for the fun part! Divide your sticky cookie dough evenly into two separate bowls. Add several drops of red gel food coloring to one bowl and several drops of green gel food coloring to the other. Mix each bowl separately until the color is uniform and as vibrant as you desire. You might need to add a few more drops of coloring to achieve a deep, festive hue.
- Chill the Dough (Crucial!): This step is absolutely essential for perfect crinkle cookies. Cover each bowl of colored dough tightly with plastic wrap and refrigerate for at least 2 to 3 hours. For best results, I often chill mine overnight. Chilling allows the dough to firm up, making it easier to handle and preventing excessive spreading in the oven, which is key for those beautiful crinkles.
- Preheat Oven and Prep Rolling Station: Once your dough is nicely chilled, preheat your oven to 350°F (175°C). Set up your rolling station: pour about 1 cup of confectioners’ sugar into a shallow bowl. Make sure it’s a generous amount – we want a thick coating!
- Roll and Coat the Cookies: Take one color of dough out of the fridge at a time (keeping the other chilled). Scoop out tablespoons of dough (a small cookie scoop works perfectly) and gently roll them into 1-inch balls. Immediately and very generously roll each dough ball in the confectioners’ sugar. Ensure the entire surface of the ball is thickly coated, almost like a little snowball. A thick sugar coating is what gives you those pronounced crinkles. Place the coated dough balls about 2 inches apart on your prepared baking sheets.
- Bake: Bake one sheet at a time for 10-12 minutes. The cookies are ready when the edges are just set, the centers still look slightly soft, and those characteristic crinkles have formed. Do not overbake, or your cookies will lose their lovely chewiness and become hard.
- Cool: Allow the baked cookies to cool on the baking sheet for about 5 minutes before carefully transferring them to a wire rack to cool completely. They are delicate when warm but will firm up as they cool.
- Repeat: Continue with the remaining dough, alternating between red and green cookies on your baking sheets for a truly festive and inviting presentation.
Tips & Suggestions
To help you achieve the most dazzling and delicious Festive Red and Green Crinkle Cookies, I’ve gathered some of my favorite tips and suggestions. These small details can make a big difference in your baking experience and the final outcome!
- Gel Coloring is a Game Changer: As I mentioned in the ingredients, always opt for gel food coloring. It delivers much more vibrant and concentrated color without adding excess liquid to your dough, which can affect texture. A little goes a long way, but don’t be afraid to add more if you desire deeper, richer holiday hues.
- Don’t Skip the Chill Time: Seriously, this is probably the most important tip! Cold dough spreads slower in the oven, allowing the powdered sugar to set and then crack properly as the cookie expands. Rushing this step will result in flatter cookies with less distinct crinkles. If your kitchen is warm, consider chilling the rolled dough balls for 10-15 minutes before baking.
- Coat Generously (and then some!): The thicker the coating of confectioners’ sugar, the more dramatic your crinkles will be. Don’t be shy! Roll each dough ball until it looks like a dense snowball. If the coating is too thin, it tends to melt into the cookie rather than cracking.
- Avoid Overbaking for Chewy Goodness: Crinkle cookies are best when they are soft and chewy in the center. Keep a close eye on them; the edges should be just set, and the center should still look slightly underdone. They will continue to cook and firm up as they cool on the hot baking sheet.
- Uniform Size for Even Baking: Try to make your cookie dough balls as uniform in size as possible. This ensures that all your cookies bake evenly at the same rate, preventing some from being overdone while others are still raw in the middle. A small cookie scoop is an excellent tool for this.
- Flavor Exploration: While vanilla is classic, consider adding a festive twist! A touch of peppermint extract (1/4 to 1/2 teaspoon) in the red dough creates a candy cane-like flavor, or a hint of almond extract in the green dough can add a lovely subtle nuttiness. Always start with a small amount of powerful extracts.
- Troubleshooting Flat/No Crinkles: The most common reasons are insufficient chilling, not enough powdered sugar coating, or sometimes using old baking powder. Ensure your ingredients are fresh and you’ve followed the chilling and coating steps meticulously.
Storage
You’ve baked up a festive batch of these beautiful Red and Green Crinkle Cookies, so let’s make sure they stay fresh and delicious for as long as possible! Proper storage is key to maintaining their soft, chewy texture and vibrant holiday look.
- At Room Temperature: Once your cookies have completely cooled, store them in an airtight container at room temperature. A cookie jar or plastic container with a tight-fitting lid is perfect. They will remain wonderfully soft and fresh for up to 5-7 days. To help keep them extra moist, you can even place half a slice of plain bread in the container; the cookies will absorb moisture from the bread. Remember to replace the bread every day or two.
- Freezing Baked Cookies: These crinkle cookies freeze exceptionally well! After they are fully cooled, arrange them in a single layer on a baking sheet and flash freeze them for about an hour until firm. This prevents them from sticking together. Once firm, transfer the cookies to a freezer-safe airtight container or a heavy-duty freezer bag, layering them with parchment paper if stacking. They can be frozen for up to 2-3 months. Thaw them at room temperature for a few hours before serving.
- Freezing Cookie Dough: You can also prepare the dough ahead of time and freeze it. After coloring, wrap each ball of dough tightly in plastic wrap, then place them in a freezer-safe bag or container. The dough can be frozen for up to 1 month. When you’re ready to bake, thaw the dough overnight in the refrigerator, then proceed with rolling in confectioners’ sugar and baking as usual. You might need to let the thawed dough sit at room temperature for 10-15 minutes to make it easier to roll.
Final Thoughts
And there you have it! I truly hope you’ve enjoyed following along with this Festive Red And Green Crinkle Cookies Recipe. What I love most about these delightful treats is how they perfectly capture the spirit of the holidays in every bite. Their vibrant red and green hues, coupled with that signature crinkled texture, make them an instant showstopper on any dessert table.
This isn’t just another cookie; it’s a simple way to bring a burst of festive joy into your home. They’re incredibly easy to make, yet they look utterly professional, leaving everyone wondering about your secret. Whether you’re baking for a holiday gathering, a cozy family evening, or simply to spread some cheer, the Festive Red And Green Crinkle Cookies Recipe is an absolute must-try. I promise you’ll be thrilled with the results – delicious, beautiful, and oh-so-festive! Happy baking!
Delicious Festive Red & Green Crinkle Cookies Recipe!

These stunning Festive Red and Green Crinkle Cookies are little bursts of joy, perfectly capturing the spirit of the season in every single bite. With their vibrant colors and delightful chewy texture, they’re sure to be a hit at any holiday gathering!
- Prep Time: 15 mins
- Cook Time: 12 mins
- Total Time: 27 minutes
- Yield: 24 cookies 1x
- Category: Dessert
- Method: Baking
- Cuisine: American
Ingredients
- 2 cups All-Purpose Flour
- 1 cup Granulated Sugar
- 1/2 cup Vegetable Oil
- 2 Large Eggs
- 2 teaspoons Baking Powder
- 1/2 teaspoon Salt
- 1 teaspoon Vanilla Extract
- Red Gel Food Coloring
- Green Gel Food Coloring
- 1 cup Confectioners' Sugar (Powdered Sugar)
Instructions
- Prepare Your Workspace: Line two baking sheets with parchment paper or silicone baking mats.
- Mix Wet Ingredients: In a large mixing bowl, combine the granulated sugar and vegetable oil. Whisk them together until well blended. Beat in the eggs one at a time, ensuring each egg is fully incorporated before adding the next. Stir in the vanilla extract until the mixture is smooth and slightly airy.
- Combine Dry Ingredients: In a separate medium-sized bowl, whisk together the all-purpose flour, baking powder, and salt until thoroughly combined.
- Form the Dough: Gradually add the dry ingredient mixture to the wet ingredients. Mix on low speed or by hand with a sturdy spatula until just combined and no streaks of flour remain. The dough will be soft and quite sticky.
- Divide and Color the Dough: Divide the sticky cookie dough evenly into two bowls. Add several drops of red gel food coloring to one bowl and several drops of green gel food coloring to the other. Mix each bowl separately until the color is uniform and as vibrant as desired.
- Chill the Dough (Crucial!): Cover each bowl of colored dough tightly with plastic wrap and refrigerate for at least 2 to 3 hours, or overnight for best results.
- Preheat Oven and Prep Rolling Station: Preheat your oven to 350°F (175°C). Pour about 1 cup of confectioners' sugar into a shallow bowl.
- Roll and Coat the Cookies: Take one color of dough out of the fridge at a time. Scoop out tablespoons of dough and roll them into 1-inch balls. Roll each dough ball generously in the confectioners' sugar, ensuring a thick coating. Place the coated dough balls about 2 inches apart on the prepared baking sheets.
- Bake: Bake one sheet at a time for 10-12 minutes. The cookies are ready when the edges are just set and the centers still look slightly soft.
- Cool: Allow the baked cookies to cool on the baking sheet for about 5 minutes before transferring them to a wire rack to cool completely.
- Repeat: Continue with the remaining dough, alternating between red and green cookies on your baking sheets.
Nutrition
- Serving Size: 1 cookie
- Calories: 100
- Sugar: 10 g
- Sodium: 50 mg
- Fat: 4 g
- Saturated Fat: 0.5 g
- Unsaturated Fat: 3.5 g
- Trans Fat: 0 g
- Carbohydrates: 15 g
- Fiber: 0 g
- Protein: 1 g
- Cholesterol: 20 mg
Keywords: Use gel food coloring for vibrant hues without altering dough consistency. Don't skip the chilling time to ensure proper crinkle formation. A thicker coating of confectioners' sugar will enhance the crinkle effect.
Leave a Comment