
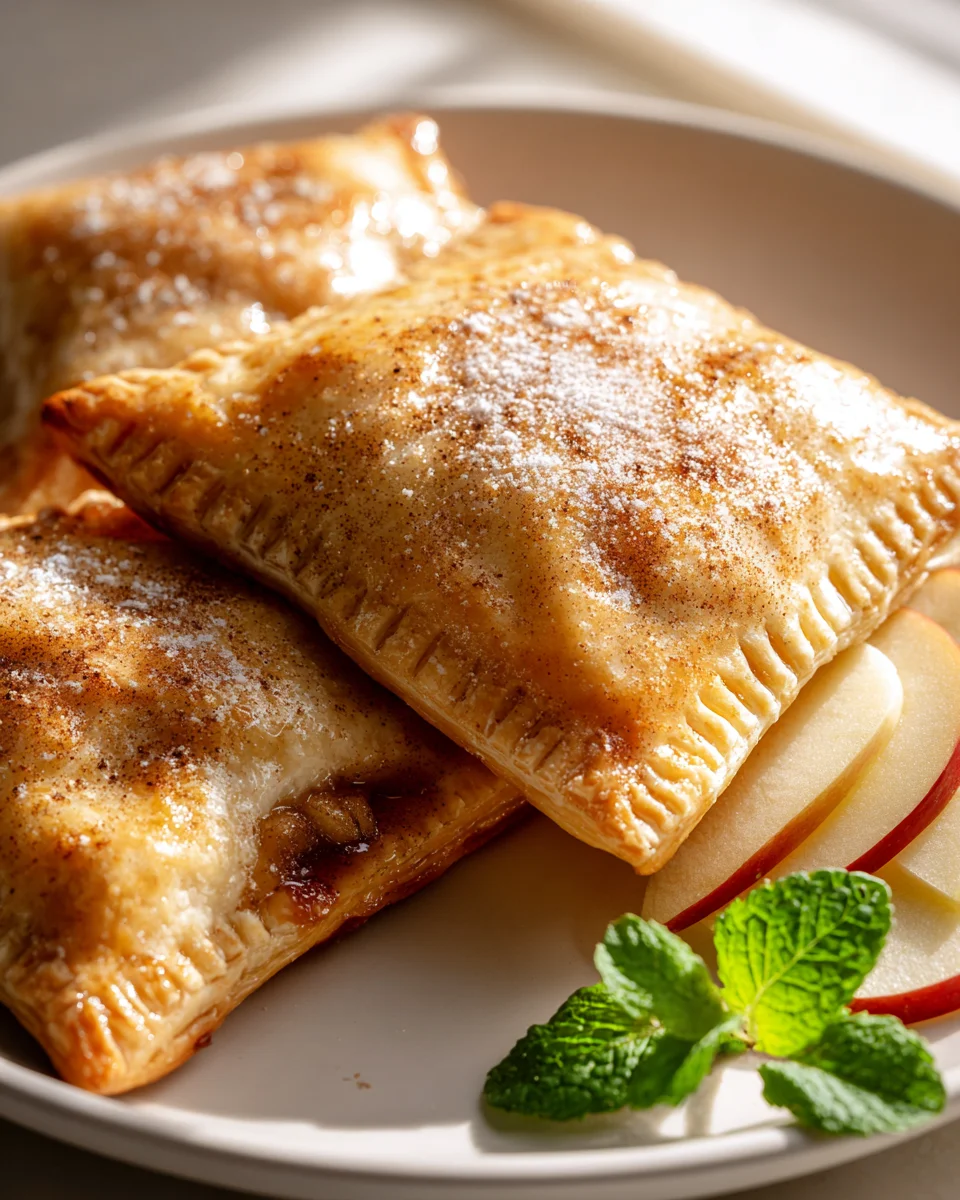
Apple Cinnamon Breakfast Pop Tarts
Oh, prepare yourselves for a trip down memory lane, but with a delicious, homemade twist! Today, I’m absolutely thrilled to share my recipe for Apple Cinnamon Breakfast Pop Tarts. You know that comforting feeling of a warm, slightly toasted pastry from your childhood? Well, imagine that, but infinitely better because you made it from scratch! This isn’t just any breakfast treat; it’s a labor of love that transforms simple ingredients into something truly extraordinary.
What makes these Apple Cinnamon Breakfast Pop Tarts so special, you ask? It’s all in the details! We’re talking about a perfectly flaky, buttery pastry crust that shatters delightfully with every bite, enveloping a gooey, warmly spiced apple cinnamon filling that just screams cozy autumn mornings. Forget the somewhat bland, dry store-bought versions; these homemade wonders are bursting with fresh apple flavor and the inviting aroma of cinnamon. Readers are going to adore these because they offer that perfect balance of nostalgia and gourmet quality – they’re comforting, satisfying, and oh-so-delicious, whether you’re starting your day or just craving a sweet pick-me-up. Plus, there’s something incredibly rewarding about serving up a batch of these beautiful, golden pastries, complete with a sweet drizzle of glaze, knowing every ingredient is wholesome and fresh. Get ready to elevate your breakfast game!
Ingredient Notes
Making homemade Apple Cinnamon Breakfast Pop Tarts might sound like a project, but trust me, it’s incredibly rewarding and much simpler than you think! The key is using quality ingredients, and I’m here to walk you through what works best and what substitutions you can confidently make.
For the Pastry
- Refrigerated Pie Crusts: My go-to for convenience! You’ll typically need two rolls of pie crust for about 6-8 pop tarts. Look for the kind that comes rolled up in a box in the refrigerated section of your grocery store. They are perfectly flaky and save so much time.
- Puff Pastry: Another fantastic option if you prefer an even lighter, airier texture. Just be sure to handle it gently, as it can be a bit more delicate. Thaw it according to package directions.
- Homemade Pie Dough: If you’re feeling ambitious, a good all-butter pie crust recipe will yield amazing results. Just make sure it’s well-chilled before rolling.
- Gluten-Free Pastry: For those with dietary restrictions, many brands now offer excellent gluten-free pie crusts or puff pastry. Just follow the package instructions, as they can sometimes behave a little differently.
For the Apple Cinnamon Filling
- Apples: This is where the magic happens! I highly recommend using a crisp, firm apple variety. Granny Smith apples are fantastic for their tartness, which balances beautifully with the sweetness of the sugar and cinnamon. A blend of Granny Smith and a sweeter apple like Honeycrisp or Fuji also works wonderfully, giving you a more complex apple flavor. Just avoid overly soft apples, as they can turn to mush.
- Brown Sugar: I prefer light brown sugar here for its molasses notes, which complement the apples and cinnamon so well. Granulated sugar can be used in a pinch, but you’ll miss that subtle depth.
- Ground Cinnamon: Absolutely essential for that classic apple pie flavor. Don’t skimp! A good quality, fresh cinnamon makes all the difference.
- Cornstarch (or Flour): This is your secret weapon to prevent a watery filling. A tablespoon or so will thicken the apple juices beautifully as they cook, ensuring your pop tart doesn’t have a soggy bottom or leak out. Flour can be used as a substitute, but I find cornstarch provides a clearer, smoother finish.
- Lemon Juice: A splash brightens the apple flavor and prevents them from browning too much during cooking. Don’t worry, you won’t taste the lemon itself prominently.
- Vanilla Extract: Just a tiny touch enhances all the other flavors.
For the Icing
- Powdered Sugar (Confectioners’ Sugar): The base of any good pop tart icing! Make sure it’s lump-free for a smooth glaze.
- Milk (or Non-Dairy Alternative): A small amount of milk (whole, 2%, or even a non-dairy option like almond or oat milk) is used to thin the icing to the perfect drizzling consistency.
- Vanilla Extract: Enhances the sweetness and adds a lovely aroma.
- Optional: Ground Cinnamon: A tiny pinch stirred into the icing takes the cinnamon flavor over the top!
Step-by-Step Instructions
Let’s get baking! Here’s how I make my delicious Apple Cinnamon Breakfast Pop Tarts, step by step. Remember, precision helps, but don’t be afraid to have fun with it!
Step 1: Prepare the Apple Cinnamon Filling
First, we need to create our wonderfully spiced apple filling. Peel, core, and dice your apples into small, uniform pieces, about 1/4 to 1/2 inch. Small dice are key for easy assembly and even cooking within the pastry. In a medium saucepan, combine the diced apples, brown sugar, cinnamon, cornstarch, and lemon juice. Cook over medium heat, stirring occasionally, until the apples have softened slightly but still retain a bit of their shape – this usually takes about 5-8 minutes. The mixture should be thick and jam-like. Stir in the vanilla extract. Remove from heat and, this part is critical, let the filling cool completely. A warm filling will make your pastry soggy and hard to work with.
Step 2: Prepare the Pastry
Unroll your refrigerated pie crusts onto a lightly floured surface. If using puff pastry, thaw it and then gently unfold. If your crusts are round, you’ll need to gently roll them out into a rough rectangle, about 9×12 inches, making them slightly thinner. Trim the edges to create clean, straight rectangles. From each rectangle, you should be able to cut 6 smaller rectangles, roughly 3×4.5 inches each. You’ll need 12 rectangles in total for 6 pop tarts (one for the bottom, one for the top).
Step 3: Assemble the Pop Tarts
Preheat your oven to 375°F (190°C). Line a baking sheet with parchment paper. Take half of your pastry rectangles and arrange them on the prepared baking sheet. Spoon about 1-2 tablespoons of the cooled apple filling onto the center of each pastry rectangle, leaving a clear border of about half an inch around the edges. Don’t overfill, or your pop tarts will burst! Lightly brush the edges of the pastry with a little water – this acts as glue to help seal. Place the remaining pastry rectangles on top of the filling-covered ones, gently aligning the edges. Using a fork, firmly crimp all four edges of each pop tart to seal them completely. This is important to keep the filling locked inside.
Step 4: Bake to Golden Perfection
If you want a beautiful golden sheen, lightly whisk an egg with a tablespoon of water to create an egg wash. Gently brush the tops of each pop tart with this egg wash. Using the tip of a knife or a skewer, poke 2-3 small holes in the top of each pop tart. This allows steam to escape, preventing the pastry from puffing up too much and keeping the top flat. Bake for 18-22 minutes, or until the pastry is beautifully golden brown and looks flaky. Keep an eye on them, as oven temperatures can vary. Once baked, transfer the pop tarts to a wire rack to cool completely before icing.
Step 5: Prepare the Icing and Decorate
While your pop tarts are cooling, it’s time to make the icing. In a small bowl, whisk together the powdered sugar, milk, and vanilla extract until smooth and no lumps remain. If you want a thicker icing, add less milk; for a thinner glaze, add a tiny bit more. If desired, stir in a pinch of ground cinnamon for extra flavor. Once the pop tarts are completely cool (this is key, or your icing will melt!), generously spread or drizzle the icing over the tops. Let the icing set for about 10-15 minutes before serving. Enjoy your homemade Apple Cinnamon Breakfast Pop Tarts!
Tips & Suggestions
Here are a few pointers I’ve picked up along the way to ensure your Apple Cinnamon Breakfast Pop Tarts are nothing short of amazing!
- Don’t Rush the Cooling: I know it’s hard to resist, but seriously, allow your apple filling to cool completely before assembling. Warm filling will lead to a soggy bottom crust and a much harder time sealing your pop tarts. Pop it in the fridge for a quicker cool-down if you’re in a hurry.
- Seal Those Edges Firmly: This is crucial! Use that fork to crimp the edges firmly, but not so hard that you cut through the dough. A good seal prevents the filling from bubbling out during baking, which nobody wants. If you find your edges aren’t sticking well, a very light brush of water on the bottom pastry before topping with the second can help.
- Even Filling Distribution: Try to keep your apple pieces small and evenly distributed. This makes for a more uniform pop tart and prevents any large chunks from tearing the pastry.
- Parchment Paper is Your Friend: Always line your baking sheet with parchment paper. It prevents sticking, makes cleanup a breeze, and ensures your pop tarts come off the tray perfectly.
- Customization Fun: While these are Apple Cinnamon, feel free to get creative! You could add a tiny pinch of nutmeg or allspice to the apple filling for an even warmer spice profile. For an extra treat, sprinkle some toasted chopped pecans or walnuts into the apple filling before sealing.
- For a Crispier Pastry: If you prefer a really crispy pastry, bake them for an extra 2-3 minutes, keeping a close eye to prevent burning.
Storage
So, you’ve made a batch of these delightful Apple Cinnamon Breakfast Pop Tarts, and you might have some left (or maybe you’re planning ahead!). Here’s how I recommend storing them to keep them fresh and delicious.
- At Room Temperature: Once the icing has fully set, you can store your pop tarts in an airtight container at room temperature for up to 2-3 days. This is my preferred method for short-term storage, as it keeps the pastry nicely tender.
- In the Refrigerator: If you want to extend their freshness, particularly if your kitchen is warm, you can place them in an airtight container in the refrigerator for up to 5 days. Just be aware that refrigeration can sometimes make the pastry a little firmer.
- Freezing Baked Pop Tarts: These pop tarts freeze beautifully! Once completely cooled and iced (ensure the icing is fully set), wrap each pop tart individually in plastic wrap, then place them in a freezer-safe bag or container. They can be frozen for up to 1-2 months.
- Reheating:
- From Room Temperature/Refrigerated: My favorite way to reheat them is in a toaster oven or conventional oven at 300°F (150°C) for about 5-10 minutes, or until warmed through and the pastry crisps up a bit. This brings back that lovely flaky texture. You can also carefully pop them in a regular toaster (if they fit!) on a low setting, but watch them closely to avoid burning the icing. A microwave works in a pinch (15-30 seconds), but it can make the pastry softer rather than crisp.
- From Frozen: Remove the plastic wrap and reheat them in a toaster oven or conventional oven at 325°F (160°C) for 15-20 minutes, or until heated through.
Final Thoughts
There’s truly something magical about starting your day with a homemade treat, and these Apple Cinnamon Breakfast Pop Tarts are no exception. I promise you, once you experience the warm, spiced apple filling encased in that perfectly flaky, golden crust, you’ll understand why this recipe is an absolute must-try. It’s more than just a breakfast item; it’s a comforting hug, a sweet indulgence, and a delightful aroma all rolled into one. I encourage you to whip up a batch of these incredible Apple Cinnamon Breakfast Pop Tarts and discover the joy of a truly special morning.
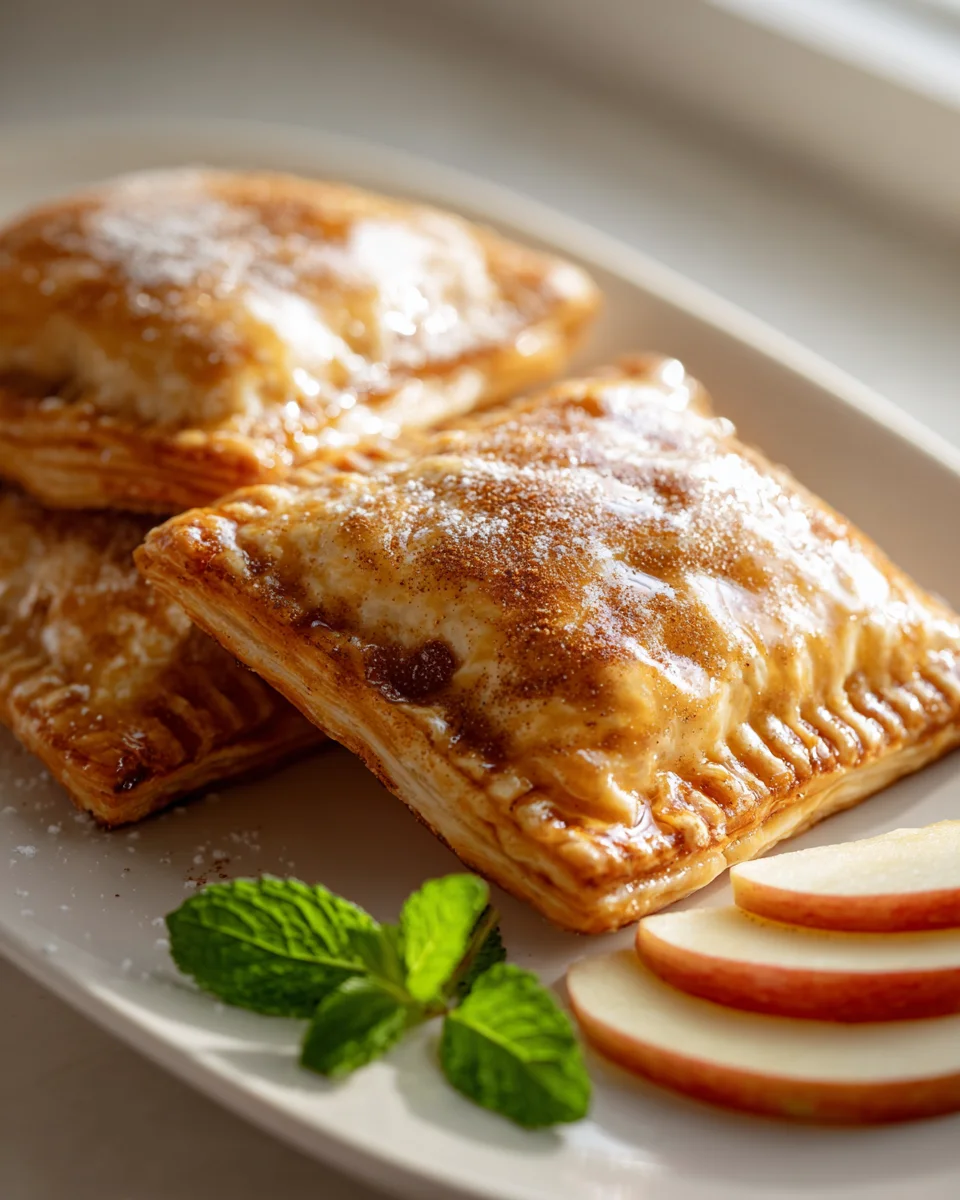
Homemade Apple Cinnamon Pop Tarts – Breakfast Delight

Indulge in the nostalgia of childhood with these delightful homemade Apple Cinnamon Pop Tarts. Enjoy a flaky pastry filled with a warm, spiced apple filling, perfect for breakfast or a sweet treat!
- Prep Time: 30 mins
- Cook Time: 20 mins
- Total Time: 50 minutes
- Yield: 6 pop tarts 1x
- Category: Breakfast
- Method: Baking
- Cuisine: American
Ingredients
- 2 rolls of Refrigerated Pie Crusts
- Puff Pastry (optional)
- Homemade Pie Dough (optional)
- Gluten-Free Pastry (optional)
- Apples (preferably Granny Smith and a sweeter variety like Honeycrisp or Fuji)
- Light Brown Sugar
- Ground Cinnamon
- Cornstarch (or Flour)
- Lemon Juice
- Vanilla Extract
- Powdered Sugar (Confectioners' Sugar)
- Milk (or Non-Dairy Alternative)
- Vanilla Extract (for icing)
- Optional: Ground Cinnamon (for icing)
Instructions
- Prepare the Apple Cinnamon Filling: Peel, core, and dice your apples into small, uniform pieces, about 1/4 to 1/2 inch. In a medium saucepan, combine the diced apples, brown sugar, cinnamon, cornstarch, and lemon juice. Cook over medium heat, stirring occasionally, until the apples have softened slightly but still retain a bit of their shape, about 5-8 minutes. Stir in the vanilla extract and let the filling cool completely.
- Prepare the Pastry: Unroll your refrigerated pie crusts onto a lightly floured surface. If using puff pastry, thaw it and gently unfold. Roll the crusts into a rough rectangle, about 9×12 inches, and cut into 12 smaller rectangles, roughly 3×4.5 inches each.
- Assemble the Pop Tarts: Preheat your oven to 375°F (190°C) and line a baking sheet with parchment paper. Take half of your pastry rectangles and arrange them on the prepared baking sheet. Spoon about 1-2 tablespoons of the cooled apple filling onto the center of each pastry rectangle, leaving a clear border around the edges. Lightly brush the edges with water and place the remaining pastry rectangles on top. Crimp the edges with a fork to seal.
- Bake to Golden Perfection: Lightly whisk an egg with a tablespoon of water and brush the tops of each pop tart with the egg wash. Poke 2-3 small holes in the top of each pop tart. Bake for 18-22 minutes, or until golden brown. Transfer to a wire rack to cool completely.
- Prepare the Icing and Decorate: In a small bowl, whisk together the powdered sugar, milk, and vanilla extract until smooth. If desired, stir in a pinch of ground cinnamon. Once the pop tarts are completely cool, drizzle the icing over the tops and let it set for about 10-15 minutes before serving.
Nutrition
- Serving Size: 1 pop tart
- Calories: 250
- Sugar: 12 g
- Sodium: 150 mg
- Fat: 10 g
- Saturated Fat: 3 g
- Unsaturated Fat: 7 g
- Trans Fat: 0 g
- Carbohydrates: 36 g
- Fiber: 2 g
- Protein: 2 g
- Cholesterol: 20 mg
Keywords: Allow the apple filling to cool completely before assembling to avoid a soggy bottom crust. Ensure a good seal on the edges to prevent filling from leaking during baking. Feel free to customize the filling with additional spices or nuts if desired.
Leave a Comment