
Chocolate Fudge Pop Tarts
Oh, prepare yourselves for a trip down memory lane, but with a gourmet twist! I don’t know about you, but those store-bought Pop Tarts were an absolute staple in my childhood. While I have fond memories, I always knew we could do better, and let me tell you, we absolutely have with these homemade Chocolate Fudge Pop Tarts.
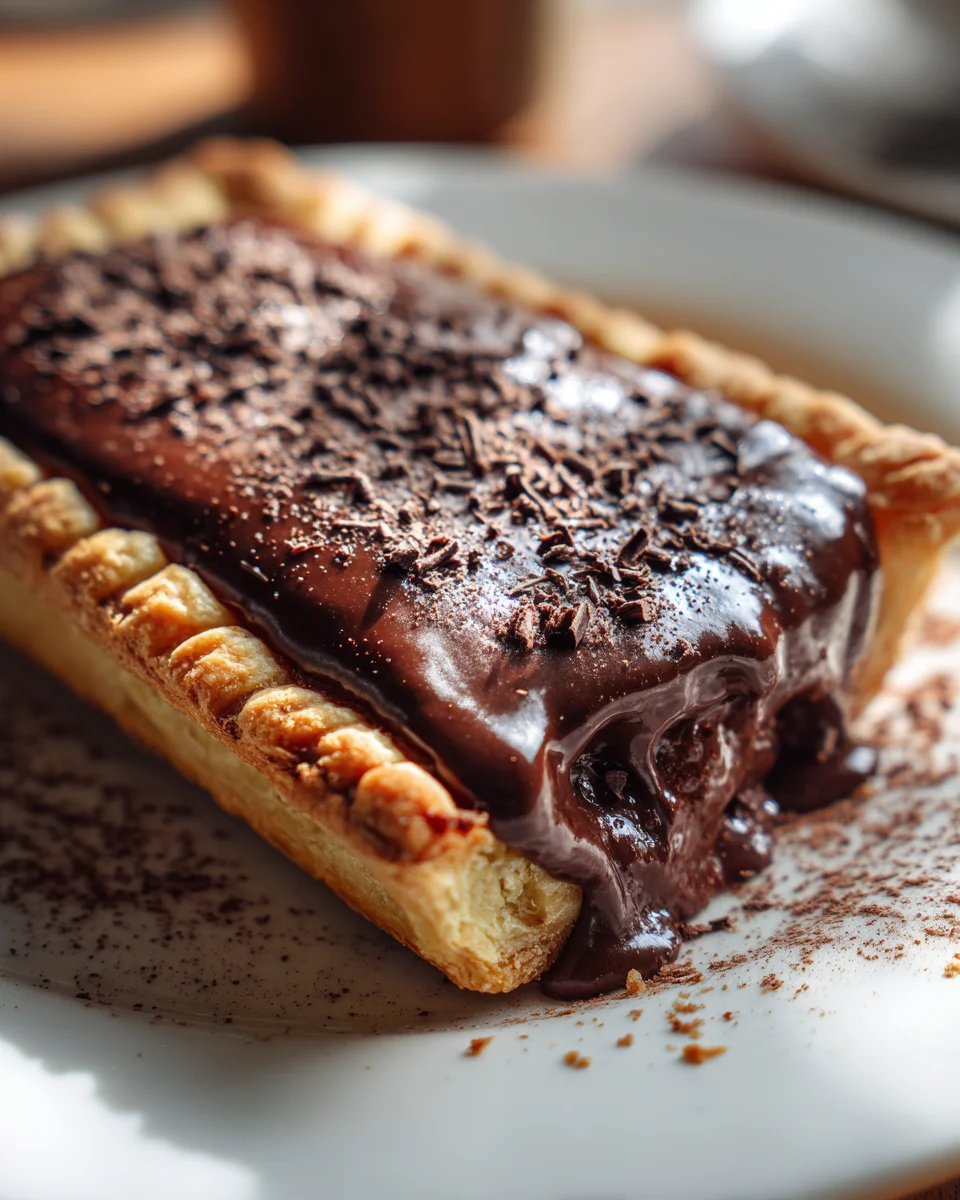
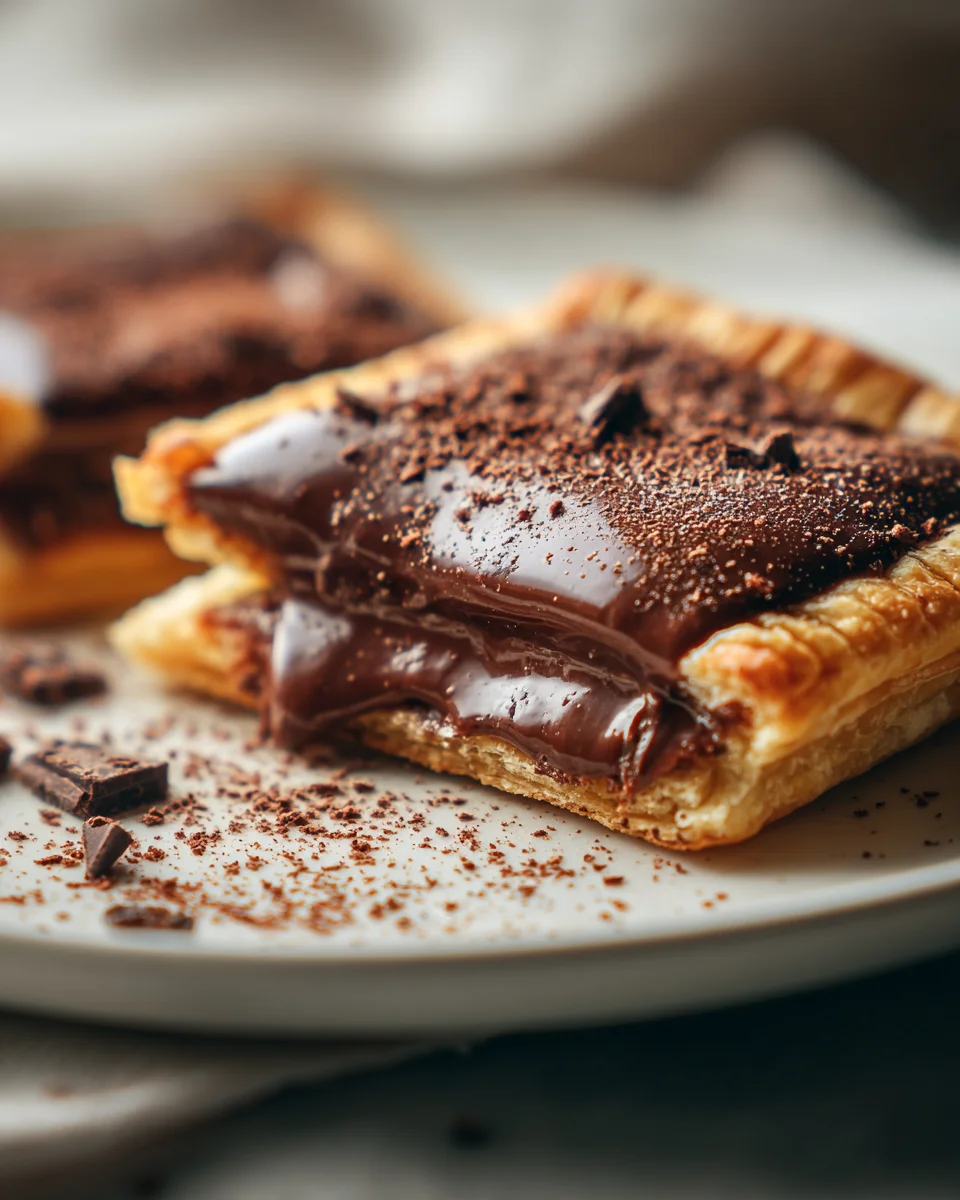
What makes these so special, you ask? Well, imagine a tender, flaky pastry, baked to golden perfection, encasing a generous amount of rich, warm, and wonderfully gooey chocolate fudge filling. It’s like a warm hug for your taste buds! We’re talking about real chocolate here, melting into a luscious interior that simply blows any packaged version out of the water. Plus, the joy of crafting these beauties from scratch means you get to control every delicious ingredient, ensuring peak flavor and freshness.
You are absolutely going to adore these for so many reasons. For starters, the nostalgia alone will make you smile, but then the sheer indulgence of that warm, molten chocolate will make you swoon. They’re perfect for a comforting breakfast, a delightful afternoon treat, or even a surprisingly elegant dessert. Forget dry, crumbly pastries; these are packed with flavor, texture, and pure chocolate bliss, topped with a sweet chocolate glaze and maybe a sprinkle of fun. Get ready to elevate your snack game and experience the ultimate chocolate fantasy!
Ingredient Notes
Creating delicious Chocolate Fudge Pop Tarts starts with a few key ingredients, each playing a crucial role in achieving that perfect balance of flaky crust, rich fudge filling, and sweet glaze. Here’s what I typically reach for, along with some helpful notes and substitutions.
- Ready-Made Pie Crusts: For convenience, I often use two boxes (four individual rolls) of store-bought, refrigerated pie crusts. They’re usually found in the dairy section of your grocery store. This saves a lot of time and effort, making the whole process much quicker. If you prefer, a homemade pastry dough will certainly elevate your Pop Tarts to another level, offering a more tender and buttery crust. Just ensure your homemade dough is well-chilled and rolled thinly for the best results.
- Unsweetened Cocoa Powder: This is essential for our chocolate fudge filling. I recommend using good quality Dutch-processed cocoa powder for a darker color and milder chocolate flavor, which really enhances the “fudge” aspect. Natural unsweetened cocoa powder works too, but it might result in a slightly lighter color and a more intense, acidic chocolate taste.
- Granulated Sugar & Brown Sugar: We use both in the fudge filling. Granulated sugar provides sweetness and structure, while a touch of light brown sugar adds a subtle molasses note and helps with that chewy, fudgy texture we’re aiming for. You can stick with just granulated sugar if that’s all you have, but I find the brown sugar makes a noticeable difference.
- Milk: Any milk will do for the fudge filling and the frosting. Whole milk will give you a richer, creamier fudge, but 2% or even a non-dairy alternative like almond or oat milk works perfectly fine.
- Unsalted Butter: This is vital for the richness and smooth texture of our fudge filling. I always use unsalted so I can control the salt content myself. If you only have salted butter, just omit the extra pinch of salt in the filling recipe.
- Vanilla Extract: A splash of good quality vanilla extract really amplifies the chocolate flavor in the fudge filling and adds depth to the frosting. Don’t skip it!
- Cornstarch: This is my secret weapon for a perfectly thick fudge filling that won’t ooze out of your Pop Tarts during baking. It helps stabilize the filling and gives it that true fudge-like consistency. All-purpose flour can be used as a substitute, but you might need slightly more to achieve the same thickness.
- Salt: Just a pinch in the filling brings out all the chocolate flavors beautifully. It’s amazing how a tiny bit of salt can make a big difference in sweet treats.
- Egg Wash: A simple whisked egg (or just an egg white, or even milk) brushed over the crust before baking helps achieve that beautiful golden-brown color and creates a slight seal.
- Powdered Sugar (Confectioners’ Sugar): For our easy chocolate glaze. It dissolves smoothly, giving us a silky, sweet topping.
- Optional Toppings: Sprinkles, mini chocolate chips, or even a dusting of extra cocoa powder are fun ways to finish your Pop Tarts and make them feel extra special.
Step-by-Step Instructions
Let’s get baking! Here’s how I bring my Chocolate Fudge Pop Tarts to life, step by delicious step.
- Prepare the Fudge Filling: In a medium saucepan, I combine the unsweetened cocoa powder, granulated sugar, brown sugar, milk, unsalted butter, vanilla extract, cornstarch, and a pinch of salt. I whisk everything together until smooth. Then, I place the saucepan over medium heat, stirring constantly, until the mixture thickens to a pudding-like consistency. This usually takes about 5-7 minutes. Once thickened, I remove it from the heat and let it cool completely. It’s crucial that the filling is cool before assembling, otherwise, it can make your pastry dough soggy.
- Roll Out the Dough: While the filling cools, I carefully unroll the refrigerated pie crusts onto a lightly floured surface. I typically use a rolling pin to gently stretch each crust into a rectangle, aiming for a size of about 9×12 inches, or slightly larger than their original circular shape.
- Cut the Pastry Rectangles: Using a sharp knife or a pizza cutter, I trim the edges to make neat rectangles. Then, I cut each large rectangle into eight smaller, roughly 3×4-inch rectangles. This means each pie crust yields 8 individual pieces, so with four crusts, I get 32 pieces total – enough for 16 Pop Tarts.
- Assemble the Pop Tarts: I lay out half of the pastry rectangles on a parchment-lined baking sheet. Then, I spoon about 1-2 tablespoons of the cooled chocolate fudge filling onto the center of each rectangle, leaving a ½-inch border all around the edges. I try not to overfill, as this can lead to leaks during baking.
- Seal Them Up: In a small bowl, I whisk one egg with a tablespoon of water to create an egg wash. I lightly brush the edges of the pastry rectangles with the egg wash. Then, I carefully place the remaining plain pastry rectangles on top of the filled ones, aligning the edges. To seal them, I gently press down around the filling to remove any air pockets, and then use the tines of a fork to crimp all four edges, creating a tight seal and that classic Pop Tart look.
- Vent and Bake: I use a fork or a skewer to poke 3-4 holes in the top of each Pop Tart. These small vents allow steam to escape during baking, preventing the pastries from puffing up too much and cracking. I then brush the tops with a little more egg wash for a golden finish. I bake them in a preheated oven at 375°F (190°C) for 15-18 minutes, or until the crusts are beautifully golden brown and lightly puffed.
- Cool Completely: Once baked, I transfer the Pop Tarts to a wire rack and let them cool completely. This is very important; attempting to frost them while warm will just result in melted, messy frosting.
- Make the Chocolate Glaze: In a small bowl, I whisk together the powdered sugar, a tablespoon of unsweetened cocoa powder, 2-3 tablespoons of milk, and ¼ teaspoon of vanilla extract until smooth and thick but pourable. If it’s too thick, I add a tiny bit more milk; if too thin, a bit more powdered sugar.
- Frost and Decorate: Once the Pop Tarts are completely cool, I spoon or spread the chocolate glaze over the tops. This is where you can get creative! Immediately after frosting, I add any optional sprinkles or toppings before the glaze sets.
- Enjoy! After the glaze has set for a few minutes, your homemade Chocolate Fudge Pop Tarts are ready to be devoured!
Tips & Suggestions
Making Pop Tarts at home is such a fun and rewarding experience, and over time, I’ve picked up a few tricks to ensure they turn out perfectly every time. Here are my best tips for your Chocolate Fudge Pop Tarts:
- Keep Your Dough Cold: Cold dough is happy dough, especially when working with pastry. If your store-bought pie crusts become too warm and sticky, pop them back into the refrigerator for 10-15 minutes. This makes them much easier to handle and prevents them from tearing.
- Don’t Overfill: It’s tempting to load up on that delicious fudge filling, but less is more here. Overfilling is the number one cause of Pop Tart blowouts in the oven. Stick to the recommended 1-2 tablespoons, leaving ample border space.
- Seal Those Edges Securely: A good seal is critical to prevent leaks. After placing the top crust, gently press around the filling to push out any air, then use your fork to really crimp the edges firmly. If you want an extra layer of protection, you can even do two rounds of crimping.
- Cool the Filling Completely: I can’t stress this enough! Warm filling will melt your pastry, making it soggy and difficult to work with. Plan ahead and make your fudge filling at least an hour before assembling, or even the day before, to ensure it’s completely chilled.
- The Perfect Glaze Consistency: When making the chocolate glaze, start with less milk and add a tiny bit at a time until you reach your desired consistency. You want it thick enough to coat the back of a spoon but still pourable. A runny glaze will just drip off, and a too-thick glaze will be hard to spread evenly.
- Enhance the Chocolate: For an even deeper chocolate flavor in your fudge filling, consider adding a tiny pinch of espresso powder (about ¼ teaspoon). It won’t make your Pop Tarts taste like coffee, but it significantly enhances the richness of the chocolate.
- Consider a Double Bake (Optional): If you like a slightly crispier pastry, after the initial bake and cooling, you can pop the unfrosted Pop Tarts back into a 300°F (150°C) oven for 5-7 minutes. This often brings out a little more flakiness and crispness, similar to a toaster pastry. Make sure they cool again before frosting.
Storage
Once you’ve gone to all the effort of making these delightful Chocolate Fudge Pop Tarts, you’ll want to make sure they stay fresh and delicious for as long as possible. Here’s how I store mine:
- At Room Temperature: Fully cooled and frosted Chocolate Fudge Pop Tarts can be stored in an airtight container at room temperature for up to 2-3 days. Make sure the glaze has completely set before stacking them to prevent sticking. I often place a piece of parchment paper between layers if I need to stack them tightly.
- In the Refrigerator: If you want to extend their shelf life a bit, you can store them in an airtight container in the refrigerator for up to 5 days. Be aware that refrigeration can sometimes slightly alter the texture of the pastry, making it a little less tender. I usually let them come to room temperature for about 15-20 minutes before enjoying, or give them a quick warm-up.
- Freezing (Baked Pop Tarts): Yes, you can freeze baked Pop Tarts! Once completely cooled and frosted (ensure the frosting is fully set), wrap each Pop Tart individually in plastic wrap, then place them in a freezer-safe bag or airtight container. They will keep well in the freezer for up to 1 month. To enjoy, thaw them at room temperature, or pop them in a toaster oven for a few minutes (without the plastic wrap, of course!) until warmed through.
- Freezing (Unbaked Pop Tarts): This is a great meal prep trick! Assemble the Pop Tarts up to the point of brushing with egg wash and baking. Place them on a baking sheet and freeze until solid (this prevents them from sticking together). Once solid, transfer them to a freezer-safe bag or container. When you’re ready to bake, you can bake them directly from frozen. They might require an extra 5-10 minutes in the oven compared to fresh, so keep an eye on them. You can brush with egg wash before baking if you like, or omit it. Frost once cooled.
- Reheating: For the best experience, I like to gently reheat room temperature or refrigerated Pop Tarts. A toaster oven works wonderfully, warming them through and crisping the crust slightly, usually at about 300°F (150°C) for 5-10 minutes. You can also use a regular oven. Avoid the microwave, as it tends to make the crust soggy.
Final Thoughts
Well, there you have it! Crafting your own Chocolate Fudge Pop Tarts is an experience I genuinely believe everyone should embrace. Forget those mass-produced imposters; these homemade treats are in a league entirely of their own. The luxurious, deep chocolate fudge filling, perfectly nestled within that flaky, golden pastry, delivers a wave of comfort and pure indulgence with every bite. They’re not just a snack; they’re a warm hug of chocolatey goodness, evoking happy memories while creating new ones. I promise you, once you taste these magnificent Chocolate Fudge Pop Tarts, you’ll understand why I’m so passionate about sharing this recipe. Dive in, bake a batch, and prepare to fall in love!
Homemade Chocolate Fudge Pop Tarts Recipe – Delicious Treat!

Indulge in the nostalgia of childhood with a gourmet twist by making these homemade Chocolate Fudge Pop Tarts. Experience the rich, gooey chocolate filling encased in a flaky pastry that will elevate your snack game!
- Prep Time: 30 mins
- Cook Time: 18 mins
- Total Time: 48 minutes
- Yield: 16 Pop Tarts 1x
- Category: Dessert
- Method: Baking
- Cuisine: American
Ingredients
- 2 boxes (four individual rolls) of store-bought, refrigerated pie crusts
- 1/2 cup unsweetened cocoa powder
- 1/2 cup granulated sugar
- 1/4 cup brown sugar
- 1 cup milk
- 1/4 cup unsalted butter
- 1 teaspoon vanilla extract
- 2 tablespoons cornstarch
- 1/4 teaspoon salt
- 1 egg (for egg wash)
- 1 tablespoon water (for egg wash)
- 1 cup powdered sugar (confectioners' sugar)
- 1 tablespoon unsweetened cocoa powder (for glaze)
- 2–3 tablespoons milk (for glaze)
- 1/4 teaspoon vanilla extract (for glaze)
- Optional toppings: sprinkles, mini chocolate chips, or extra cocoa powder
Instructions
- Prepare the Fudge Filling: In a medium saucepan, combine the unsweetened cocoa powder, granulated sugar, brown sugar, milk, unsalted butter, vanilla extract, cornstarch, and a pinch of salt. Whisk everything together until smooth. Place the saucepan over medium heat, stirring constantly, until the mixture thickens to a pudding-like consistency, about 5-7 minutes. Remove from heat and let it cool completely.
- Roll Out the Dough: While the filling cools, unroll the refrigerated pie crusts onto a lightly floured surface. Use a rolling pin to stretch each crust into a rectangle, about 9×12 inches.
- Cut the Pastry Rectangles: Trim the edges to make neat rectangles. Cut each large rectangle into eight smaller, roughly 3×4-inch rectangles, yielding 32 pieces total for 16 Pop Tarts.
- Assemble the Pop Tarts: Lay out half of the pastry rectangles on a parchment-lined baking sheet. Spoon about 1-2 tablespoons of the cooled chocolate fudge filling onto the center of each rectangle, leaving a ½-inch border.
- Seal Them Up: In a small bowl, whisk one egg with a tablespoon of water to create an egg wash. Lightly brush the edges of the pastry rectangles with the egg wash. Place the remaining plain pastry rectangles on top, aligning the edges. Press down around the filling to remove air pockets, and use a fork to crimp all four edges.
- Vent and Bake: Poke 3-4 holes in the top of each Pop Tart to allow steam to escape. Brush the tops with more egg wash. Bake in a preheated oven at 375°F (190°C) for 15-18 minutes, until golden brown.
- Cool Completely: Transfer the Pop Tarts to a wire rack and let them cool completely.
- Make the Chocolate Glaze: In a small bowl, whisk together the powdered sugar, unsweetened cocoa powder, 2-3 tablespoons of milk, and ¼ teaspoon of vanilla extract until smooth and thick but pourable. Adjust the consistency with more milk or powdered sugar as needed.
- Frost and Decorate: Spoon or spread the chocolate glaze over the tops of the cooled Pop Tarts. Add optional sprinkles or toppings before the glaze sets.
- Enjoy: After the glaze has set for a few minutes, your homemade Chocolate Fudge Pop Tarts are ready to be devoured!
Nutrition
- Serving Size: 1 Pop Tart
- Calories: 250
- Sugar: 20 g
- Sodium: 150 mg
- Fat: 10 g
- Saturated Fat: 5 g
- Unsaturated Fat: 3 g
- Trans Fat: 0 g
- Carbohydrates: 35 g
- Fiber: 1 g
- Protein: 3 g
- Cholesterol: 30 mg
Keywords: Keep your dough cold for easier handling, avoid overfilling to prevent leaks, and ensure the filling is completely cooled before assembling. For the glaze, adjust the milk for desired consistency and consider adding espresso powder for enhanced chocolate flavor.
Leave a Comment