
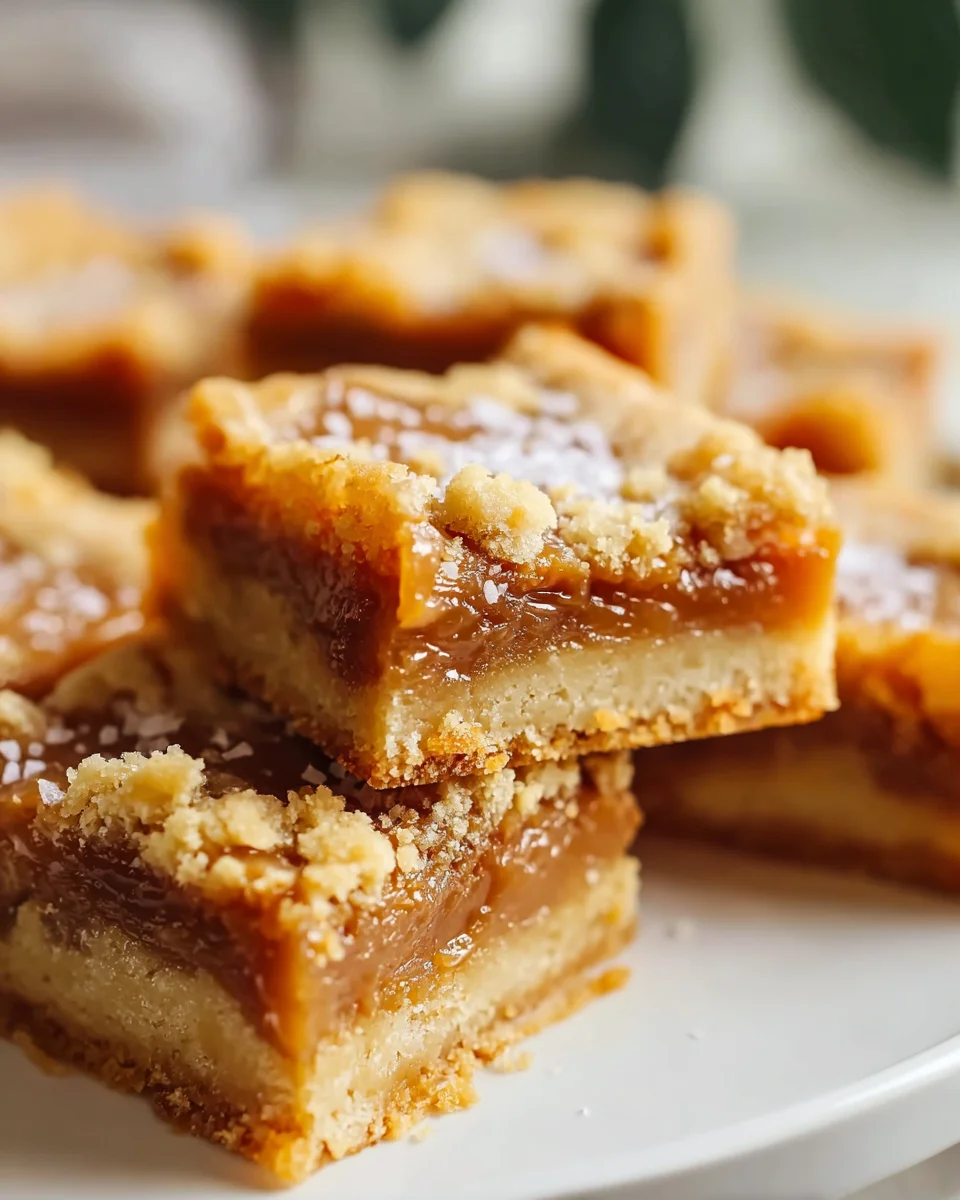
Salted Caramel Butter Bars Tasty Irresistible – just hearing those words evokes a symphony of delightful flavors, doesn’t it? I’m absolutely thrilled to share a recipe that perfectly encapsulates everything wonderful about a decadent dessert. Imagine sinking your teeth into a buttery, crumbly base, giving way to a rich, gooey layer of luscious salted caramel, all topped with a delicate, sweet crumble. It’s a truly unforgettable experience that balances sweetness with that essential hint of salt, creating an explosion of taste that will have everyone reaching for another piece.
The magic of salted caramel, a concept refined in France’s Brittany region, has captivated taste buds worldwide, transforming classic sweets into something extraordinary. When combined with the comforting, nostalgic appeal of a classic butter bar – a staple at many a bake sale and family gathering – you get something truly special. People adore these bars not just for their complex yet harmonious flavors, but also for their incredible texture: a satisfying chewiness from the caramel, a delightful crumb from the crust, and a melt-in-your-mouth richness that simply cannot be beaten. They are remarkably convenient for parties, easy to transport, and guaranteed to be a crowd-pleaser. I believe you’ll find these Salted Caramel Butter Bars Tasty Irresistible in every sense of the word, making them a superb choice for any occasion where pure indulgence is on the menu.

Ingredients:
- For the Shortbread Base:
- 2 ½ cups (300g) all-purpose flour
- 1 cup (226g) unsalted butter, softened to room temperature
- ½ cup (100g) granulated sugar
- ½ teaspoon fine sea salt
- For the Salted Caramel Filling:
- 1 cup (226g) unsalted butter
- 1 cup (200g) granulated sugar
- ½ cup (170g) light corn syrup (or golden syrup)
- 1 (14-ounce/397g) can sweetened condensed milk
- ½ cup (120ml) heavy cream (full-fat is best!)
- 2 teaspoons pure vanilla extract
- 1 teaspoon fine sea salt, plus extra for sprinkling
- For the Crumble Topping:
- 1 ½ cups (180g) all-purpose flour
- ½ cup (100g) granulated sugar
- ½ cup (113g) unsalted butter, melted
- ½ teaspoon baking powder
- ¼ teaspoon fine sea salt
Equipment You’ll Need:
- 9×13 inch baking pan (I prefer metal for even baking)
- Parchment paper
- Large mixing bowls (at least two)
- Electric mixer (stand mixer with paddle attachment or handheld mixer)
- Medium saucepan (heavy-bottomed is ideal for the caramel)
- Whisk
- Rubber spatula
- Measuring cups and spoons
- Wire cooling rack
- Sharp knife for cutting
Phase 1: Preparing the Shortbread Base
- Preheat and Prep Your Pan: First things first, let’s get our oven ready. Preheat your oven to a comfortable 350°F (175°C). Then, take your 9×13 inch baking pan and line it completely with parchment paper, making sure to leave an overhang on the two longer sides. This overhang acts as “handles” later on, making it incredibly easy to lift the entire batch of Salted Caramel Butter Bars out of the pan once they’re cooled. A little spray of non-stick cooking spray in the pan before the parchment can help the paper stay put, too. Trust me, this small step will save you so much hassle!
- Cream the Butter and Sugar: In a large mixing bowl, either using your stand mixer fitted with the paddle attachment or a handheld electric mixer, cream together the softened unsalted butter and granulated sugar for the shortbread base. Beat them on medium speed until the mixture is light, fluffy, and noticeably pale in color. This process usually takes about 2-3 minutes. You want to incorporate plenty of air here, as it contributes to a wonderfully tender and delicate shortbread texture. Scrape down the sides of the bowl occasionally to ensure everything is evenly combined. This is a crucial step for a really tasty, irresistible base.
- Add the Dry Ingredients: With the mixer on low speed, gradually add the all-purpose flour and ½ teaspoon of fine sea salt to the creamed butter and sugar mixture. Continue to mix until just combined. You’ll notice the dough will be quite thick and crumbly. Be careful not to overmix at this stage; overmixing can develop the gluten in the flour too much, leading to a tough shortbread rather than the melt-in-your-mouth experience we’re aiming for. The goal is to have no visible streaks of dry flour left.
- Press the Dough into the Pan: Now, transfer the shortbread dough into your prepared 9×13 inch baking pan. Using your fingers, the back of a spoon, or a flat-bottomed measuring cup, press the dough evenly and firmly into the bottom of the pan. It’s essential to get an even layer from edge to edge so that your Salted Caramel Butter Bars bake uniformly. Spend a little extra time ensuring the corners are well-filled and the surface is as flat and consistent as possible. This forms the sturdy and delicious foundation for our bars.
- Par-Bake the Crust: Place the pan with the pressed shortbread dough into your preheated oven. Bake for 18-22 minutes, or until the edges are just beginning to turn a very light golden brown. The center might still look a little pale, and that’s perfectly fine – we’re just par-baking it to give it a head start and ensure it’s firm enough to hold up to the luscious caramel we’re about to add. This also helps prevent the crust from becoming soggy. Once par-baked, remove the pan from the oven and set it aside to cool slightly while we prepare the star of the show: the salted caramel.
Phase 2: Crafting the Silky Salted Caramel Filling
- Combine Caramel Ingredients (Except Vanilla and Salt): In a heavy-bottomed medium saucepan, combine the 1 cup of unsalted butter, 1 cup of granulated sugar, ½ cup of light corn syrup (or golden syrup if you prefer a slightly different flavor profile), the full can of sweetened condensed milk, and ½ cup of heavy cream. Using a heavy-bottomed pan is important here as it helps distribute heat more evenly and reduces the risk of scorching your precious caramel.
- Cook the Caramel to a Gentle Boil: Place the saucepan over medium heat. Whisk constantly as the butter melts and the sugar dissolves. Continue whisking as the mixture heats up. The goal is to bring the mixture to a gentle boil, ensuring all the ingredients are fully incorporated and smooth. This constant stirring is key to preventing anything from sticking to the bottom of the pan and burning. Patience is a virtue when making caramel, and it will pay off with a truly tasty, irresistible filling.
- Boil and Thicken the Caramel: Once the mixture reaches a gentle boil, reduce the heat to medium-low to maintain a simmer. Continue to cook, stirring frequently (you don’t need to stir constantly at this stage, but often enough to prevent sticking), for 8-12 minutes. The caramel is ready when it has significantly thickened and turned a beautiful amber color. If you have a candy thermometer, you’re looking for it to reach about 225-230°F (107-110°C). If you don’t have a thermometer, a good visual cue is when a spoon pulled through the caramel leaves a clear path for a moment before the caramel flows back together. The mixture should also coat the back of a spoon quite thickly. Don’t rush this step; properly cooked caramel is what makes these Salted Caramel Butter Bars so extraordinary.
- Stir in Vanilla and Salt: Once your caramel has reached the desired consistency and color, remove the saucepan from the heat immediately. Stir in the 2 teaspoons of pure vanilla extract and 1 teaspoon of fine sea salt. The vanilla adds a lovely depth of flavor, while the salt is absolutely essential for balancing the sweetness and truly making this “salted” caramel. Give it a good stir until everything is perfectly combined. The aroma at this stage is truly heavenly!
Phase 3: Assembling and Baking Your Salted Caramel Butter Bars
- Pour Caramel Over the Shortbread Base: Carefully and evenly pour the warm, silky salted caramel mixture over the par-baked shortbread crust in your pan. Use a rubber spatula to scrape out every last drop of that glorious caramel goodness. Gently spread the caramel all the way to the edges of the shortbread layer, creating an even, uniform layer. It’s perfectly fine if the shortbread crust is still a bit warm; it won’t affect the final outcome.
- Prepare the Crumble Topping: In a separate medium mixing bowl, combine the 1 ½ cups of all-purpose flour, ½ cup of granulated sugar, ½ teaspoon of baking powder, and ¼ teaspoon of fine sea salt for the crumble topping. Whisk these dry ingredients together thoroughly. Then, pour in the ½ cup of melted unsalted butter. Using a fork or your fingertips, mix until the mixture resembles coarse crumbs with some larger clumps. This crumble topping adds a delightful texture contrast and is a signature element of these Salted Caramel Butter Bars.
- Scatter the Crumble Topping: Evenly sprinkle the prepared crumble topping over the warm salted caramel layer. Try to get good coverage across the entire surface. You can leave some slightly larger clumps for added visual appeal and texture, or break them down further if you prefer a finer crumble. This topping will bake up beautifully golden and crunchy, providing a perfect counterpoint to the soft caramel and tender shortbread.
- Bake the Assembled Bars: Return the pan to your preheated 350°F (175°C) oven. Bake for an additional 25-30 minutes, or until the crumble topping is golden brown and the caramel underneath appears set and is no longer jiggly in the center when you gently shake the pan. The edges of the caramel might bubble a bit, which is normal. Keep an eye on the topping to ensure it doesn’t get too dark. Every oven is a little different, so use your best judgment based on visual cues. The smell filling your kitchen will be utterly incredible, a true sign that these Salted Caramel Butter Bars are going to be tasty and irresistible.
Phase 4: Cooling, Cutting, and Enjoying Your Tasty Irresistible Treat
- Cool Completely (This is Crucial!): Once baked, remove the pan from the oven and place it on a wire cooling rack. This is arguably the most important step for perfectly cut bars: allow the Salted Caramel Butter Bars to cool completely in the pan before attempting to cut them. This will take at least 2-3 hours at room temperature, or you can speed up the process by chilling them in the refrigerator for 1-2 hours once they’ve cooled down a bit. The caramel needs ample time to set up properly; if you try to cut them warm, the caramel will be gooey and will make a mess. Patience here ensures clean, beautiful squares.
- Lift and Cut the Bars: Once thoroughly cooled and firm, use the parchment paper overhang as handles to carefully lift the entire slab of Salted Caramel Butter Bars out of the pan and transfer it to a cutting board. Now, for the cutting! Using a very sharp knife, carefully slice the slab into desired bar sizes. I usually cut them into 24 squares (6×4 arrangement), but you can make them larger or smaller depending on your preference. For the cleanest cuts, wipe your knife with a warm, damp cloth between each slice, especially after cutting through the sticky caramel. This helps prevent the caramel from dragging and makes for professional-looking bars.
- Sprinkle with Extra Sea Salt (Optional but Recommended): For that extra touch of “salted” goodness, I highly recommend sprinkling a tiny bit of flaky sea salt (like Maldon) over the top of your freshly cut Salted Caramel Butter Bars. This not only enhances the flavor profile by providing little bursts of saltiness that cut through the sweetness but also adds a beautiful visual appeal. It makes them truly pop and emphasizes why they are so tasty and irresistible.
- Serve and Store: Your delectable Salted Caramel Butter Bars are now ready to be devoured! Serve them as a dessert, a snack, or a delightful treat with coffee or tea. Store any leftover bars in an airtight container at room temperature for up to 3-4 days, or in the refrigerator for up to a week. If refrigerated, allow them to come to room temperature for about 15-20 minutes before serving for the best texture and flavor. They also freeze exceptionally well for up to a month – just thaw them at room temperature when you’re ready for another tasty, irresistible bite. Enjoy the fruits of your labor!
Conclusion:
My friends, if you’ve made it this far, you know we’ve journeyed through the creation of something truly spectacular. These aren’t just any dessert bars; they are an experience, a symphony of textures and tastes that will absolutely enchant your palate. The moment those golden-brown squares emerge from your oven, filling your kitchen with an intoxicating aroma of sweet butter, rich caramel, and a hint of sea salt, you’ll understand exactly what I mean. The buttery, crumbly base, offering just the right amount of resistance, gives way to a gooey, molten salted caramel layer that is pure, unadulterated bliss. And then, topping it all off, more of that delightful crumble, adding a perfect textural counterpoint. Each bite delivers that exquisite balance of sweet and salty, chewy and tender, firm and yielding. I can confidently say that these Salted Caramel Butter Bars Tasty Irresistible treats are destined to become a staple in your baking repertoire. They are ridiculously easy to make, yet they present themselves with an elegance and flavor profile that suggests hours of complex work. Truly, they are a testament to simple ingredients coming together to create something profoundly delicious. Trust me when I say, you absolutely have to try these; they embody everything wonderful about a homemade sweet treat.
Now, while these bars are utterly divine straight out of the pan (once cooled enough not to burn your tongue, of course!), there are so many wonderful ways to enjoy them. Imagine a square, still slightly warm from a gentle reheat in the microwave or oven, served alongside a scoop of high-quality vanilla bean ice cream. The cold, creamy ice cream melting into the warm, gooey caramel is a revelation! Alternatively, they are the perfect companion to your morning coffee or afternoon tea, transforming a simple break into a moment of pure indulgence. For a more sophisticated dessert presentation, try dusting them lightly with a sprinkle of flaky sea salt just before serving – it elevates both the visual appeal and intensifies that incredible sweet and salty dynamic. They also travel beautifully, making them an ideal treat to bring to a potluck, a picnic, or to gift to a loved one. Seriously, consider a batch for your next gathering; they are always the first to disappear, a guaranteed crowd-pleaser that will have everyone asking for the recipe.
But the magic doesn’t stop there! One of my favorite things about a truly great recipe is its versatility, and these butter bars are no exception. While the classic version is undeniably perfect, feel free to get creative and personalize your batch:
Nutty Twist:
For an added layer of crunch and flavor, try folding a cup of chopped pecans or walnuts into the base mixture, or even sprinkling them generously over the caramel layer before adding the final crumble. Toasted nuts work wonders here, adding a delightful depth and aroma that pairs beautifully with the rich caramel.
Chocolate Lover’s Dream:
Who can resist chocolate with salted caramel? A generous handful of mini chocolate chips, swirled into the caramel just before baking or sprinkled on top of the final crumble, takes these to a whole new level of decadence. Dark chocolate chips would offer a lovely bitterness to perfectly balance the sweetness, while milk chocolate would add even more creamy indulgence.
Spice It Up:
A pinch of ground cinnamon, a tiny grating of fresh nutmeg, or even a touch of cardamom added to the base flour mixture can infuse the bars with a subtle warmth that complements the caramel beautifully, especially during the colder months, adding an unexpected but welcome complexity.
Gluten-Free Option:
For those with dietary considerations, these bars can often be adapted by simply swapping the all-purpose flour for a good quality 1:1 gluten-free baking blend. Just ensure your chosen blend contains xanthan gum for structure, ensuring your bars hold together perfectly and maintain that satisfying chew.
Different Salts:
While flaky sea salt is my personal go-to for its textural pop and clean finish, experiment with smoked sea salt for a deeper, more complex flavor, or even a pink Himalayan salt for a unique mineral touch. The possibilities are genuinely endless! These minor tweaks can transform the bars to suit any palate or occasion, making them truly your own.
So, what are you waiting for? I truly hope I’ve convinced you to dive into your kitchen and whip up a batch of these incredible bars. They are not just a dessert; they are an invitation to joy, a promise of comfort, and a testament to the power of simple, honest ingredients that combine to create something extraordinary. Don’t deny yourself the pleasure of experiencing that first bite – the rich butter, the sweet, yielding caramel, the perfect kiss of salt. I guarantee you’ll be adding them to your regular rotation in no time, becoming your go-to recipe for any occasion, big or small. Once you’ve made them, and experienced their undeniable deliciousness, please come back and share your experience! Did you try a variation? What was your favorite part? Your feedback and culinary adventures truly inspire me, and I love hearing about your successes in the kitchen. Happy baking, my friends, and prepare to fall in love with your new favorite treat!
Salted Caramel Butter Bars: Easy, Tasty & Irresistible Treat
These Salted Caramel Butter Bars combine a buttery, crumbly base with a rich, gooey salted caramel layer and a delicate sweet crumble topping. A delightful treat that balances sweetness with a hint of salt, perfect for any occasion.
Ingredients
Instructions
Important Information
Nutrition Facts (Per Serving)
It is important to consider this information as approximate and not to use it as definitive health advice.
Allergy Information
Please check ingredients for potential allergens and consult a health professional if in doubt.
Leave a Comment