
Pizza Hut Cheese Sticks: Who can resist that warm, gooey, cheesy goodness? I know I certainly can’t! These aren’t just any cheese sticks; they’re a nostalgic trip back to Friday night pizza parties and after-school treats. Recreating this iconic appetizer at home is easier than you might think, and trust me, the results are absolutely worth it.
While the exact origins of cheese sticks are debated, their popularity exploded in the late 20th century, becoming a staple on menus across America. Pizza Hut’s version, with its signature blend of cheeses and perfectly seasoned crust, quickly became a fan favorite. The combination of the crispy exterior, the soft, chewy interior, and that incredible cheese pull is simply irresistible. It’s no wonder people of all ages adore them!
What makes Pizza Hut Cheese Sticks so beloved? It’s the perfect blend of comfort food and convenience. They’re easy to share, satisfyingly cheesy, and offer a delightful textural experience. Plus, with this recipe, you can enjoy that classic Pizza Hut flavor without even leaving your house. Get ready to impress your friends and family with these homemade cheese sticks that taste just like the real deal!

Ingredients:
- For the Dough:
- 2 cups (250g) all-purpose flour, plus more for dusting
- 1 teaspoon (3g) instant dry yeast
- 1 teaspoon (6g) salt
- 1 tablespoon (15ml) olive oil, plus more for greasing
- ¾ cup (180ml) warm water (105-115°F or 40-46°C)
- 1 teaspoon (5g) sugar
- For the Garlic Butter:
- 4 tablespoons (56g) unsalted butter, melted
- 2 cloves garlic, minced
- 1/2 teaspoon dried oregano
- 1/4 teaspoon garlic powder
- 1/4 teaspoon salt
- 1/4 teaspoon black pepper
- 1 tablespoon chopped fresh parsley (optional)
- For the Cheese Topping:
- 2 cups (224g) shredded mozzarella cheese
- 1/2 cup (56g) shredded parmesan cheese
- For Serving:
- Marinara sauce, for dipping
Preparing the Dough:
- Activate the Yeast: In a large bowl, dissolve the sugar in the warm water. Sprinkle the instant dry yeast over the water and let it sit for 5-10 minutes, or until foamy. This indicates that the yeast is active and ready to use. If it doesn’t foam, your yeast might be old and you’ll need to get a fresh batch.
- Combine Dry Ingredients: In a separate large bowl, whisk together the flour and salt. This ensures the salt is evenly distributed throughout the flour.
- Combine Wet and Dry Ingredients: Pour the yeast mixture and olive oil into the bowl with the flour mixture. Use a wooden spoon or your hands to mix until a shaggy dough forms.
- Knead the Dough: Turn the dough out onto a lightly floured surface. Knead the dough for 5-7 minutes, or until it becomes smooth and elastic. If the dough is too sticky, add a little more flour, one tablespoon at a time. If it’s too dry, add a teaspoon of water at a time. The dough should be slightly tacky but not overly sticky.
- First Rise: Lightly grease a large bowl with olive oil. Place the dough in the bowl, turning to coat it with the oil. Cover the bowl with plastic wrap or a clean kitchen towel. Let the dough rise in a warm place for 1-1.5 hours, or until it has doubled in size. This is a crucial step for developing the flavor and texture of the dough.
Preparing the Garlic Butter:
- Melt the Butter: In a small bowl, melt the unsalted butter in the microwave or in a saucepan over low heat. Be careful not to burn the butter.
- Add Garlic and Spices: Add the minced garlic, dried oregano, garlic powder, salt, and pepper to the melted butter. Stir well to combine.
- Infuse the Flavors: Let the garlic butter sit for a few minutes to allow the flavors to meld together. This will enhance the overall taste of the cheese sticks.
- Add Parsley (Optional): If using fresh parsley, stir it into the garlic butter just before using.
Assembling and Baking the Cheese Sticks:
- Preheat Oven: Preheat your oven to 400°F (200°C). Line a large baking sheet with parchment paper. This will prevent the cheese sticks from sticking to the pan.
- Punch Down the Dough: Once the dough has doubled in size, gently punch it down to release the air.
- Divide the Dough: Turn the dough out onto a lightly floured surface. Divide the dough in half. Roll each half into a rectangle approximately 12×8 inches.
- Cut into Strips: Using a pizza cutter or a sharp knife, cut each rectangle into approximately 1-inch wide strips. You should get about 12-16 strips from each rectangle.
- Arrange on Baking Sheet: Place the dough strips on the prepared baking sheet, leaving a little space between each strip.
- Brush with Garlic Butter: Brush the tops of the dough strips generously with the garlic butter. Make sure to get the garlic pieces on each strip for maximum flavor.
- Add Cheese Topping: Sprinkle the shredded mozzarella and parmesan cheese evenly over the garlic butter-covered dough strips.
- Bake: Bake in the preheated oven for 12-15 minutes, or until the cheese is melted and bubbly and the dough is golden brown. Keep a close eye on them to prevent burning.
- Cool Slightly: Remove the baking sheet from the oven and let the cheese sticks cool for a few minutes before serving. This will allow the cheese to set slightly and prevent it from being too stringy.
Serving:
- Serve Warm: Serve the cheese sticks warm with marinara sauce for dipping. You can also use other dipping sauces like ranch dressing, garlic aioli, or pizza sauce.
- Garnish (Optional): Garnish with extra chopped fresh parsley or a sprinkle of parmesan cheese for added visual appeal.
Tips for Perfect Cheese Sticks:
- Use Fresh Yeast: Make sure your yeast is fresh for the dough to rise properly.
- Warm Water Temperature: The water should be warm, not hot, to activate the yeast. Too hot water can kill the yeast.
- Don’t Overknead: Overkneading can result in tough cheese sticks. Knead until the dough is smooth and elastic.
- Proper Rising Time: Allow the dough to rise properly for the best flavor and texture.
- Even Cheese Distribution: Ensure the cheese is evenly distributed over the dough strips for consistent cheesy goodness.
- Monitor Baking Time: Keep a close eye on the cheese sticks while baking to prevent burning.
- Adjust Garlic to Taste: Adjust the amount of garlic in the garlic butter to your preference.
- Experiment with Cheese: Feel free to experiment with different types of cheese, such as cheddar, provolone, or asiago.
- Add Spices to Dough: For extra flavor, you can add a pinch of garlic powder, onion powder, or Italian seasoning to the dough.
- Make Ahead: You can prepare the dough ahead of time and store it in the refrigerator for up to 24 hours. Let it come to room temperature before rolling and baking.
Variations:
- Pepperoni Cheese Sticks: Add sliced pepperoni to the cheese topping for a meaty twist.
- Jalapeño Cheese Sticks: Add diced jalapeños to the cheese topping for a spicy kick.
- Everything Bagel Cheese Sticks: Sprinkle everything bagel seasoning over the cheese topping for a savory flavor.
- Pesto Cheese Sticks: Spread pesto over the dough before adding the cheese for a flavorful variation.
- Spinach and Artichoke Cheese Sticks: Mix chopped spinach and artichoke hearts with the cheese topping for a delicious and healthy option.
Storage Instructions:
- Refrigerate: Store leftover cheese sticks in an airtight container in the refrigerator for up to 3 days.
- Reheat: Reheat the cheese sticks in the oven at 350°F (175°C) for 5-10 minutes, or until heated through. You can also reheat them in the microwave, but they may become slightly soggy.
- Freeze: For longer storage, freeze the cheese sticks in a single layer on a baking sheet until solid. Then, transfer them to a freezer bag or airtight container and freeze for up to 2 months. Reheat from frozen in the oven at 350°F (175°C) for 10-15 minutes, or until heated through.

Conclusion:
And there you have it! I truly believe this recipe for homemade Pizza Hut Cheese Sticks is a must-try for anyone who loves that cheesy, garlicky goodness. Forget ordering takeout; you can recreate that iconic flavor right in your own kitchen, and honestly, I think it’s even better! The crispy, golden-brown exterior gives way to a molten, stretchy cheese pull that’s simply irresistible. Plus, you have complete control over the ingredients, so you can customize it to your exact liking.
Why is this recipe a winner? First, it’s surprisingly easy. You don’t need any fancy equipment or culinary expertise. If you can mix ingredients and bake, you can nail this recipe. Second, it’s incredibly satisfying. There’s something so comforting about warm, cheesy bread, especially when it tastes just like (or even better than!) your favorite restaurant version. Third, it’s a crowd-pleaser. Whether you’re hosting a game night, having a family movie marathon, or just craving a cheesy snack, these cheese sticks are guaranteed to be a hit.
But the fun doesn’t stop there! Feel free to experiment with different cheeses. While mozzarella is the classic choice, try adding a blend of provolone, parmesan, or even a little bit of pepper jack for a spicy kick. You can also play around with the seasonings. Add a pinch of red pepper flakes to the garlic butter for some heat, or sprinkle on some dried oregano or basil for an extra layer of flavor.
Serving Suggestions and Variations:
* Dipping Sauces: Don’t forget the dipping sauces! Marinara sauce is the obvious choice, but ranch dressing, garlic aioli, or even a creamy pesto would be delicious.
* Pizza Dough Variations: If you’re feeling adventurous, try using a different type of pizza dough. A sourdough crust would add a tangy flavor, while a whole wheat crust would make them a bit healthier.
* Stuffed Cheese Sticks: For an extra indulgent treat, try stuffing the cheese sticks with pepperoni, sausage, or even some cooked vegetables. Just make sure to seal the edges tightly to prevent the filling from leaking out.
* Air Fryer Option: If you want a quicker and slightly healthier option, you can also cook these in an air fryer. Just preheat your air fryer to 375°F (190°C) and cook for about 8-10 minutes, or until golden brown and the cheese is melted.
I’m so excited for you to try this recipe and experience the joy of homemade Pizza Hut Cheese Sticks. I know you’ll love them as much as I do. Once you’ve made them, I’d love to hear about your experience! Did you make any variations? What dipping sauce did you choose? Share your photos and comments in the comments section below. I can’t wait to see your cheesy creations! Happy baking (or air frying!), and enjoy! Don’t forget to rate the recipe if you loved it! Your feedback helps others discover this delicious treat.
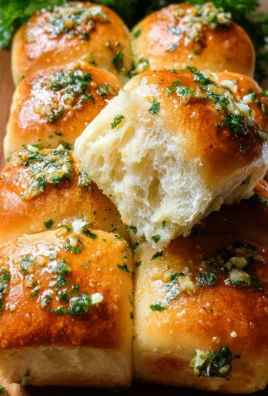
Pizza Hut Cheese Sticks: A Delicious and Cheesy Delight
Warm, cheesy, and garlicky homemade cheese sticks, perfect for dipping in marinara sauce. An easy and delicious appetizer or snack!
Ingredients
Instructions
Recipe Notes
- Use fresh yeast for the dough to rise properly.
- The water should be warm, not hot, to activate the yeast.
- Don’t overknead the dough.
- Allow the dough to rise properly for the best flavor and texture.
- Ensure the cheese is evenly distributed over the dough strips.
- Monitor baking time to prevent burning.
- Adjust garlic to taste.
- Experiment with different types of cheese.
- Add spices to dough for extra flavor.
- You can prepare the dough ahead of time and store it in the refrigerator for up to 24 hours.


Leave a Comment