
S’mores Rolls are about to become your new favorite way to experience that iconic campfire magic, no fire pit required! Imagine sinking your teeth into a warm, soft pastry bursting with melted chocolate, gooey marshmallow, and crunchy graham cracker bits – it’s an utterly irresistible combination that brings joy with every bite. I’m thrilled to share a recipe that transforms a beloved outdoor tradition into an accessible, utterly decadent treat you can enjoy anytime, anywhere.
A Beloved Classic Reimagined
The original s’mores, a delightful portmanteau for “some more,” have been a quintessential part of American outdoor culture since at least the 1920s, cementing their place as the ultimate campfire dessert. They evoke feelings of nostalgia, friendship, and simple pleasures. Now, these incredible S’mores Rolls take all that heartwarming sentiment and elevate it into a convenient, party-ready format. People absolutely adore this dish not only for its incredible taste and texture—the delightful contrast between the soft roll, the molten filling, and the slight crunch—but also for its ability to transport them back to cherished memories around a crackling fire, all from the comfort of their kitchen. They are perfect for sharing, a fantastic dessert for any gathering, or simply a comforting indulgence on a quiet evening.
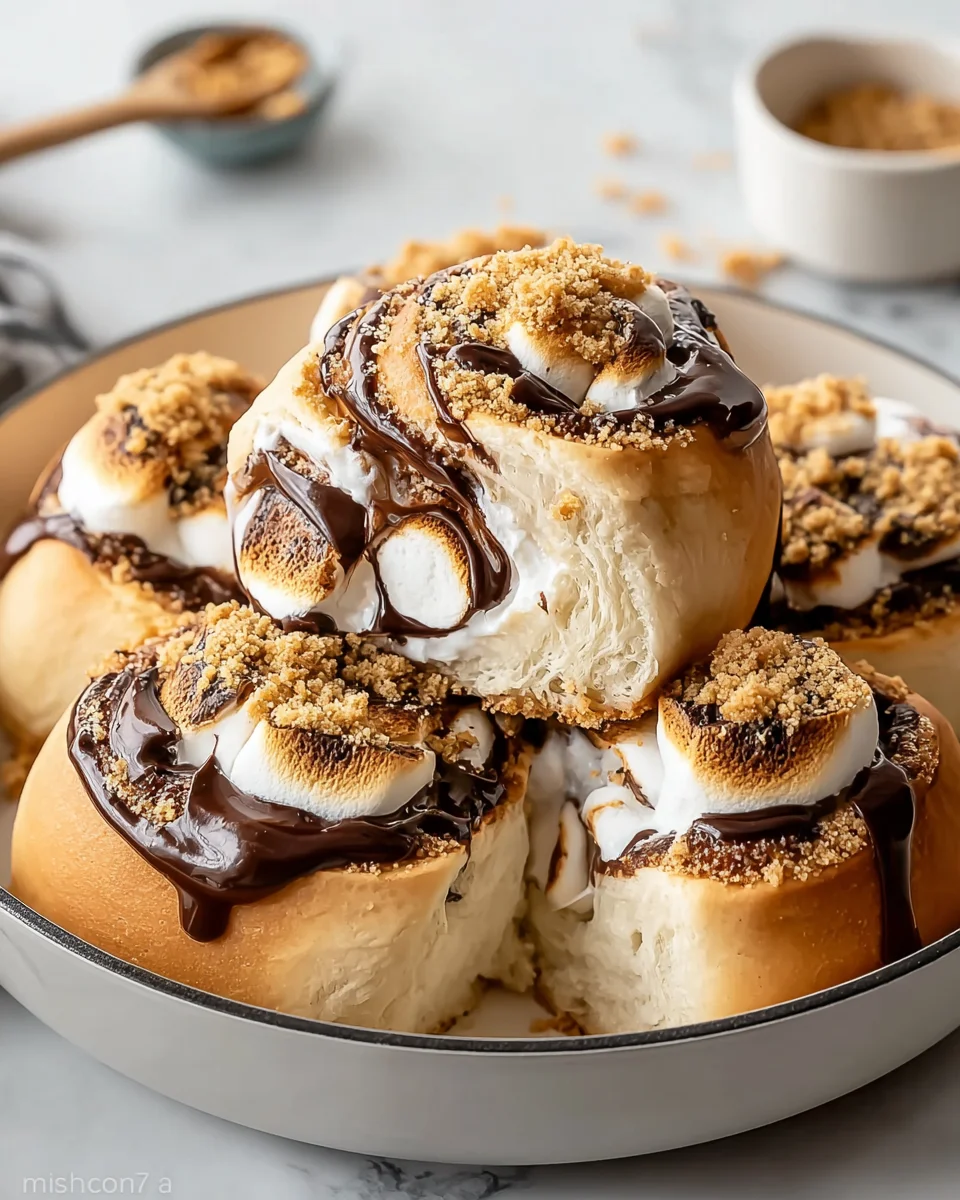
Ingredients:
Gathering all your ingredients before you start is a little trick I always use to make the baking process smooth and enjoyable. Trust me, it makes a big difference when you’re in the rhythm of creating these delightful S’mores Rolls!
- For the Dough:
- 1 cup (240ml) whole milk, warmed to 105-115°F (40-46°C) – the temperature is crucial for activating the yeast properly!
- 2 ¼ teaspoons (1 packet) active dry yeast
- ¼ cup (50g) granulated sugar, plus a pinch for the yeast
- ½ cup (113g) unsalted butter, melted and slightly cooled
- 1 large egg, at room temperature, lightly beaten
- 1 teaspoon vanilla extract
- 3 ½ – 4 cups (420-480g) all-purpose flour, plus more for dusting – start with 3 ½ cups and add more if needed, dough consistency is key!
- 1 teaspoon salt
- For the S’mores Filling:
- ¾ cup (170g) unsalted butter, softened to room temperature
- 1 cup (200g) packed light brown sugar
- ½ cup (40g) finely crushed graham crackers (about 6-8 full sheets)
- ¼ cup (20g) unsweetened cocoa powder – for that rich chocolate depth!
- 1 teaspoon vanilla extract
- Pinch of salt
- 2 cups (about 5 ounces) mini marshmallows, divided
- For the Chocolate Glaze:
- 4 ounces (113g) semi-sweet chocolate, finely chopped or chocolate chips
- ½ cup (120ml) heavy cream
- 1 cup (120g) powdered sugar, sifted
- ½ teaspoon vanilla extract
- Extra mini marshmallows for topping (optional, for torching)
Preparing the Enriched Yeast Dough for your S’mores Rolls
- Activate the Yeast: In a large mixing bowl (or the bowl of your stand mixer), pour in the warm milk. Make sure it’s not too hot, otherwise, it will kill your yeast, and your S’mores Rolls won’t rise! Sprinkle in the pinch of granulated sugar and the active dry yeast. Give it a gentle stir and let it sit for about 5-10 minutes. You’re looking for a frothy, foamy layer to appear on top, which tells you your yeast is alive and ready to work its magic. If you don’t see this foamy layer, your yeast might be expired, or your milk might have been too hot or too cold, and it’s best to start this step over. This frothing is a crucial indicator of a good rise!
- Combine Wet Ingredients: Once your yeast is active, add the ¼ cup of granulated sugar, the melted and slightly cooled butter, the lightly beaten egg, and the vanilla extract to the bowl. Whisk everything together until it’s well combined and looks smooth.
- Incorporate Dry Ingredients: Gradually add 3 ½ cups of the all-purpose flour and the salt to the wet mixture. If you’re using a stand mixer, attach the dough hook and mix on low speed until a shaggy dough forms. If you’re mixing by hand, use a sturdy wooden spoon.
- Knead the Dough: Increase the speed to medium-low on your stand mixer and knead for about 8-10 minutes. If kneading by hand, turn the dough out onto a lightly floured surface and knead for 10-12 minutes. You want to achieve a soft, smooth, and elastic dough. It should be slightly tacky but not overly sticky. If the dough is too sticky, add the remaining ½ cup of flour, one tablespoon at a time, until it reaches the desired consistency. A well-kneaded dough is the secret to fluffy S’mores Rolls! To check for proper kneading, perform the “windowpane test”: stretch a small piece of dough between your fingers; if you can stretch it thin enough to see light through it without tearing, it’s ready.
- First Rise: Lightly grease a clean large bowl with a little bit of butter or non-stick spray. Place the kneaded dough into the bowl, turning it once to coat the top. Cover the bowl tightly with plastic wrap or a clean kitchen towel. Let the dough rise in a warm, draft-free place for 1 to 1 ½ hours, or until it has doubled in size. Patience here pays off! The warmth helps the yeast thrive, creating those airy pockets we love. You’ll know it’s ready when you can gently poke it with a floured finger, and the indentation remains.
Preparing the Irresistible S’mores Filling
- Crush Graham Crackers: Place your graham cracker sheets into a Ziploc bag and seal it, expelling as much air as possible. Use a rolling pin or the bottom of a heavy pan to crush them into fine crumbs. The finer, the better, as this will ensure a smooth and evenly distributed texture within your S’mores Rolls.
- Cream the Butter and Sugar: In a medium bowl, combine the softened unsalted butter and packed light brown sugar. Using an electric mixer (handheld or stand mixer with paddle attachment), beat them together on medium speed until the mixture is light, fluffy, and well combined. This usually takes about 2-3 minutes. This step creates the creamy base for your filling.
- Add Remaining Filling Ingredients: To the creamed butter and sugar, add the finely crushed graham crackers, unsweetened cocoa powder, vanilla extract, and a pinch of salt. Mix on low speed until all the ingredients are thoroughly incorporated. You should have a thick, spreadable, chocolatey-graham cracker paste. This filling is what gives our S’mores Rolls their signature flavor!
Assembling Your S’mores Rolls
- Prepare Your Workspace: Once the dough has doubled in size, gently punch it down to release the air. Turn the dough out onto a lightly floured surface. Dust your rolling pin lightly with flour as well.
- Roll Out the Dough: Roll the dough into a large rectangle, approximately 12×18 inches (30×45 cm) and about ¼ inch (0.6 cm) thick. Try your best to keep the edges as straight as possible, as this will help you create uniformly shaped S’mores Rolls. If the dough springs back, let it rest for 5-10 minutes, and then continue rolling.
- Spread the Filling: Evenly spread the entire S’mores filling mixture over the rolled-out dough rectangle, leaving about a ½-inch (1.2 cm) border along one of the long edges clean. This border will help you seal the roll later. Make sure the filling goes right up to the other three edges. You want every bite of your S’mores Rolls to be packed with flavor!
- Sprinkle Marshmallows: Now comes the fun part! Evenly sprinkle 1 ½ cups of the mini marshmallows over the chocolate-graham cracker filling. Try not to get them too close to the un-filled edge, as they can sometimes squish out during rolling. The marshmallows will melt and create pockets of gooey goodness inside.
- Roll Up the Dough: Starting from one of the long edges (the one with the filling all the way to the edge), carefully and tightly roll the dough into a log. The tighter you roll it, the more beautiful spirals your S’mores Rolls will have. As you roll, gently tuck and tighten the dough.
- Seal the Seam: Once you reach the clean edge, pinch the dough seam firmly to seal the log. Make sure it’s well-sealed so your rolls don’t unravel during baking.
- Slice the Rolls: Using a sharp, un-serrated knife or, my preferred method, a piece of unflavored dental floss, slice the log into 12 equal pieces, each about 1 ½ inches (3.8 cm) thick. To use floss, slide it underneath the log, cross the ends over the top, and pull to slice cleanly. This technique prevents squishing the rolls and keeps their shape perfect.
Second Rise and Baking Your S’mores Rolls
- Prepare Baking Dish: Lightly grease a 9×13 inch (23×33 cm) baking dish. Arrange the sliced S’mores Rolls evenly in the prepared dish, leaving a little space between each roll, as they will expand during the second rise and baking.
- Second Rise: Cover the baking dish loosely with plastic wrap or a clean kitchen towel. Let the rolls rise in a warm, draft-free place for another 30-45 minutes, or until they look puffy and have nearly doubled in size. This second rise is crucial for light and airy rolls.
- Preheat Oven: While the rolls are completing their second rise, preheat your oven to 375°F (190°C).
- Bake the S’mores Rolls: Once the oven is preheated, remove the cover from the baking dish and place it in the center of the preheated oven. Bake for 20-25 minutes, or until the rolls are golden brown on top and cooked through. The internal temperature should reach about 200-210°F (93-99°C). Keep an eye on them towards the end, as ovens can vary. You want them perfectly golden, not burnt!
- Cool Slightly: Once baked, remove the S’mores Rolls from the oven and let them cool in the baking dish for about 10 minutes while you prepare the glaze. This slight cooling helps them firm up a bit before glazing.
The Grand Finale: Chocolate Glaze and Marshmallow Topping
- Prepare the Chocolate Glaze: In a medium, heatproof bowl, combine the finely chopped semi-sweet chocolate and heavy cream. Microwave on high for 30-60 seconds, or heat gently over a double boiler, stirring until the chocolate is fully melted and the mixture is smooth and glossy. If microwaving, stir every 15 seconds to prevent scorching.
- Whisk in Powdered Sugar and Vanilla: Add the sifted powdered sugar and vanilla extract to the melted chocolate mixture. Whisk vigorously until the glaze is smooth, thick, and pourable. If it’s too thick, add a tiny bit more heavy cream (half a teaspoon at a time) until it reaches your desired consistency. If it’s too thin, add a little more powdered sugar. This glaze provides the perfect crowning glory for your S’mores Rolls!
- Glaze the Rolls: Pour or generously spread the warm chocolate glaze over the slightly cooled S’mores Rolls in the baking dish. You want to cover every nook and cranny. The warmth of the rolls will help the glaze spread beautifully.
- Add More Marshmallows (Optional but Recommended!): If you want that classic torched marshmallow look and flavor, now’s the time! Evenly scatter the remaining extra mini marshmallows over the glazed S’mores Rolls.
- Torch the Marshmallows: Using a kitchen torch, carefully toast the marshmallows until they are golden brown and slightly caramelized. Be careful not to burn them! If you don’t have a kitchen torch, you can place the rolls under a preheated broiler for 1-2 minutes, watching them very closely to avoid burning. This step really brings home the “S’mores” experience!
- Serve and Enjoy: These S’mores Rolls are best served warm, straight from the pan, while the glaze is still slightly soft and the marshmallows are gooey. Grab one, pull it apart, and savor every bite of this decadent treat!

Conclusion:
Well, my friends, we’ve come to the sweet end of our culinary journey, and I genuinely hope you’re feeling as excited as I am about trying out this incredible dessert. What truly makes this recipe a non-negotiable addition to your repertoire isn’t just its undeniable deliciousness, but its sheer genius in transforming a beloved campfire classic into something effortlessly achievable in your own kitchen. Forget the smoke, the struggle for perfect marshmallow toast, and the outdoor elements; with these S’mores Rolls, you capture all that nostalgic magic with a refined, flaky twist. Each bite is a symphony of textures and flavors: the delicate crispness of the golden-brown pastry giving way to molten, rich chocolate, followed by the gooey, ethereal sweetness of warm marshmallow, all grounded by the subtle crunch and distinct taste of graham cracker. It’s a comfort food dream, elevated, and utterly irresistible. I promise you, the aroma alone as these bake will have everyone gathered around the oven, eagerly anticipating the first taste. It’s more than just a dessert; it’s an experience, a memory in the making, and a guaranteed crowd-pleaser that requires surprisingly little effort for such a spectacular payoff.
Now, let’s talk about making this experience truly your own. While these S’mores Rolls are absolutely divine straight out of the oven, still warm and wonderfully messy, there are countless ways to enjoy them or even put your personal spin on the classic. For a truly decadent treat, I highly recommend serving them with a scoop of good quality vanilla bean ice cream. The cold, creamy ice cream against the warm, gooey roll is a match made in dessert heaven. A light dusting of powdered sugar or a delicate drizzle of extra chocolate sauce can also add that extra touch of elegance, making them perfect for a dinner party dessert. As for variations, don’t be afraid to experiment! Imagine swapping out milk chocolate for a richer dark chocolate, or even trying white chocolate chips for a different flavor profile. You could also sprinkle a tiny pinch of sea salt over the chocolate layer before baking to really make those sweet flavors pop, or add a handful of chopped toasted pecans or walnuts for an extra layer of crunch and nutty depth. Want to make them even more special? Try infusing your marshmallows with a hint of peppermint extract during the colder months, or a touch of espresso powder mixed into the chocolate for a sophisticated mocha twist. The beauty of this recipe lies in its adaptability, allowing you to tailor it perfectly to your taste or whatever you have on hand.
So, what are you waiting for? I’ve shared all my secrets and tips, and now it’s your turn to unleash your inner baker. Please, don’t just read about this deliciousness; go into your kitchen and create it! Gather your ingredients, put on some good music, and enjoy the process of bringing these incredible S’mores Rolls to life. I have no doubt that you’ll fall in love with how easy they are to make and, more importantly, how absolutely fantastic they taste. Once you’ve had a chance to try them, I would absolutely love to hear all about your experience! Did you stick to the classic? Did you try a fun variation? How did your family and friends react? Share your thoughts, your successes, and even your funny kitchen anecdotes in the comments below, or better yet, snap a photo and share it on your favorite social media platform. Let’s spread the joy of these delightful treats far and wide. Happy baking, and I can’t wait to see what wonderful creations you come up with!
Irresistible S’mores Rolls
A recipe for warm, soft pastry rolls with melted chocolate and crunchy graham cracker bits, inspired by the classic campfire treat. Made with a rich dough and topped with a chocolate glaze.
Ingredients
Instructions
Important Information
Nutrition Facts (Per Serving)
It is important to consider this information as approximate and not to use it as definitive health advice.
Allergy Information
Please check ingredients for potential allergens and consult a health professional if in doubt.
Leave a Comment