
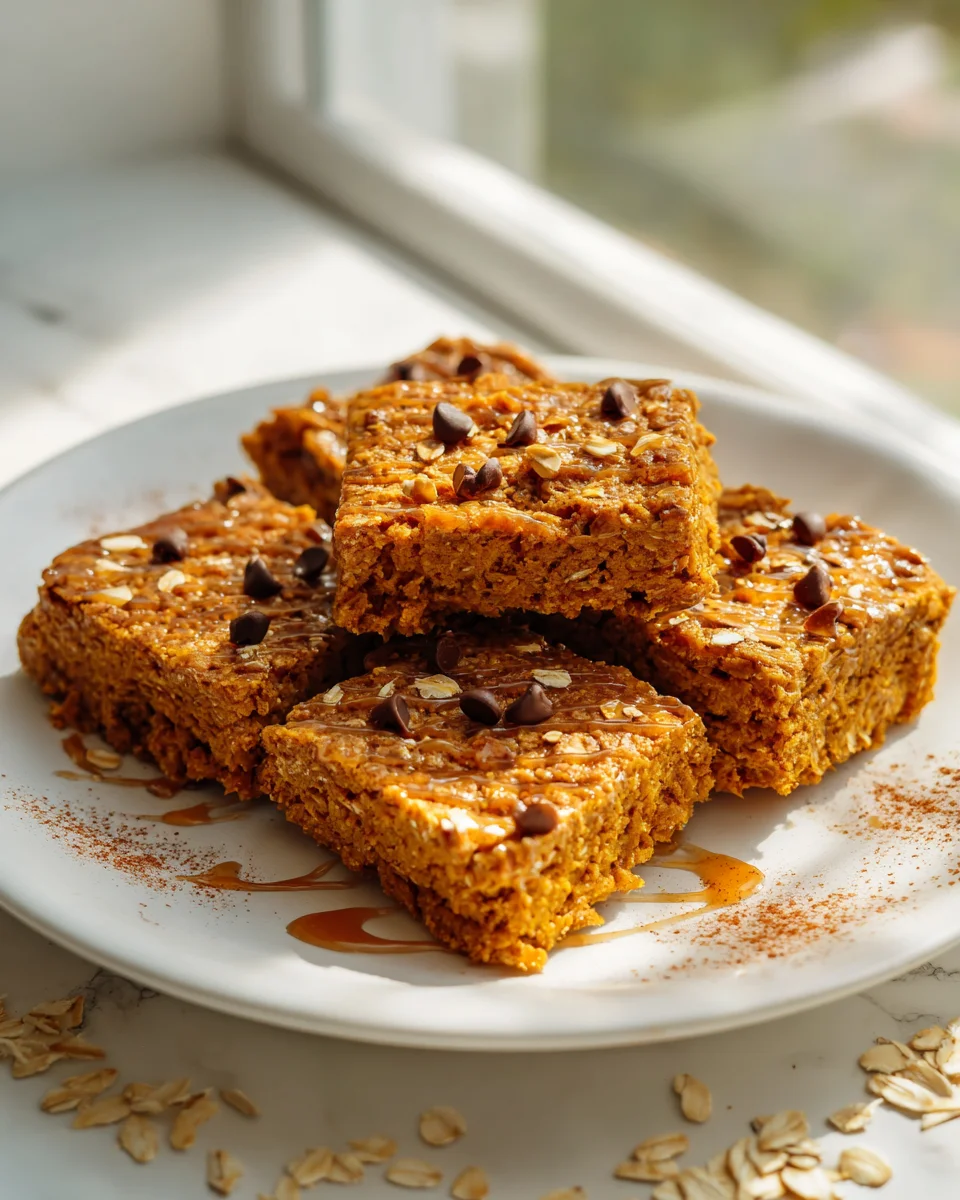
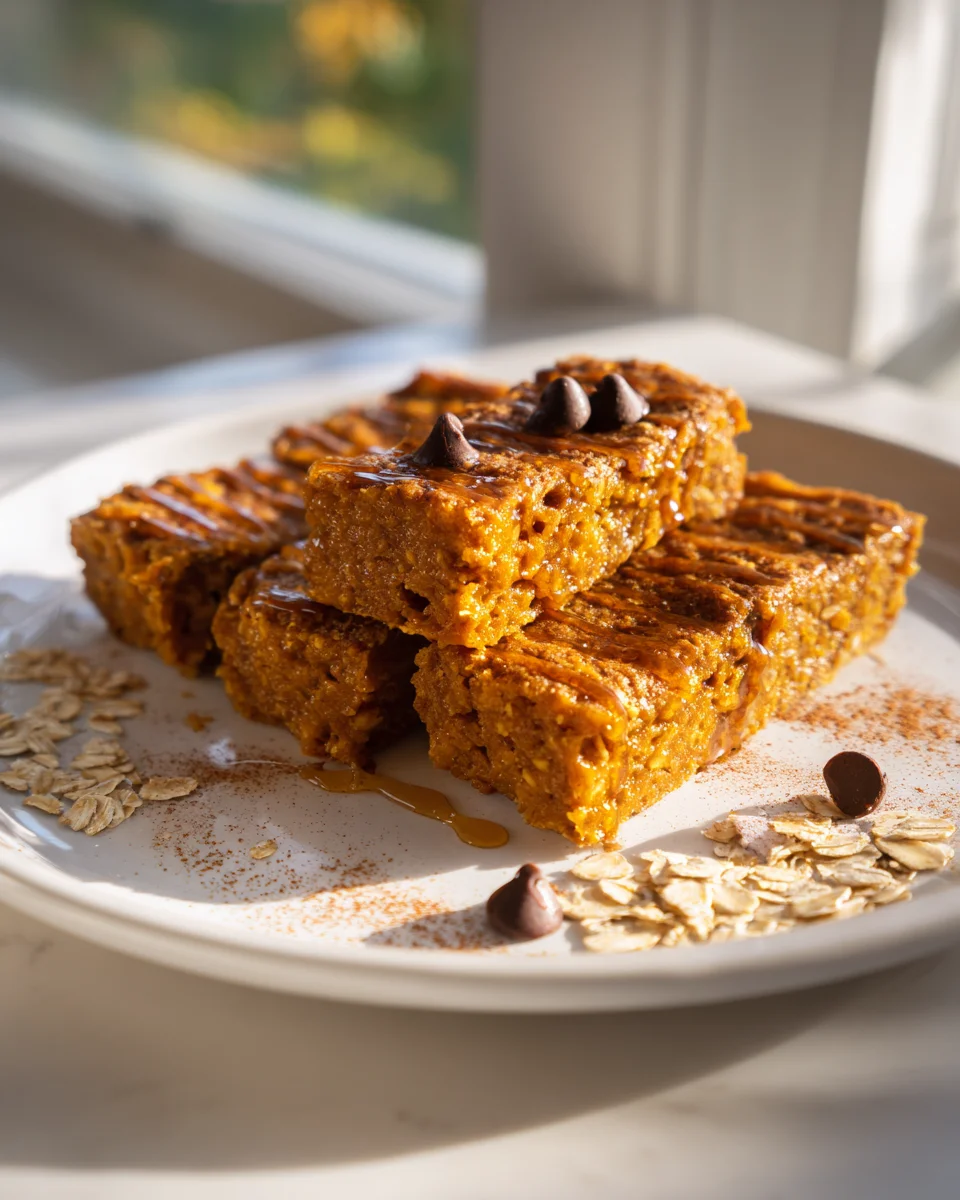
Healthy Pumpkin Oatmeal Bars
Oh, let me tell you, there’s nothing quite like the cozy embrace of autumn flavors, and these Healthy Pumpkin Oatmeal Bars are truly something special! I’m so excited to share this recipe with you because it perfectly captures that warm, comforting feeling we all crave when the leaves start to turn, but without any of the guilt.
You’re going to absolutely adore these bars because they’re the ideal blend of wholesome goodness and irresistible taste. Imagine a soft, chewy bar packed with hearty oats, earthy pumpkin puree, and a symphony of warm spices like cinnamon, nutmeg, and ginger. They’re naturally sweetened, making them a fantastic grab-and-go breakfast, a satisfying mid-day snack, or even a healthier dessert option.
What makes them stand out is how easily they come together – simple ingredients, minimal fuss, and a result that’s utterly delicious and incredibly nourishing. Plus, they make your kitchen smell absolutely heavenly while they bake! Get ready to fall in love with a treat that feels indulgent but keeps you feeling great.
Ingredient Notes
Crafting delicious and healthy pumpkin oatmeal bars starts with understanding the role each ingredient plays. I’ve carefully selected components that contribute to both amazing flavor and nutritional value, making these bars a delightful guilt-free treat. Here’s a rundown of the key ingredients I use and some handy substitutions I’ve discovered along the way.
Oats
- Old-fashioned Rolled Oats: These are the star of the show for a reason! Rolled oats provide a fantastic chewy texture and are a wonderful source of whole grains and fiber, which helps keep you feeling full and satisfied. I find that they hold their shape beautifully in the bars.
- Substitutions: I highly recommend sticking with old-fashioned rolled oats for the best texture. Quick oats can work in a pinch, but they might result in a softer, slightly more uniform texture, and steel-cut oats are definitely not suitable here as they won’t soften enough during baking.
Pumpkin Puree
- Pure Canned Pumpkin: This is where all that lovely pumpkin flavor and moisture come from! It’s packed with vitamins, minerals, and antioxidants, and it’s naturally low in calories. Just be absolutely sure you’re grabbing pure pumpkin puree, not pumpkin pie filling, which contains added sugars and spices that would throw off our recipe.
- Substitutions: Homemade pumpkin puree works wonderfully too if you have some on hand! I’ve also had success with pureed butternut squash if you’re looking for a slight flavor variation and can’t find pumpkin.
Sweeteners
- Maple Syrup or Honey: I love using natural liquid sweeteners like pure maple syrup or honey because they add a lovely depth of flavor alongside their sweetness. They contribute to the healthy profile by being less processed than refined sugars.
- Substitutions: Feel free to adjust the amount of sweetener to your personal preference. For a lower-sugar option, a blend of erythritol and stevia can be used, but keep in mind it might slightly alter the moisture content, so you might need a tiny splash more liquid if the batter seems too dry. Agave nectar is another suitable liquid sweetener.
Flour
- Whole Wheat Flour or Oat Flour: To keep these bars healthy and hearty, I typically use whole wheat flour for its fiber and nutrients. It gives the bars a nice structure without being heavy.
- Substitutions: If you’re looking for a gluten-free option, oat flour is fantastic – just make sure it’s certified gluten-free if needed. You can easily make your own oat flour by blending rolled oats until fine. Almond flour can also work for a lower-carb version, but you might need to slightly reduce the amount or add a touch more liquid as it absorbs differently.
Fats
- Melted Coconut Oil or Grapeseed Oil: A little healthy fat is important for texture and moisture. Coconut oil adds a subtle richness and beneficial medium-chain triglycerides. Grapeseed oil is a good neutral-flavored alternative.
- Substitutions: Melted unsalted butter also works beautifully if you’re not dairy-free, or for a lower-fat option, you can experiment with unsweetened applesauce, though this might make the bars a bit softer and chewier.
Spices
- Pumpkin Pie Spice: This blend of cinnamon, nutmeg, ginger, and cloves is essential for that signature autumnal pumpkin flavor.
- Substitutions: If you don’t have pumpkin pie spice, you can easily make your own blend using individual spices! I usually combine 1 teaspoon cinnamon, 1/4 teaspoon nutmeg, 1/4 teaspoon ginger, and a pinch of cloves for the equivalent of about 1.5 teaspoons of pumpkin pie spice.
Leavening Agents
- Baking Powder and Baking Soda: These are crucial for giving our bars a slight lift and tender crumb. They react with the acidic pumpkin puree to create the perfect texture.
- Substitutions: These are pretty standard and essential for the structure, so I wouldn’t recommend substituting them.
Binder
- Egg: A single egg helps bind all the ingredients together and adds to the richness and texture of the bars.
- Substitutions: For a vegan version, a “flax egg” works perfectly. To make one, combine 1 tablespoon of ground flaxseed meal with 3 tablespoons of water and let it sit for 5 minutes until it thickens.
Step-by-Step Instructions
Making these healthy pumpkin oatmeal bars is incredibly straightforward, even for beginner bakers. Just follow these simple steps, and you’ll have a batch of delicious, wholesome bars ready to enjoy in no time. I always find it helpful to read through all the steps once before I start!
- Prepare Your Baking Dish: First things first, preheat your oven to 350°F (175°C). Then, lightly grease an 8×8 inch square baking dish (or a 9×9 inch for slightly thinner bars) with coconut oil or your preferred cooking spray. For easier removal, I like to line it with parchment paper, leaving an overhang on two sides to create “handles.”
- Combine Dry Ingredients: In a large mixing bowl, whisk together the old-fashioned rolled oats, whole wheat flour (or oat flour), pumpkin pie spice, baking powder, baking soda, and a pinch of salt. Make sure everything is well combined. This ensures an even distribution of flavor and leavening throughout your bars.
- Mix Wet Ingredients: In a separate medium bowl, whisk together the pumpkin puree, maple syrup (or honey), melted coconut oil (or grapeseed oil), vanilla extract, and the egg (or flax egg). Whisk until the mixture is smooth and thoroughly combined.
- Combine Wet and Dry: Pour the wet ingredients into the bowl with the dry ingredients. Using a spatula or wooden spoon, gently mix until just combined. Be careful not to overmix; overmixing can develop the gluten in the flour too much, leading to tougher bars. A few streaks of flour are perfectly fine.
- Add Optional Mix-ins (If Desired): If you’re adding chocolate chips, chopped nuts, or dried fruit, gently fold them into the batter now. I love adding a handful of mini chocolate chips or toasted pecans for extra texture and flavor.
- Spread into Baking Dish: Transfer the batter to your prepared baking dish. Use the back of your spatula or your hands (lightly moistened to prevent sticking) to spread the batter evenly into the pan. Make sure it’s pressed firmly and uniformly into the corners.
- Bake to Perfection: Place the baking dish in your preheated oven and bake for 25-30 minutes. The bars are ready when the edges are lightly golden, and a toothpick inserted into the center comes out clean or with moist crumbs, but no wet batter. The exact baking time can vary depending on your oven and the thickness of your bars, so keep an eye on them!
- Cool Completely: This step is CRUCIAL! Once baked, remove the bars from the oven and let them cool completely in the pan on a wire rack. This usually takes at least 1-2 hours. Cooling allows the bars to firm up properly, making them much easier to cut into neat squares without crumbling. Patience is a virtue here!
- Slice and Serve: Once fully cooled, use the parchment paper overhang to lift the bars out of the pan. Place them on a cutting board and slice into your desired size squares or rectangles. I usually cut them into 9 or 12 bars. Now they’re ready to enjoy!
Tips & Suggestions
I’ve baked countless batches of these healthy pumpkin oatmeal bars, and along the way, I’ve picked up some invaluable tips that I’m excited to share with you. These suggestions will help ensure your bars turn out perfectly every time and allow you to customize them to your heart’s content!
- Don’t Overmix the Batter: This is a golden rule for many baked goods, and it definitely applies here. Once you combine the wet and dry ingredients, mix just until everything is incorporated. Overmixing can develop the gluten in the flour too much, leading to a tougher, less tender bar. We want a soft, chewy texture!
- Cooling is Non-Negotiable: I cannot stress this enough – let your bars cool completely in the pan before attempting to cut them. The ingredients need time to set and firm up. If you try to cut them while warm, they’ll be crumbly and fall apart. Trust me, it’s worth the wait for perfectly shaped bars!
- Adjust Sweetness to Your Liking: The beauty of using natural sweeteners like maple syrup or honey is that you can easily adjust the amount. If you prefer a less sweet bar, reduce the quantity by a tablespoon or two. If you have a sweeter tooth, add a little extra. Taste your wet mixture before adding it to the dry ingredients (assuming no raw egg is present if you modify the recipe, otherwise, be cautious).
- Make Them Vegan: As mentioned in the ingredient notes, simply swap out the egg for a “flax egg” (1 tbsp ground flaxseed meal + 3 tbsp water, let sit 5 mins). Ensure you’re using maple syrup (not honey) and a plant-based oil like coconut or grapeseed oil, and these bars are perfectly vegan-friendly!
- Go Gluten-Free: These bars are super adaptable for a gluten-free diet. Just ensure you use certified gluten-free rolled oats and swap the whole wheat flour for oat flour (easily made by blending GF rolled oats) or a suitable gluten-free all-purpose baking blend.
- Spice It Up: Don’t be afraid to play with the spices! If you love a stronger ginger kick, add a pinch more. A tiny bit of allspice or even a whisper of cardamom can add an interesting twist to the pumpkin pie spice blend.
- Amazing Add-Ins: These bars are a fantastic canvas for additional textures and flavors. I often fold in:
- Chocolate Chips: Mini chocolate chips or dark chocolate chunks are a divine pairing with pumpkin.
- Nuts: Toasted pecans, walnuts, or even almonds add a lovely crunch and healthy fats.
- Seeds: Pumpkin seeds (pepitas), sunflower seeds, or chia seeds boost the nutrition and texture.
- Dried Fruit: Dried cranberries, chopped apricots, or golden raisins can add a burst of chewy sweetness.
I recommend about 1/2 to 3/4 cup of total mix-ins.
- For Firmer Bars: If you find your bars are a little softer than you prefer, try increasing the oats by about 1/4 cup or adding an extra tablespoon of flour in your next batch. This will absorb more moisture and give them more structure.
- Serving Suggestions: These bars are incredibly versatile. I love them as a quick breakfast on the go, a satisfying afternoon snack with a cup of tea or coffee, or even a light dessert. They’re also wonderful crumbled over yogurt with some fresh fruit.
Storage
One of the best things about these healthy pumpkin oatmeal bars is how well they store, making them perfect for meal prepping and having healthy snacks on hand throughout the week. Proper storage ensures they stay fresh and delicious for as long as possible.
At Room Temperature
If you plan to devour your bars within a day or two, you can store them at room temperature. Simply place the completely cooled bars in an airtight container. Keep them away from direct sunlight or heat sources. I find they stay perfectly fresh and soft for about 1-2 days this way, which is great if you’re making them for a quick party or gathering.
In the Refrigerator
For longer-term storage, the refrigerator is your best friend. After the bars have completely cooled, transfer them to an airtight container. You can stack them with small pieces of parchment paper in between layers to prevent sticking, although they usually don’t stick too much if fully cooled. Stored this way, my healthy pumpkin oatmeal bars will happily last for up to 5-7 days. They’re wonderful cold, offering a slightly firmer, chewier texture straight from the fridge.
In the Freezer
These bars freeze beautifully, which is fantastic if you want to make a big batch and enjoy them over several weeks or months. This is my go-to method for ensuring I always have a healthy snack ready.
- To Freeze: Once the bars are completely cool, cut them into individual portions. You can then wrap each bar tightly in plastic wrap or parchment paper, or simply place them in a single layer on a baking sheet and freeze for about an hour until firm.
- Transfer to Container: Once firm, transfer the individually wrapped or unwrapped frozen bars to a freezer-safe airtight container or a heavy-duty freezer bag. Removing as much air as possible from the bag helps prevent freezer burn.
- Freezer Lifespan: Your healthy pumpkin oatmeal bars will maintain their quality in the freezer for up to 2-3 months.
- To Thaw and Enjoy: When you’re ready for a bar, simply pull one out of the freezer! You can let it thaw at room temperature for about 30-60 minutes, or pop it in the microwave for 15-30 seconds if you’re in a hurry. They taste just as fresh as the day they were baked!
Always ensure your bars are completely cooled before storing them in any container to prevent condensation, which can lead to sogginess and spoilage.
Final Thoughts
I truly hope you give these Healthy Pumpkin Oatmeal Bars a try! They’re more than just a recipe; they’re a delightful way to bring the cozy flavors of pumpkin and wholesome goodness into your day. I find them incredibly satisfying, whether I’m grabbing one for a quick breakfast, a guilt-free snack, or even a light dessert after a meal.
What makes these Healthy Pumpkin Oatmeal Bars a true must-try is their perfect balance of being deliciously spiced, wonderfully moist, and yet packed with nutritious ingredients. You get all the comfort without any of the compromise. It’s a fantastic recipe to have in your rotation, especially when you’re craving something sweet but still want to feel good about what you’re eating.
So, go ahead and whip up a batch! I promise, these Healthy Pumpkin Oatmeal Bars will become a cherished treat in your home, bringing smiles and a touch of healthy indulgence to every bite. Enjoy!
Healthy Pumpkin Oatmeal Bars – Easy Fall Breakfast Treat

These Healthy Pumpkin Oatmeal Bars are a delightful blend of wholesome ingredients and autumn flavors, perfect for a guilt-free breakfast or snack. Enjoy the soft, chewy texture packed with oats, pumpkin puree, and warm spices.
- Prep Time: 15 mins
- Cook Time: 30 mins
- Total Time: 45 minutes
- Yield: 12 servings 1x
- Category: Breakfast
- Method: Baking
- Cuisine: American
Ingredients
- 2 cups old-fashioned rolled oats
- 1 cup whole wheat flour or oat flour
- 1 teaspoon pumpkin pie spice
- 1 teaspoon baking powder
- 1/2 teaspoon baking soda
- 1/4 teaspoon salt
- 1 cup pure canned pumpkin
- 1/2 cup maple syrup or honey
- 1/4 cup melted coconut oil or grapeseed oil
- 1 teaspoon vanilla extract
- 1 large egg or 1 flax egg (1 tablespoon ground flaxseed meal + 3 tablespoons water)
- Optional: 1/2 to 3/4 cup chocolate chips, chopped nuts, or dried fruit
Instructions
- Preheat your oven to 350°F (175°C) and lightly grease an 8×8 inch square baking dish with coconut oil or cooking spray. Optionally, line it with parchment paper for easier removal.
- In a large mixing bowl, whisk together the old-fashioned rolled oats, whole wheat flour (or oat flour), pumpkin pie spice, baking powder, baking soda, and a pinch of salt until well combined.
- In a separate medium bowl, whisk together the pumpkin puree, maple syrup (or honey), melted coconut oil (or grapeseed oil), vanilla extract, and the egg (or flax egg) until smooth.
- Pour the wet ingredients into the bowl with the dry ingredients and gently mix until just combined, being careful not to overmix.
- If desired, fold in chocolate chips, chopped nuts, or dried fruit into the batter.
- Transfer the batter to the prepared baking dish and spread it evenly, pressing it firmly into the corners.
- Bake in the preheated oven for 25-30 minutes, or until the edges are lightly golden and a toothpick inserted in the center comes out clean or with moist crumbs.
- Remove the bars from the oven and let them cool completely in the pan on a wire rack for at least 1-2 hours before cutting.
- Once cooled, lift the bars out using the parchment paper overhang, place them on a cutting board, and slice into squares or rectangles.
Nutrition
- Serving Size: 1 bar
- Calories: 150
- Sugar: 8 g
- Sodium: 100 mg
- Fat: 5 g
- Saturated Fat: 3 g
- Unsaturated Fat: 2 g
- Trans Fat: 0 g
- Carbohydrates: 24 g
- Fiber: 3 g
- Protein: 3 g
- Cholesterol: 20 mg
Keywords: Don't overmix the batter to ensure a soft, chewy texture. For a vegan version, replace the egg with a flax egg and use maple syrup instead of honey. Adjust sweetness to your liking by modifying the amount of sweetener used.
Leave a Comment