
Raspberry Cookies
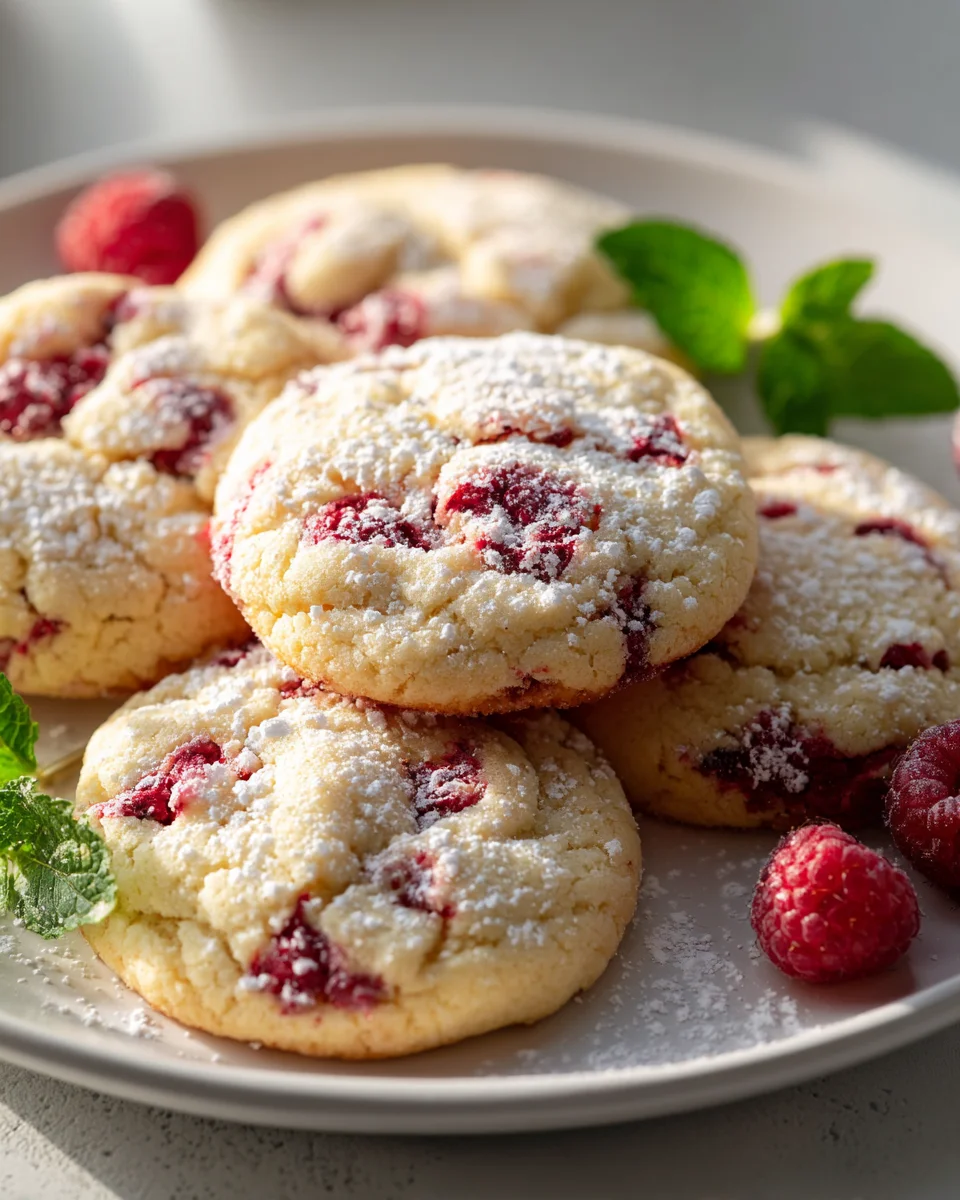
Oh, prepare yourselves, because I am absolutely bursting with excitement to share this incredible recipe for Raspberry Cookies with you! Forget everything you thought you knew about a simple cookie; these beauties are on another level. What makes them so incredibly special, you ask? It’s that magical combination of a wonderfully tender, melt-in-your-mouth cookie base with the vibrant, sweet-tart burst of fresh raspberries in every single bite. The stunning natural color of the raspberries speckling through the dough makes them as gorgeous to look at as they are delicious to eat.
I just know you’re going to fall head over heels in love with these cookies because they strike the perfect balance between comforting familiarity and an exciting pop of fresh fruit flavor. They’re not overly sweet, allowing the natural goodness of the raspberries to truly shine. Whether you’re baking for a special occasion, a cozy afternoon snack, or just because you deserve a treat, these cookies are a guaranteed crowd-pleaser that will bring smiles all around. Trust me, the aroma alone as they bake is pure bliss!
So, what exactly are we whipping up? We’re talking about soft, chewy cookies generously studded with juicy raspberries. Some versions might have a hint of lemon zest to brighten the flavor even further, or perhaps a dreamy white chocolate chip or a delicate glaze to crown them, but the star of the show is undeniably the glorious raspberry. Get ready for a simple yet utterly irresistible homemade cookie that tastes like a ray of sunshine on a plate. Let’s get baking!
Ingredient Notes
Creating truly irresistible raspberry cookies starts with understanding the role each ingredient plays. I’ve found that using high-quality components makes all the difference in achieving that perfect balance of sweetness, chewiness, and bright fruity flavor.
- All-Purpose Flour: This is the backbone of our cookies. I always use unbleached all-purpose flour for a tender crumb. While you could experiment with a 1:1 gluten-free baking blend for a gluten-free option, you might need to slightly adjust the liquid or resting time as gluten-free flours absorb moisture differently. I wouldn’t recommend substituting with whole wheat flour directly as it can result in a denser, tougher cookie.
- Unsalted Butter: For me, butter is non-negotiable for flavor and texture. Using unsalted butter allows me to control the salt content in the recipe. Make sure your butter is softened to room temperature – not melted, not cold – so it creams properly with the sugar, creating air pockets for a lighter cookie. If you need a dairy-free alternative, a good quality plant-based butter substitute or solid vegetable shortening can work, though the flavor profile will shift slightly.
- Granulated Sugar & Brown Sugar: I use a combination of both. Granulated sugar provides crispness and sweetness, while light brown sugar adds moisture, chewiness, and a subtle caramel note that complements the raspberries beautifully. You can play with the ratio slightly; more brown sugar for a chewier cookie, more granulated for a crispier edge.
- Eggs: Large eggs bind everything together and add richness. They also contribute to the cookie’s structure and rise. Ensure your eggs are at room temperature, just like your butter, for easier incorporation into the dough.
- Vanilla Extract: Pure vanilla extract is crucial for rounding out the flavors. I never skimp on good vanilla! If you’re feeling adventurous, a touch of almond extract can also be lovely with raspberries, but use it sparingly as it’s potent.
- Baking Soda & Baking Powder: This dynamic duo gives our cookies the perfect lift and spread. Baking soda reacts with the acidic brown sugar and any slight acidity from the raspberries, while baking powder provides consistent leavening. Make sure yours are fresh for the best results.
- Salt: Just a pinch of fine sea salt enhances all the other flavors, preventing the cookies from tasting overly sweet and bringing out the fruitiness of the raspberries.
- Raspberries: Ah, the star of the show! I prefer using fresh raspberries when they’re in season because their vibrant flavor truly shines. However, frozen raspberries work wonderfully too. If using frozen, don’t thaw them completely before folding them in, as they can become mushy. Just lightly rinse them and pat dry if they have excessive ice crystals. You could also use freeze-dried raspberries, crushed, for an intense, non-soggy raspberry punch. For an extra pop, sometimes I’ll even add a swirl of good quality raspberry jam into the dough right before baking, or dollop a small amount on top of each cookie.
Step-by-Step Instructions
Making these raspberry cookies is a delightful process, and I’m excited to guide you through each step to ensure you get perfectly soft, chewy, and fruity results every time. Remember, the key is gentle handling of the dough and especially the delicate raspberries!
- Prepare Your Workspace: First things first, I always get my baking sheets ready. Line two large baking sheets with parchment paper. This prevents sticking and makes for easy cleanup. Preheat your oven to 350°F (175°C). Having everything organized before you start mixing makes the process so much smoother.
- Combine Dry Ingredients: In a medium bowl, whisk together your all-purpose flour, baking soda, baking powder, and salt. Whisking ensures that the leavening agents and salt are evenly distributed throughout the flour, which is crucial for a consistent cookie texture. Set this bowl aside for now.
- Cream Butter and Sugars: In a large mixing bowl (or the bowl of a stand mixer fitted with the paddle attachment), beat the softened unsalted butter with both the granulated sugar and light brown sugar on medium speed. Cream this mixture until it’s light and fluffy, usually about 2-3 minutes. This step incorporates air into the butter, contributing to the cookies’ soft texture. Scrape down the sides of the bowl as needed to ensure everything is well combined.
- Add Eggs and Vanilla: Reduce the mixer speed to low. Beat in the eggs, one at a time, mixing well after each addition until just combined. Then, stir in the pure vanilla extract. Be careful not to overmix at this stage; we just want everything incorporated.
- Combine Wet and Dry: Gradually add the dry ingredient mixture to the wet ingredients, mixing on low speed until just combined. The moment you see no more streaks of flour, stop mixing. Overmixing develops the gluten in the flour, which can lead to tough cookies, and we’re aiming for tender and chewy!
- Gently Fold in Raspberries: This is where the magic happens! Carefully fold in your fresh or lightly frozen raspberries by hand using a rubber spatula. I always use a gentle hand here to avoid crushing the delicate berries too much. We want delicious bursts of raspberry, not purple-streaked mush. If you’re using fresh raspberries, they’re quite fragile, so be extra gentle. If using lightly frozen, they’ll hold their shape a bit better.
- Scoop and Bake: Drop rounded tablespoons of cookie dough onto your prepared baking sheets, leaving about 2 inches between each cookie. They will spread! I usually get about 12 cookies per sheet.
- Bake to Perfection: Bake for 10-12 minutes, or until the edges are lightly golden and the centers are still soft and slightly underbaked. Remember that ovens vary, so keep an eye on them. I find that pulling them out when they look just about done, but not fully set in the middle, results in a wonderfully chewy cookie once cooled.
- Cool: Let the cookies cool on the baking sheets for about 5 minutes before transferring them to a wire rack to cool completely. This resting time on the hot sheet allows them to firm up without breaking. Trust me, it’s worth the wait!
Tips & Suggestions
After baking countless batches of raspberry cookies, I’ve gathered a few invaluable tips and tricks that I love to share. These will help you elevate your cookies from simply good to truly spectacular, ensuring they’re always a hit!
- Don’t Overmix the Dough: This is a golden rule for most cookies, and especially true for raspberry cookies. Overmixing the flour activates gluten, which can lead to a tough, dry cookie. Mix just until the ingredients are combined. Once you add the raspberries, fold them in gently by hand.
- Handle Raspberries with Care: Raspberries are delicate! Whether fresh or frozen, handle them gently when folding into the dough. If using fresh, make sure they are dry to avoid adding excess moisture to the dough. If using frozen, don’t thaw them completely; a slight chill helps them hold their shape better during mixing and baking, preventing them from bleeding too much into the dough and making your cookies purple. Some bakers like to toss frozen raspberries in a tablespoon of flour before adding them to the dough; this can help absorb excess moisture and prevent them from sinking to the bottom.
- Consider Chilling the Dough: While not strictly necessary for this recipe, chilling the dough for at least 30 minutes (or up to 24 hours) can improve the texture and flavor. Cold dough spreads less, resulting in thicker, chewier cookies, and it allows the flavors to meld beautifully. If you chill the dough, you might need to add a minute or two to the baking time.
- Flavor Boosters: For an extra layer of flavor, try adding 1 teaspoon of fresh lemon zest to the dough with the vanilla extract. Lemon and raspberry are a match made in heaven! A handful of white chocolate chips can also be folded in with the raspberries for a delightful sweetness that pairs wonderfully with the tart fruit.
- Even Baking: For uniformly baked cookies, rotate your baking sheets halfway through the baking time. Also, avoid overcrowding the baking sheets, as this can lead to uneven baking and prevent the cookies from spreading properly.
- The “Underbaked” Secret: For the softest, chewiest cookies, I always recommend pulling them out of the oven when the edges are just set and lightly golden, but the centers still look slightly soft and puffed. They will continue to cook slightly from the residual heat on the baking sheet as they cool, leading to that perfect tender-chewy texture.
- Adjust for Oven Hot Spots: Get to know your oven! If you notice some cookies browning faster than others, your oven likely has hot spots. Adjust your baking sheets accordingly or rotate them more frequently.
Storage
Once you’ve baked a batch of these glorious raspberry cookies, proper storage is key to keeping them fresh, soft, and delicious for as long as possible. Here’s how I like to store mine:
- Room Temperature: Once completely cooled, store your raspberry cookies in an airtight container at room temperature. I often place a piece of parchment paper between layers of cookies to prevent them from sticking together. They will stay wonderfully fresh and soft for up to 3-4 days. Because they contain fresh fruit, they might not last quite as long as plain chocolate chip cookies, so it’s best to enjoy them relatively quickly.
- Refrigeration: While not strictly necessary for short-term storage, if you live in a very warm or humid climate, or if you want to extend their shelf life a bit, you can store them in an airtight container in the refrigerator for up to a week. Just be aware that refrigeration can sometimes alter the texture of cookies, making them a little firmer. I usually let them come to room temperature for about 15-20 minutes before serving, or even give them a quick 10-second zap in the microwave to bring back some of that fresh-baked warmth and softness.
- Freezing Baked Cookies: These raspberry cookies freeze beautifully! Once they are completely cool, arrange them in a single layer on a baking sheet and freeze until solid (this prevents them from sticking together in a clump). Then, transfer the frozen cookies to a freezer-safe airtight container or a heavy-duty freezer bag, with parchment paper between layers if stacking. They will keep well in the freezer for up to 2-3 months. When you’re ready to enjoy them, simply thaw them at room temperature for an hour or two, or warm them gently in the microwave or a low oven for a few minutes.
- Freezing Cookie Dough: You can also freeze the unbaked cookie dough! Scoop the dough into individual portions onto a parchment-lined baking sheet and freeze until solid. Then, transfer the frozen dough balls to a freezer-safe bag. You can bake them straight from frozen (add a couple of extra minutes to the baking time) whenever a cookie craving strikes. This is a fantastic way to have fresh, warm raspberry cookies on demand!

Final Thoughts
I truly hope you’re as excited as I am about these absolutely delightful Raspberry Cookies! I’ve poured my heart into crafting a recipe that brings together the perfect balance of a tender, sweet cookie base with the bright, tangy burst of fresh raspberries. There’s something undeniably magical about biting into one of these treats and discovering those vibrant, fruity pockets – it’s a flavor experience that truly stands out.
These aren’t just any cookies; they’re little bites of joy, perfect for brightening any day, sharing with loved ones, or simply treating yourself with a warm cup of coffee or a delicious non-alcohol alternative beverage. The unique combination of textures and flavors in these Raspberry Cookies makes them an absolute must-try. Trust me, once you experience their charm, they’ll quickly become a cherished favorite in your baking collection. Happy baking!
Easy Raspberry Cookies: Soft, Chewy, & Bursting with Flavor

These Raspberry Cookies are soft, chewy, and filled with vibrant bursts of fresh raspberries. Perfect for any occasion, they strike a delightful balance between sweetness and fruity flavor.
- Prep Time: 15 mins
- Cook Time: 12 mins
- Total Time: 27 minutes
- Yield: 24 cookies 1x
- Category: Dessert
- Method: Baking
- Cuisine: American
Ingredients
- 2 1/2 cups all-purpose flour
- 1 teaspoon baking soda
- 1 teaspoon baking powder
- 1/2 teaspoon fine sea salt
- 1/2 cup unsalted butter, softened
- 1/2 cup granulated sugar
- 1/2 cup light brown sugar
- 2 large eggs
- 1 teaspoon pure vanilla extract
- 1 1/2 cups fresh raspberries
Instructions
- Prepare Your Workspace: Line two large baking sheets with parchment paper and preheat your oven to 350°F (175°C).
- Combine Dry Ingredients: In a medium bowl, whisk together the all-purpose flour, baking soda, baking powder, and salt. Set aside.
- Cream Butter and Sugars: In a large mixing bowl, beat the softened unsalted butter with both the granulated sugar and light brown sugar on medium speed until light and fluffy, about 2-3 minutes.
- Add Eggs and Vanilla: Reduce the mixer speed to low and beat in the eggs one at a time, mixing well after each addition. Stir in the pure vanilla extract.
- Combine Wet and Dry: Gradually add the dry ingredient mixture to the wet ingredients, mixing on low speed until just combined.
- Gently Fold in Raspberries: Carefully fold in the fresh or lightly frozen raspberries by hand using a rubber spatula.
- Scoop and Bake: Drop rounded tablespoons of cookie dough onto the prepared baking sheets, leaving about 2 inches between each cookie.
- Bake to Perfection: Bake for 10-12 minutes, or until the edges are lightly golden and the centers are still soft.
- Cool: Let the cookies cool on the baking sheets for about 5 minutes before transferring them to a wire rack to cool completely.
Nutrition
- Serving Size: 1 cookie
- Calories: 120
- Sugar: 8 g
- Sodium: 50 mg
- Fat: 5 g
- Saturated Fat: 3 g
- Unsaturated Fat: 2 g
- Trans Fat: 0 g
- Carbohydrates: 16 g
- Fiber: 1 g
- Protein: 1 g
- Cholesterol: 20 mg
Keywords: Handle raspberries gently to avoid crushing them. Consider chilling the dough for improved texture and flavor. For added flavor, try incorporating lemon zest or white chocolate chips.
Leave a Comment