
Mini Christmas Cheesecakes Recipe – what could possibly be more delightful to grace your festive dessert table this holiday season?
Imagine a symphony of creamy, tangy sweetness, perfectly portioned into individual bites, each adorned with vibrant Christmas colours.
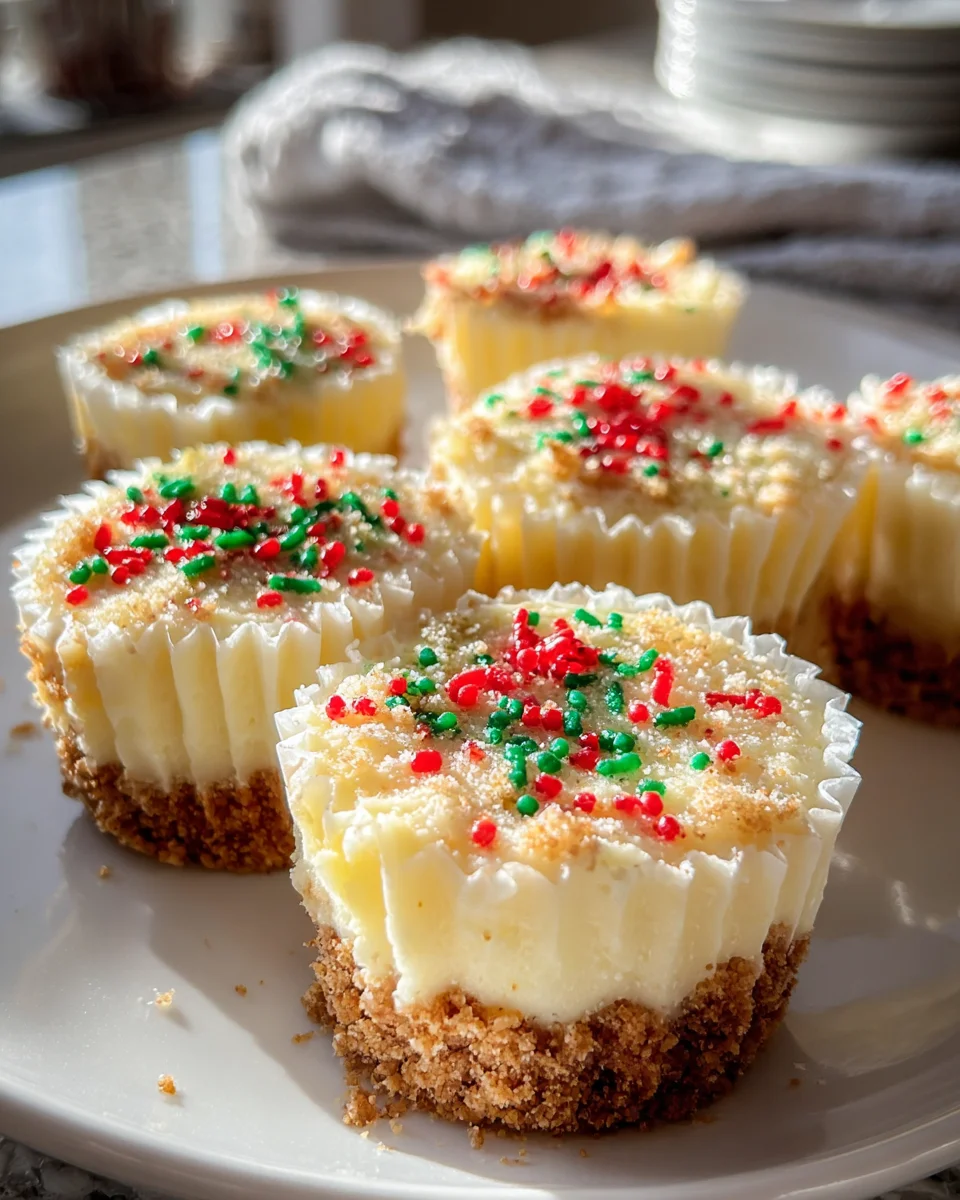
This isn’t just any dessert; it’s a miniature masterpiece designed to bring smiles and merriment to every guest. While the classic cheesecake itself boasts a history stretching back to ancient Greece, the concept of transforming this beloved treat into festive, individual portions for Christmas gatherings is a relatively modern joy, born from our desire for elegant convenience during the busiest time of the year. I find that people absolutely adore these mini cheesecakes not only for their incredibly rich and velvety texture paired with a buttery graham cracker crust but also for their sheer convenience. No need for messy slicing or serving large portions; each guest can simply pick up their own little slice of heaven. They’re visually stunning, easy to eat, and truly capture the spirit of holiday indulgence without overwhelming. Preparing this Mini Christmas Cheesecakes Recipe will undoubtedly make your holiday celebrations feel even more special and stress-free, leaving you more time to cherish moments with loved ones.
Ingredients:
For the Gingerbread Crust:
- 1 ½ cups (approximately 180g) high-quality gingerbread cookies, finely crushed – I love using crisp, traditional gingerbread men or thin snaps for the best flavor and texture. Ensure they are completely dry and not soft for optimal crumb consistency.
- ¼ cup (50g) granulated sugar – this adds a touch more sweetness to the crust and helps with the slight caramelization during pre-baking, creating a firmer base.
- ½ teaspoon ground cinnamon – enhancing that warm, familiar festive spice that pairs so wonderfully with gingerbread.
- ¼ teaspoon ground ginger – for an extra, pungent kick of gingerbread flavor that makes the crust truly stand out.
- 6 tablespoons (85g) unsalted butter, melted – this is the crucial binding agent for the crust, ensuring it holds together beautifully and creates a rich, buttery foundation.
For the Creamy Cheesecake Filling:
- 24 ounces (680g) full-fat cream cheese, softened to absolute room temperature – this is perhaps the single most critical ingredient for a smooth, lump-free filling. Please ensure it's not cold when you start; take it out of the refrigerator at least 1-2 hours in advance.
- 1 cup (200g) granulated sugar – for perfect sweetness and to contribute to the filling’s lovely, rich structure.
- 2 large eggs, also at room temperature – crucial for emulsification, helping the filling come together smoothly and preventing cracking during baking.
- 1 teaspoon pure vanilla extract – the classic warmth and aromatic depth that complements all the other flavors beautifully.
- ½ teaspoon almond extract (optional, but highly recommended for a subtle, sophisticated holiday note that pairs exceptionally well with cranberry and ginger).
- 2 tablespoons all-purpose flour – this acts as a gentle stabilizer, helping to achieve that perfect creamy, dense texture and significantly minimizing the chance of cracks forming on your cheesecakes.
- ¼ cup (60ml) heavy cream or sour cream, at room temperature – for an extra layer of luscious richness and an even creamier, melt-in-your-mouth texture. Room temperature is important here too.
- 1 teaspoon fresh lemon zest (from about ½ a lemon) – a bright, zesty counterpoint that prevents the cheesecake from being too heavy and adds a lovely hint of freshness.
- A tiny pinch of salt – just enough to enhance and balance all the sweet flavors, making them pop.
For the Festive Toppings and Garnish:
- 1 cup high-quality cranberry sauce (homemade is divine if you have the time, but a good quality store-bought variety works perfectly for convenience) – for a burst of tart, vibrant flavor and an essential festive red color.
- Fresh cranberries – these provide a beautiful pop of natural color and a pleasant textural contrast.
- Small sprigs of fresh rosemary – for an aromatic, evergreen touch that visually evokes winter forests and adds a wonderful scent.
- Confectioners' sugar – for a magical "snow-dusted" finish that makes your Mini Christmas Cheesecakes look even more enchanting.
- Melted white chocolate (optional) – for a delicate, artistic drizzle if you're feeling fancy and want to add another layer of sweetness and visual appeal.
Equipment You'll Need:
- 12-cup standard muffin tin (or two 6-cup tins if you only have one, you'll need to bake in batches)
- Paper liners or silicone baking cups (I find paper liners especially useful for easy removal and neat presentation of mini cheesecakes).
- Food processor (highly recommended for finely crushing cookies, but a sturdy bag and rolling pin work too).
- Large mixing bowl
- Electric mixer (either a stand mixer with a paddle attachment or a powerful handheld mixer).
- Rubber spatula (essential for scraping down the bowl and folding ingredients).
- Measuring cups and spoons
- Small saucepan or microwave-safe bowl (for melting butter).
- Small cookie scoop or tablespoon (for portioning crust and filling).
- Wire cooling rack
- Zester or microplane (for lemon zest).
- Small sieve (for dusting confectioners' sugar).
Preparing the Gingerbread Crust for Your Mini Christmas Cheesecakes:
- Preheat and Prepare Your Muffin Tin: First things first, let's get our oven ready. Preheat your oven to 325°F (160°C). Then, meticulously line a 12-cup standard muffin tin with paper liners. I find using paper liners for mini cheesecakes an absolute game-changer, as they make removal incredibly easy, prevent sticking, and help keep those beautiful, defined edges intact. If you're using silicone baking cups, they are generally non-stick, but paper liners still offer a good level of convenience for handling.
- Crush the Gingerbread Cookies: This step is all about creating the perfect foundation. In a food processor, pulse your gingerbread cookies until they are transformed into very fine, even crumbs. We're aiming for a sand-like consistency, not chunks. If you don't have a food processor, simply place the cookies in a sturdy Ziploc bag, seal it, and then crush them with a rolling pin or the bottom of a heavy pan until they reach that desirable fine crumb consistency. Remember, the finer the crumbs, the better and more cohesive your crust will hold together.
- Combine Dry Ingredients: Transfer these finely crushed gingerbread crumbs to a medium-sized mixing bowl. Now, add the granulated sugar, ground cinnamon, and ground ginger. Using a spoon or a whisk, stir these dry ingredients together thoroughly until they are well combined. This ensures an even distribution of those wonderful festive spices throughout your crust, guaranteeing a burst of flavor in every bite.
- Incorporate the Melted Butter: Gently pour the melted unsalted butter over the gingerbread mixture. Using a fork or a rubber spatula, stir thoroughly and patiently until all the crumbs are uniformly moistened. The mixture should resemble wet sand and hold together when pressed. It’s absolutely crucial that every single crumb is coated in butter; this is what creates a stable, sturdy crust that won't crumble or fall apart when you bite into your delightful Mini Christmas Cheesecakes.
- Form the Crusts: Now, let's form our bases. Divide the gingerbread mixture as evenly as possible among the 12 prepared muffin cups. I often find that a small cookie scoop, holding about 1.5 tablespoons, works perfectly for portioning. Once the mixture is in the cups, use the back of a spoon, your fingertips, or a small tart tamper to press the mixture firmly and evenly into the bottom of each liner. Pressing firmly is a key technique here; it creates a compact, sturdy crust that won't break apart during baking or serving.
- Pre-bake the Crusts: Carefully transfer the muffin tin to your preheated oven and bake for 6-8 minutes. Keep an eye on them; the goal is for the crusts to become wonderfully fragrant and just lightly golden around the edges. This essential pre-baking step serves two purposes: it helps to set the crust, making it less likely to crumble, and it prevents it from becoming soggy once the creamy cheesecake filling is added.
- Cool Down: Once baked, remove the muffin tin from the oven and immediately place it on a wire cooling rack. Allow these fragrant gingerbread crusts to cool completely to room temperature while you meticulously prepare the luscious cheesecake filling. This cooling step is vital to prevent the warm crust from melting the butter in the cheesecake filling, which could lead to a greasy base.
Crafting the Creamy Cheesecake Filling for Your Mini Christmas Cheesecakes:
- Prepare Cream Cheese to Perfection: In a large mixing bowl, using an electric mixer fitted with a paddle attachment (or a handheld mixer with beaters), begin by beating the softened cream cheese on medium speed for a good 2 to 3 minutes. My goal here is to achieve an incredibly smooth, airy, and utterly lump-free foundation for our cheesecake. This initial beating is paramount; if your cream cheese isn't perfectly smooth at this stage, it's very difficult to get rid of lumps later on. Make sure to frequently stop and scrape down the sides and bottom of the bowl with a rubber spatula to ensure every bit of cream cheese is being evenly mixed and aerated.
- Introduce the Sugar: Gradually add the granulated sugar to the cream cheese mixture, beating on low speed initially until just combined. Then, increase the speed to medium and continue beating for another 1-2 minutes until the mixture appears light, fluffy, and perfectly homogenous. Continue scraping down the bowl as needed to ensure no sugar crystals remain unmixed. Remember, while we want it fluffy, we're still cautious about overmixing.
- Incorporate the Eggs Gently: Add the large, room-temperature eggs one at a time. After each egg, beat on the lowest speed just until it is fully incorporated into the mixture. It’s incredibly important to avoid overmixing the eggs at this stage. Overbeating eggs can introduce too much air into the batter, which will expand rapidly during baking and then collapse, leading to unsightly cracks in your otherwise perfect cheesecakes. The goal is merely to combine them, not to whip them.
- Infuse with Flavor Boosters: Now for the magic! Stir in the pure vanilla extract, the optional but delightful almond extract, the bright fresh lemon zest, and that tiny pinch of salt. Mix on the lowest speed until these aromatic ingredients are just combined and evenly distributed throughout the filling. The lemon zest, in particular, truly brightens up the flavor profile and adds a lovely hint of freshness that beautifully cuts through the richness of the cheesecake.
- Stabilize with Flour: Gently fold in the all-purpose flour. The flour is not just a filler; it acts as a very subtle stabilizer, which is instrumental in helping to prevent those dreaded cracks and contributes to a slightly firmer, yet still incredibly creamy, texture for our Mini Christmas Cheesecakes. Mix just until no streaks of flour remain visible. As always, be careful not to overmix at this point.
- Finish with Creamy Richness: Finally, pour in the room-temperature heavy cream (or sour cream, if you chose that option). Mix on the lowest speed possible, just until it is fully combined and the entire mixture is gloriously smooth and silky. The cream adds an extra layer of luxurious richness and ensures that the final texture of your cheesecakes is wonderfully smooth and melts in your mouth.
- Final Scrape and Ready: Give the entire bowl a comprehensive, final scrape with your rubber spatula. This ensures that every ingredient is perfectly incorporated and there are no hidden pockets of unmixed ingredients lurking at the bottom or sides of the bowl. Your cheesecake filling should now be gloriously smooth, velvety, and perfectly ready to be transformed into festive treats!
Baking Your Mini Christmas Cheesecakes to Perfection:
- Fill the Cups: With your perfectly prepared filling and cooled crusts, it's time to assemble for baking. Carefully spoon or scoop the cheesecake filling evenly over the cooled gingerbread crusts in each cup of your muffin tin. I personally find a small ice cream scoop (about 1.5-2 tablespoons) works wonderfully for this, ensuring each cup is filled about ¾ full. Once filled, gently tap the muffin tin on the counter a few times. This simple action helps to release any trapped air bubbles within the filling and encourages a beautifully smooth top surface on your cheesecakes.
- Consider a Water Bath (Optional but Recommended for Cracks): For mini cheesecakes, a full water bath (where water surrounds the cheesecake pan) isn't always strictly necessary, especially if you've meticulously followed the steps of using room temperature ingredients and avoided overmixing. However, if you've experienced cracking with cheesecakes in the past, or if your oven tends to run hot or bake unevenly, a partial water bath can be a fantastic preventative measure. To do this, simply place your muffin tin inside a larger roasting pan. Then, carefully pour hot water into the roasting pan until it comes about halfway up the sides of the muffin tin. This creates a moist, gentle baking environment, which significantly reduces the risk of cracks by keeping the cheesecake moist and preventing the surface from drying out too quickly.
- The Delicate Bake Time: Carefully transfer your muffin tin (with or without the roasting pan/water bath) to the preheated oven. Bake for approximately 18-22 minutes. The key here is to watch for specific cues: the edges of the cheesecakes should appear just set, and when you gently tap the side of the muffin tin, the centers should still have a slight, delicate jiggle. The centers should look mostly set but not completely firm or solidified. They will continue to firm up beautifully as they cool. Remember, avoiding overbaking is one of the most common secrets to preventing cracks and ensuring a truly creamy texture.
- The Slow Cool-Down in the Oven: Once the baking time is complete and the cheesecakes exhibit that perfect slight jiggle, turn off the oven completely. However, resist the urge to pull them out immediately! Instead, leave the cheesecakes inside the oven with the oven door propped open slightly. I find a wooden spoon works perfectly to keep the door ajar by about an inch or two. Allow them to slowly cool in this environment for about 15-20 minutes. This gradual cooling process is absolutely crucial as it helps prevent drastic temperature changes, which are a major culprit behind cheesecake cracking.
- Final Cooling to Room Temperature: After their gentle cool-down in the oven, remove the muffin tin and transfer it to a wire cooling rack. Now, allow the Mini Christmas Cheesecakes to cool completely to room temperature. This stage can take about 1-2 hours, depending on your kitchen's temperature. Patience is truly a virtue when making cheesecakes!
Chilling for Perfection:
- The Essential Refrigeration Period: Once your mini cheesecakes have reached complete room temperature, transfer the entire muffin tin to the refrigerator. Now, comes the longest but arguably most important part of the process: chilling. Allow the cheesecakes to chill for a minimum of 4 hours, but honestly, for the absolute best results in terms of flavor, texture, and firmness, I highly recommend chilling them overnight. Chilling is a non-negotiable step for cheesecake. It allows all those wonderful flavors to meld and deepen, the texture to firm up to that classic creamy denseness, and ensures they are perfectly set and ready for their festive adornments and serving.
Assembling and Decorating Your Mini Christmas Cheesecakes:
- Unmold the Chilled Cheesecakes: Once your mini cheesecakes are thoroughly chilled and firm, it's time to gently liberate them from the muffin tin. If you used paper liners, simply peel them away carefully from the sides. If you opted for silicone cups, they should pop out with remarkable ease. Place your perfectly formed Mini Christmas Cheesecakes on a beautiful serving platter or individual dessert plates, ready for their festive transformation.
- Add the Vibrant Cranberry Topping: Now for that quintessential Christmas touch! Spoon a small dollop of your chosen cranberry sauce on top of each cheesecake. You can spread it gently and neatly to cover the top, or leave it as a charming, rustic mound – either way, the vibrant, jewel-toned red of the cranberry sauce instantly brings that undeniable festive Christmas cheer and a burst of tart flavor.
- Garnish with Fresh Elements: To truly elevate the visual appeal, carefully place a few fresh cranberries and a small, delicate sprig of fresh rosemary on top of the cranberry sauce for each cheesecake. The deep, rich red of the cranberries paired with the crisp, evergreen green of the rosemary creates an absolutely stunning visual contrast. This combination not only looks incredibly festive but also adds a lovely fresh aroma, truly making these Mini Christmas Cheesecakes sparkle and shine as holiday showstoppers.
- Optional Candied Rosemary/White Chocolate Drizzle: For an extra layer of artistry and a touch of professional flair, consider preparing candied rosemary. This involves lightly brushing small rosemary sprigs with a whisked egg white, then gently rolling them in granulated sugar, and allowing them to dry. The result is beautiful, frosted-looking branches that mimic a winter wonderland. Alternatively, a delicate drizzle of melted white chocolate across the top of each cheesecake can add another layer of elegance, sweetness, and visual interest, creating a lovely contrast with the red and green.
- Dust with Enchanting Snow: Just before you are ready to serve your masterpieces, take a small sieve and lightly dust the finished cheesecakes with a generous coating of confectioners' sugar. This final flourish adds a breathtaking "snow-kissed" effect that is absolutely perfect for the holiday season, making them look even more magical and inviting.
Tips for Success with Your Mini Christmas Cheesecakes:
- Room Temperature Ingredients are Non-Negotiable: I cannot emphasize this enough! It is the golden rule of cheesecake baking. Ensure your cream cheese and eggs are at absolute room temperature. Cold cream cheese will inevitably result in a lumpy, inconsistent batter, no matter how much you beat it. Similarly, cold eggs won't emulsify properly with the cream cheese, which can lead to a less smooth texture and an increased risk of cracks. Plan ahead and take them out of the refrigerator at least 1-2 hours before you even begin preparing your recipe.
- The Art of Not Overmixing: While you certainly want the cream cheese to be incredibly smooth and lump-free at the start, once the eggs and flour are introduced, your mixing technique becomes more delicate. Mix just until combined. Overmixing at these later stages incorporates too much air into the batter, which, while seemingly innocuous, expands rapidly during baking and then dramatically collapses as the cheesecake cools, often causing unsightly cracks in your otherwise beautiful desserts.
- Understanding the Water Bath for Mini Cheesecakes: While a full-sized cheesecake often benefits immensely from a water bath to ensure even baking and crack prevention, for these smaller Mini Christmas Cheesecakes, it’s often considered optional. Their smaller size naturally bakes more quickly and uniformly. However, if you're particularly nervous about cracks, or if you know your oven tends to bake unevenly or with dry heat, using a partial water bath (simply placing the muffin tin within a larger roasting pan containing hot water) can certainly provide that extra moist environment and peace of mind.
- Patience is a Virtue, Especially with Cooling and Chilling: Cheesecake is not a quick gratification dessert. The gradual cooling process, first in the turned-off oven and then at room temperature, followed by the extensive chilling period in the refrigerator, are absolutely vital steps that cannot be rushed. Skimping on these steps will result in a less firm, less flavorful, and most certainly a more prone-to-cracking cheesecake. Allow the cheesecake to fully set and for the flavors to meld.
- Customize Your Crust to Your Liking: While our festive gingerbread crust is wonderfully aromatic and perfect for Christmas, don't hesitate to experiment! A classic graham cracker crust, buttery shortbread cookies, or even dark chocolate wafers would all make a delicious and delightful base for these mini treats. Just remember to adjust the spices in the crust mixture to best complement your chosen cookie base.
- Get Creative with Your Toppings: Cranberry sauce is indeed perfect for a festive Christmas theme, but your creativity shouldn't stop there! Consider other delicious options such as a vibrant raspberry coulis, a rich cherry pie filling, a tangy lemon curd, a decadent chocolate ganache, or even a simple yet elegant dollop of freshly whipped cream. The possibilities are endless, allowing you to tailor these mini cheesecakes to any preference or occasion.
- Make Ahead for Stress-Free Entertaining: These Mini Christmas Cheesecakes are an absolute dream for making ahead, which is a huge bonus during the busy holiday season! You can prepare and bake them a day or even two in advance, store them undecorated in an airtight container in the fridge, and then simply add all the beautiful, fresh festive toppings right before you're ready to serve. This strategy makes holiday entertaining so much smoother and more enjoyable!
Storage Instructions for Your Mini Christmas Cheesecakes:
- Refrigeration: Any leftover Mini Christmas Cheesecakes should be meticulously stored in an airtight container. Place them in the refrigerator, where they will maintain their deliciousness and beautiful texture for up to 3-4 days. For optimal freshness and presentation, if you have extra delicate toppings like fresh cranberries or rosemary sprigs, it's often best to remove them before storing. This prevents them from wilting, drying out, or becoming soggy. You can then add fresh garnish just before serving any cherished leftovers.
- Freezing: Good news! These mini cheesecakes are perfectly freezer-friendly, making them an excellent option for long-term storage or holiday meal prep. To freeze them, ensure the cheesecakes are completely chilled and, importantly, undecorated. Arrange them on a baking sheet and place them in the freezer until they are solid (this usually takes about 2-3 hours). Once thoroughly frozen, wrap each individual cheesecake tightly in plastic wrap, then transfer these wrapped delights into a freezer-safe airtight container or a heavy-duty freezer bag. They can be stored in the freezer for up to 1 month without any compromise in quality.
- Thawing: When you're ready to enjoy your frozen cheesecakes, simply transfer them from the freezer to the refrigerator. Allow them to thaw slowly overnight, or for at least 6-8 hours, until they are completely defrosted. Once thawed, you can then add your fresh, festive toppings and serve these delightful treats as if they were freshly made! This is a fantastic option for staying ahead during the hectic holiday season.

Conclusion:
As we reach the sweet culmination of our culinary journey, I sincerely hope you’re feeling as excited as I am about the prospect of bringing this incredible recipe to life in your own kitchen. I truly believe that this isn’t just another dessert; it’s a holiday experience waiting to unfold. This particular Mini Christmas Cheesecakes Recipe stands out as an absolute must-try because it masterfully blends sophisticated flavors with an undeniable festive charm, all while remaining surprisingly simple to execute. Imagine the rich, velvety texture of perfectly baked cheesecake, infused with a subtle hint of festive spices or perhaps a bright citrusy zest, nestled atop a delightful, crumbly crust. Each miniature cheesecake is a testament to holiday joy, a bite-sized piece of magic that promises to captivate everyone fortunate enough to taste it. They are the epitome of elegance and convenience, saving you the fuss of slicing and serving a traditional large cheesecake, allowing your guests to easily grab their own individual portion of pure delight. The sheer delight these treats bring, not just in their consumption but also in their creation, makes them an indispensable addition to your holiday baking repertoire.
Beyond their intrinsic deliciousness and undeniable appeal, the versatility of these mini cheesecakes is another reason they deserve a prime spot on your festive table. When it comes to serving suggestions, the possibilities are as endless as your imagination. For a classic, elegant presentation, I love to adorn them with a simple dollop of freshly whipped cream and a few glistening fresh cranberries or raspberries, perhaps a sprig of fragrant mint for a pop of color. A dusting of powdered sugar or a light sprinkle of finely chopped pistachios can add another layer of visual and textural interest. Consider a delicate drizzle of warm salted caramel sauce or a rich dark chocolate ganache just before serving to elevate them to an even more luxurious level. If you’re feeling particularly festive, a sprinkle of crushed peppermint candy canes will not only add a wonderful crunch but also a cool, refreshing zing that screams Christmas. They pair wonderfully with a warm mug of hot cocoa, a robust cup of coffee, or even a glass of sparkling cider or mulled wine, making them perfect for any holiday gathering, from an intimate family dinner to a grand festive party.
And let’s talk about variations – this is where you can truly let your creativity shine! While the core recipe is utterly fantastic as is, feel free to experiment and make it uniquely yours. For the crust, why not try crushed gingerbread cookies for an extra spicy kick, or perhaps Oreo cookies for a chocolatey twist? You could even use shortbread or speculoos biscuits for a different texture and flavor profile. The cheesecake filling itself can be a canvas for new ideas: infuse it with a touch of almond extract for a marzipan-like essence, or grate in some orange zest for a bright, citrusy note that cuts through the richness beautifully. A swirl of cranberry sauce or cherry pie filling folded gently into the batter before baking can create stunning marbling and introduce an exciting fruity element. You could also experiment with different toppings: candied pecans, toasted coconut flakes, a homemade cranberry-orange compote, or even a decadent white chocolate ganache. These mini cheesecakes are also incredibly make-ahead friendly, meaning you can prepare them a day or two in advance and simply chill them, freeing up precious time on the busy day of your celebration. They also freeze wonderfully, allowing you to enjoy a taste of Christmas long after the holidays have passed.
So, there you have it – my heartfelt encouragement for you to dive into this delightful project. Don’t be shy; embrace the joy of baking and create something truly special this holiday season. I promise you, the smiles these little treats will bring to the faces of your loved ones will be absolutely priceless. I am genuinely excited for you to experience the magic of creating these festive delights and, more importantly, the pure satisfaction of sharing them. Please, please, please, once you’ve whipped up your own batch of these beautiful cheesecakes, share your experiences with me! I would absolutely adore seeing your creations, hearing about any unique twists you added, and learning how they were received by your friends and family. Snap some photos, tell me about your favorite serving suggestion, or recount a funny baking anecdote. Your feedback and shared moments truly inspire me, and it’s wonderful to build a community around the shared love of delicious, homemade food. Let’s make this holiday season the most delicious one yet!
Delicious Mini Christmas Cheesecakes – Perfect Holiday Treat!
Mini Christmas Cheesecakes – a miniature masterpiece designed to bring smiles and merriment to every guest. Perfect for holiday gatherings, these individual cheesecakes feature a rich, velvety texture and buttery crust, making them visually stunning and easy to eat. A festive, convenient treat for the holiday season.
Ingredients
Instructions
Important Information
Nutrition Facts (Per Serving)
It is important to consider this information as approximate and not to use it as definitive health advice.
Allergy Information
Please check ingredients for potential allergens and consult a health professional if in doubt.
Leave a Comment