
Crispy Pizza Chips are about to revolutionize your snack game, transforming what might have been yesterday’s leftover pizza into today’s most sought-after, utterly addictive treat. Imagine the savory goodness of your favorite pizza, but with an exhilarating, satisfying crunch that makes every bite a joyous experience. This ingenious culinary twist offers a fantastic solution to food waste while simultaneously introducing a phenomenal new texture to a beloved classic. Historically, pizza has evolved from humble street food to a global phenomenon, constantly adapting and inspiring new creations. These chips represent a modern, innovative step in that journey, proving that versatility is truly in pizza’s DNA and that good food always finds new forms.
Why Crispy Pizza Chips Are Universally Adored
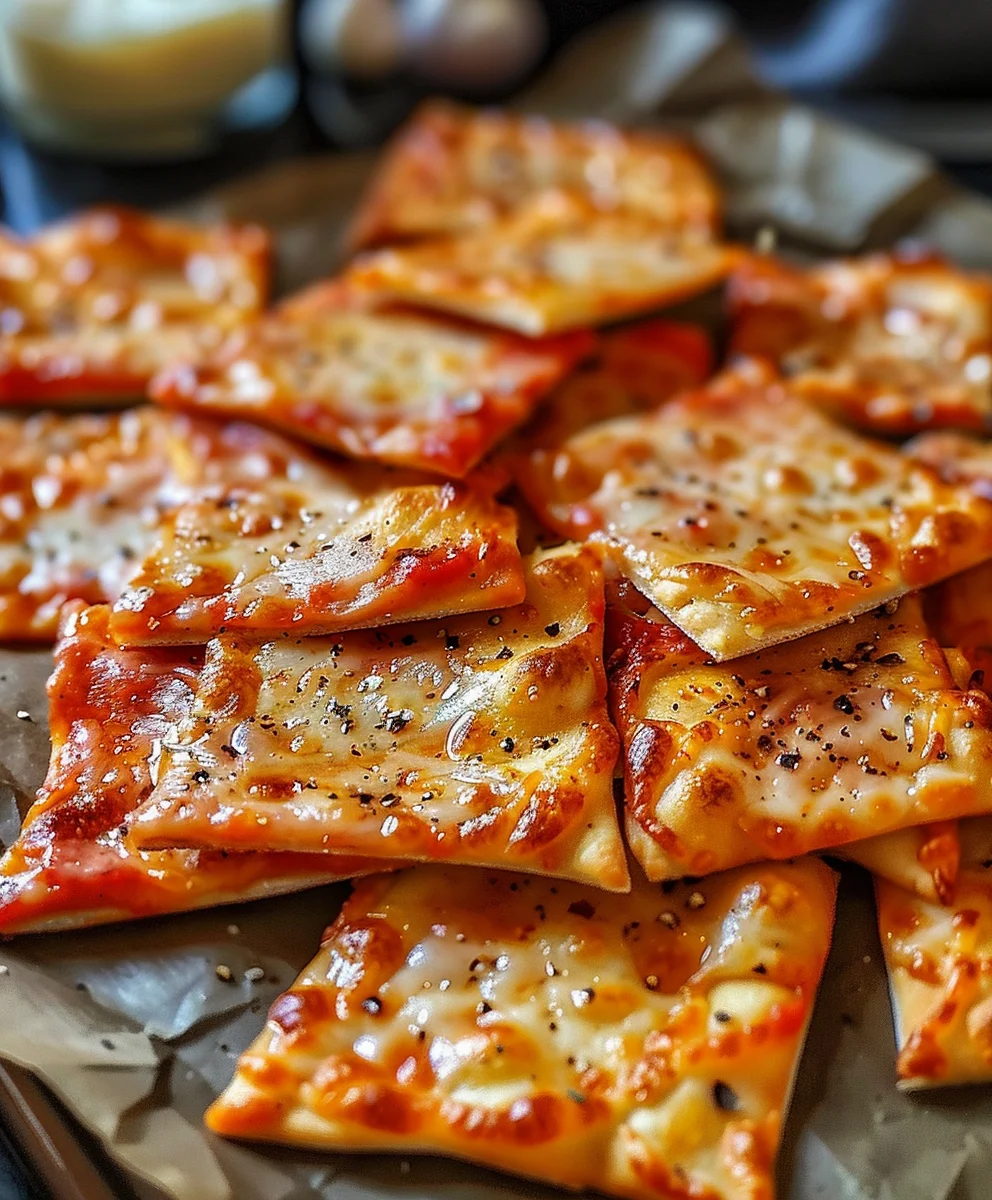
It’s simple: these chips deliver an unparalleled combination of familiar pizza flavors and an exciting, unexpected texture. Each piece is a miniature explosion of cheese, sauce, and toppings, transformed into a perfectly crisp bite that’s ideal for dipping or enjoying on its own. Beyond their incredible taste, they’re incredibly quick and easy to prepare, making them perfect for impromptu gatherings, a fun movie night snack, or just a clever way to elevate your everyday lunch. Once you try these, I assure you, you’ll quickly understand why these Crispy Pizza Chips are generating so much buzz among food enthusiasts and casual snackers alike. Get ready to discover your new go-to snack that truly redefines crispy!
Ingredients:
- For the Dough Base:
- 1 pound (approx. 450g) store-bought pizza dough, or your favorite homemade recipe (I find good quality store-bought dough makes this so much quicker!)
- 2 tablespoons olive oil, plus extra for brushing
- 2 tablespoons all-purpose flour or semolina, for dusting
- For the Sauce & Cheese:
- ½ cup good quality pizza sauce or marinara sauce (I love a rich, slightly sweet sauce for these Crispy Pizza Chips)
- 1 ½ cups shredded mozzarella cheese, low-moisture, part-skim (this melts beautifully without making them soggy)
- ¼ cup grated Parmesan cheese, for extra flavor and crispiness
- For the Toppings (choose your favorites!):
- 2 tablespoons mini pepperoni (or regular pepperoni, finely diced)
- 2 tablespoons finely diced bell peppers (any color works, I love red for sweetness)
- 1 tablespoon finely chopped red onion
- 1 tablespoon sliced black olives, finely diced
- 1 teaspoon dried oregano or Italian seasoning blend
- ½ teaspoon red pepper flakes (optional, for a little kick)
- Fresh basil leaves, for garnish (optional)
- Optional Dipping Sauce:
- Extra pizza sauce or warm marinara
- Ranch dressing
- Garlic aioli
Preparation of the Pizza Dough Base
- Bring Dough to Room Temperature: If you’re using store-bought pizza dough from the refrigerator, I highly recommend taking it out about 30-60 minutes before you plan to start working with it. This allows the gluten to relax, making the dough much easier to roll out evenly. Trust me, trying to roll cold dough is a battle you don’t want to fight when aiming for perfectly thin Crispy Pizza Chips. You want it pliable and soft.
- Preheat Your Oven and Prepare Baking Sheets: This step is crucial for achieving that ultimate crispness. Preheat your oven to a blazing 425°F (220°C). While it’s heating up, prepare two large baking sheets. I like to line them with parchment paper for easy cleanup and to prevent sticking. If you don’t have parchment, a light coating of olive oil on the baking sheet will work, but parchment is my go-to for ensuring these chips slide right off.
- Prepare Your Work Surface: Lightly dust a clean, dry work surface with about 1 tablespoon of all-purpose flour or semolina. Semolina is fantastic here because its coarser texture helps prevent sticking and can even add a little extra crispiness to the bottom of your chips, which is exactly what we want for Crispy Pizza Chips. Place your room-temperature pizza dough ball onto the floured surface.
- Roll Out the Dough: Using a rolling pin, begin to roll out the pizza dough. You’re aiming for a very thin, even layer, approximately 1/16 to 1/8 inch thick. Think cracker thin, not regular pizza crust thickness. This is perhaps the most important step for getting truly crispy results. If the dough starts to spring back, cover it with a clean kitchen towel and let it rest for 5-10 minutes, then continue rolling. This resting period allows the gluten to relax again. Try to roll it into a large rectangle or circle that will give you the most yield.
- Brush with Olive Oil: Once your dough is rolled out to your desired thinness, lightly brush the entire surface with about 1 tablespoon of olive oil. This not only adds flavor but also helps in the crisping process and acts as a barrier to prevent the sauce from making the dough soggy, ensuring your Crispy Pizza Chips stay wonderfully crunchy.
Crafting the Crispy Pizza Chips
- Apply the Sauce: Spoon your pizza sauce onto the oiled dough. Using the back of the spoon or an offset spatula, spread the sauce in a very thin, even layer across the entire surface, leaving about a ½-inch border around the edges. Less is more here! Too much sauce will lead to a soggy chip, and we are absolutely aiming for max crispness. You really just want a hint of flavor.
- Sprinkle with Cheese: Evenly sprinkle the shredded mozzarella cheese over the sauced dough, followed by the grated Parmesan cheese. The Parmesan adds a delightful salty, umami kick and contributes to a beautiful golden-brown crispness as it bakes. Make sure the cheese covers most of the surface without being too thick in any one area.
-
Add Your Toppings: Now for the fun part – toppings! Carefully and evenly scatter your chosen toppings over the cheese. Remember, we’re making chips, so think small and thin.
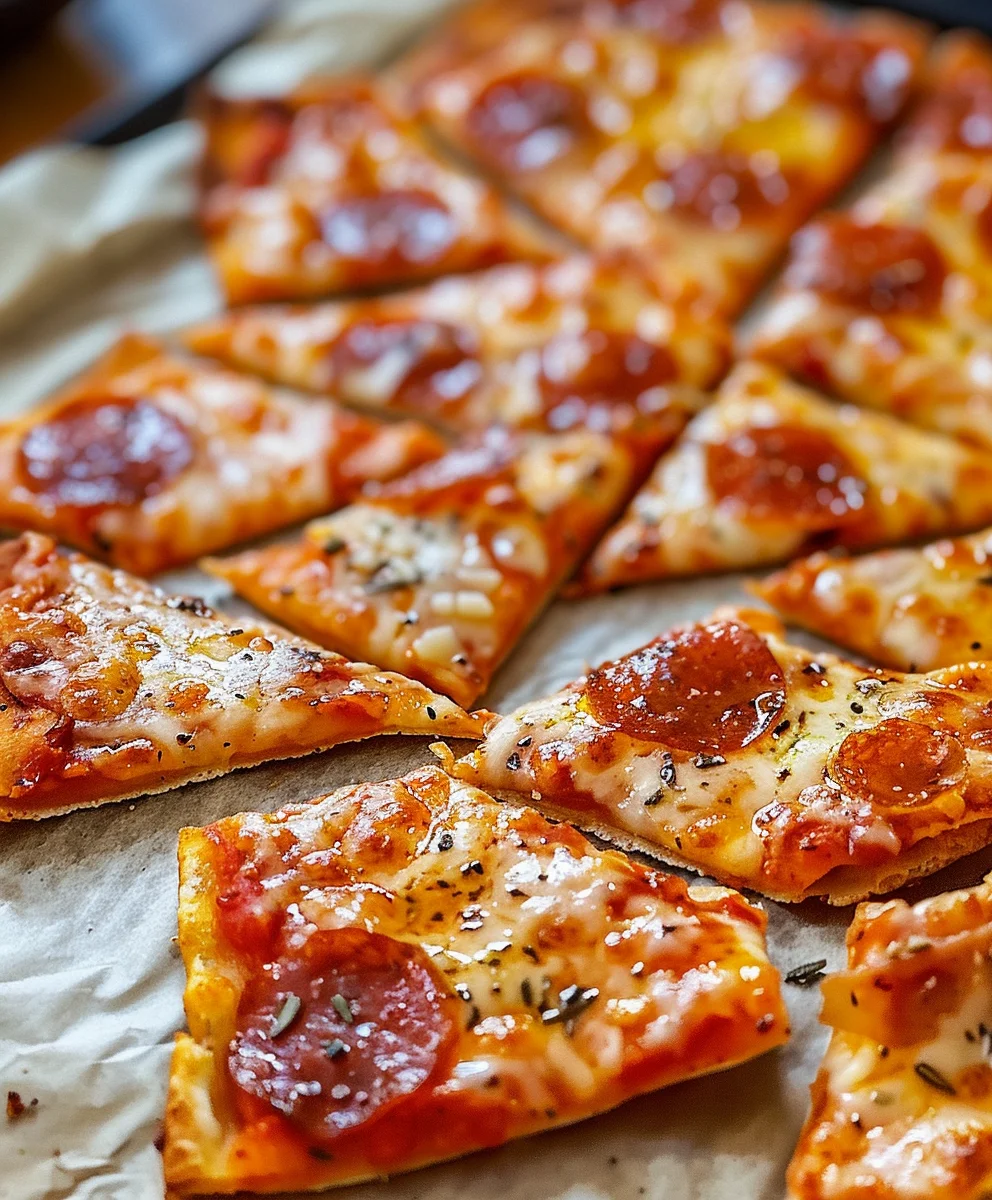
- For pepperoni, I love using mini pepperoni or finely dicing regular slices.
- Bell peppers and red onions should be diced very, very small – almost minced.
- Black olives also work best when finely chopped.
The key is to ensure the toppings are distributed thinly and don’t clump together. This allows for even baking and crisping. Finish with a sprinkle of dried oregano or Italian seasoning and red pepper flakes if you’re feeling a little spicy.
- Cut into Chip Shapes: Using a pizza cutter or a sharp knife, cut the dough into chip-sized pieces. You can go for traditional triangles, squares, or even irregular shards – whatever inspires you! I personally love irregular triangles because they look so rustic and inviting. Aim for pieces roughly 1.5 to 2 inches in size. Don’t worry if they’re not all perfect; the charm of homemade Crispy Pizza Chips is their unique character.
- Arrange on Baking Sheets: Carefully transfer the cut pizza chips to your prepared baking sheets. Arrange them in a single layer, making sure there’s a little space between each piece. Overcrowding the baking sheet will lead to steaming instead of baking, and that’s the enemy of crispiness. If you have a lot of chips, it’s better to bake them in batches to ensure optimal crunch.
Baking for Ultimate Crispiness
- Bake in Batches: Place one baking sheet into your preheated 425°F (220°C) oven. If your oven has a convection setting, now is a great time to use it, as it promotes even browning and incredible crispness. Bake for 8-12 minutes.
- Monitor for Doneness: Keep a close eye on your Crispy Pizza Chips during baking. Oven temperatures can vary, and thin dough cooks quickly! You’re looking for the edges to be deeply golden brown and the cheese to be bubbly and slightly caramelized. The chips should look dry and feel firm when gently nudged with a spatula. If you notice some chips browning faster than others, you can carefully remove them and let the remaining ones bake a bit longer. I often find myself rotating the baking sheet halfway through to ensure even baking.
- Achieving Peak Crispness: If, after 10-12 minutes, your chips aren’t as crispy as you’d like (perhaps the toppings added a bit too much moisture), you have a couple of options. You can reduce the oven temperature slightly to 375°F (190°C) and bake for an additional 2-4 minutes, watching them like a hawk. Alternatively, if your chips are already golden but just need that extra snap, you can turn off the oven and leave them in there for another 5 minutes with the door slightly ajar. The residual heat will continue to dry them out without over-browning.
- Cooling Down: Once baked to golden, crispy perfection, carefully remove the baking sheets from the oven. Transfer the hot Crispy Pizza Chips to a wire cooling rack immediately. This is another crucial step! Cooling on a wire rack allows air to circulate around all sides of the chips, preventing condensation from forming underneath and making them soggy. Trust me, you’ve worked too hard for crispness to lose it now! Let them cool for at least 5-10 minutes. As they cool, they will become even crispier.
Finishing Touches and Serving Your Crispy Pizza Chips
- Garnish (Optional but Recommended): Once the chips have cooled slightly, if you like, you can sprinkle them with a little fresh chopped basil. The vibrant green and fresh aroma of basil really elevate the pizza experience, even in chip form. A final dusting of Parmesan is never a bad idea either!
- Serve Immediately: These Crispy Pizza Chips are best enjoyed warm, shortly after they’ve cooled enough to handle. Arrange them on a platter or in a large bowl. They make an incredible appetizer for parties, a fun snack for movie night, or even a light lunch.
- Dipping Sensations: While absolutely delicious on their own, these chips are also fantastic with a side of your favorite dipping sauce. A warm marinara or extra pizza sauce provides that classic pizza parlor feel. I also love them with a creamy ranch dressing or a homemade garlic aioli for an extra layer of flavor. Don’t be shy to experiment with your favorites!
Pro Tips for the Best Crispy Pizza Chips
- Don’t Skimp on Thinness: I cannot emphasize enough how important it is to roll your dough as thin as possible. If it’s too thick, you’ll end up with chewy pizza crackers, not the delightful snap of true Crispy Pizza Chips. Aim for the thickness of a thick sheet of paper or a very thin cracker.
- Experiment with Toppings: While I’ve given you a classic combination, feel free to get creative! Just remember the golden rule: everything needs to be finely diced and applied sparingly to prevent moisture and ensure even cooking. Think about different cheese blends, a sprinkle of everything bagel seasoning, or even a touch of pesto instead of red sauce (but still very, very thin!). Imagine a spinach and feta version, or a chicken BBQ flavor – the possibilities are endless for your Crispy Pizza Chips.
- Optimal Storage: If by some miracle you have leftovers, store your Crispy Pizza Chips in an airtight container at room temperature. They will retain their crispness for a day or two. After that, they might start to soften a bit.
- Reheating for Fresh Crispness: To revive any slightly softened chips, simply spread them on a baking sheet and pop them back into a preheated oven at 350°F (175°C) for 3-5 minutes, or until they are hot and crispy again. You can also use a toaster oven for smaller batches. This trick ensures you always get to enjoy that satisfying crunch.
- The Right Baking Sheet Matters: Darker baking sheets tend to conduct heat more efficiently and can lead to faster browning. If you’re using darker sheets, you might need to reduce your baking time slightly. Lighter, reflective sheets might require a minute or two longer. Knowing your oven and your equipment will help you achieve the perfect Crispy Pizza Chips every time.
- No Time for Dough? Use Tortillas! If you’re really in a rush and want an even quicker version, you can adapt this recipe using large flour tortillas. Simply follow the topping and baking instructions, but reduce the baking time significantly (usually 5-8 minutes). While they won’t have the same chewy base texture as pizza dough, they still make fantastic, ultra-fast Crispy Pizza Chips.
- Flavor Boost with Garlic Oil: Instead of plain olive oil for brushing the dough, infuse it with garlic! Gently warm about 2 tablespoons of olive oil with 1-2 minced garlic cloves for a few minutes, then strain out the garlic (or leave it in if you love a strong garlic flavor). Brush this aromatic oil over your rolled-out dough before adding sauce for an extra layer of deliciousness in your Crispy Pizza Chips.
- Avoid Over-Topping: This is a common pitfall. The more toppings you add, especially those with high moisture content (like fresh tomatoes or mushrooms), the harder it will be to achieve a truly crispy chip. When in doubt, err on the side of fewer, smaller toppings for the best Crispy Pizza Chips. If you love a lot of veggies, consider sautéing them lightly beforehand to remove excess moisture.
Conclusion:
And there you have it, my friends! We’ve journeyed through the simple yet utterly brilliant process of transforming humble ingredients into something truly extraordinary. I genuinely believe this recipe for our star creation is an absolute game-changer in your snack repertoire, and honestly, a revelation for anyone looking to add a little flair to their culinary adventures without breaking a sweat. It’s not just a snack; it’s an experience, a delightful crunch that brings pure joy with every bite. I’ve made these countless times for family gatherings, impromptu movie nights, and even just for myself when a serious craving for something savory hits, and they never, ever disappoint. The sheer simplicity combined with the spectacular outcome is what makes this recipe a must-try. You’re not just making a snack; you’re crafting moments of deliciousness, effortlessly.
Why these are an undeniable must-try: First and foremost, the texture is out of this world. We’re talking about that perfect, irresistible snap that makes your taste buds sing. It’s that satisfying crunch that you just don’t get with traditional pizza, offering an entirely new dimension to the beloved classic. Then there’s the flavor – all the glorious, familiar taste of your favorite pizza, concentrated into a convenient, dippable, incredibly addictive form. They are remarkably versatile, serving as the perfect canvas for whatever seasonings and dips your heart desires. Forget soggy crusts or awkward slices; these are pure, unadulterated flavor and texture perfection, designed for optimal snacking pleasure. Plus, the ease of preparation means you can whip up a batch in no time, making them ideal for last-minute guests or when hunger strikes unexpectedly. I promise you, once you try these, there’s no going back to plain old crackers or chips.
Serving Suggestions to Elevate Your Crispy Pizza Chips Experience:
Now that you’ve mastered the art of making these delightful bites, let’s talk about how to present them to truly shine. While they are absolutely phenomenal on their own – trust me, I’ve devoured entire batches solo – they truly come alive with the right accompaniments. My go-to serving suggestion is always a warm bowl of rich marinara sauce. The classic combination of tomato and basil notes complements the cheesy, herby chips perfectly, creating a nostalgic dip that’s simply heavenly. But don’t stop there! Consider a creamy ranch dip for a cool, tangy contrast, or a spicy garlic aioli if you’re looking to add a little kick. For something a bit more sophisticated, a homemade pesto or even a luxurious truffle dip can elevate your snacking game to an entirely new level. Think outside the dip bowl too! These Crispy Pizza Chips make fantastic croutons for a fresh Caesar salad, adding an incredible textural dimension and burst of Italian flavor. They’re also surprisingly good crumbled over a creamy tomato soup, providing that much-needed crunch and a familiar, comforting taste. Imagine them arranged artfully on a charcuterie board alongside olives, cured meats, and cheeses – a delightful surprise amidst the usual crackers.
Unleash Your Creativity: Exciting Variations!
One of the things I adore most about this recipe is its incredible adaptability. Once you have the basic technique down, the possibilities for customization are endless. Don’t hesitate to experiment with different cheese blends; a mix of mozzarella, provolone, and a touch of smoked gouda can introduce a wonderful depth of flavor. If you’re a fan of heat, a generous sprinkle of red pepper flakes before baking will give them a fiery kick. For herb lovers, fresh oregano or finely chopped basil added to the cheese mixture before baking will infuse them with an even more vibrant aroma and taste. Want to make them ‘mini pepperoni pizza chips’? Simply place tiny pepperoni circles on top of the cheese before baking for an authentic pizzeria twist. You could even explore a ‘white pizza chip’ variation by skipping the tomato sauce base and using a garlic-infused olive oil, a blend of ricotta and mozzarella, and a sprinkle of fresh parsley. For a gourmet touch, consider adding a whisper of balsamic glaze drizzle after they’ve cooled. The beauty is that you are the chef, and this recipe is merely a starting point for your culinary imagination. Don’t be afraid to make them your own!
So, my fellow food enthusiasts, I implore you: clear your kitchen counter, gather your ingredients, and set aside some time this week to give these a try. I promise you won’t regret it. The satisfaction of pulling a tray of perfectly golden, irresistibly crunchy chips from your oven is truly unparalleled. And when you do, please, please share your creations with me! I absolutely adore seeing your culinary triumphs. Tag me on social media, leave a comment below with your favorite serving suggestion or a brilliant variation you came up with, or simply tell me how much you and your loved ones enjoyed them. Your feedback and experiences mean the world to me and help foster a wonderful community of home cooks. So go forth, bake these sensational Crispy Pizza Chips, and let the deliciousness commence!
Crispy Pizza Chips
Revolutionize your snack game with these Crispy Pizza Chips, transforming plain tortillas into an utterly addictive, crunchy treat. A perfect blend of familiar pizza flavors and an exciting, satisfying crunch, ideal for dipping or enjoying on its own.
Ingredients
-
4 large corn or flour tortillas
-
1 cup pizza sauce or marinara sauce
-
1 cup shredded mozzarella cheese (or a mix with cheddar, provolone, Parmesan)
-
1 cup chopped toppings (e.g., mini beef pepperoni, diced bell peppers, olives)
-
1 tsp Italian herbs
-
1 tsp garlic powder
-
1/2 tsp crushed red pepper flakes (optional)
Instructions
-
Step 1
Preheat oven to 425°F (220°C). Line a large baking sheet with parchment paper. Lay tortillas flat on the prepared sheet. -
Step 2
Spread a thin layer of pizza sauce over each tortilla, leaving a small border. Evenly sprinkle shredded mozzarella and other cheeses, then your finely chopped toppings (e.g., mini beef pepperoni, diced bell peppers, olives), Italian herbs, garlic powder, and red pepper flakes (if using). -
Step 3
Using a pizza cutter or sharp knife, cut each tortilla into 8-12 chip-sized triangles or squares. Arrange the cut chips in a single layer on the baking sheet, ensuring slight spacing to prevent steaming. -
Step 4
Bake for 5-8 minutes, or until edges are deeply golden brown, and cheese is bubbly and crispy. Monitor closely as thin tortillas cook quickly. -
Step 5
Immediately transfer chips to a wire rack to cool completely. This crucial step allows air circulation for maximum crispness. Serve warm with dipping sauces like marinara or ranch, if desired.
Important Information
Nutrition Facts (Per Serving)
It is important to consider this information as approximate and not to use it as definitive health advice.
Allergy Information
Please check ingredients for potential allergens and consult a health professional if in doubt.
Leave a Comment