
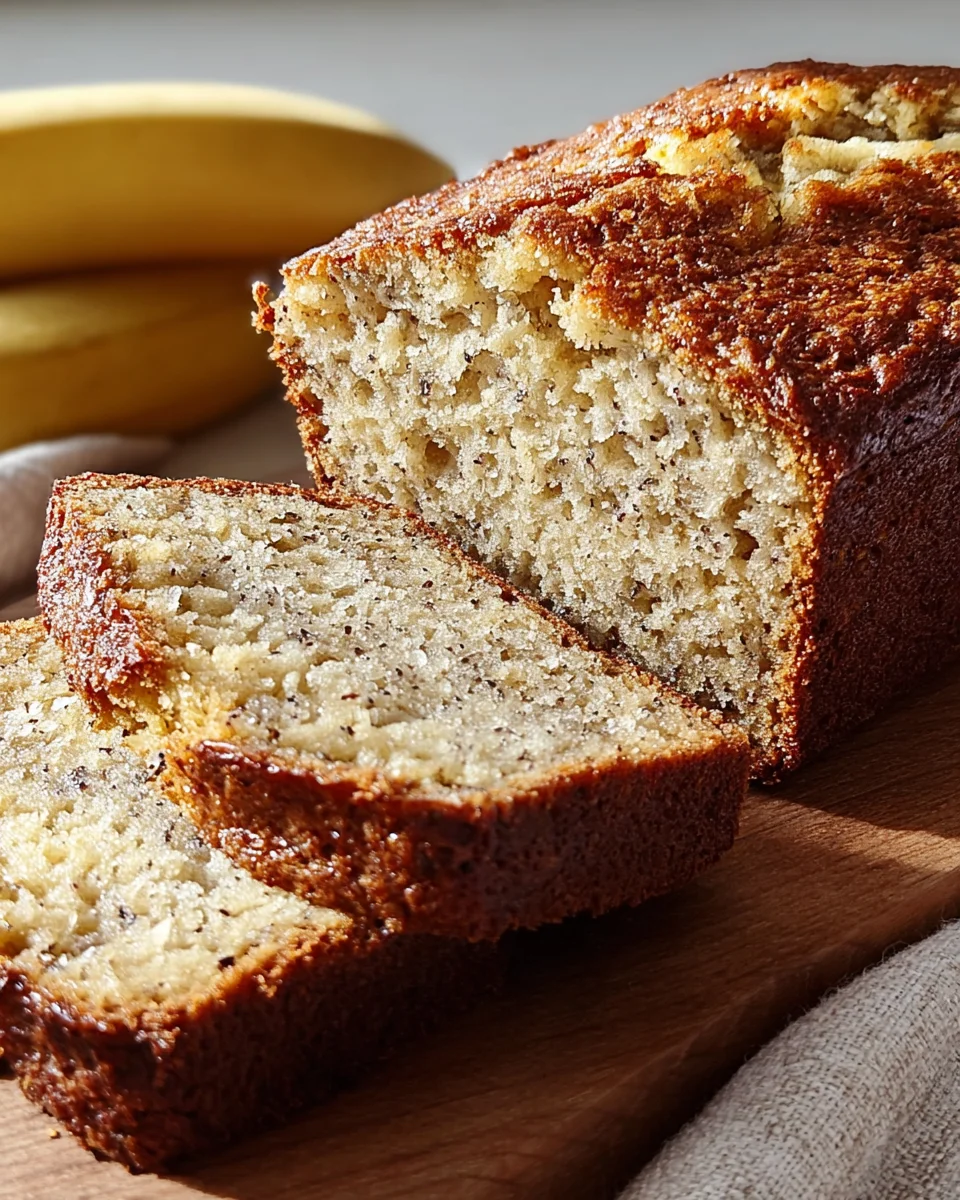
Banana Bread Recipe – just hearing those three words conjures up images of warmth, comfort, and that unmistakable sweet aroma wafting through the kitchen. Have you ever looked at a bunch of overly ripe bananas on your counter, their skins speckled with brown, and wondered what magic they could create? Well, prepare to turn those humble fruits into a golden loaf of pure delight!
This beloved quick bread has a fascinating story, gaining significant popularity during the Great Depression in America as a resourceful way to utilize overripe bananas, which were becoming more accessible thanks to baking soda and powder’s widespread availability. It truly embodies the spirit of turning something seemingly past its prime into a culinary masterpiece, a testament to resourcefulness that endures to this day.
People absolutely adore this dish for so many reasons. Its incredibly moist crumb, the perfect balance of sweetness, and its tender texture make every bite a comforting experience. Whether slathered with butter for breakfast, enjoyed with a cup of coffee as an afternoon treat, or simply savored plain, it’s a versatile crowd-pleaser. Beyond its delightful taste, the simplicity of a good Banana Bread Recipe makes it a favorite for home bakers of all skill levels. It’s an accessible project that yields impressive results every single time. I invite you to discover the joy of baking this classic and bring that delightful aroma into your own home.
Ingredients:
- 3-4 medium very ripe bananas: My absolute top tip for the best banana bread is to use bananas that are not just ripe, but super ripe. I’m talking about bananas with lots of brown spots, or even almost entirely black peels. These overripe beauties are incredibly soft, easy to mash, and packed with natural sugars and intense banana flavor. They provide the sweetness and moisture that makes this bread so incredibly delicious and tender. If your bananas aren’t quite there yet, you can speed up the process by baking them in their skins on a baking sheet at 300°F (150°C) for 15-30 minutes until they turn black and soft. Just be careful, they’ll be hot!
- 1/2 cup (113g) unsalted butter: This should be softened to room temperature. This is a crucial detail! Room temperature butter creams beautifully with the sugar, incorporating air and contributing to a light, tender crumb in your finished banana bread. If your butter is too cold, it won’t mix properly; if it’s melted, your bread can become dense. Take it out of the fridge at least an hour before you plan to bake.
- 3/4 cup (150g) granulated sugar: While the bananas add natural sweetness, this amount of granulated sugar ensures a perfectly balanced, sweet flavor that’s not overwhelming. It also helps with the browning of the crust, giving it that lovely golden hue.
- 1 large egg: Again, room temperature is best here. A room temperature egg emulsifies better with the butter and sugar mixture, leading to a smoother, more uniform batter and a finer texture in your baked bread. You can quickly bring an egg to room temperature by placing it in a bowl of warm water for 5-10 minutes.
- 1 teaspoon vanilla extract: I always use pure vanilla extract for its rich, warm, and aromatic depth. It enhances the banana flavor and adds a beautiful complexity that makes homemade banana bread truly irresistible. Don’t skimp on the quality here if you can help it!
- 1 1/2 cups (180g) all-purpose flour: Standard all-purpose flour works wonderfully. While some recipes call for sifting, I often don’t bother if I’m careful with my mixing. However, sifting certainly helps ensure there are no lumps and contributes to a slightly lighter texture. If you decide to sift, do it before measuring.
- 1 teaspoon baking soda: This is our primary leavening agent. Baking soda reacts with the acids in the ripe bananas and other ingredients to produce carbon dioxide gas, which creates bubbles and makes the bread rise beautifully. Ensure your baking soda is fresh for the best results – you can test it by adding a little to vinegar; if it fizzes vigorously, it’s good to go!
- 1/2 teaspoon salt: A small but mighty ingredient! Salt is essential for balancing the sweetness and enhancing all the other flavors in the banana bread. It prevents the bread from tasting flat and brings out the natural deliciousness of the bananas.
- Optional additions: 1/2 cup chopped walnuts or pecans, 1/2 cup chocolate chips (dark or semi-sweet work wonderfully), or a sprinkle of cinnamon or nutmeg for extra spice. These add-ins can elevate your banana bread to another level, adding texture and extra bursts of flavor.
Prepping Your Bananas and Wet Ingredients
-
Preheat Oven and Prep Bananas:
First things first, let’s get that oven ready! Preheat your oven to 350°F (175°C). While it’s heating up, prepare your loaf pan. I always use a standard 9×5-inch loaf pan. You’ll want to grease and flour it generously, or for an even easier cleanup and guaranteed non-stick release, line it with parchment paper, leaving an overhang on the long sides to use as “handles” later. This little trick makes lifting the bread out of the pan a breeze.
Now, let’s get those lovely ripe bananas ready. Peel your three to four very ripe bananas. Place them in a medium bowl and, using a fork or a potato masher, mash them thoroughly. You’re looking for a consistency that’s mostly smooth but still has a few small lumps – those little pieces of banana add wonderful texture and bursts of flavor in the finished bread. Avoid making it a completely smooth puree; a little chunkiness is good! Set the mashed bananas aside for a moment. You should have approximately 1 to 1 ½ cups of mashed banana.
-
Cream the Butter and Sugar:
In a large mixing bowl, combine your softened room temperature butter and the granulated sugar. Using an electric mixer (either a stand mixer with the paddle attachment or a hand mixer), beat them together on medium speed. This step is crucial for the texture of your banana bread. You want to beat them until the mixture is light, fluffy, and pale yellow. This usually takes about 2 to 3 minutes, sometimes a little longer depending on your mixer. What you’re doing here is incorporating air into the butter, which creates pockets that will expand during baking, resulting in a lighter, more tender crumb. Make sure to scrape down the sides of the bowl with a rubber spatula occasionally to ensure everything is evenly combined.
-
Add the Egg and Vanilla:
Once your butter and sugar are beautifully creamed, crack in the large, room temperature egg. Continue beating on medium speed until the egg is fully incorporated into the mixture. It should look smooth and uniform. Then, pour in the pure vanilla extract. Beat for another 30 seconds or so, just until the vanilla is well distributed. Again, give the bowl a good scrape-down to ensure all the ingredients are fully mixed and no streaks of butter or egg remain uncombined at the bottom or sides of the bowl. This ensures a consistent batter.
-
Stir in the Mashed Bananas:
Finally, add your mashed bananas to the wet ingredient mixture. Fold them in gently with your rubber spatula until they are just combined. You don’t need to beat them vigorously here; just ensure they are evenly distributed throughout the butter and sugar mixture. At this point, your kitchen should already be starting to smell wonderfully of bananas and butter – a true sign of good things to come!
Combining Dry and Wet Ingredients
-
Combine Dry Ingredients:
In a separate medium bowl, whisk together your all-purpose flour, baking soda, and salt. Whisking them thoroughly ensures that the leavening agent and salt are evenly distributed throughout the flour. This means your banana bread will rise uniformly and have consistent flavor throughout. If you’re opting to sift your flour, now is the time to do it, then whisk in the baking soda and salt.
-
Gently Combine Dry and Wet Mixtures:
Now comes a critical step to ensure a tender banana bread and avoid a tough, dense one. Add the dry ingredient mixture to the wet ingredient mixture in two or three additions. After each addition, use your rubber spatula or a wooden spoon (not the electric mixer at this stage!) to gently fold the dry ingredients into the wet ones. Mix just until the flour streaks disappear.
It’s incredibly important not to overmix the batter at this stage. Overmixing develops the gluten in the flour too much, which can lead to a tough, rubbery banana bread. A few small lumps of flour are perfectly fine and will disappear during baking. The goal is just to bring everything together until barely combined.
-
Fold in Optional Additions:
If you’re adding walnuts, pecans, chocolate chips, or any other mix-ins, gently fold them into the batter now. Again, do this with a spatula and fold just until they are evenly distributed. Overmixing here can also contribute to toughness, and it can cause your add-ins to sink to the bottom of the loaf during baking. A trick I sometimes use to prevent sinking is to toss the add-ins with about a tablespoon of the flour from the dry mix before adding them to the batter; this light coating helps them stay suspended.
A little extra tip for flavor: If you love a hint of spice, now is a great time to fold in a ½ teaspoon of ground cinnamon or a ¼ teaspoon of ground nutmeg with your optional additions. It complements the banana flavor beautifully.
Baking the Banana Bread
-
Pour Batter into Loaf Pan:
Carefully spoon or pour the prepared banana bread batter into your greased and floured, or parchment-lined, 9×5-inch loaf pan. Use your spatula to gently spread the batter evenly in the pan. You can also gently tap the pan on the counter a couple of times to release any large air bubbles, which can help ensure a more uniform crumb. For an even more professional look, you can create a slight ridge down the center of the batter with your spatula. This helps the bread to rise beautifully and crack nicely down the middle during baking.
-
Bake Until Golden Brown and Cooked Through:
Place the loaf pan in your preheated 350°F (175°C) oven. The baking time for banana bread can vary slightly depending on your oven and the exact moisture content of your bananas, but it typically takes between 50 to 70 minutes.
Here’s how to tell if it’s done: The top should be a beautiful golden brown color. To test for doneness, insert a wooden skewer, toothpick, or thin knife into the very center of the loaf. When it comes out clean, with no wet batter clinging to it, your banana bread is perfectly baked. If it comes out with wet batter, return it to the oven for another 5-10 minutes and test again.
What if the top browns too quickly? Sometimes, the top of the banana bread can get very dark before the inside is fully cooked. If you notice this happening, loosely tent the loaf pan with aluminum foil for the remaining baking time. This will prevent further browning of the top while allowing the inside to finish cooking thoroughly.
Trust your nose too! Your kitchen will be filled with the most incredible aroma of sweet, baked bananas and warm spices when it’s nearing completion – another good sign it’s almost ready to come out of the oven. Avoid opening the oven door too frequently during the first 30-40 minutes of baking, as sudden temperature drops can cause the bread to sink.
Cooling and Serving
-
Cool in the Pan, Then on a Wire Rack:
Once your banana bread is baked to perfection and passes the toothpick test, carefully remove the loaf pan from the oven. Let the banana bread cool in the pan on a wire rack for at least 10 to 15 minutes. This initial cooling period in the pan is important because it allows the bread to set and firm up a bit, making it less likely to break or crumble when you remove it. It also allows any residual heat to continue to cook the very center, if needed, and distribute moisture evenly.
After the initial cooling time, use those parchment paper “handles” if you used them, or carefully invert the pan onto the wire rack to remove the bread. If you didn’t use parchment, you might need to run a thin knife around the edges first to loosen it. Invert it again so the bread is right-side up on the wire rack.
-
Cool Completely Before Slicing:
Now for the hardest part: letting it cool completely on the wire rack before slicing! I know, the smell is intoxicating, and you’ll want to dig in immediately, but truly, for the best texture and to prevent a gummy slice, patience is key. Cooling completely allows the internal structure of the bread to fully set and ensures a clean, beautiful slice. It also allows the flavors to meld and deepen even further. This can take anywhere from 1 to 2 hours.
Why is cooling important? When bread is hot, the starches are still gelatinized and soft. Slicing too early can crush the crumb and make it appear dense or wet. As it cools, the starches recrystallize, giving the bread its final, desired texture.
-
Slice and Enjoy:
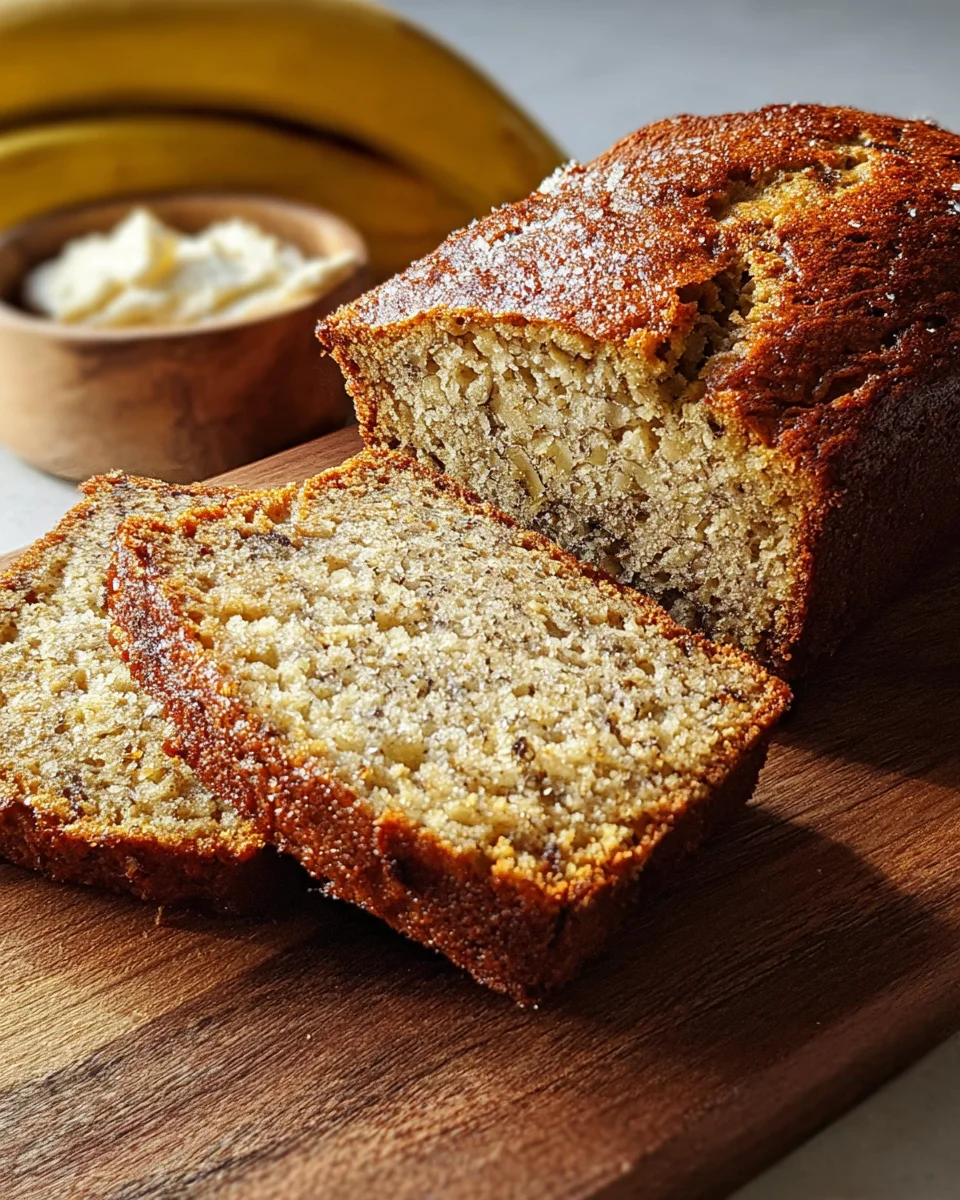
Once fully cooled, grab a serrated knife for the cleanest slices. Slice your homemade banana bread into thick, satisfying pieces. This banana bread is absolutely delicious on its own, with its moist crumb and rich banana flavor. However, it’s also wonderful with a smear of butter, cream cheese, or a drizzle of honey. It pairs perfectly with a cup of coffee or tea for breakfast, a delightful afternoon snack, or a comforting dessert.
Storage: Store any leftover banana bread in an airtight container at room temperature for up to 3-4 days, or in the refrigerator for up to a week. For longer storage, slices or the whole loaf can be wrapped tightly in plastic wrap and then aluminum foil and frozen for up to 3 months. Thaw at room temperature when you’re ready to enjoy another slice of pure comfort!
This classic “Banana Bread Recipe” is more than just a simple bake; it’s a hug in food form. Enjoy every single bite!
Conclusion:
Well, there you have it! We’ve journeyed through the simple steps to create something truly magical in your own kitchen. I genuinely believe this isn’t just another baking project; it’s an experience that delivers pure comfort and joy with every slice. What makes this particular Banana Bread Recipe a non-negotiable addition to your baking repertoire is its unparalleled combination of ease, incredible flavor, and that wonderfully moist texture we all crave. It’s perfect for those overripe bananas sitting on your counter, transforming them from forgotten fruit into a golden-brown masterpiece. Seriously, the aroma alone as it bakes is enough to brighten any day, filling your home with a warmth that store-bought versions simply cannot replicate. It’s a testament to the fact that sometimes, the most humble ingredients yield the most extraordinary results. This recipe is designed to be foolproof, ensuring even novice bakers can achieve a perfect loaf, while seasoned pros will appreciate its classic appeal and the opportunity to add their own personal touch. It’s a versatile star, ready to shine at breakfast, as an afternoon snack, or even a comforting dessert. The beauty of this recipe lies in its ability to bring smiles and satisfy cravings, making it a truly invaluable skill to master.
Once you pull that beautifully golden loaf from the oven, the possibilities for enjoyment are endless. For a classic, wholesome start to your day, I love a thick slice of warm banana bread simply spread with a knob of good quality butter, melting into its tender crumb. It’s an ideal companion to your morning coffee or a soothing cup of tea. But don’t stop there! Elevate it into a decadent dessert by serving it warm with a scoop of vanilla bean ice cream and a drizzle of caramel sauce – trust me, it’s divine! Alternatively, a dollop of freshly whipped cream or a sprinkle of toasted coconut flakes can add a delightful textural contrast. I’ve even been known to turn leftover slices into an incredible French toast for a weekend brunch, dipping them in egg batter and frying until golden, then topping with maple syrup. Talk about a glorious treat! You could also slice it thin and toast it lightly for a crispier texture, perfect for spreading with cream cheese or a fruit jam. It’s also an absolutely thoughtful and much-appreciated homemade gift for friends, family, or neighbors – wrap it in parchment paper and tie with a ribbon for a personal touch that speaks volumes.
Unleash Your Creativity: Wonderful Variations Await!
One of the aspects I adore most about this recipe is its incredible adaptability. While it’s perfect as written, it also serves as a fantastic canvas for your culinary imagination. Feel free to stir in a cup of chopped walnuts or pecans for a delightful crunch and nutty flavor – a timeless combination. If you have a sweet tooth like me, a cup of chocolate chips (milk, dark, or even white chocolate) folded into the batter transforms it into an irresistible indulgence that kids and adults alike will adore. For an extra layer of spice, a pinch of nutmeg or a dash of allspice can complement the cinnamon beautifully. You could also experiment with adding dried cranberries, raisins, or shredded coconut for different textures and flavor profiles. Another wonderful variation is to create a simple streusel topping with flour, sugar, and butter to sprinkle over the batter before baking, adding a sweet, crumbly crust. Or, for a touch of elegance, whisk together a quick powdered sugar glaze with a little milk or lemon juice to drizzle over the cooled loaf. And if you’re short on time or prefer individual portions, simply pour the batter into a muffin tin for perfect banana bread muffins, adjusting the baking time accordingly. They’re fantastic for grab-and-go breakfasts or lunchbox treats!
So, now it’s your turn. I truly hope you feel inspired and ready to tie on your apron and give this Banana Bread Recipe a try. Don’t hesitate, because the reward of that first warm, fragrant bite is absolutely worth it. There’s something profoundly satisfying about baking from scratch, especially when the results are this consistently delicious. I’m confident that once you experience the joy of making and tasting this perfect loaf, it will quickly become a cherished favorite in your home, just as it is in mine. Please, when you do bake it, I’d absolutely love to hear about your experience! Did you add any exciting variations? What did you serve it with? Share your photos, your tips, and your triumphs in the comments below. Let’s celebrate the simple, wholesome goodness of homemade baking together. Happy baking, my friends!
Best Homemade Banana Bread Recipe – Quick & Moist!
Turn overly ripe bananas into a golden loaf of pure delight with this quick and easy recipe. This classic banana bread offers an incredibly moist crumb, perfect balance of sweetness, and tender texture, making it a versatile crowd-pleaser for any occasion.
Ingredients
Instructions
Important Information
Nutrition Facts (Per Serving)
It is important to consider this information as approximate and not to use it as definitive health advice.
Allergy Information
Please check ingredients for potential allergens and consult a health professional if in doubt.
Leave a Comment