
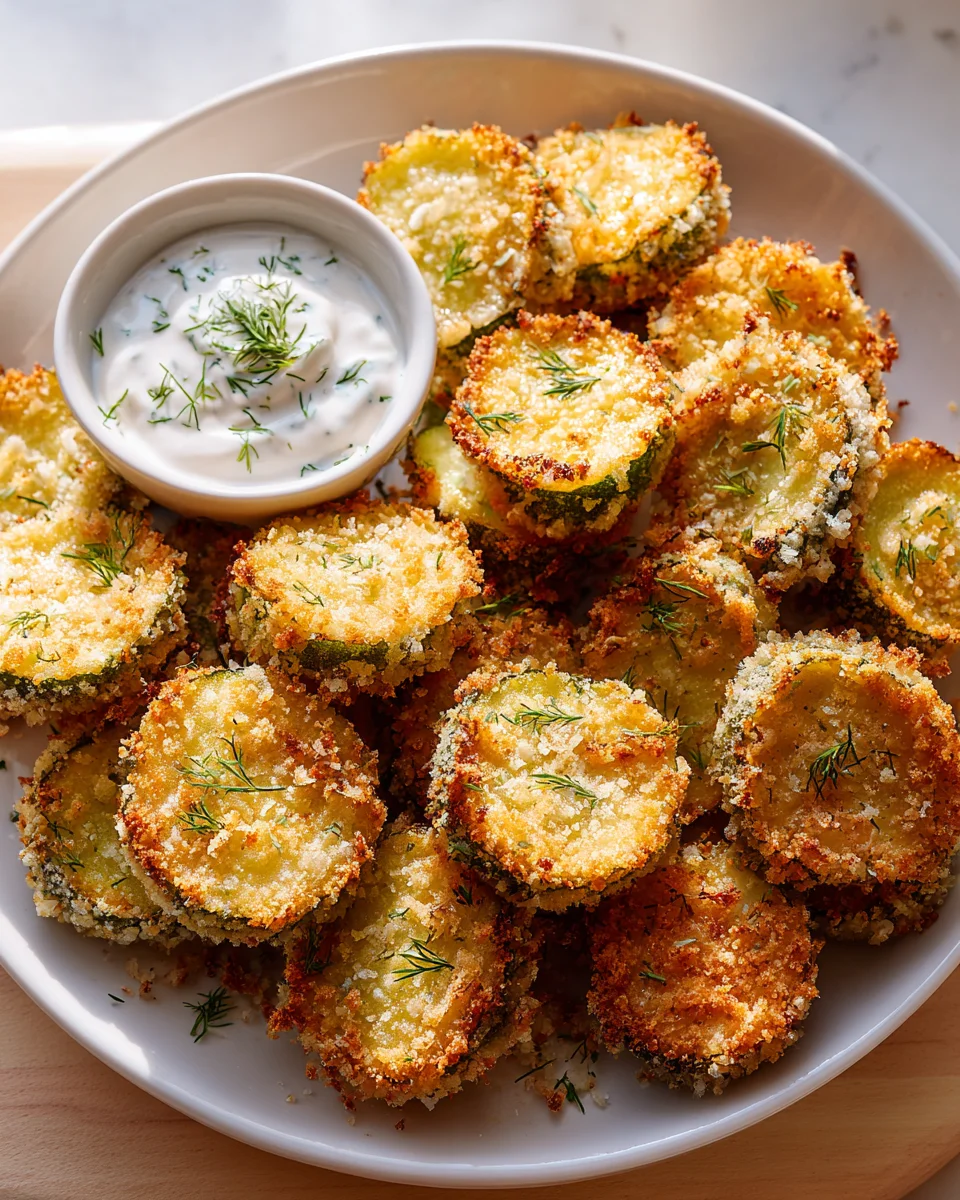
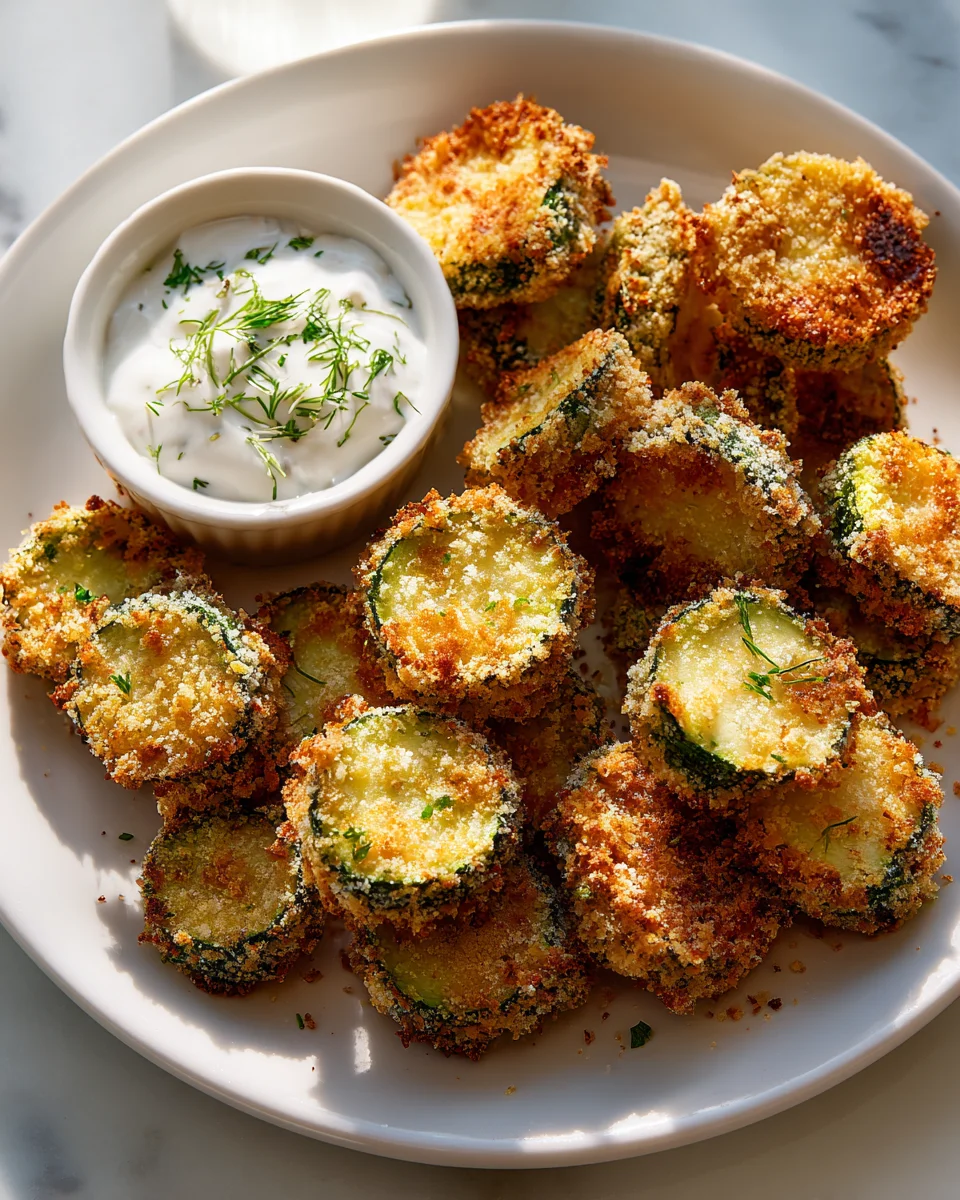
Air Fryer Fried Pickles
Oh my goodness, get ready to meet your new favorite snack! I am absolutely thrilled to share with you my recipe for Air Fryer Fried Pickles. If you, like me, adore the tangy, savory crunch of a classic fried pickle but aren’t so keen on the mess and oil of deep frying, then this recipe is about to become your kitchen MVP. What makes this version so incredibly special? It’s all thanks to the magic of the air fryer! We’re talking perfectly golden, irresistibly crispy dill pickle slices, enveloped in a savory, seasoned crust, all achieved with minimal oil and maximum flavor.
You’re going to absolutely love how quick and fuss-free these are to whip up. Seriously, transforming a humble jar of pickles into an addictive appetizer or game-day treat has never been easier or healthier. Each bite delivers that delightful contrast of a warm, slightly softened pickle interior against an unbelievably crispy exterior. It’s the ultimate combination of salty, sour, and utterly satisfying. Get ready to impress your taste buds and your guests with this healthier, equally delicious take on a beloved classic – they disappear faster than you can say “dill-icious!”
Ingredient Notes
Making delicious air fryer fried pickles starts with choosing the right ingredients, and I’ve found that a few key considerations make all the difference for that perfect crispy, tangy bite. Trust me, I’ve tried countless combinations to land on this winning formula!
Pickles: The Star of the Show
- Dill Pickle Slices: My absolute go-to are thick-cut dill pickle chips or sandwich slices. You want something sturdy enough to hold up to breading and air frying without falling apart, but not so thick that they become chewy. Avoid super thin slices, as they tend to get overly crispy and sometimes burn. Spear-shaped pickles can work too, but you might need to adjust cooking time slightly and ensure they’re not too long for your air fryer basket.
- Pat Them Dry: This is perhaps the most critical step! Excess moisture is the enemy of crispiness. I lay my pickle slices out on a paper towel-lined plate and then top them with more paper towels, pressing down gently to absorb as much liquid as possible. You might even repeat this process a couple of times. The drier the pickle, the crispier your coating will be.
The Breading System
For that irresistible crunch, we’re using a classic three-part breading station:
- All-Purpose Flour: This provides the initial base for the egg wash to adhere to. I often mix in a pinch of salt and black pepper here for foundational flavor. For a gluten-free option, a good quality gluten-free all-purpose flour blend works beautifully.
- Egg Wash: A simple mix of one or two large eggs, whisked well. To make it a little thinner and easier to coat, I sometimes add a tablespoon of water or a non-dairy milk alternative, but it’s not strictly necessary. This acts as the “glue” for our breadcrumbs.
- Panko Breadcrumbs: Ah, panko! This is where the magic happens for air frying. Panko breadcrumbs are coarser and flakier than traditional breadcrumbs, which means they absorb less oil and become incredibly crispy and airy in the air fryer. They are truly superior for achieving that “fried” texture without deep-frying. I love to season my panko generously with garlic powder, onion powder, paprika (smoked paprika adds a lovely depth!), and a little cayenne pepper if I’m in the mood for a kick. Don’t be shy with the seasonings here; they really infuse flavor into the pickles.
Other Essentials
- Cooking Oil Spray: Essential for air frying! A neutral-flavored oil spray like avocado oil, grapeseed oil, or even olive oil spray works best. This helps achieve that golden-brown, crispy exterior and prevents sticking in the air fryer basket.
- Dipping Sauces: While not part of the core recipe, having a favorite dipping sauce ready is a must. My top picks are a creamy ranch dressing, a zesty sriracha mayo, or even a homemade comeback sauce.
Step-by-Step Instructions
Get ready to transform simple pickles into an unbelievably addictive snack! Follow these steps carefully, and you’ll be enjoying perfectly crispy air fryer fried pickles in no time. I always recommend reading through the entire recipe once before you begin.
Step 1: Prepare Your Pickles
First things first, let’s get those pickles ready. Open your jar of dill pickle slices and drain them thoroughly. Then, spread the pickle slices out in a single layer on a plate or cutting board lined with several sheets of paper towels. Place more paper towels on top and gently press down to absorb as much excess moisture as possible. This step is absolutely crucial for preventing soggy breading and ensuring maximum crispiness. I usually let them sit for 5-10 minutes, pressing periodically, until they feel significantly drier to the touch. The drier they are, the better the breading will stick and crisp up.
Step 2: Set Up Your Breading Station
Now, let’s create our assembly line for breading. You’ll need three shallow bowls:
- Bowl 1 (Flour): In the first bowl, combine your all-purpose flour with a pinch of salt and black pepper. Whisk it well to combine.
- Bowl 2 (Egg Wash): In the second bowl, crack your eggs and whisk them vigorously until the yolks and whites are fully combined and slightly frothy. If you’re using it, add a tablespoon of water or non-dairy milk alternative here and whisk again.
- Bowl 3 (Panko & Seasoning): In the third bowl, combine your panko breadcrumbs with garlic powder, onion powder, paprika, and cayenne pepper (if using). Stir everything together thoroughly until the seasonings are evenly distributed throughout the panko.
Step 3: Bread the Pickles
This is where the magic really begins! Working one pickle slice at a time, follow this sequence:
- Flour: Dredge the pickle slice in the flour mixture, ensuring it’s fully coated. Shake off any excess flour.
- Egg Wash: Dip the floured pickle into the egg wash, letting any excess drip off.
- Panko: Transfer the pickle to the panko mixture. Press the panko firmly onto both sides of the pickle slice, making sure it’s completely coated. The firmer you press, the better the breadcrumbs will adhere, leading to a crispier result.
Place each breaded pickle on a clean plate or parchment-lined baking sheet as you go, making sure they don’t touch each other. Repeat until all your pickle slices are breaded.
Step 4: Preheat the Air Fryer
Preheat your air fryer to 375°F (190°C) for about 3-5 minutes. Preheating helps achieve that immediate crispness when the food hits the hot basket, much like deep frying.
Step 5: Air Fry the Pickles
Lightly spray the bottom of your air fryer basket with cooking oil spray. Arrange a single layer of breaded pickle slices in the basket, making sure not to overcrowd them. Overcrowding will steam the pickles instead of crisping them, so work in batches if necessary. Once arranged, lightly spray the tops of the pickles with cooking oil spray.
Air fry for 8-12 minutes, flipping them halfway through, until they are golden brown and wonderfully crispy. Cooking times can vary slightly depending on your air fryer model and the thickness of your pickles, so keep an eye on them towards the end. I usually aim for around 10 minutes total for a perfect golden hue.
Step 6: Serve Immediately
Carefully remove the crispy air fryer fried pickles from the basket. They will be hot! Transfer them to a serving platter and serve immediately with your favorite dipping sauces. They are best enjoyed fresh off the air fryer when they’re at their absolute crispiest.
Tips & Suggestions
To help you get the best possible results every single time you make these air fryer fried pickles, I’ve gathered some of my top tips and suggestions. These little insights come from lots of trial and error, so you can benefit from my culinary adventures!
The Power of Dryness
I cannot stress this enough: pat your pickles incredibly dry! This is the number one secret to achieving a truly crispy breading that adheres well. Any residual moisture will create steam, making your breading soggy instead of crunchy. Think of it as preparing a blank, dry canvas for your delicious breading. If I’m really keen on maximum dryness, I’ll even let them air dry for a few minutes after patting, or even use a salad spinner if they’re chips to remove surface water.
Don’t Be Shy with the Panko Press
When you’re breading the pickles in the panko, don’t just gently roll them. Press the panko firmly onto both sides. This ensures a thick, even coating that will create that fantastic crunchy exterior. The more panko that sticks, the crispier your fried pickle will be, and the less likely the breading is to fall off during cooking.
The Golden Rule of Air Frying: No Crowding!
This is crucial for any air fryer recipe, especially for achieving that “fried” texture. Always cook your fried pickles in a single layer, ensuring there’s space around each one. If you overcrowd the basket, the air won’t circulate properly, leading to uneven cooking and steamy, soft pickles instead of crispy ones. Patience is key here; it’s always better to work in batches than to end up with a sub-par result. Your air fryer is designed to mimic frying by circulating hot air, and it can’t do its job if the air can’t reach everything.
Oil Spray for the Win
While the air fryer doesn’t require deep-frying oil, a light mist of cooking oil spray is your best friend for achieving that beautiful golden-brown color and extra crispiness. Don’t skip spraying the pickles both before and halfway through cooking. The oil helps the panko toast and become perfectly crunchy, giving them that authentic fried look and feel. I prefer using avocado or olive oil spray for a neutral flavor and good heat tolerance.
Seasoning is Your Friend
Feel free to adjust the seasonings in your panko mix to suit your taste. Love a little heat? Add extra cayenne pepper or a pinch of chili powder. Want more savory notes? A little extra garlic and onion powder never hurt. You could even experiment with a touch of dried dill to amplify the pickle flavor, or some smoked paprika for a deeper, richer taste. Taste your panko mix before you start; it’s easier to adjust seasonings then.
Dipping Sauce Variety
While ranch dressing is a classic pairing for fried pickles, don’t limit yourself! Experiment with different dipping sauces to find your favorite. Some excellent options include:
- Sriracha Mayo: For a spicy kick.
- Comeback Sauce: A tangy, savory, and slightly spicy Southern staple.
- Honey Mustard: For a sweet and tangy contrast.
- Zesty Aioli: Garlic-infused mayonnaise with a lemon zing.
Having a couple of options available can make the experience even more enjoyable.
Reheating for Best Results
If you happen to have any leftovers (which is rare in my house!), the best way to reheat them is back in the air fryer. Preheat your air fryer to 350°F (175°C) and cook for 3-5 minutes, or until heated through and re-crisped. This will help bring back some of their original crunch.
Storage
While air fryer fried pickles are truly at their absolute best when enjoyed immediately, I understand that sometimes you might have a few leftover, or perhaps you made a larger batch than intended. Here’s how I handle storing them, keeping in mind their peak deliciousness is right out of the air fryer.
Cool Completely First
Before even thinking about storing them, it’s crucial to let your air fryer fried pickles cool down completely. If you pack them away while they’re still warm, the trapped heat will create condensation, which will make the breading soggy very quickly. Spread them out on a wire rack to allow air to circulate around them and ensure they cool down evenly.
Airtight Container in the Fridge
Once fully cooled, transfer the fried pickles to an airtight container. I like to place a paper towel at the bottom of the container to help absorb any residual moisture, and sometimes I even place another one on top before sealing the lid. This small step can help mitigate some of the inevitable loss of crispness.
Store the sealed container in the refrigerator. They will typically last for about 1-2 days. However, please be aware that the breading will soften considerably over time, even with proper storage. They won’t be as delightfully crispy as they were fresh, but they will still retain their tangy flavor.
Reheating Leftovers
To bring some life back to refrigerated fried pickles, the air fryer is your best friend. I highly recommend against using a microwave, as it will only make them softer and chewier. Instead, preheat your air fryer to 350°F (175°C) and place the leftover fried pickles in a single layer in the basket. Air fry for about 3-5 minutes, or until they are heated through and the breading has regained some of its crispiness. Keep an eye on them to prevent burning. They won’t be quite as good as fresh, but this method comes the closest to restoring their original texture.
Freezing Not Recommended
Unfortunately, I don’t recommend freezing air fryer fried pickles. The texture of the pickle itself tends to become mushy and watery after thawing, and the breading almost entirely loses its integrity and crispness. These are definitely a dish best made and enjoyed fresh!
Final Thoughts
And there you have it – my absolute favorite way to enjoy a classic snack with a modern twist! These Air Fryer Fried Pickles are truly a game-changer. What makes THIS recipe a must-try? It’s the magic combination of perfectly crisp breading, the delightful tang of dill pickles, and the incredible satisfaction of achieving that golden-brown perfection with so much less oil.
No more splashing hot oil or feeling heavy after indulging. With these Air Fryer Fried Pickles, you get all the irresistible flavor and satisfying crunch you crave, but in a lighter, guilt-free package. They’re unbelievably easy to make, vanishingly quick to cook, and absolutely impossible to resist. Whether you’re whipping up a quick snack, an appetizer for friends, or just treating yourself, I genuinely believe you’ll fall in love with how simple and delicious these are. Go on, give them a whirl – I know you’ll be as hooked as I am!
Best Air Fryer Fried Pickles – Super Crispy & Flavorful

Get ready to enjoy the ultimate snack with these Air Fryer Fried Pickles! Perfectly crispy and bursting with flavor, they are a healthier take on a classic favorite.
- Prep Time: 15 mins
- Cook Time: 10 mins
- Total Time: 25 minutes
- Yield: 4 servings
- Category: Appetizer
- Method: Air Frying
- Cuisine: American
Ingredients
- Dill Pickle Slices
- All-Purpose Flour
- Salt
- Black Pepper
- Large Eggs
- Water or Non-Dairy Milk (optional)
- Panko Breadcrumbs
- Garlic Powder
- Onion Powder
- Paprika
- Cayenne Pepper (optional)
- Cooking Oil Spray (e.g. avocado oil, grapeseed oil, or olive oil spray)
- Dipping Sauces (e.g. ranch dressing, sriracha mayo, or comeback sauce)
Instructions
- Prepare your pickles by draining and drying the dill pickle slices thoroughly using paper towels.
- Set up your breading station with three shallow bowls: combine all-purpose flour with salt and black pepper in the first bowl, whisk eggs (and water or non-dairy milk if using) in the second bowl, and mix panko breadcrumbs with garlic powder, onion powder, paprika, and cayenne pepper in the third bowl.
- Bread the pickles by dredging each slice in the flour mixture, then dipping it in the egg wash, and finally coating it with the panko mixture, pressing firmly to ensure the breadcrumbs adhere.
- Preheat your air fryer to 375°F (190°C) for 3-5 minutes.
- Lightly spray the air fryer basket with cooking oil spray and arrange a single layer of breaded pickle slices, lightly spraying the tops with more cooking oil spray.
- Air fry for 8-12 minutes, flipping halfway through, until golden brown and crispy.
- Serve immediately with your favorite dipping sauces.
Nutrition
- Serving Size: 1 serving
- Calories: 150
- Sugar: 1 g
- Sodium: 300 mg
- Fat: 7 g
- Saturated Fat: 1 g
- Unsaturated Fat: 5 g
- Trans Fat: 0 g
- Carbohydrates: 18 g
- Fiber: 1 g
- Protein: 4 g
- Cholesterol: 70 mg
Keywords: Ensure pickles are very dry before breading for maximum crispiness. Don't overcrowd the air fryer basket to achieve the best texture.
Leave a Comment