
Maple Donut Bars The Ultimate Guide To Baking Delicious Treats
Oh, my goodness, I am so incredibly excited to share this recipe with you! Have you ever craved the warm, comforting taste of a fresh maple donut but didn’t want the fuss of deep-frying or shaping individual rings? Well, my friends, I’ve cracked the code and found the perfect solution with these Maple Donut Bars. This isn’t just any dessert; it’s a game-changer that lives up to its name: The Ultimate Guide To Baking Delicious Treats!
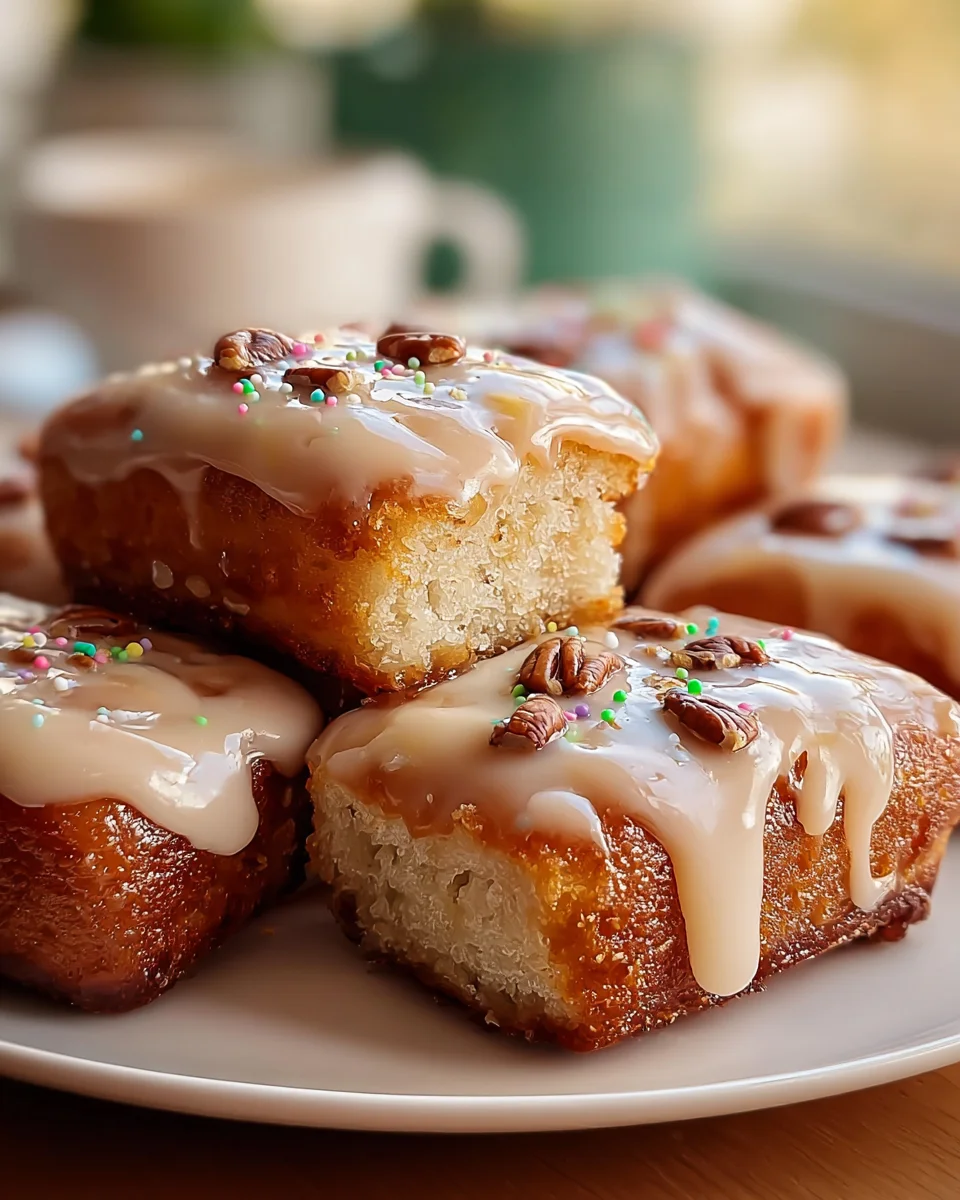
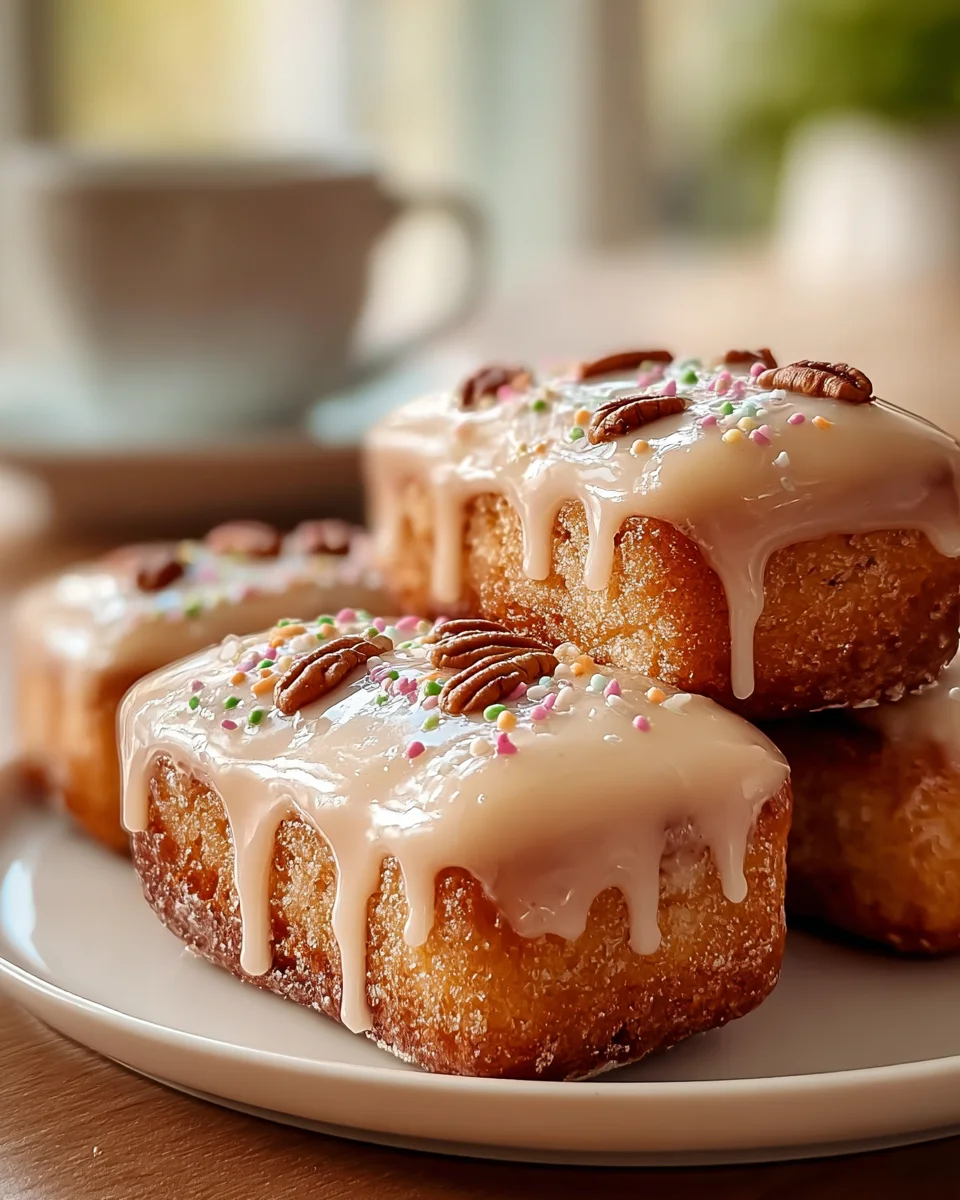
What makes these bars truly special is how they capture all the best elements of a classic maple donut—that tender, sweet crumb and a luscious maple glaze—but transform them into an incredibly easy-to-bake, slice-and-serve format. Imagine a moist, cake-like bar, infused with rich, warm maple flavor throughout, topped with an irresistible, slightly crackly maple glaze that melts in your mouth. It’s pure maple magic!
You are absolutely going to adore these Maple Donut Bars because they’re the ultimate fuss-free indulgence. They’re perfect for breakfast, brunch, an afternoon treat, or even a simple dessert. No tricky shaping, no hot oil, just straightforward baking that yields spectacular results every single time. Get ready to impress everyone (and yourself!) with this delightful spin on a beloved classic. Trust me, once you try these, you’ll wonder how you ever lived without them!
Ingredient Notes
Welcome, fellow baking enthusiasts! I’m thrilled to guide you through crafting the most delightful Maple Donut Bars. Achieving that perfect balance of tender crumb and rich maple flavor starts with understanding your ingredients. Think of this as your foundational knowledge for baking success.
For the main bar component, we’re aiming for a soft, cake-like texture, reminiscent of a baked donut. Here are the key players:
- All-Purpose Flour: This is our base. I always recommend using a good quality, unbleached all-purpose flour. For an even more tender crumb, you can substitute about 1/4 cup of the all-purpose flour with cake flour, reducing the total amount accordingly.
- Granulated Sugar & Light Brown Sugar: A blend of these two sugars provides both sweetness and moisture. The brown sugar adds a lovely subtle molasses note that complements the maple beautifully.
- Unsalted Butter: My go-to for flavor and texture. Ensure it’s softened to room temperature for proper creaming with the sugars. If you only have salted butter, simply omit the added salt in the recipe. For a dairy-free alternative, a good quality plant-based butter substitute works well, though the flavor profile might shift slightly.
- Large Eggs: These act as a binder and add richness. Again, room temperature eggs emulsify better into the batter, leading to a smoother texture.
- Milk: Any milk will do – whole milk for richness, skim for a lighter option, or even a non-dairy alternative like almond or oat milk will work perfectly here.
- Pure Maple Syrup: This is the star! Please, please, please use real, pure maple syrup. Grade A amber or dark robust maple syrup will give you the deepest, most authentic maple flavor. Imitation syrups won’t deliver the same incredible taste we’re aiming for. This goes for both the bars and the glaze.
- Baking Powder & Baking Soda: Our leavening agents, working together to give these bars their lovely rise and tender crumb. Ensure they are fresh for optimal results!
- Vanilla Extract: A touch of vanilla enhances all the other flavors. Pure vanilla extract is always my preference.
- Salt: A pinch of salt balances the sweetness and brings out the maple flavor.
And for that irresistible Maple Glaze:
- Powdered Sugar (Confectioners’ Sugar): The base for our smooth, pourable glaze. Sift it to prevent lumps.
- Pure Maple Syrup: Once again, quality is key!
- Milk: Just a touch to achieve the desired glaze consistency.
- Vanilla Extract: Optional, but I find it adds a nice depth to the glaze.
Step-by-Step Instructions
Let’s get baking! Follow these clear steps to create your ultimate Maple Donut Bars. Precision and patience are your best friends here.
- Prepare Your Pan and Preheat Oven: My first step is always to get the oven ready. Preheat your oven to 350°F (175°C). Lightly grease and flour a 9×13 inch baking pan, or line it with parchment paper, leaving an overhang on the sides for easy removal. This ensures your beautiful bars won’t stick!
- Combine Dry Ingredients: In a medium bowl, whisk together the all-purpose flour, baking powder, baking soda, and salt. Whisking ensures these ingredients are evenly distributed, which is crucial for a consistent rise. Set this bowl aside for now.
- Cream Butter and Sugars: In a large mixing bowl, using an electric mixer (either hand-held or stand mixer with a paddle attachment), cream together the softened unsalted butter, granulated sugar, and light brown sugar on medium speed. Beat until the mixture is light, fluffy, and pale in color, typically 2-3 minutes. This step incorporates air, contributing to the bars’ tender texture.
- Add Eggs and Vanilla: Beat in the large eggs one at a time, mixing well after each addition. Make sure each egg is fully incorporated before adding the next. Stir in the vanilla extract and 2 tablespoons of the pure maple syrup. Scrape down the sides of the bowl to ensure everything is thoroughly combined.
- Alternate Dry and Wet Ingredients: With the mixer on low speed, gradually add about one-third of the dry ingredient mixture to the wet ingredients, mixing until just combined. Then, pour in half of the milk, mixing until just incorporated. Repeat this process: add another third of the dry ingredients, then the remaining milk, and finally the last of the dry ingredients. Mix only until no streaks of flour remain. Be careful not to overmix the batter; overmixing can lead to tough bars.
- Spread into Pan and Bake: Pour the batter evenly into your prepared 9×13 inch baking pan. Use an offset spatula or the back of a spoon to smooth the top. Bake for 25-30 minutes, or until a wooden skewer or toothpick inserted into the center comes out clean. The top should be golden brown and spring back lightly when touched.
- Cool the Bars: Once baked, remove the pan from the oven and let the bars cool in the pan on a wire rack for at least 30 minutes. This allows them to set properly before glazing.
- Prepare the Maple Glaze: While the bars are cooling, prepare your glaze. In a small bowl, whisk together the sifted powdered sugar, 3 tablespoons of pure maple syrup, 1 tablespoon of milk, and the optional vanilla extract until smooth. If the glaze is too thick, add more milk a teaspoon at a time until you reach a pourable, but still thick, consistency. If it’s too thin, whisk in a little more powdered sugar.
- Glaze and Slice: Once the bars have cooled significantly (they can be slightly warm, but not hot), pour the maple glaze evenly over the top. Use an offset spatula to spread it to the edges. Let the glaze set for at least 15-20 minutes before slicing the bars into your desired size and serving. Enjoy your ultimate maple treat!
Tips & Suggestions
To truly master these Maple Donut Bars and elevate them from delicious to utterly divine, I’ve gathered some of my favorite tips and suggestions for you. These little secrets will ensure your baking experience is as rewarding as the treat itself!
- Embrace Real Maple: I cannot stress this enough – the number one tip for truly exceptional maple donut bars is to use high-quality, pure maple syrup. This isn’t the time for imitation! The nuanced flavor of real maple is what makes these bars sing. Explore different grades; a darker robust syrup will give you a more intense maple punch.
- Do Not Overmix: This is a golden rule in baking, especially for cakes and bars. Once you add the flour, mix only until just combined. Overmixing develops the gluten in the flour too much, resulting in tough, chewy bars rather than the tender, cake-like texture we’re after.
- Room Temperature Ingredients: Ensure your butter, eggs, and milk are all at room temperature. This allows them to emulsify better, creating a smoother, more uniform batter and a finer crumb in the finished product. Plan ahead and take them out of the fridge at least 30-60 minutes before you start.
- Perfect Glaze Consistency: The glaze is crucial! If it’s too thick, it won’t spread smoothly; too thin, and it will soak right into the bars (which isn’t bad, but doesn’t give you that classic donut bar look). Adjust with tiny amounts of powdered sugar or milk until you achieve a thick, yet pourable consistency that coats the back of a spoon.
- Creative Toppings: While delicious on their own, don’t hesitate to get creative with toppings!
- Crunchy Nuts: A sprinkle of finely chopped pecans or walnuts over the wet glaze adds a lovely texture and nutty flavor that pairs wonderfully with maple.
- Spice It Up: A light dusting of cinnamon or a tiny pinch of nutmeg in the batter can enhance the warm, comforting flavors.
- Savory Twist: For an adventurous palate, consider sprinkling finely crumbled, crispy beef bacon bits over the glaze. The salty, savory crunch is an unexpected but incredibly delicious counterpoint to the sweet maple!
- Don’t Overbake: Keep a close eye on your oven. Overbaking is the quickest way to dry out your bars. Start checking for doneness a few minutes before the recipe suggests the minimum baking time.
- Cool Completely (or almost): For the best glaze adherence and to avoid a soggy glaze, let your bars cool completely, or at least to lukewarm, before applying the glaze.
Storage
Once you’ve baked a batch of these glorious Maple Donut Bars, you’ll want to make sure they stay fresh and delicious for as long as possible. Here’s my advice for proper storage:
- Room Temperature: For optimal freshness and texture, I recommend storing your Maple Donut Bars at room temperature. Place them in an airtight container. They will remain wonderfully fresh for up to 2-3 days. Storing them uncovered will cause them to dry out quickly.
- Refrigeration: While not strictly necessary, if you live in a very warm climate or prefer a firmer texture, you can refrigerate the bars. Again, ensure they are in an airtight container. When refrigerated, they will last for up to 4-5 days. Just be aware that refrigeration can sometimes alter the texture slightly, making them a bit denser. I like to let them come closer to room temperature before enjoying them if they’ve been chilled.
- Freezing (Un-Glazed): If you want to make a batch ahead of time, I suggest freezing the un-glazed bars. Once completely cooled, wrap the entire slab (or individual bars) tightly in plastic wrap, then an additional layer of aluminum foil. They can be frozen for up to 2 months. Thaw them overnight in the refrigerator, or at room temperature for a few hours, then prepare and apply the glaze just before serving.
- Freezing (Glazed): You can also freeze glazed bars, though the glaze might become a little less pristine upon thawing. Place the glazed bars in a single layer on a baking sheet and freeze until solid. Once frozen, transfer them to an airtight freezer-safe container or bag, separating layers with parchment paper. Thaw at room temperature for a few hours.
Final Thoughts
And there you have it! We’ve reached the sweet culmination of our baking adventure with Maple Donut Bars The Ultimate Guide To Baking Delicious Treats. I truly hope you’ve enjoyed every step of crafting these delightful bars, from the simple mixing to the final, irresistible maple drizzle.
What makes Maple Donut Bars The Ultimate Guide To Baking Delicious Treats truly special is how it beautifully marries the comforting, nostalgic flavor of a classic maple donut with the effortless convenience of a bar. It’s a brilliant shortcut to pure bliss, perfect for sharing (or not!) and guaranteed to bring a smile to anyone’s face. These aren’t just any treats; they are a celebration of warm, cozy flavors in an unbelievably easy-to-manage form.
So, I wholeheartedly encourage you to dive in and experience the magic of Maple Donut Bars The Ultimate Guide To Baking Delicious Treats for yourself. Trust me, the sheer joy and deliciousness they bring to your kitchen and your taste buds make them an absolute must-try. Happy baking, my friends!
Bake Maple Donut Bars: Your Ultimate Delicious Treat Guide

Indulge in the warm, comforting flavors of Maple Donut Bars that capture the essence of classic maple donuts in a fuss-free, slice-and-serve format. Perfect for any occasion, these bars are a delightful treat that will impress everyone!
- Prep Time: 15 mins
- Cook Time: 30 mins
- Total Time: 45 minutes
- Yield: 12 servings 1x
- Category: Dessert
- Method: Baking
- Cuisine: American
Ingredients
- 2 cups All-Purpose Flour
- 1/4 cup Cake Flour (optional)
- 1/2 cup Granulated Sugar
- 1/2 cup Light Brown Sugar
- 1/2 cup Unsalted Butter, softened
- 2 Large Eggs, room temperature
- 1 cup Milk (whole, skim, or non-dairy)
- 1/2 cup Pure Maple Syrup
- 2 teaspoons Baking Powder
- 1/2 teaspoon Baking Soda
- 1/2 teaspoon Salt
- 1 teaspoon Vanilla Extract
- 1 cup Powdered Sugar (Confectioners' Sugar), sifted
- 3 tablespoons Pure Maple Syrup (for glaze)
- 1 tablespoon Milk (for glaze)
- 1 teaspoon Vanilla Extract (optional, for glaze)
Instructions
- Preheat your oven to 350°F (175°C) and lightly grease and flour a 9×13 inch baking pan, or line it with parchment paper.
- In a medium bowl, whisk together the all-purpose flour, baking powder, baking soda, and salt. Set aside.
- In a large mixing bowl, cream together the softened unsalted butter, granulated sugar, and light brown sugar on medium speed until light and fluffy, about 2-3 minutes.
- Beat in the large eggs one at a time, mixing well after each addition. Stir in the vanilla extract and 2 tablespoons of the pure maple syrup.
- With the mixer on low speed, gradually add about one-third of the dry ingredient mixture to the wet ingredients, mixing until just combined. Then, pour in half of the milk, mixing until just incorporated. Repeat this process until all ingredients are combined, being careful not to overmix.
- Pour the batter into the prepared baking pan and smooth the top. Bake for 25-30 minutes, or until a toothpick inserted in the center comes out clean.
- Once baked, let the bars cool in the pan on a wire rack for at least 30 minutes.
- While the bars are cooling, prepare the glaze by whisking together the sifted powdered sugar, 3 tablespoons of pure maple syrup, 1 tablespoon of milk, and optional vanilla extract until smooth.
- Once the bars have cooled, pour the maple glaze evenly over the top and let it set for at least 15-20 minutes before slicing and serving.
Nutrition
- Serving Size: 1 bar
- Calories: 200
- Sugar: 15 g
- Sodium: 150 mg
- Fat: 8 g
- Saturated Fat: 5 g
- Unsaturated Fat: 2 g
- Trans Fat: 0 g
- Carbohydrates: 30 g
- Fiber: 1 g
- Protein: 3 g
- Cholesterol: 40 mg
Keywords: Use high-quality, pure maple syrup for the best flavor. Ensure all ingredients are at room temperature for better emulsification. Avoid overmixing to maintain a tender texture.
Leave a Comment