
One rainy Sunday afternoon, I found myself in the kitchen with my grandmother, the aroma of roasted garlic and herbs swirling around us. We had decided to try our hand at making Hasselback potatoes, a dish she had raved about from her travels to Sweden. I remember her carefully slicing the potatoes, not all the way through, creating a beautiful fan-like shape. As we placed them in the oven, the anticipation filled the air. The golden edges crisped perfectly, while the insides remained fluffy and tender. That moment, surrounded by family and the warmth of the oven, is etched in my memory.
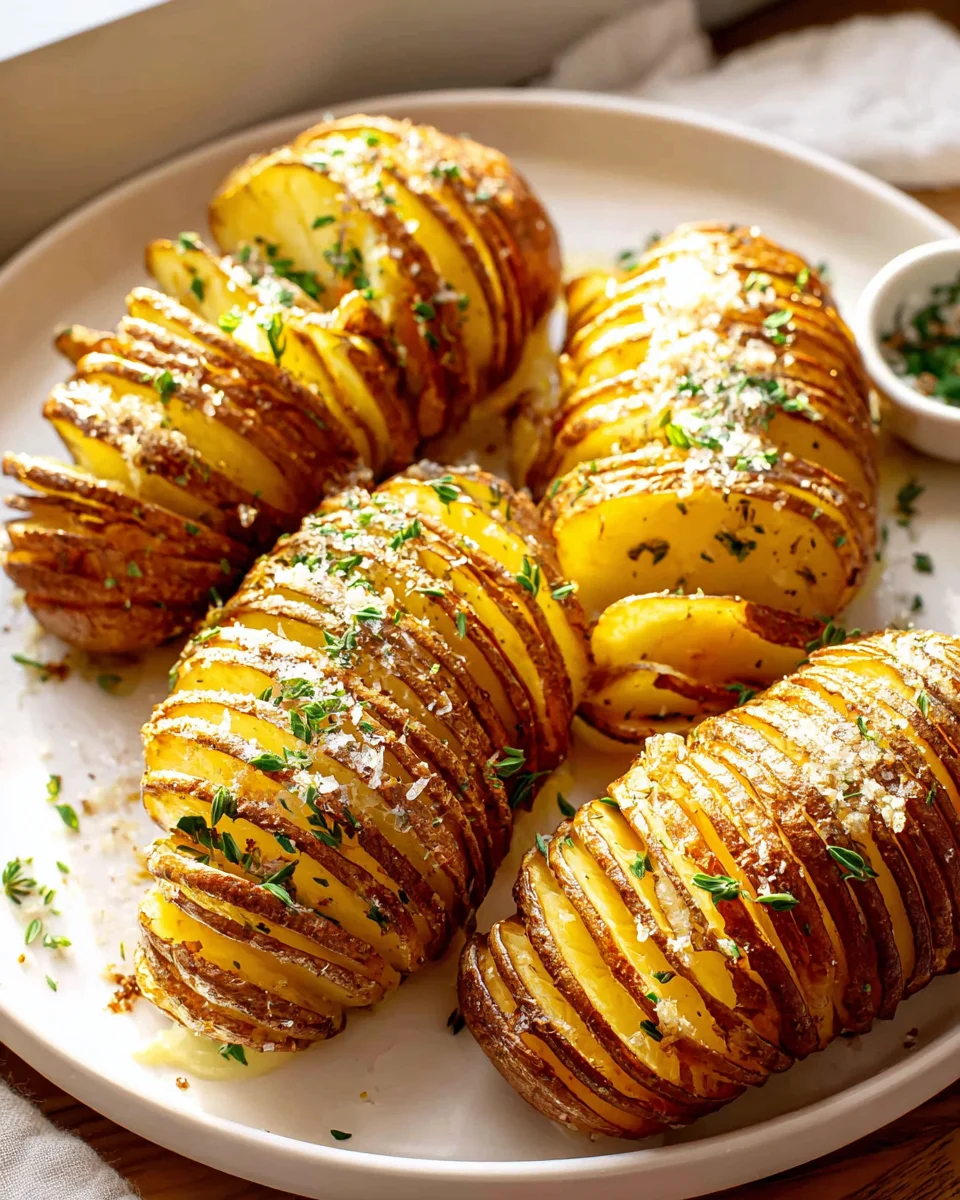
Hasselback potatoes are a feast for the eyes. Imagine a perfectly roasted potato, its skin a rich golden brown, and each slice revealing a tender interior that’s just waiting to soak up flavor. When you pull them from the oven, the tantalizing scent of crispy edges mingles with the buttery, garlicky aroma that makes your mouth water. Each bite is a delightful contrast—crispy on the outside, soft and creamy on the inside, with a burst of flavor from the herbs and spices.
What makes my version of Hasselback potatoes special is the addition of fresh herbs and a hint of lemon zest, giving them a bright, zesty kick that elevates the classic recipe. Plus, I love to drizzle a little extra virgin olive oil for that luxurious finish. It’s a dish that brings people together, a perfect side for any meal or even a star on its own.
Let me show you exactly how to make these delicious Hasselback potatoes!
Why You’ll Love This Recipe
- Thinly sliced layers create a delightful contrast between crispy edges and a tender interior that’s simply irresistible.
- This recipe requires just five ingredients, making it both budget-friendly and easy to whip up on a weeknight.
- Ready in about 70 minutes, with only 10 minutes of prep time, it fits perfectly into a busy schedule.
- The garlic and butter combination infuses each potato slice, offering rich flavor that elevates any meal.
- Hasselback potatoes are visually stunning, making them a perfect centerpiece for your dinner table or festive gatherings.
Ingredients
- 4 large russet potatoes (or Yukon gold)
- 1 teaspoon salt
- 1 teaspoon garlic powder
- ½ teaspoon black pepper
- 1/4 cup melted butter
When it comes to Hasselback potatoes, the quality of the ingredients makes a significant difference. The potatoes are the stars, so opt for large russet potatoes or Yukon golds. Russets are starchy and create a fluffy interior, while Yukon golds bring a buttery flavor. Both varieties hold up well to slicing and baking, ensuring a delicious outcome. If you’re in a pinch, red potatoes can also work, but they will yield a creamier texture.
Salt is essential for enhancing the flavor of the potatoes. I recommend using kosher salt for its coarse texture, which helps distribute flavor evenly. Garlic powder adds an aromatic kick; however, fresh minced garlic can elevate your dish even further. If you’re watching your sodium intake, consider using a salt substitute or reducing the amount of salt to your taste. Lastly, butter is crucial for achieving that golden, crispy finish. For a dairy-free alternative, olive oil is a fantastic substitute, adding a different flavor profile while still promoting crunchiness.
Step-by-Step Instructions
- Preheat your oven to 425°F (220°C). This temperature is perfect for achieving crispy edges while keeping the interior tender.
- Wash the potatoes under cold water and pat them dry with paper towels. Make sure they’re completely dry to ensure crispiness.
- Place a potato between two chopsticks or a wooden spoon. This prevents your knife from cutting all the way through, which is crucial for keeping the potato intact.
- Using a sharp knife, cut vertical slits into the potato, about 1/8 inch apart. Be careful not to cut through the bottom. You want the slices to fan out but remain connected at the base.
- In a small bowl, combine the salt, garlic powder, and black pepper. This mixture will season the potatoes beautifully.
- Brush half of the melted butter over the potatoes, making sure to let some drip into the slits. This will add flavor directly to the potato layers.
- Sprinkle half of the salt mixture over the potatoes, ensuring even distribution for maximum flavor impact.
- Place the potatoes on a baking sheet lined with parchment paper for easy cleanup. Bake for 30 minutes, watching for the edges to start turning golden brown.
- After 30 minutes, use a knife to gently pull the layers apart. This allows the butter and seasonings to seep in better. Brush the remaining butter over the potatoes.
- Bake for another 30 minutes. You’ll know they’re ready when the tops are crispy and the layers are beautifully fanned out. Sprinkle with the remaining salt mixture before serving.
Pro Tips for the Best Hasselback Potatoes
- One common mistake is cutting the slits too deep or too wide. Aim for a consistent 1/8 inch apart and don’t cut through the bottom; this keeps the potato intact for that perfect fan effect.
- Invest in a good-quality vegetable peeler and a sharp knife. A dull knife can lead to uneven cuts, making it harder to achieve the desired texture.
- For an extra layer of flavor, consider adding fresh herbs like rosemary or thyme to the butter before brushing it on. This will elevate the taste and aroma.
- Use a baking sheet with raised edges to catch any butter drips — this will prevent a messy oven and make cleanup easier.
- Experiment with the seasoning ratios; if you love garlic, feel free to double the garlic powder for a more intense flavor.
Variations & Serving Ideas
For creative variations on your Hasselback potatoes, consider these ideas:
1. Cheesy Hasselback Potatoes: Add shredded cheese between the slices during the last 10-15 minutes of baking for a gooey, cheesy delight.
2. Herbed Butter Version: Mix in fresh herbs like parsley, chives, or dill with the butter for an aromatic twist.
3. Spicy Hasselback Potatoes: Add a pinch of cayenne pepper or smoked paprika to the seasoning for a spicy kick.
4. Bacon-Wrapped Hasselbacks: Wrap the potatoes in bacon strips before baking for added crunch and flavor.
Pair your Hasselback potatoes with a variety of main dishes. A succulent grilled steak complements the crispy texture nicely. Alternatively, serve these potatoes alongside roasted chicken for a comforting, hearty meal. They also pair well with a fresh garden salad, providing a delightful contrast between the crispy potatoes and the crisp greens.
Storage, Make-Ahead & Reheating
For optimal storage, keep any leftover Hasselback potatoes in an airtight container in the fridge for up to 3 days. While they can be frozen, I recommend enjoying them fresh for the best texture. If you choose to freeze, wrap them tightly in plastic wrap and then place them in a freezer-safe bag for up to 2 months.
When it comes to reheating, the best method is to place them in a preheated oven at 350°F (175°C) for about 15-20 minutes. This helps to restore their crispy edges. Interestingly, many find that the flavors meld beautifully when stored overnight, making them even more delightful the next day!
Frequently Asked Questions
Can I make Hasselback Potatoes ahead of time?
Yes — in fact, Hasselback potatoes taste even better the next day. You can prepare them up to the baking stage, cover them, and refrigerate. When you’re ready to bake, just brush them with butter and seasonings before popping them in the oven.
What type of potatoes are best for Hasselback Potatoes?
Russet or Yukon gold potatoes are ideal for Hasselback preparation. Russets provide a fluffy texture, while Yukon golds offer a creamy, buttery flavor. Both varieties hold up well during baking and slicing.
Can I use other seasonings on my Hasselback Potatoes?
Absolutely! Feel free to customize your seasoning blend. Popular options include Parmesan cheese, fresh herbs, or even a drizzle of balsamic reduction for a gourmet touch. The beauty of this dish lies in its versatility!
How can I prevent the potatoes from browning too quickly?
If you find your potatoes browning too fast, cover them loosely with aluminum foil during baking. This will allow the potatoes to cook through without burning while still achieving that crispy exterior.
Can I make Hasselback Potatoes in an air fryer?
Yes! Preheat your air fryer to 375°F (190°C). Cook the prepared Hasselback potatoes for about 25-30 minutes, checking for doneness. Air frying provides a wonderfully crispy finish while keeping the insides tender.

Final Thoughts
Hasselback Potatoes are a delightful blend of crispy skin and tender, fluffy interior, making them a satisfying side dish that elevates any meal. The unique slicing technique allows for endless flavor possibilities, from garlic and herbs to cheese and crispy bacon, ensuring each bite is packed with deliciousness.
This is the kind of recipe I come back to again and again, especially when I want to impress guests or simply indulge in a comforting home-cooked meal. The visual appeal and flavor combinations never fail to bring a smile to my face.
I encourage you to try making these Hasselback Potatoes for your next gathering or cozy dinner. Don’t hesitate to share your results or add your own twist—experimenting with toppings is half the fun!
Crispy Hasselback Potatoes Recipe for Perfect Side Dish

These Crispy Hasselback Potatoes are a delightful blend of crispy skin and tender, fluffy interior, making them a satisfying side dish that elevates any meal. With a hint of garlic and fresh herbs, each bite is packed with flavor.
- Prep Time: 10 mins
- Cook Time: 60 mins
- Total Time: 1 hour 10 minutes
- Yield: 4 servings 1x
- Category: Side Dish
- Method: Baking
- Cuisine: Swedish
Ingredients
- 4 large russet potatoes (or Yukon gold)
- 1 teaspoon salt
- 1 teaspoon garlic powder
- ½ teaspoon black pepper
- 1/4 cup melted butter
Instructions
- Preheat your oven to 425°F (220°C). This temperature is perfect for achieving crispy edges while keeping the interior tender.
- Wash the potatoes under cold water and pat them dry with paper towels. Make sure they’re completely dry to ensure crispiness.
- Place a potato between two chopsticks or a wooden spoon. This prevents your knife from cutting all the way through, which is crucial for keeping the potato intact.
- Using a sharp knife, cut vertical slits into the potato, about 1/8 inch apart. Be careful not to cut through the bottom. You want the slices to fan out but remain connected at the base.
- In a small bowl, combine the salt, garlic powder, and black pepper. This mixture will season the potatoes beautifully.
- Brush half of the melted butter over the potatoes, making sure to let some drip into the slits. This will add flavor directly to the potato layers.
- Sprinkle half of the salt mixture over the potatoes, ensuring even distribution for maximum flavor impact.
- Place the potatoes on a baking sheet lined with parchment paper for easy cleanup. Bake for 30 minutes, watching for the edges to start turning golden brown.
- After 30 minutes, use a knife to gently pull the layers apart. This allows the butter and seasonings to seep in better. Brush the remaining butter over the potatoes.
- Bake for another 30 minutes. You’ll know they’re ready when the tops are crispy and the layers are beautifully fanned out. Sprinkle with the remaining salt mixture before serving.
Nutrition
- Serving Size: 1 potato
- Calories: 250
- Sugar: 1 g
- Sodium: 500 mg
- Fat: 12 g
- Saturated Fat: 7 g
- Unsaturated Fat: 5 g
- Trans Fat: 0 g
- Carbohydrates: 36 g
- Fiber: 4 g
- Protein: 4 g
- Cholesterol: 20 mg
Keywords: For a dairy-free alternative, olive oil can be used instead of butter. Consider adding fresh herbs like rosemary or thyme to the butter for extra flavor.
Leave a Comment