
Mouthwatering Red Velvet Cream Cheese Thumbprint Cookies
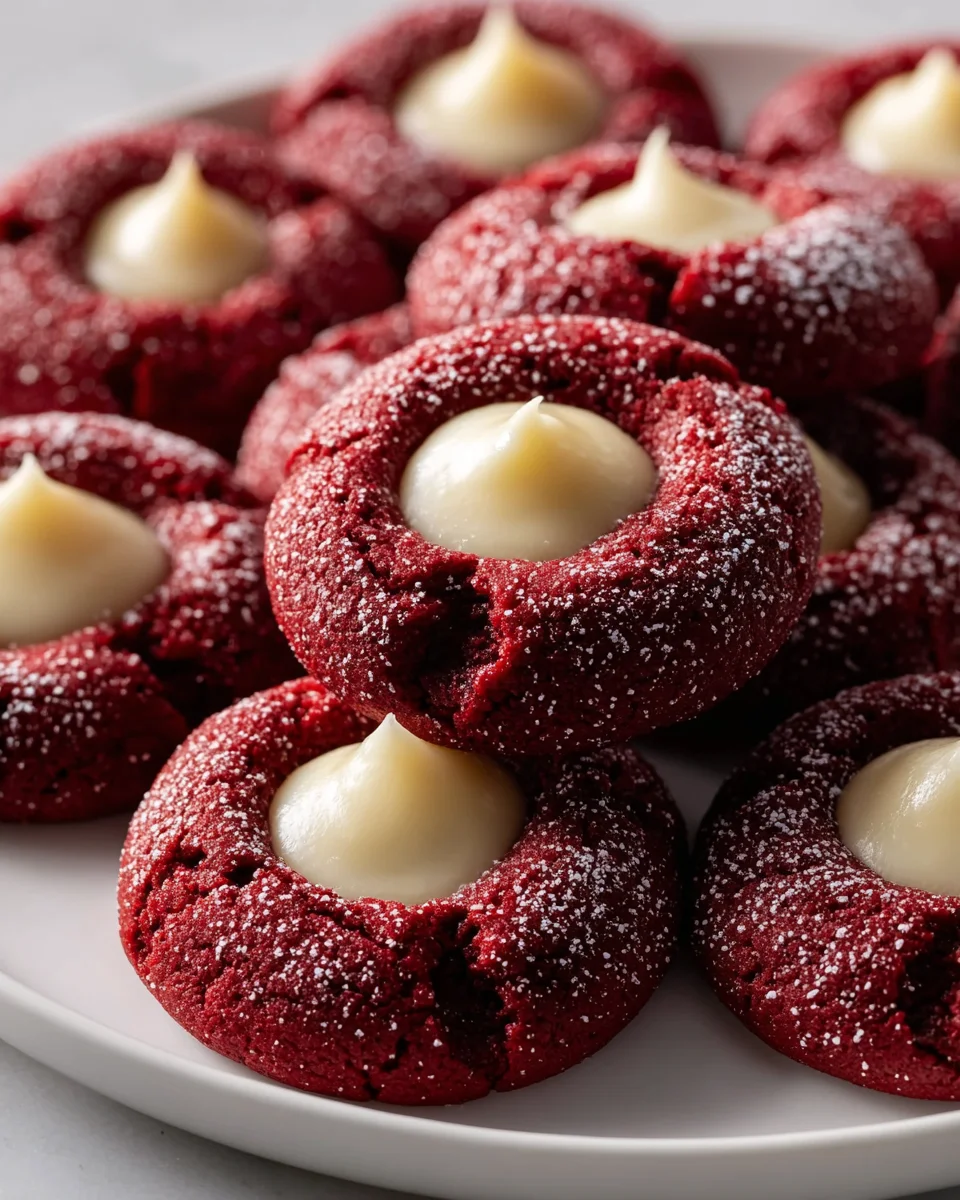
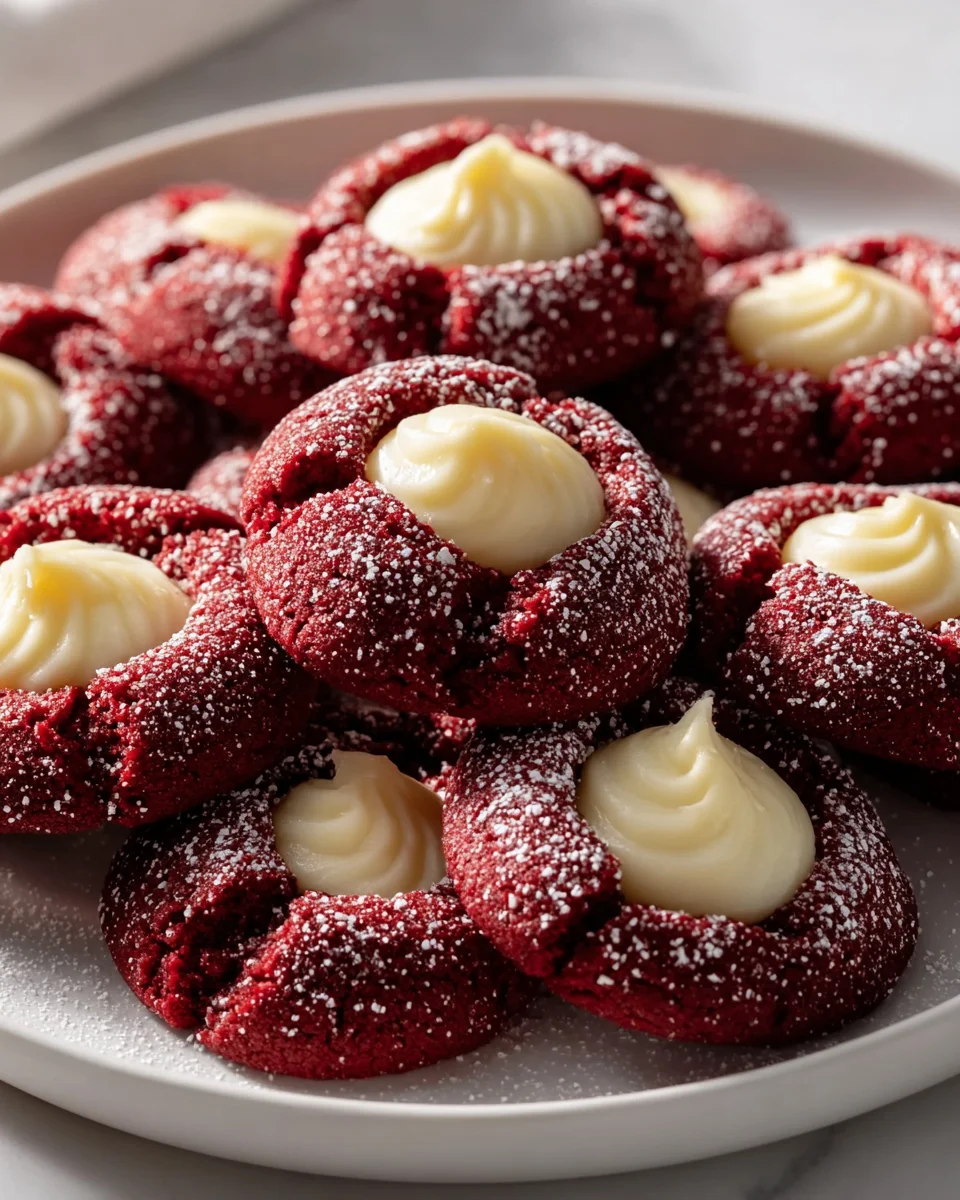
Oh, let me tell you about these Mouthwatering Red Velvet Cream Cheese Thumbprint Cookies! If you’re looking for a cookie that is not only delicious but also a showstopper at any gathering, you’ve found it right here. These cookies are a delightful twist on the classic red velvet cake, combining the rich, velvety flavor of red velvet with the creamy tanginess of cream cheese filling. Trust me, your taste buds are in for a treat!
What makes this recipe truly special is the perfect balance of flavors and textures. The soft, chewy cookie base boasts that iconic red hue, while the luscious cream cheese filling adds a burst of creamy goodness in every bite. Whether you’re baking for a special occasion or simply indulging in a sweet afternoon pick-me-up, these thumbprint cookies will have everyone coming back for seconds (or thirds!). Plus, the vibrant color makes them perfect for festive celebrations, making them not just delicious but visually stunning as well.
So, grab your apron and let’s dive into the world of these irresistible treats! I promise you’ll love every moment of baking—and eating—these scrumptious cookies.
Ingredient Notes
When making my Mouthwatering Red Velvet Cream Cheese Thumbprint Cookies, there are a few key ingredients that truly shine. Let’s break them down:
- All-purpose flour: This is the base of our cookies. If you’re looking for a gluten-free option, you can substitute with a 1:1 gluten-free flour blend.
- Cocoa powder: A small amount of unsweetened cocoa powder gives the cookies their signature red velvet flavor. Make sure to use high-quality cocoa for the best taste.
- Granulated sugar: This adds sweetness. You can replace some of it with brown sugar for a deeper flavor.
- Unsalted butter: Softened butter is crucial for the texture. If you’re dairy-free, consider using vegan butter.
- Egg: This helps bind the ingredients together. For a vegan option, you can use applesauce or a flax egg (1 tablespoon ground flaxseed mixed with 3 tablespoons water).
- Red food coloring: To achieve that vibrant red color, use gel food coloring for the best results, as it won’t alter the cookie’s consistency.
- Cream cheese: The star of the thumbprint filling! Use full-fat cream cheese for a rich and creamy texture. If you need a dairy-free option, look for vegan cream cheese alternatives.
- Vanilla extract: This enhances all the flavors. Feel free to substitute with almond extract for a different twist.
Step-by-Step Instructions
Now that we have our ingredients ready, let’s dive into making these delightful cookies:
- Preheat your oven: Start by preheating your oven to 350°F (175°C) and line a baking sheet with parchment paper.
- Mix the dry ingredients: In a bowl, whisk together 2 cups of all-purpose flour, 2 tablespoons of cocoa powder, and 1 teaspoon of baking soda. Set this aside.
- Cream the butter and sugar: In a large mixing bowl, beat together ½ cup of softened unsalted butter and 1 cup of granulated sugar until light and fluffy.
- Add the egg and flavorings: Incorporate 1 large egg, 1 teaspoon of vanilla extract, and 1 tablespoon of red food coloring into the butter-sugar mixture. Mix until fully combined.
- Combine wet and dry ingredients: Gradually add the dry mixture to the wet ingredients, mixing just until combined. Be careful not to overmix!
- Shape the cookies: Using a tablespoon, scoop the dough and roll it into balls. Place them on the prepared baking sheet, leaving space in between.
- Create the thumbprint: Using your thumb or the back of a teaspoon, gently press down in the center of each dough ball to create an indentation.
- Prepare the cream cheese filling: In a separate bowl, beat together 4 ounces of cream cheese, ½ cup of powdered sugar, and ½ teaspoon of vanilla extract until smooth.
- Fill the cookies: Spoon or pipe the cream cheese mixture into each thumbprint indentation, filling them generously.
- Bake: Place the cookies in the preheated oven and bake for 12-15 minutes, or until they are set and slightly firm to the touch.
- Cool: Allow the cookies to cool on the baking sheet for a few minutes before transferring them to a wire rack to cool completely.
Tips & Suggestions
Here are some of my favorite tips to ensure your Mouthwatering Red Velvet Cream Cheese Thumbprint Cookies turn out perfectly:
- Chill the dough: If the dough feels too soft to handle, consider chilling it for about 30 minutes. This makes shaping the cookies easier.
- Don’t skip the cream cheese filling: It’s what makes these cookies truly special! Feel free to experiment by adding a sprinkle of lemon zest to the cream cheese mixture for a citrusy twist.
- Decorate: After cooling, drizzle some melted white chocolate over the cookies for an extra touch of sweetness and visual appeal.
- Batch baking: These cookies freeze well! You can freeze the unbaked dough balls and bake them directly from the freezer when you’re ready for a fresh batch.
Storage
To store your Mouthwatering Red Velvet Cream Cheese Thumbprint Cookies, follow these tips:
- At room temperature: Keep the cookies in an airtight container for up to 5 days. They’re best enjoyed fresh but will stay delicious for a few days.
- Refrigeration: If you want to extend their shelf life, store them in the fridge for up to a week. The cream cheese filling will keep them moist.
- Freezing: For longer storage, you can freeze the cookies in a single layer, then transfer them to a freezer-safe container. They can last for up to 3 months. Thaw them at room temperature before serving.
Enjoy baking and indulging in these Mouthwatering Red Velvet Cream Cheese Thumbprint Cookies!
Final Thoughts
If you’re looking to impress your family and friends with a delightful treat, then these Mouthwatering Red Velvet Cream Cheese Thumbprint Cookies are a must-try! From their vibrant red hue to the luscious cream cheese filling, each bite is a perfect blend of flavors and textures that will leave everyone craving more. The combination of a soft cookie base and the rich cream cheese center creates a truly unforgettable experience. Plus, they’re perfect for any occasion, whether it’s a holiday gathering or a cozy night in. So go ahead, whip up a batch of these irresistible cookies, and enjoy the joy they bring to every gathering!
Mouthwatering Red Velvet Cream Cheese Thumbprint Cookies Recipe

These Mouthwatering Red Velvet Cream Cheese Thumbprint Cookies are a delightful twist on the classic red velvet cake, featuring a rich cookie base and creamy cream cheese filling. Perfect for any gathering, they are both delicious and visually stunning!
- Prep Time: 15 mins
- Cook Time: 15 mins
- Total Time: 30 minutes
- Yield: 24 cookies 1x
- Category: Dessert
- Method: Baking
- Cuisine: American
Ingredients
- 2 cups all-purpose flour
- 2 tablespoons cocoa powder
- 1 teaspoon baking soda
- ½ cup unsalted butter, softened
- 1 cup granulated sugar
- 1 large egg
- 1 teaspoon vanilla extract
- 1 tablespoon red food coloring
- 4 ounces cream cheese
- ½ cup powdered sugar
- ½ teaspoon vanilla extract
Instructions
- Preheat your oven to 350°F (175°C) and line a baking sheet with parchment paper.
- In a bowl, whisk together 2 cups of all-purpose flour, 2 tablespoons of cocoa powder, and 1 teaspoon of baking soda. Set this aside.
- In a large mixing bowl, beat together ½ cup of softened unsalted butter and 1 cup of granulated sugar until light and fluffy.
- Incorporate 1 large egg, 1 teaspoon of vanilla extract, and 1 tablespoon of red food coloring into the butter-sugar mixture. Mix until fully combined.
- Gradually add the dry mixture to the wet ingredients, mixing just until combined. Be careful not to overmix!
- Using a tablespoon, scoop the dough and roll it into balls. Place them on the prepared baking sheet, leaving space in between.
- Using your thumb or the back of a teaspoon, gently press down in the center of each dough ball to create an indentation.
- In a separate bowl, beat together 4 ounces of cream cheese, ½ cup of powdered sugar, and ½ teaspoon of vanilla extract until smooth.
- Spoon or pipe the cream cheese mixture into each thumbprint indentation, filling them generously.
- Place the cookies in the preheated oven and bake for 12-15 minutes, or until they are set and slightly firm to the touch.
- Allow the cookies to cool on the baking sheet for a few minutes before transferring them to a wire rack to cool completely.
Nutrition
- Serving Size: 1 cookie
- Calories: 150
- Sugar: 10 g
- Sodium: 100 mg
- Fat: 7 g
- Saturated Fat: 4 g
- Unsaturated Fat: 2 g
- Trans Fat: 0 g
- Carbohydrates: 20 g
- Fiber: 1 g
- Protein: 2 g
- Cholesterol: 30 mg
Keywords: Chill the dough for about 30 minutes if it's too soft to handle. Don't skip the cream cheese filling; consider adding lemon zest for a citrusy twist. Decorate with melted white chocolate for extra sweetness.
Leave a Comment