
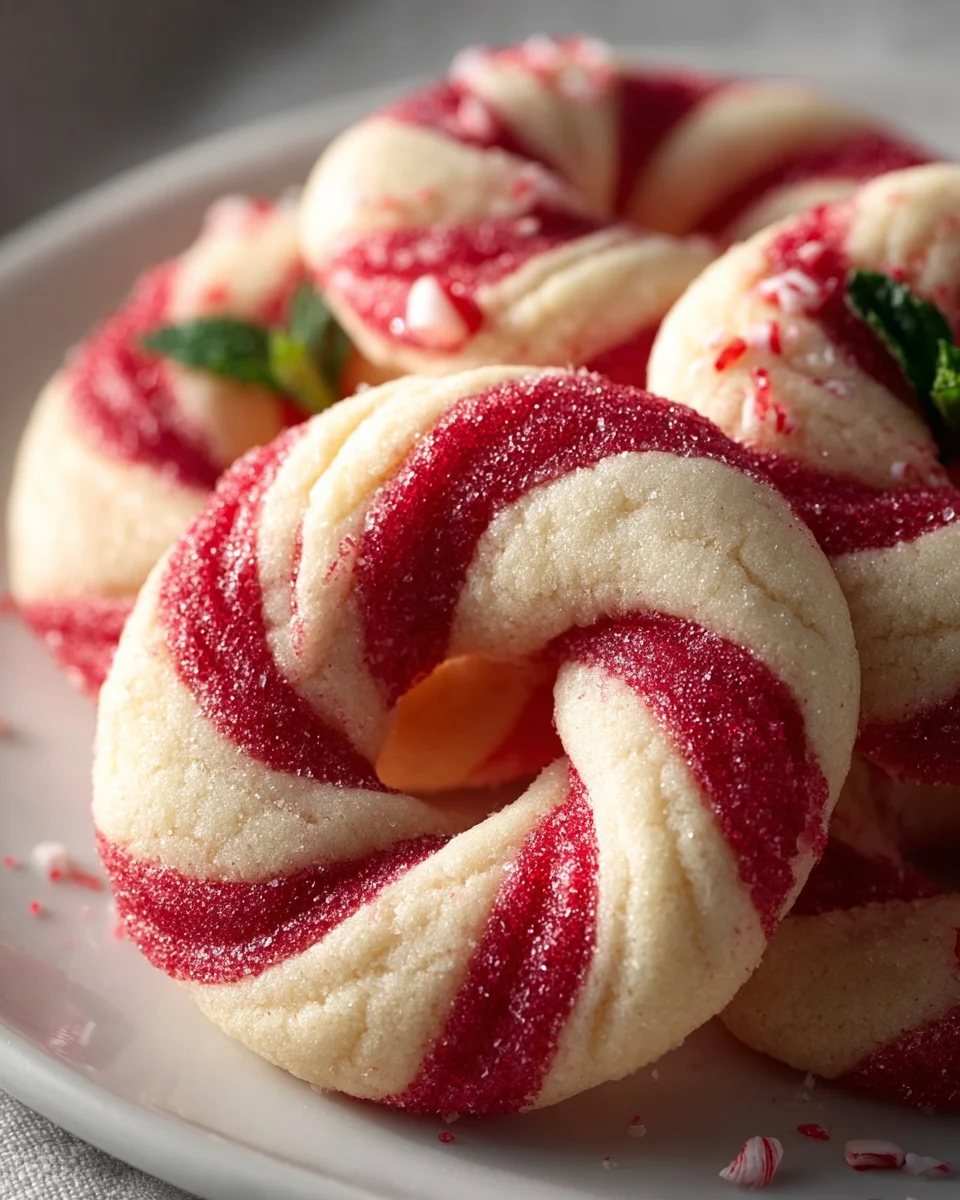
Magic Of Candy Cane Cookies – isn’t there something utterly enchanting about these festive treats? As the holiday season approaches, I find myself eagerly anticipating the delightful aroma of peppermint and vanilla filling my kitchen, a sure sign that it’s time to bake these iconic beauties. There’s a wonderful tradition behind the candy cane itself, dating back centuries and often associated with Christmas joy and giving. This classic cookie perfectly embodies that spirit, translating the beloved striped confection into a tender, buttery biscuit that’s as delightful to look at as it is to eat.
People absolutely adore these cookies for countless reasons. Beyond their strikingly beautiful red and white swirl, which instantly evokes childhood memories and festive cheer, it’s their irresistible flavor and texture that truly captivate. Imagine a soft, melt-in-your-mouth cookie, infused with just the right amount of refreshing peppermint, balanced by a hint of sweet vanilla. They are a true holiday staple, a labor of love that brings smiles to every face and a wonderful sense of nostalgia. Preparing them is a joy in itself, from the vibrant colored dough to the intricate twisting that creates their signature look. You’ll quickly understand the sheer Magic Of Candy Cane Cookies once you experience the joy of baking and sharing them with loved ones. I promise, they’re simply irresistible!
Ingredients:
Get ready to embark on a delightful baking journey! Here are the essential ingredients you’ll need to create the truly magical Magic Of Candy Cane Cookies. Using high-quality ingredients truly makes a difference in both flavor and texture, so I always recommend opting for the best you can find.
- 1 cup (2 sticks or 226g) Unsalted Butter: Make sure this is softened to room temperature. This is absolutely crucial for proper creaming with the sugar, leading to a light and fluffy dough. If your butter is too cold, it won’t cream properly; if it’s melted, your cookies will spread too much.
- 1 ½ cups (300g) Granulated Sugar: This provides the perfect sweetness and contributes to the cookie’s tender texture. Don’t skimp on the sugar; it’s a key structural component.
- 1 large Egg: Also at room temperature. A room temperature egg emulsifies better with the butter and sugar mixture, resulting in a smoother, more uniform dough.
- 1 teaspoon Pure Vanilla Extract: Vanilla adds a foundational warmth and depth of flavor that complements the vibrant peppermint beautifully. I love using pure extract for the best taste.
- 1 teaspoon Peppermint Extract: This is the star flavor of our Magic Of Candy Cane Cookies! Ensure you use a good quality peppermint extract, not spearmint. The intensity can vary, so you might adjust slightly to your preference, but 1 teaspoon is a great starting point for that classic holiday zing.
- 3 cups (360g) All-Purpose Flour: Sifted, if possible, to prevent lumps. Flour provides the structure for our cookies. Measuring correctly is important; either weigh it or use the spoon-and-level method (spoon flour into a measuring cup, then level off with a straight edge) to avoid compacting it.
- 1 teaspoon Baking Powder: This leavening agent helps the cookies rise ever so slightly, giving them a tender crumb without making them cakey.
- ½ teaspoon Salt: A little bit of salt brings out all the other flavors, balancing the sweetness and enhancing the peppermint notes. Don’t skip it!
- 1 teaspoon Red Gel Food Coloring: Gel food coloring is vastly superior to liquid drops for achieving vibrant, deep colors without adding too much moisture to your dough. You’ll want a rich red to create that striking contrast with the white dough.
- ½ cup Crushed Candy Canes (optional): For garnish. This adds an extra layer of peppermint flavor, a delightful crunch, and truly enhances the festive aesthetic of our Magic Of Candy Cane Cookies. You can crush them in a food processor or by placing them in a Ziploc bag and smashing with a rolling pin.
Creating the Dough: The Foundation of the Magic Of Candy Cane Cookies
This is where the magic truly begins! Crafting the perfect dough is the first step to ensuring your Magic Of Candy Cane Cookies are not only beautiful but also incredibly delicious. Pay close attention to these initial stages; they lay the groundwork for everything that follows.
- Creaming the Butter and Sugar: In the bowl of a stand mixer fitted with the paddle attachment (or using a large bowl and a hand mixer), combine your softened unsalted butter and granulated sugar. Beat on medium speed for about 3-5 minutes. You’re looking for a transformation here: the mixture should become incredibly light, fluffy, and pale in color. This process incorporates air into the butter, which contributes to the cookies’ tender texture. Don’t rush this step! It’s crucial for the overall success of your cookies. Make sure to stop and scrape down the sides and bottom of the bowl frequently with a rubber spatula to ensure everything is evenly combined. We want every speck of sugar to be incorporated into that glorious butter mixture.
- Incorporating the Wet Ingredients: Once your butter and sugar mixture is light and airy, crack in the large, room-temperature egg. Mix on medium speed until it’s just combined, about 30 seconds. Be careful not to overmix at this stage. Next, add your pure vanilla extract and, importantly, the peppermint extract. Mix again until everything is fully incorporated. The aroma of peppermint should now be filling your kitchen – isn’t that just the best? Again, scrape down the sides of the bowl to ensure all these lovely wet ingredients are fully integrated.
- Whisking the Dry Ingredients: In a separate medium-sized bowl, whisk together your all-purpose flour, baking powder, and salt. Whisking these dry ingredients together thoroughly before adding them to the wet mixture ensures that the leavening and salt are evenly distributed throughout the dough. This prevents pockets of unmixed ingredients and helps achieve a uniform texture in your baked cookies. This little step takes only a moment but makes a big difference.
- Combining Wet and Dry: With your mixer on low speed, gradually add the dry ingredient mixture to the wet ingredients, a third at a time. Mix only until just combined and a soft, cohesive dough forms. As soon as you see no more streaks of dry flour, stop the mixer. It’s absolutely vital not to overmix the dough! Overmixing develops the gluten in the flour too much, which can lead to tough, chewy cookies instead of the tender, melt-in-your-mouth texture we’re aiming for with these Magic Of Candy Cane Cookies. A perfectly mixed dough will be soft and slightly crumbly but will come together when gently pressed.
- Dividing and Coloring the Dough: Now for the fun part that truly brings out the festive spirit! Carefully divide the dough in half. I usually eyeball it, but if you want precision, you can weigh it for two perfectly equal portions. Leave one half as is for your white dough. To the other half, add 1 teaspoon of red gel food coloring. I prefer gel coloring because it’s highly concentrated and won’t thin out your dough. Gently knead the red food coloring into the dough by hand until the color is vibrant and uniform. This might take a few minutes of patient kneading. You’ll want a rich, deep red for a striking candy cane effect. If you find the color isn’t intense enough, add a tiny bit more gel coloring and continue kneading.
- Chilling the Dough: Shape each colored dough ball (white and red) into a flat disc. Wrap each disc tightly in plastic wrap. Transfer both discs to the refrigerator and chill for at least 1 hour, or up to 2-3 days. Chilling the dough is a non-negotiable step for these cookies. Why is this so important? It firms up the butter in the dough, which prevents the cookies from spreading too much in the oven, helping them maintain their distinctive candy cane shape. It also makes the dough much easier to handle, preventing stickiness during the shaping process. This waiting period is perfect for tidying up your kitchen or anticipating the deliciousness to come!
Shaping and Twisting: Unleashing the Candy Cane Charm
This is where your artistic side comes out! The shaping process is what gives the Magic Of Candy Cane Cookies their iconic look. It might seem a little intimidating at first, but with a bit of patience and practice, you’ll be creating perfectly swirled masterpieces in no time. I find this part incredibly satisfying as the cookies start to take their festive form.
- Prepare Your Workspace and Preheat: While your dough is chilling, line several baking sheets with parchment paper or silicone baking mats. This ensures your cookies won’t stick and makes for easier cleanup. When you’re ready to start shaping, preheat your oven to 375°F (190°C). It’s always good practice to have your oven at the correct temperature before the cookies go in, ensuring even baking from the start. Lightly dust your countertop or work surface with a small amount of flour. Not too much, just enough to prevent sticking.
- Rolling Out Dough Ropes: Remove one disc of white dough and one disc of red dough from the refrigerator. You’ll want to work with small portions of dough at a time to keep the rest chilled. Take a small piece of the white dough, roughly 1 tablespoon in size. Roll it between your palms and then on your lightly floured surface into a thin rope, about 6 inches long and ¼ inch thick. Try to keep the rope as uniform in thickness as possible, as this will ensure even baking and a beautiful swirl. Repeat this process with a piece of the red dough, aiming for the same length and thickness. Consistency is key here for the best visual appeal of your Magic Of Candy Cane Cookies.
- Twisting the Ropes Together: Once you have one white rope and one red rope of similar size, lay them side by side on your work surface. Gently pinch one end of both ropes together to join them securely. Now, carefully twist the two ropes around each other, working from the pinched end down to the other end. As you twist, apply gentle pressure to encourage them to adhere to each other without breaking. You want a nice, even twist that showcases both colors prominently. If the dough starts to crack, you might be twisting too tightly or your dough is too cold. Let it warm up for a minute or two, or try to roll it a bit more gently.
- Shaping into Candy Canes: After you’ve twisted the two ropes together, you’ll have a beautiful, striped piece of dough. Carefully transfer this twisted rope to your prepared baking sheet. Once on the sheet, gently bend the top portion down to form the classic curved hook shape of a candy cane. Take your time to get the shape just right; a gentle curve is usually best. Press the ends down slightly onto the parchment paper to ensure they don’t unravel during baking. Space the cookies about 1-2 inches apart on the baking sheet to allow for slight spreading. Continue this process with the remaining dough, rolling, twisting, and shaping until all your incredible Magic Of Candy Cane Cookies are ready for the oven.
- Optional Garnish: Crushed Candy Canes: For an extra layer of festive charm and peppermint punch, you can lightly sprinkle some crushed candy canes over the shaped cookies before baking. Gently press the crushed candy canes onto the dough with your fingertips to help them adhere. This step adds not only texture and flavor but also makes them look even more authentic and irresistible! The crushed candy canes will melt slightly and crystalize beautifully, creating a stunning finish. If you’re a true peppermint lover, I highly recommend this addition!
Baking Perfection: Bringing the Magic Of Candy Cane Cookies to Life
You’ve done all the hard work, and now it’s time for the oven to transform your carefully crafted dough into exquisite Magic Of Candy Cane Cookies. Baking is a precise science, but don’t worry, I’ll guide you through it to ensure you get perfect results every time.
- Preheat Oven and Prepare for Baking: As mentioned before, ensure your oven is fully preheated to 375°F (190°C). Having the oven at the correct temperature from the moment the cookies enter is crucial for proper rising and setting. Place your baking sheets, filled with the beautifully shaped candy cane cookies, into the preheated oven. If you have multiple sheets, bake one sheet at a time, or rotate them halfway through if your oven tends to have hot spots, to ensure even baking. I find single-sheet baking often yields the most consistent results.
- Bake the Cookies: Bake for 8-10 minutes. The baking time can vary slightly depending on your oven and the thickness of your cookies, so keep a close eye on them. You’ll know they’re ready when the edges are just barely set and very lightly golden. The centers might still look a little soft, but that’s perfectly fine; they will firm up as they cool. It’s crucial not to overbake these cookies! Overbaking will result in dry, crumbly cookies, and we want them to be tender and delightful. They won’t brown significantly due to the nature of sugar cookies and the food coloring, so primarily look for those slightly set edges. The vivid red and white swirls should retain their beautiful contrast.
- Initial Cooling on the Baking Sheet: Once baked, carefully remove the baking sheets from the oven. Allow the Magic Of Candy Cane Cookies to cool on the hot baking sheets for about 5 minutes. This initial cooling period on the warm sheet helps the cookies to set up properly without breaking, as they are quite delicate when first out of the oven. It allows their structure to firm up, making them much easier to handle. Resisting the urge to move them immediately can be hard when your kitchen smells this good, but it’s a vital step for cookie integrity!
- Transfer to a Wire Rack for Complete Cooling: After their brief rest on the baking sheet, carefully transfer the cooled cookies to a wire cooling rack to cool completely. Using a thin, wide spatula is best for this delicate task. Allowing them to cool completely on a wire rack ensures that air circulates all around the cookies, preventing them from becoming soggy on the bottom from residual heat. This also helps them achieve that perfect crisp-tender texture that we all adore. Patience is a virtue here! You’ll want them fully cooled before stacking or storing to prevent sticking and maintain their gorgeous appearance.
Storage and Serving Suggestions: Prolonging the Magic Of Candy Cane Cookies
Now that you’ve successfully brought these enchanting Magic Of Candy Cane Cookies to life, let’s talk about how to keep them fresh and how to best enjoy them. Whether you’re planning to share them, keep them for yourself (no judgment here!), or make them ahead of time, proper storage is key to maintaining their delightful flavor and texture.
- Ensure Complete Cooling Before Storing: This might sound like a minor detail, but it’s actually incredibly important. Before storing your beautiful Magic Of Candy Cane Cookies, they must be cooled completely to room temperature. Storing warm cookies, even slightly warm, can create condensation inside your storage container. This moisture will make your cookies soft, gummy, and potentially lead to spoilage much faster. Take your time and let them chill out on the wire rack until they are absolutely cool to the touch. This ensures they maintain their crispness and fresh taste.
- Proper Storage Techniques: To keep your Magic Of Candy Cane Cookies at their best, store them in an airtight container at room temperature. A cookie tin or a plastic container with a tight-fitting lid works perfectly. They will stay fresh and delicious for up to 1 week. If you need to stack them, you can place a piece of parchment paper between layers to prevent them from sticking together, especially if you’ve added the crushed candy cane topping. For longer storage, these cookies freeze wonderfully! Arrange the cooled cookies in a single layer on a baking sheet and freeze until solid, about 1-2 hours. Then, transfer them to a freezer-safe airtight container or heavy-duty freezer bag. They can be frozen for up to 2-3 months. When you’re ready to enjoy them, simply thaw them at room temperature for a few hours. This is a fantastic way to get a head start on your holiday baking!
- Serving Suggestions and Enjoyment: These Magic Of Candy Cane Cookies are truly a delight on their own, a perfect embodiment of holiday cheer and flavor. They are wonderful served with a warm cup of coffee, hot cocoa, or a glass of cold milk. Imagine cozying up by the fireplace with one of these beauties! They also make a stunning addition to any holiday dessert platter, adding a festive pop of color and that irresistible peppermint aroma. If you’re giving them as gifts, arrange them artfully in a festive box or bag, perhaps tied with a ribbon. Sharing the Magic Of Candy Cane Cookies with friends and family is one of the greatest joys of the holiday season! They’re always a conversation starter and bring smiles wherever they go. Enjoy every single bite of your homemade, enchanting creations!
Conclusion:
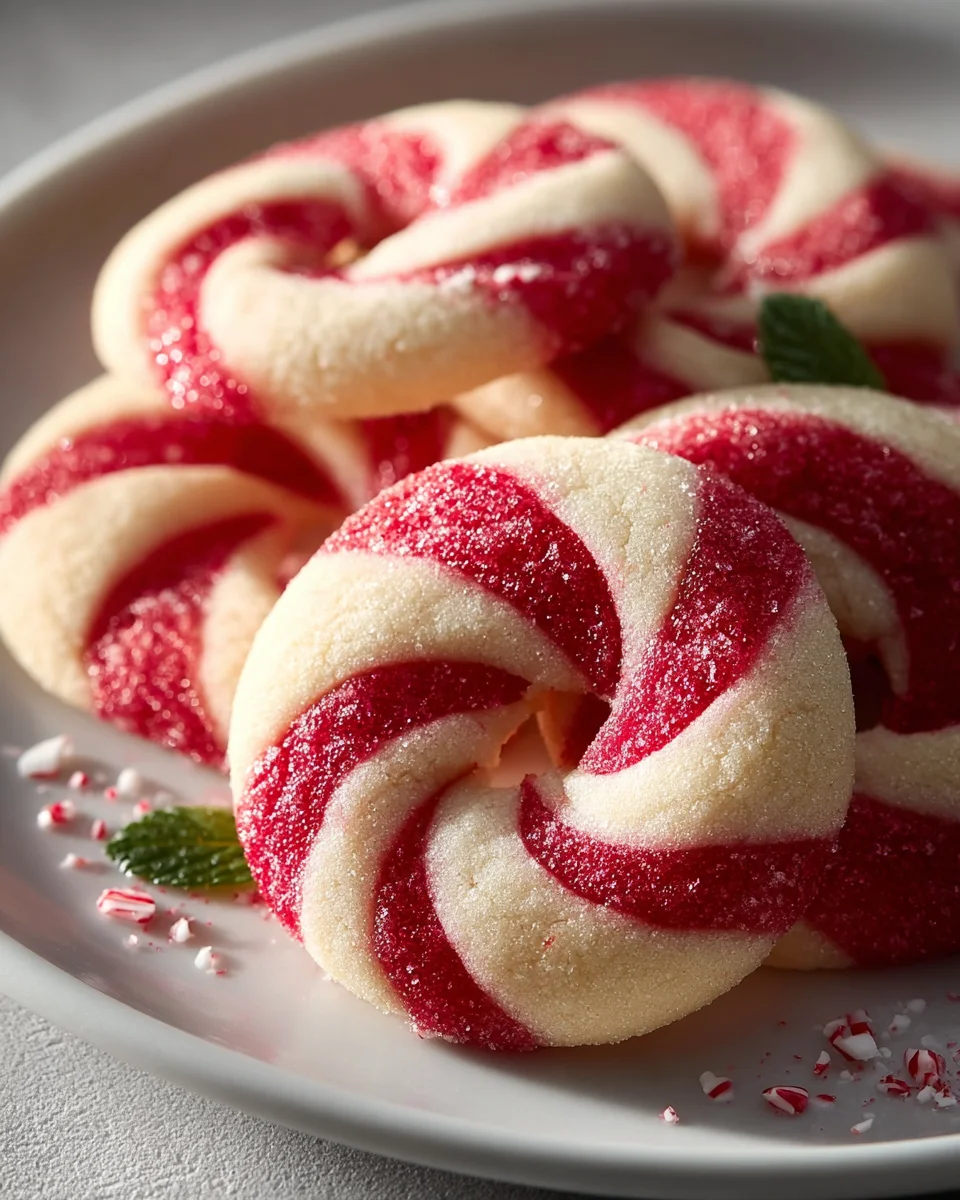
As we wrap up our journey through this delightful recipe, I truly hope you’re feeling as inspired and excited as I am about the prospect of bringing these beautiful treats to life in your own kitchen. We’ve explored every nuanced step, from mixing the vibrant dough to expertly shaping those iconic stripes, and now it’s time to reflect on why these aren’t just any cookies—they are, without a doubt, a must-try for anyone who loves baking, festive cheer, or simply enjoys a moment of sweet indulgence. What makes this recipe so uniquely compelling is its perfect blend of visual artistry and irresistible flavor. Each cookie is a miniature masterpiece, a swirl of festive color that promises to capture hearts even before the first bite. The crisp, buttery texture gives way to that wonderfully familiar, cool peppermint burst, a sensation that perfectly embodies the spirit of the holiday season.
I genuinely believe that the act of baking these cookies is an experience in itself, a delightful escape into a world of flour, sugar, and pure joy. There’s something inherently therapeutic about working with the dough, carefully twisting the red and white strands, and watching them transform into perfect candy canes in the oven. It’s a process that yields not just delicious treats, but also cherished memories and a wonderful sense of accomplishment. The aroma that will waft through your home as they bake is utterly intoxicating, a warm and comforting scent that instantly conjures images of cozy evenings and happy gatherings. These aren’t just a snack; they’re an edible celebration, a centerpiece for joy, and an easy way to spread happiness to friends and family. They truly encapsulate the essence of what makes holiday baking so special.
Once your beautiful batch is cooled and ready, the serving possibilities are endless! Imagine them artfully arranged on a festive platter, perhaps alongside a steaming mug of rich hot chocolate topped with whipped cream, or a brisk glass of cold milk. They make an absolutely charming addition to any holiday dessert spread, standing out with their vibrant colors and distinctive shape. For a more sophisticated touch, pair them with an after-dinner coffee or a delicate peppermint tea; the minty notes will beautifully complement the drink. They’re also perfect for cookie exchanges, school parties, or as thoughtful, homemade gifts. Simply stack a few in a clear cellophane bag, tie with a pretty ribbon, and you have a personalized present that’s sure to be adored. Don’t underestimate their power as a simple, delightful treat for a quiet evening at home, perhaps curled up with a good book or watching a favorite holiday movie.
Feeling adventurous? These cookies are incredibly versatile and invite creative experimentation! While the classic peppermint is divine, consider a batch where you swap peppermint extract for pure almond extract for a marzipan-like twist, or even a hint of orange zest in the white dough for a citrusy brightness. You could also experiment with different food colorings – imagine green and white for a whimsical Grinch-themed cookie, or even blue and white for a frosty winter wonderland effect. For an extra touch of decadence, once cooled, drizzle them with melted dark or white chocolate, or dip one end into a bowl of finely crushed peppermints or festive sprinkles before the chocolate sets. Small edible glitter can also add a magical sparkle, making them even more captivating. These little tweaks can elevate the cookies even further and allow you to personalize them to your taste or event theme.
So, now it’s your turn! I wholeheartedly encourage you to roll up your sleeves, preheat your oven, and dive into making these incredible cookies. Don’t hesitate, because the joy of creating something so visually stunning and deliciously satisfying is truly unparalleled. It’s more than just a recipe; it’s an invitation to create, to share, and to bring a little extra sparkle into your home and the lives of those you care about. The process is rewarding, the aroma is divine, and the result is absolutely spectacular. You’ll be so proud to present these elegant, festive treats, and everyone who tries them will undoubtedly be asking for the recipe. There’s a genuine satisfaction in baking something from scratch that looks this impressive yet is so wonderfully accessible.
Once you’ve experienced the pure delight of baking and tasting these, I would absolutely love to hear about it! Please, share your culinary adventures with me. Did you try a unique variation? What serving suggestion did you find most successful? Did your family and friends love them as much as mine do? Take a picture of your beautiful creations and tell me all about your experience. Your feedback and creativity inspire me and others in our baking community. Let’s truly embrace the Magic Of Candy Cane Cookies this season and make memories that are as sweet and lasting as the treats themselves. Happy baking, my friends!
Magic Of Candy Cane Cookies
These enchanting Candy Cane Cookies are a festive holiday staple, translating the beloved striped confection into a tender, buttery biscuit infused with peppermint and vanilla. Their striking red and white swirl and irresistible flavor bring joy and nostalgia to any holiday celebration.
Ingredients
Instructions
Important Information
Nutrition Facts (Per Serving)
It is important to consider this information as approximate and not to use it as definitive health advice.
Allergy Information
Please check ingredients for potential allergens and consult a health professional if in doubt.
Leave a Comment