
Sticky Chicken Bowls Recipe is more than just a meal; it’s a culinary hug in a bowl, a vibrant explosion of flavors that promises to become a firm favorite in your kitchen rotation. There’s something truly magical about perfectly cooked chicken coated in a luscious, sweet, and savory glaze that clings to every morsel, creating an irresistible texture and an unforgettable taste experience. I’m incredibly excited to share with you how to achieve this delightful dish right in your own home.
While the exact origins of the “sticky chicken bowl” as we know it today are relatively modern, combining global comfort food trends with the convenience of bowl meals, its roots are deeply inspired by the rich culinary traditions of Asia. Think of the delectable glazes found in dishes like Japanese teriyaki, Korean gochujang chicken, or classic Chinese sweet and sour preparations. Our version pays homage to these incredible flavors, bringing that much-loved umami depth and finger-licking stickiness to your table in an easy-to-assemble format. This dish isn’t just popular for its incredible taste; people adore its versatility and the sheer convenience it offers, making it perfect for busy weeknights or a satisfying weekend feast. The combination of tender chicken, vibrant vegetables, and that signature glossy sauce makes for a truly satisfying and wholesome meal.
You’ll discover that preparing this Sticky Chicken Bowls Recipe is surprisingly straightforward, yielding a dish that looks and tastes like it came from a gourmet restaurant. The beautiful balance of sweet, savory, and a hint of tang will have everyone asking for seconds. Get ready to impress your family and friends with this absolutely delicious and endlessly customizable meal!

Ingredients:
-
For the Irresistible Sticky Chicken:
- 1.5 pounds boneless, skinless chicken thighs (I find thighs stay juicier and more flavorful, but breast works too!), cut into 1-inch bite-sized pieces
- 2 tablespoons neutral cooking oil (like vegetable, canola, or grapeseed oil)
- 1 teaspoon garlic powder
- 1/2 teaspoon onion powder
- 1/2 teaspoon paprika
- 1/4 teaspoon black pepper
- 1/2 teaspoon salt, or to taste
-
For the Glorious Sticky Sauce:
- 1/2 cup low-sodium soy sauce (I always opt for low-sodium to control the saltiness myself!)
- 1/4 cup honey (the real star for that sticky sweetness!)
- 1/4 cup light brown sugar, packed
- 2 tablespoons rice vinegar (unseasoned is best here)
- 1 tablespoon fresh ginger, peeled and finely grated (don’t skip the fresh ginger, it makes all the difference!)
- 3 cloves garlic, minced (fresh garlic adds so much aromatic depth)
- 1 teaspoon sesame oil (a little goes a long way for that distinct nutty flavor)
- 1 tablespoon cornstarch
- 2 tablespoons cold water (for the cornstarch slurry)
- 1-2 teaspoons Sriracha or chili garlic sauce (optional, for a little kick!)
-
For Assembling Your Perfect Bowls:
- 3-4 cups cooked jasmine or basmati rice (prepare this ahead of time, it makes assembly a breeze!)
- 2 cups broccoli florets, steamed or lightly roasted
- 1 large carrot, julienned or shredded
- 2 green onions, thinly sliced (for garnish and a lovely fresh bite)
- 1 tablespoon toasted sesame seeds (for garnish and a beautiful finish)
Part 1: Preparing and Cooking Your Juicy Chicken
My journey to creating the ultimate Sticky Chicken Bowls Recipe always starts with the chicken itself. The goal is perfectly cooked, tender chicken that’s ready to soak up all that incredible sticky sauce. Trust me, these steps ensure maximum flavor and ideal texture.
-
Prepping the Chicken for Perfection:
First things first, let’s get our chicken ready. Take your 1.5 pounds of boneless, skinless chicken thighs (or breast, if you prefer, but I genuinely believe thighs are superior for this recipe due to their moisture content and richer flavor). Using a sharp knife, carefully cut the chicken into uniform 1-inch bite-sized pieces. Uniformity is key here because it ensures even cooking. Next, and this is a step many people skip but it’s incredibly important, pat the chicken pieces thoroughly dry with paper towels. Why dry the chicken? Excess moisture on the surface of the chicken prevents it from browning effectively in the pan. We want a beautiful golden crust, not steamed chicken!
-
Seasoning the Chicken:
Once your chicken is perfectly dry, transfer it to a medium-sized bowl. Now, let’s season it generously. Sprinkle in the 1 teaspoon of garlic powder, 1/2 teaspoon of onion powder, 1/2 teaspoon of paprika, 1/4 teaspoon of black pepper, and 1/2 teaspoon of salt. Using your hands (or a spoon, but hands are better for even coating!), toss the chicken thoroughly until every piece is beautifully coated with the spices. This initial seasoning is crucial for building layers of flavor in our Sticky Chicken Bowls Recipe before the sauce even comes into play.
-
Searing the Chicken for Golden Goodness:
Now, let’s get cooking! Heat a large skillet or wok over medium-high heat. Add 2 tablespoons of your chosen neutral cooking oil (vegetable, canola, or grapeseed work wonderfully here), swirling it around to coat the bottom of the pan. You’ll know the oil is hot enough when it shimmers and just begins to show the slightest wisps of smoke. Carefully add about half of your seasoned chicken pieces to the hot pan. It is absolutely critical not to overcrowd the pan. If you add too much chicken at once, the temperature of the pan will drop dramatically, causing the chicken to steam instead of sear. We’re aiming for that gorgeous golden-brown crust and a flavorful fond (the delicious browned bits at the bottom of the pan).
Allow the chicken to cook undisturbed for about 3-4 minutes per side. You’ll see a beautiful crust developing. Once one side is golden, flip the pieces and cook for another 3-4 minutes until the other side is also nicely browned and the chicken is cooked through. The internal temperature of chicken should reach 165°F (74°C) to be safe. Don’t worry if it’s not absolutely perfect at this stage, it will finish cooking in the sauce. Once the first batch is done, remove the chicken from the pan and set it aside on a clean plate. Repeat this process with the remaining chicken, adding a little more oil if needed.
Part 2: Crafting the Irresistible Sticky Sauce
Ah, the heart and soul of our Sticky Chicken Bowls Recipe! This sauce is what transforms simple chicken into an unforgettable, glossy, and incredibly flavorful dish. It’s a balance of sweet, savory, and a little tang, with a hint of warmth from ginger and garlic. Making it is surprisingly simple, yet the results are profoundly delicious.
-
Preparing the Sauce Base:
While your chicken is resting, let’s turn our attention to the sauce. In a medium bowl, whisk together the 1/2 cup of low-sodium soy sauce (I always recommend low-sodium so you can adjust the saltiness to your preference), 1/4 cup of honey, 1/4 cup of packed light brown sugar, 2 tablespoons of rice vinegar, and 1 teaspoon of sesame oil. If you enjoy a little heat, now is the time to add 1-2 teaspoons of Sriracha or chili garlic sauce to the mixture. Whisk everything really well until the honey and brown sugar are fully dissolved. This liquid concoction is the flavor backbone of our sticky sauce.
-
Creating the Cornstarch Slurry:
For that perfect sticky, glossy consistency, we need a thickening agent. In a small separate bowl, whisk together 1 tablespoon of cornstarch with 2 tablespoons of cold water until no lumps remain. This is your cornstarch slurry. It’s important to use cold water, as hot water can cause the cornstarch to clump. Set this aside for now, we’ll use it at the very end to magically thicken our sauce.
-
Building the Aromatics in the Pan:
Using the same skillet you cooked the chicken in (don’t clean it yet – those browned bits, or “fond,” at the bottom are packed with flavor!), reduce the heat to medium-low. If there’s a lot of excess oil, you can carefully pour some out, leaving about a tablespoon. Add your 3 cloves of minced garlic and 1 tablespoon of finely grated fresh ginger to the pan. Sauté for about 30-60 seconds, stirring constantly, until they become fragrant. Be careful not to burn the garlic and ginger, as this can make them bitter. We just want to awaken their amazing aromas.
-
Simmering the Sauce to Perfection:
Once the garlic and ginger are fragrant, pour the prepared sauce mixture from step 1 into the skillet. Increase the heat to medium and bring the sauce to a gentle simmer, stirring occasionally. Let it simmer for about 2-3 minutes, allowing the flavors to meld beautifully. You’ll notice the sauce starting to darken slightly and become more aromatic. This simmering time is crucial for developing the depth of flavor that makes this Sticky Chicken Bowls Recipe so utterly satisfying.
-
Achieving the Perfect Sticky Consistency:
Now for the thickening! Give your cornstarch slurry a quick re-whisk, as cornstarch can settle at the bottom. While continuously whisking the simmering sauce in the pan, slowly pour in the cornstarch slurry. Continue to whisk for another 1-2 minutes. You’ll notice almost immediately that the sauce will begin to thicken and become glossy. Keep whisking until it reaches your desired consistency – it should be thick enough to coat the back of a spoon. Don’t over-thicken it initially, as it will continue to thicken slightly as it cools. If it gets too thick, you can always thin it out with a tablespoon or two of hot water or chicken broth.
Part 3: Bringing it All Together: The Ultimate Sticky Chicken
This is where the magic truly happens! We’re taking our perfectly seared chicken and enveloping it in that incredible, glossy, sticky sauce we just made. This step transforms the individual components into a cohesive, unbelievably flavorful dish that is the star of our Sticky Chicken Bowls Recipe.
-
Reuniting Chicken and Sauce:
Once your sauce has reached that beautiful, thick, and glossy consistency, it’s time to bring the chicken back into the fold. Carefully add all the cooked chicken pieces (including any juices that may have accumulated on the plate – that’s extra flavor!) into the skillet with the sticky sauce. Using a spoon or spatula, gently toss the chicken, ensuring every single piece is thoroughly coated in that gorgeous, glistening sauce. You want every nook and cranny of the chicken to be drenched in deliciousness.
-
Allowing the Flavors to Marry:
Once the chicken is coated, continue to gently simmer for another 2-3 minutes, stirring occasionally. This brief simmering time allows the chicken to warm through completely and, more importantly, gives the sauce a chance to really cling and absorb into the surface of the chicken. You’ll notice the sauce becoming even more luscious and truly “sticky” as it reduces slightly and melds with the chicken. This step is crucial for achieving that characteristic sticky glaze that makes this dish so irresistible. I often let it bubble just enough to see that beautiful sheen develop on the chicken.
-
Final Touch and Taste Test:
Before serving, always give it a quick taste! This is your opportunity to adjust any seasonings. Does it need a tiny pinch more salt? A little more Sriracha for an extra kick? Maybe a splash more honey if you like it sweeter? Adjust to your personal preference. Once you’re happy with the flavor, remove the skillet from the heat. Your utterly delicious sticky chicken is now ready to be served!
Part 4: Assembling Your Delicious Sticky Chicken Bowls
The beauty of a bowl meal is in its vibrant presentation and the delightful combination of textures and flavors in every bite. Assembling your Sticky Chicken Bowls Recipe is the final, satisfying step, bringing all your hard work together into a wholesome and incredibly tasty meal.
-
Preparing Your Foundation: Fluffy Rice:
Assuming you’ve prepared your rice beforehand (I love using jasmine rice for its fragrant aroma and fluffy texture, but basmati or even brown rice works wonderfully), now’s the time to scoop it into your serving bowls. Fill each bowl with a generous portion of warm, fluffy rice, creating a comfortable bed for our sticky chicken and vegetables. The rice acts as a perfect neutral base to absorb all the wonderful sauce.
-
Adding Your Vibrant Vegetables:
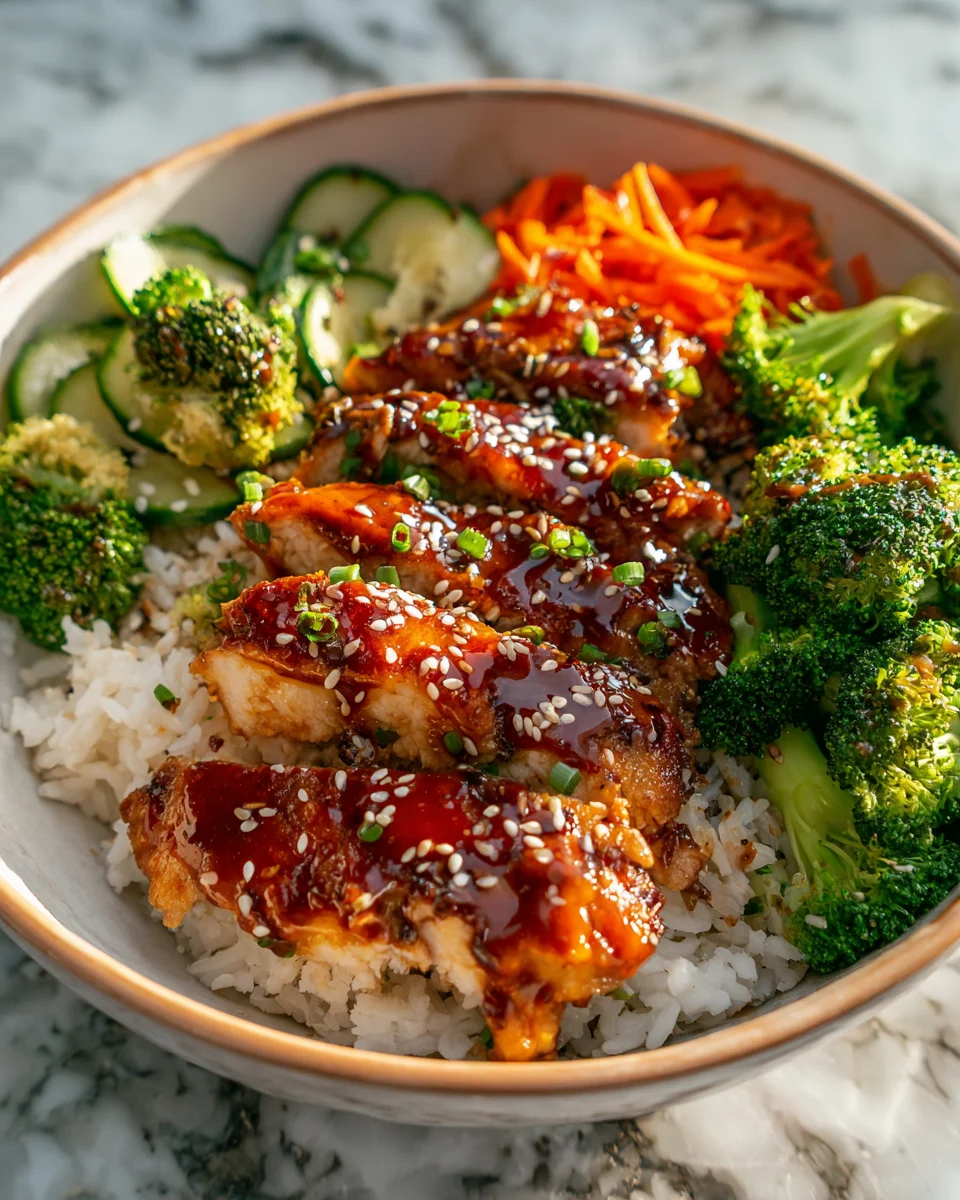
Next, arrange your cooked vegetables alongside the rice. For this recipe, I highly recommend steamed or lightly roasted broccoli florets and julienned or shredded carrots. The vibrant green of the broccoli adds a lovely pop of color and a healthy crunch, while the sweetness of the carrots complements the savory chicken beautifully. You could also add edamame, bell peppers, or snap peas if you wish. Aim for a balanced plate both visually and nutritionally.
-
Crowning Glory: The Sticky Chicken:
Now for the star of the show! Spoon a generous amount of the sticky, glossy chicken over the rice and alongside your vegetables. Make sure to drizzle plenty of that extra sauce from the pan over everything. This is where the “sticky” truly comes alive, coating the rice and mingling with the veggies. The aroma alone will make your mouth water!
-
The Finishing Touches: Garnish for Flavor and Beauty:
To complete your Sticky Chicken Bowls Recipe, add the perfect garnishes. Sprinkle generously with thinly sliced green onions; their fresh, pungent flavor provides a wonderful contrast to the richness of the chicken. Then, sprinkle a tablespoon or so of toasted sesame seeds over the top. The sesame seeds not only add a lovely nutty flavor and texture but also make the bowls look incredibly appealing, just like something you’d get from your favorite takeout spot. These small additions truly elevate the dish.
-
Serve and Savor:
Serve your beautiful Sticky Chicken Bowls immediately while everything is warm and the sauce is at its peak stickiness. Encourage everyone to dig in and enjoy the harmonious blend of flavors and textures. I find that these bowls are fantastic for meal prep too; just store the chicken and rice separately and combine when ready to eat. Reheating gently often brings back that lovely glossiness of the sauce. Enjoy every single delicious bite!
Conclusion:
Well, there you have it! I truly believe this isn’t just another dish; it’s an experience waiting to happen in your kitchen. We’ve journeyed through the simple steps that culminate in a truly spectacular meal, and I can’t wait for you to taste the magic for yourself. What makes this recipe an absolute must-try, in my humble opinion, is the incredible balance of flavors and textures. The chicken, coated in that glorious, thick, and glossy sauce, offers a beautiful caramelized sweetness with just the right hint of savory depth. It’s that irresistible stickiness that makes every bite so utterly satisfying, perfectly clinging to whatever delightful accompaniments you choose. It’s comforting, vibrant, and surprisingly straightforward to achieve, transforming everyday ingredients into something truly special that will undoubtedly impress anyone at your table, including yourself! I’ve lost count of how many times friends and family have asked for this recipe after their first taste; it’s genuinely that good, a real crowd-pleaser that delivers on flavor without demanding hours of your time.
Now, let’s talk about making this meal truly your own. While the core recipe is fantastic as is, there are so many delightful serving suggestions and variations you can explore to suit your taste or what you have on hand. For a classic presentation, I love serving this chicken over a bed of fluffy jasmine rice or sticky sushi rice, allowing that incredible sauce to soak into every grain. If you’re looking for something lighter, try pairing it with a vibrant quinoa salad or even cauliflower rice. Don’t shy away from adding some fresh, crisp vegetables! Steamed broccoli florets, sautéed snap peas, or a quick stir-fry of bell peppers and carrots can really enhance the meal both nutritionally and visually. A sprinkle of toasted sesame seeds and thinly sliced green onions not only adds a beautiful garnish but also a lovely textural contrast and a burst of fresh flavor. For an extra kick, a drizzle of sriracha or a pinch of red pepper flakes can elevate the heat level, catering to those who love a little fire in their food.
Embrace Your Inner Chef: Customizing Your Sticky Chicken Bowls
And speaking of variations, this recipe is incredibly adaptable! If you’re not a fan of chicken, or simply want to try something new, cubed firm tofu or even large shrimp would work beautifully with this sauce, just adjust the cooking times accordingly. For a vegetarian twist, sautéed mushrooms, bell peppers, and onions tossed in the sauce create an equally compelling dish that’s packed with umami. You could even experiment with different types of sweeteners in the sauce; while honey or brown sugar are my go-to’s, maple syrup or agave nectar could offer a slightly different flavor profile. Consider adding a touch of grated ginger or garlic directly to the sauce for an extra aromatic punch. The beauty of this dish is its versatility; feel free to adjust the spice level, add your favorite vegetables, or even turn it into a wrap by serving the chicken in lettuce cups. The possibilities are truly endless, making this a recipe you’ll return to again and again.
So, what are you waiting for? I wholeheartedly encourage you to roll up your sleeves and give this incredible Sticky Chicken Bowls Recipe a try this week. I promise you won’t regret it! It’s the kind of meal that brings smiles to faces and warmth to the table, perfect for a cozy weeknight dinner or even entertaining guests. Once you’ve experienced the deliciousness, please come back and share your creations and experiences with me. Did you try a new variation? What did your family think? Your feedback and culinary adventures truly inspire me, and I love seeing how you make these recipes your own. Happy cooking, and get ready to fall in love with your new favorite sticky chicken dish!
Sticky Chicken Bowls: Quick & Flavorful Dinner Idea!
Sticky Chicken Bowls Recipe is a culinary hug in a bowl, a vibrant explosion of flavors that promises to become a firm favorite. Featuring perfectly cooked chicken coated in a luscious, sweet, and savory glaze, this dish is inspired by rich Asian culinary traditions, offering umami depth and finger-licking stickiness in an easy-to-assemble format. It’s perfect for busy weeknights or a satisfying weekend feast.
Ingredients
Instructions
Important Information
Nutrition Facts (Per Serving)
It is important to consider this information as approximate and not to use it as definitive health advice.
Allergy Information
Please check ingredients for potential allergens and consult a health professional if in doubt.
Leave a Comment