
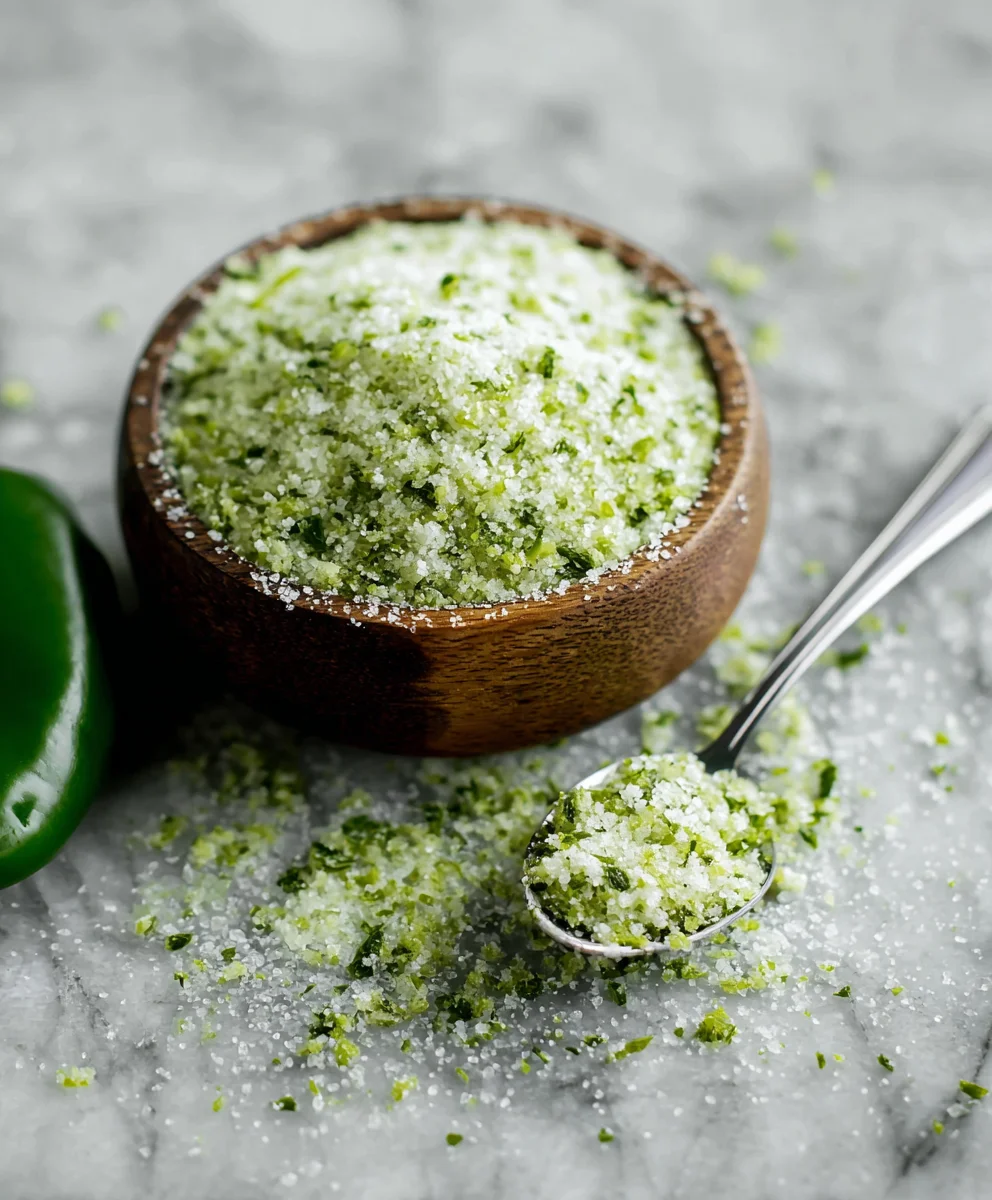
Jalapeno Salt – what a simple yet profoundly transformative ingredient! If you’ve ever wished for a dash of vibrant heat and savory depth to elevate your culinary creations, then you’ve stumbled upon a true kitchen game-changer. I remember the first time I experimented with infusing humble sea salt with the fiery zest of fresh jalapenos; the result was an explosion of flavor that instantly became a staple in my pantry. While the concept of flavored salts has roots in ancient culinary traditions, enhancing everything from roasted meats to fresh vegetables, the modern twist of incorporating this iconic Mexican chili brings a contemporary sizzle. People adore this particular blend for its incredible versatility and the beautiful balance it strikes: a subtle warmth that awakens the palate without overwhelming it, coupled with that essential salty kick. Making your own Jalapeno Salt is surprisingly easy, transforming common ingredients into a gourmet seasoning that promises to inject excitement into every meal. It’s the perfect way to add a sophisticated, spicy edge to everything from grilled corn to rimming a margarita glass.
Ingredients:
- For the Spicy Roasted Chicken:
- 1 whole chicken, about 4-5 pounds (I always opt for a good quality, free-range bird for the best flavor and texture)
- 2 tablespoons olive oil, plus more for drizzling
- 2 teaspoons our incredible Jalapeno Salt (this is where the magic happens, giving us that fantastic spicy kick!)
- 1 teaspoon black pepper, freshly ground
- 1 lemon, halved
- 1 head garlic, cut in half horizontally, revealing the cloves
- A few sprigs of fresh rosemary or thyme (I find these herbs really complement the spice of the Jalapeno Salt beautifully)
- 2 tablespoons unsalted butter, melted (for that beautiful, crispy skin finish)
- For the Creamy Garlic Mashed Potatoes:
- 2 pounds russet potatoes, peeled and cut into 1-inch chunks (russets give us that lovely fluffy texture we’re after)
- 4-6 cloves garlic, peeled and minced (or more, if you’re a garlic lover like me!)
- 1/2 cup whole milk, warmed (or cream, for an extra indulgent treat)
- 1/4 cup unsalted butter, softened
- 1 teaspoon Jalapeno Salt, or to taste (start with less and add more as you go, tasting for that perfect balance)
- 1/2 teaspoon black pepper, freshly ground
- 2 tablespoons fresh chives, finely chopped (for garnish and a lovely oniony counterpoint)
- For the Roasted Asparagus with Jalapeno Salt:
- 1 bunch fresh asparagus, about 1 pound, tough ends trimmed
- 1 tablespoon olive oil
- 1/2 teaspoon Jalapeno Salt, or to taste (just a sprinkle is often enough to brighten these green spears)
- 1/4 teaspoon black pepper, freshly ground
- Optional: Lemon wedges for serving
Phase 1: Preparing Our Star – The Spicy Roasted Chicken
My absolute favorite part of this meal is definitely the chicken, largely thanks to the vibrant kick from our special Jalapeno Salt. It’s truly a game-changer for roasted poultry!
-
Preheat Your Oven and Prep the Pan: First things first, let’s get that oven roaring. Preheat it to 425°F (220°C). While it’s heating, grab a large roasting pan. I like to line mine with foil for easier cleanup, but it’s totally optional. If you have a roasting rack, now’s the time to place it in the pan. This allows for better air circulation and ensures the chicken skin gets beautifully crisp all around.
-
Chicken TLC – Pat It Dry: This step is non-negotiable for crispy skin, folks! Take your whole chicken out of its packaging and remove any giblets from the cavity. Give the chicken a thorough rinse under cold water, both inside and out. Then, and this is crucial, pat it absolutely, positively dry with paper towels. I mean, every nook and cranny. A dry surface is the secret to golden, crackling skin, something we definitely want when working with our incredible Jalapeno Salt seasoning!
-
The Flavor Foundation – Seasoning the Chicken: Now for the fun part! Drizzle the chicken all over with 2 tablespoons of olive oil. Using your hands, rub the oil evenly over the entire surface, making sure it’s coated well. This acts as a binder for our seasonings and helps achieve that gorgeous golden-brown color. Next, sprinkle generously with the Jalapeno Salt and black pepper, both inside the cavity and all over the skin. Don’t be shy here; remember, the Jalapeno Salt is going to infuse so much fantastic flavor. Make sure you rub the seasonings in well, really getting into all the creases. I even like to gently lift the skin over the breast and rub a little seasoning directly onto the meat – it’s a little extra effort that pays off big time in flavor.
-
Aromatic Stuffing for Extra Zest: Take your halved lemon, cut garlic head, and fresh rosemary or thyme sprigs, and tuck them inside the chicken cavity. These aromatics will steam from within, infusing the chicken meat with wonderful, subtle flavors that perfectly complement the bold spice of the Jalapeno Salt on the exterior. It’s a simple trick that adds so much depth.
-
Trussing for Even Cooking (Optional, but Recommended): If you’re comfortable with it, trussing the chicken with kitchen twine will help it cook more evenly and keep its shape nicely. Simply tie the legs together, and if you can, tuck the wing tips under the body. If trussing feels intimidating, don’t worry too much about it; the chicken will still be delicious! Place the prepared chicken breast-side up on your roasting rack in the pan.
-
The Roasting Process: Transfer the chicken to your preheated oven. We’re going to roast it for about 1 hour and 15 minutes to 1 hour and 30 minutes, or until an instant-read thermometer inserted into the thickest part of the thigh (without touching bone) registers 165°F (74°C). After about 45 minutes, I like to gently brush the chicken with the melted butter. This helps enhance that glorious, crispy skin and gives it a beautiful golden sheen. If you notice the skin browning too quickly, you can loosely tent the chicken with aluminum foil. Remember, every oven is a little different, so keep an eye on it!
-
The All-Important Rest: Once the chicken is cooked through, carefully remove it from the oven. This next step is incredibly important for juicy meat: transfer the chicken to a cutting board and tent it loosely with foil. Let it rest for at least 10-15 minutes before carving. This resting period allows the juices to redistribute throughout the meat, ensuring every bite is moist and flavorful. Trust me, it’s worth the wait, especially after all that delicious Jalapeno Salt has worked its magic!
Phase 2: Crafting the Creamy Garlic Mashed Potatoes
No roasted chicken meal is complete without a side of luscious, creamy mashed potatoes, and ours get a fantastic little zing from a touch of our favorite Jalapeno Salt. It elevates them from simple to sublime!
-
Potato Prep: Peel your russet potatoes and cut them into roughly 1-inch chunks. Try to make them as uniform as possible so they cook evenly. Place the potato chunks into a large pot and add your minced garlic. This is a crucial step; cooking the garlic with the potatoes ensures a mellow, integrated garlic flavor rather than a sharp, raw one.
-
Boiling to Perfection: Cover the potatoes and garlic with cold water by about an inch. Add a generous pinch of regular salt (not our Jalapeno Salt yet, we’ll add that later for better control over the final flavor). Bring the water to a boil over high heat, then reduce the heat to medium-low and simmer until the potatoes are fork-tender. This usually takes about 15-20 minutes, depending on the size of your potato chunks. You should be able to easily pierce them with a fork without resistance.
-
Drain and Dry: Once tender, carefully drain the potatoes and garlic very well in a colander. I like to return them to the empty hot pot over low heat for a minute or two, gently shaking the pot. This helps any remaining moisture evaporate, which is key for fluffy, not watery, mashed potatoes. Moisture is the enemy of truly great mash!
-
Mashing and Enriching: Remove the pot from the heat. Add the softened butter, warmed milk (or cream), our fantastic Jalapeno Salt, and freshly ground black pepper. Now, get mashing! You can use a potato masher for a rustic texture, or for a super creamy, smooth mash, a potato ricer is your best friend. I love a ricer; it makes the potatoes incredibly light and airy. Mash until smooth and creamy, being careful not to overmix, as this can make the potatoes gummy. Taste and adjust the seasoning – you might want a little more Jalapeno Salt to bring out that lovely warmth and spice, or a touch more butter for richness. This is your chance to really make them perfect for your palate!
-
Finishing Touch: Stir in the fresh chives right before serving. The vibrant green and delicate onion flavor of the chives add a beautiful freshness that cuts through the richness of the potatoes and complements the subtle heat from the Jalapeno Salt.
Phase 3: Roasting the Vibrant Asparagus Spears
To complete our meal, a simple yet elegant side of roasted asparagus provides a delightful crisp texture and earthy flavor, brightened by our signature Jalapeno Salt.
-
Asparagus Preparation: Start by washing your asparagus thoroughly. The easiest way to trim the tough, woody ends is to snap them off by hand; they’ll naturally break where the tender part begins. Alternatively, you can line up the spears and cut off the bottom inch or so with a knife. Pat them dry with paper towels – just like the chicken, dry surfaces encourage better roasting!
-
Seasoning and Tossing: Lay the trimmed asparagus spears on a baking sheet. Drizzle them with olive oil and then sprinkle generously with our beloved Jalapeno Salt and black pepper. Use your hands to gently toss the asparagus, ensuring each spear is evenly coated with the oil and seasonings. The Jalapeno Salt here isn’t just for heat; it actually enhances the natural sweetness of the asparagus.
-
Roasting for Tenderness and Snap: If your oven is still hot from the chicken (and it probably is!), you can often roast the asparagus alongside it during the last 15-20 minutes of the chicken’s cooking time, or while the chicken is resting. Otherwise, pop them into a 400°F (200°C) oven for about 8-12 minutes. The cooking time will vary depending on the thickness of your asparagus spears. You want them to be tender-crisp, bright green, and slightly caramelized at the tips. Keep an eye on them; nobody likes soggy, overcooked asparagus!
-
Optional Zest: If you like, a squeeze of fresh lemon juice over the hot roasted asparagus before serving can really brighten the flavors and add another layer of acidity that pairs wonderfully with the spice from the Jalapeno Salt. It’s a simple addition that makes a big difference.
Phase 4: Bringing It All Together and Serving Suggestions
Congratulations, you’ve created a truly spectacular meal! Now comes the best part – plating and enjoying the fruits of your labor, especially showcasing that incredible flavor profile enhanced by our hero ingredient, the Jalapeno Salt.
-
Carving the Chicken: Once the rested chicken is ready, carve it carefully. I usually start by removing the legs and thighs, then separating the breast meat from the bone. Arrange the carved chicken pieces on a large serving platter. You can spoon some of the glorious pan juices over the chicken for extra moisture and flavor – those juices are packed with deliciousness from the herbs, lemon, garlic, and of course, the remnants of our wonderful Jalapeno Salt!
-
Plating the Sides: Alongside the chicken, generously spoon out the creamy garlic mashed potatoes. I love a big dollop of mash next to the crispy chicken. Then, artfully arrange the roasted asparagus spears. The contrast in colors and textures is just beautiful.
-
Final Touches: For an extra flourish, you can sprinkle a tiny bit more of our amazing Jalapeno Salt over the chicken and asparagus right before serving. This really brings out that fresh, spicy aroma and provides a final pop of flavor. A few more fresh chives on the potatoes, and perhaps a fresh lemon wedge or two for squeezing over the asparagus, complete the presentation.
-
Enjoying Your Masterpiece: This meal is perfect for a cozy family dinner or impressive enough for guests. The succulent, spicy roasted chicken, the rich and garlicky mashed potatoes with their subtle kick, and the vibrant, tender-crisp asparagus all come together in a symphony of flavors. Each component, especially with the thoughtful application of Jalapeno Salt, sings its own tune while harmonizing beautifully with the rest of the dish. I guarantee your taste buds will thank you for this delightful culinary adventure!
Conclusion:
And there you have it, my friends! We’ve journeyed together through the delightful process of creating something truly magical in your kitchen – a condiment that I believe will utterly transform your culinary landscape. This isn’t just another seasoning; it’s an experience, a flavor booster, and frankly, a game-changer that I find myself reaching for almost daily. If you’ve been on the fence about trying a new homemade staple, let me assure you, this recipe for Jalapeno Salt is not just a must-try, it’s a revelation waiting to happen in your pantry. It brings a vibrant, zesty heat combined with that perfect savory kick that elevates even the simplest of dishes into something extraordinary. The beauty of crafting your own Jalapeno Salt lies not only in its incredible flavor but also in the immense satisfaction of knowing exactly what goes into it, allowing you to tailor the spice level and other nuances to your precise liking. It’s a small effort with a gigantic payoff, delivering a depth of flavor that store-bought alternatives simply cannot match.
One of the aspects I absolutely adore about this homemade gem is its incredible versatility. Seriously, once you have a jar of this fantastic Jalapeno Salt on hand, you’ll start seeing endless possibilities. Let’s talk serving suggestions, because this is where the fun truly begins! Imagine sprinkling it over your morning scrambled eggs, giving them an instant gourmet upgrade. Or how about rimming a glass for a zesty margarita or a bold Bloody Mary? It’s phenomenal on grilled meats, whether it’s a juicy steak, tender chicken, or a perfectly seared piece of fish – a sprinkle before or after cooking really makes those flavors pop. For the snack lovers out there, try dusting it generously over popcorn for a movie night treat you won’t soon forget, or on your homemade sweet potato fries for an irresistible savory-spicy crunch. I’ve also discovered it’s brilliant on roasted vegetables like broccoli, cauliflower, or asparagus, adding a layer of sophisticated warmth. Don’t shy away from experimenting with fruit either; a little pinch on sliced mango or pineapple can create an unexpected and delightful sweet-and-spicy sensation that will surprise your taste buds in the best way possible.
Beyond these classic applications, don’t be afraid to get creative. Stir a teaspoon into a simple guacamole for an extra layer of flavor and heat. Mix it with some melted butter to brush over corn on the cob. Whisk it into your salad dressings or marinades for an instant kick. You can even combine it with a dollop of sour cream or Greek yogurt for a quick and easy dip for chips or veggie sticks. The possibilities truly are as vast as your culinary imagination. As for variations, if you’re feeling adventurous after mastering the basic recipe, consider incorporating other elements. A touch of lime zest can add a wonderful brightness, while a pinch of smoked paprika can introduce a deeper, earthier note. For those who crave even more heat, try adding a few flakes of dried habanero or serrano pepper when you’re preparing your jalapenos. Or perhaps a hint of garlic powder or onion powder for an added layer of umami. The beauty of making your own is that you are the master chef, dictating every nuance of flavor.
I truly hope this recipe inspires you to dive into the world of homemade condiments. There’s a profound satisfaction that comes from creating something so potent and delicious with your own hands. So, please, gather your ingredients, set aside a little time, and embark on this flavorful journey. You won’t regret it. Once you’ve whipped up your very own batch of this incredible Jalapeno Salt, I would absolutely love to hear about your experience! What did you use it on first? Did you try any exciting variations? Did it become a new staple in your kitchen? Share your triumphs, your tips, and even your funny kitchen anecdotes in the comments below or tag me on social media. Your feedback and creativity inspire not just me, but our entire community of food lovers. Let’s celebrate the joy of good food together, one perfectly seasoned dish at a time. Happy cooking!
FAQs:
What is Jalapeno Salt used for?
Jalapeno Salt is incredibly versatile! It’s fantastic for seasoning grilled meats, poultry, and fish, giving them a spicy, savory kick. It’s also excellent on eggs, avocado toast, roasted vegetables, and popcorn. Many people love to use it to rim glasses for margaritas or Bloody Marys, or to sprinkle on fruit like mango or pineapple for a unique sweet and spicy treat. Don’t hesitate to experiment!
Is homemade Jalapeno Salt very spicy?
The spice level of homemade Jalapeno Salt can be adjusted to your preference. Our recipe aims for a balanced, vibrant heat that enhances flavor without overwhelming it. If you prefer less heat, you can remove more of the seeds and membranes from the jalapenos before drying. For an extra fiery version, leave more seeds in, or even add a small amount of a hotter chili like serrano or habanero flakes during the blending process.
How long does homemade Jalapeno Salt last?
When stored properly in an airtight container in a cool, dark place, homemade Jalapeno Salt can last for a significant period, typically 6 months to a year, or even longer. The key is to ensure your jalapenos are thoroughly dried before blending to prevent any moisture that could lead to clumping or spoilage. Always check for any signs of moisture or off-smells if it’s been stored for a very long time.
Can I use fresh jalapenos to make Jalapeno Salt?
While our primary recipe focuses on using dried jalapenos (either store-bought or home-dried from fresh), you absolutely can start with fresh jalapenos! The process involves thinly slicing or mincing fresh jalapenos and then thoroughly dehydrating them in a food dehydrator or a very low oven until they are completely crisp and brittle. Once fully dried, they can then be processed into Jalapeno Salt following the recipe’s blending steps. Ensuring they are bone-dry is critical for shelf stability.
What other variations can I make with my Jalapeno Salt?
The beauty of making your own Jalapeno Salt is the freedom to customize! You can introduce other flavors during the blending process. Consider adding:
- Citrus Zest: Dried lime or orange zest for a bright, tangy note.
- Garlic or Onion Powder: For an extra layer of savory depth.
- Smoked Paprika: To impart a smoky, earthy warmth.
- Other Dried Chilies: A pinch of chipotle powder for smokiness, or a hotter pepper like habanero for more intense heat.
- Herbs: Dried cilantro or oregano for an herbal twist.
Experiment and find your favorite personalized blend!
Ultimate Jalapeno Salt
A simple yet profoundly transformative homemade seasoning, this Jalapeno Salt offers a vibrant dash of heat and savory depth, perfect for elevating culinary creations. It’s surprisingly easy to make and a game-changer for dishes from grilled corn to margaritas.
Ingredients
-
10-12 medium fresh jalapeno peppers
-
1 cup coarse sea salt
Instructions
-
Step 1
Wearing gloves, wash and thoroughly dry jalapeno peppers. Remove stems, de-seed, and finely dice the peppers. -
Step 2
Spread the diced jalapenos on a dehydrator tray. Dehydrate for 6-10 hours at 125°F (52°C) until completely brittle. -
Step 3
Add the dried jalapeno pieces to a food processor. Pulse 2-3 times to break them into small pieces, similar in size to coarse salt grains. Process more for a finer salt, or less for a coarser texture. -
Step 4
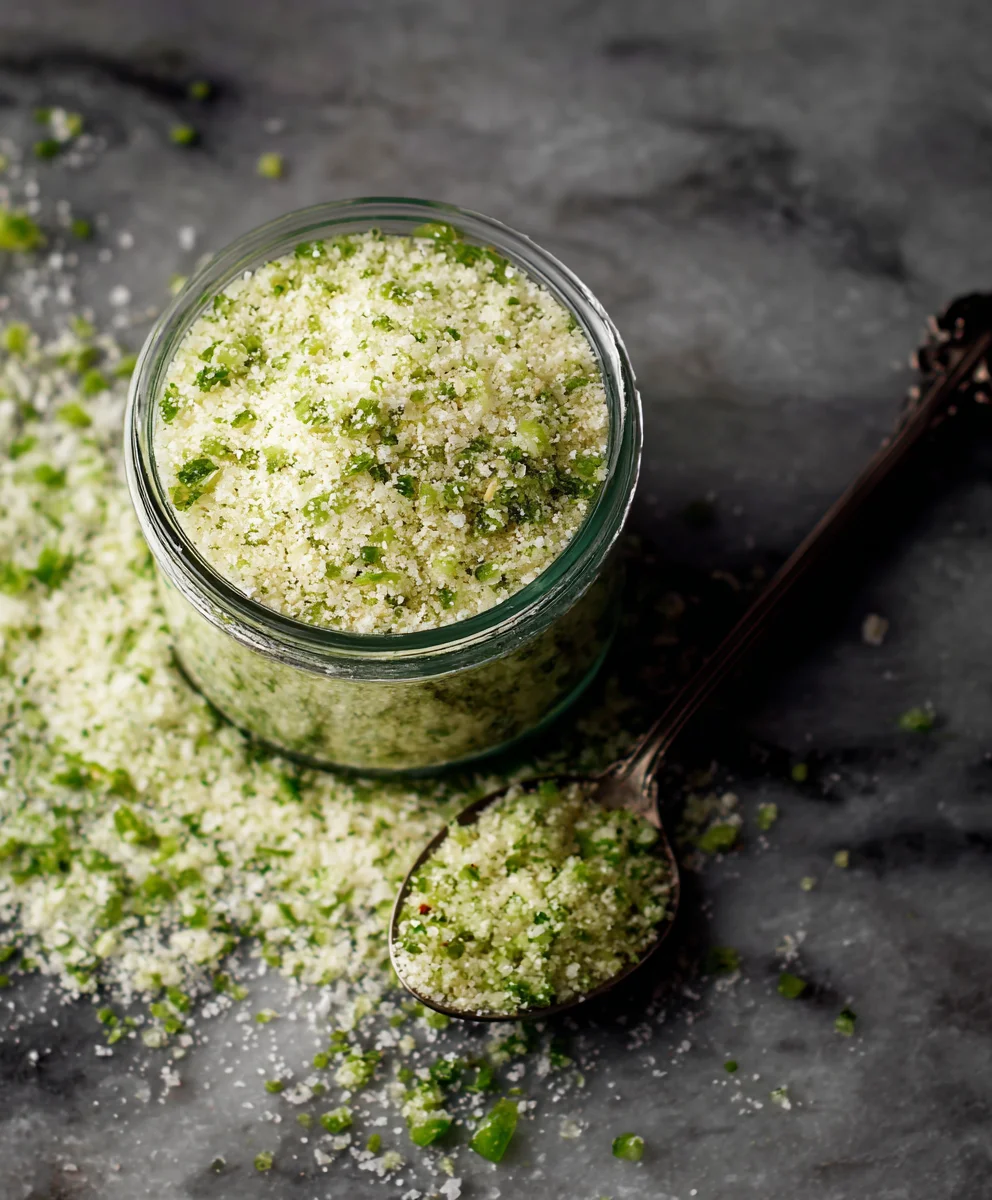
Combine the processed dried jalapenos with the coarse sea salt in a clean, dry bowl. Mix thoroughly. Store the finished Jalapeno Salt in an airtight container in a cool, dark place.
Important Information
Nutrition Facts (Per Serving)
It is important to consider this information as approximate and not to use it as definitive health advice.
Allergy Information
Please check ingredients for potential allergens and consult a health professional if in doubt.


Leave a Comment