
Quick easy hamburger buns, fresh from the oven, are the unsung heroes of any truly great burger. Forget the store-bought, often stale, options! Imagine sinking your teeth into a juicy, perfectly cooked burger nestled between two soft, slightly sweet, and utterly irresistible homemade buns. Sounds heavenly, doesn’t it?
While the exact origins of the hamburger bun are debated, its rise to prominence is inextricably linked to the popularization of the hamburger itself in the early 20th century. As roadside diners and fast-food chains exploded across America, the humble bun became an essential component, transforming the hamburger from a simple patty into a portable and convenient meal. It’s a testament to American ingenuity and our love for handheld food!
People adore a good hamburger bun for several reasons. First, the texture is key. A soft, slightly chewy bun provides the perfect counterpoint to the savory burger patty and toppings. Second, the subtle sweetness enhances the overall flavor profile, creating a harmonious balance. And finally, let’s be honest, there’s something incredibly satisfying about biting into a freshly baked bun. That’s why I’m so excited to share this recipe for quick easy hamburger buns. It’s simpler than you think, and the results are absolutely worth it. Get ready to elevate your burger game!
Ingredients:
- 3 1/4 cups (400g) all-purpose flour, plus more for dusting
- 1/4 cup (50g) granulated sugar
- 1 teaspoon salt
- 1 packet (2 1/4 teaspoons) active dry yeast
- 1 cup (240ml) warm milk (105-115°F)
- 1/4 cup (60ml) warm water (105-115°F)
- 1/4 cup (60ml) unsalted butter, melted
- 1 large egg, lightly beaten, for egg wash
- Sesame seeds, for topping (optional)
Preparing the Dough:
- Proof the Yeast: In a large bowl, combine the warm milk, warm water, sugar, and yeast. Gently stir to combine. Let it sit for 5-10 minutes, or until the mixture becomes foamy. This step is crucial because it ensures that your yeast is active and will help your buns rise properly. If it doesn’t foam, your yeast might be old and you’ll need to start again with fresh yeast.
- Combine Dry Ingredients: In a separate large bowl, whisk together the flour and salt. Make sure the salt is evenly distributed, as it can inhibit yeast activity if concentrated in one spot.
- Combine Wet and Dry Ingredients: Pour the yeast mixture and melted butter into the bowl with the flour mixture. Using a wooden spoon or a stand mixer fitted with a dough hook, mix until a shaggy dough forms.
- Knead the Dough: Turn the dough out onto a lightly floured surface. Knead for 8-10 minutes, or until the dough is smooth and elastic. If using a stand mixer, knead with the dough hook on medium speed for the same amount of time. The dough should be slightly tacky but not sticky. If it’s too sticky, add a tablespoon of flour at a time until it reaches the right consistency.
- First Rise: Place the dough in a lightly oiled bowl, turning to coat all sides. Cover the bowl with plastic wrap or a clean kitchen towel. Let it rise in a warm place for 1-1.5 hours, or until doubled in size. A warm environment is key for proper rising. You can place the bowl in a slightly warmed oven (turned off!) or near a sunny window.
Shaping the Buns:
- Punch Down the Dough: Gently punch down the risen dough to release the air. Turn it out onto a lightly floured surface.
- Divide the Dough: Divide the dough into 8 equal pieces. I like to use a kitchen scale to ensure they are all the same size, which helps them bake evenly. Each piece should weigh approximately 85-90 grams.
- Shape the Buns: Gently roll each piece of dough into a smooth ball. Tuck the edges underneath to create a tight, round shape. This step is important for creating a nice, uniform bun.
- Second Rise: Place the shaped buns on a baking sheet lined with parchment paper, leaving about 2 inches between each bun. Cover loosely with plastic wrap or a clean kitchen towel. Let them rise in a warm place for 30-45 minutes, or until they have nearly doubled in size.
Baking the Buns:
- Preheat the Oven: Preheat your oven to 375°F (190°C). Make sure your oven is properly preheated for even baking.
- Prepare the Egg Wash: In a small bowl, whisk together the egg and a tablespoon of water. This will give your buns a beautiful golden-brown color.
- Egg Wash and Topping: Gently brush the tops of the risen buns with the egg wash. Sprinkle with sesame seeds, if desired. Be careful not to deflate the buns when brushing with the egg wash.
- Bake: Bake for 15-20 minutes, or until the buns are golden brown on top. Keep a close eye on them, as baking times can vary depending on your oven.
- Cool: Remove the buns from the oven and transfer them to a wire rack to cool completely before slicing and using. This prevents them from becoming soggy.
Tips for Perfect Buns:
- Use a Thermometer: Using a thermometer to check the temperature of the milk and water is crucial for activating the yeast properly. Too hot, and you’ll kill the yeast; too cold, and it won’t activate.
- Don’t Over-Knead: Over-kneading can result in tough buns. Knead until the dough is smooth and elastic, but not overly stiff.
- Proper Rising: Ensure the dough rises in a warm, draft-free environment. This will help the yeast work its magic and create light and airy buns.
- Even Baking: Rotating the baking sheet halfway through baking can help ensure even browning.
- Storage: Store the cooled buns in an airtight container at room temperature for up to 3 days, or freeze them for longer storage. To freeze, wrap the buns individually in plastic wrap and then place them in a freezer bag. Thaw them at room temperature before using.
- Variations: Get creative with your toppings! Try using poppy seeds, everything bagel seasoning, or even a sprinkle of coarse salt. You can also add herbs or spices to the dough for a unique flavor.
- Enriched Dough: For an even richer flavor, you can add an extra tablespoon or two of melted butter to the dough.
- Gluten Development: The kneading process is essential for developing the gluten in the flour, which gives the buns their structure and chewiness. Don’t skip this step!
- Oven Temperature: Make sure your oven is accurately calibrated. An oven thermometer can help you ensure that your oven is baking at the correct temperature.
- Doneness Test: If you’re unsure whether the buns are done, you can insert a toothpick into the center of one. If it comes out clean, the buns are ready.
Troubleshooting:
- Buns Didn’t Rise: This could be due to several factors, including inactive yeast, water/milk that was too hot or too cold, or a cold environment. Make sure your yeast is fresh and that your liquids are at the correct temperature. Also, ensure that the dough is rising in a warm place.
- Buns are Too Dense: This could be due to not kneading the dough enough, not allowing it to rise sufficiently, or using too much flour. Make sure to knead the dough for the recommended amount of time and allow it to rise until doubled in size.
- Buns are Too Dry: This could be due to overbaking. Keep a close eye on the buns while they’re baking and remove them from the oven as soon as they’re golden brown.
- Buns are Burning on the Bottom: This could be due to the baking sheet being too close to the heating element. Try moving the baking sheet to a higher rack in the oven.

Conclusion:
And there you have it! These quick easy hamburger buns are truly a game-changer. Forget those store-bought, often stale, excuses for buns. This recipe delivers soft, flavorful, and perfectly shaped buns every single time, and in a fraction of the time you might expect. The slight tang from the yeast combined with the subtle sweetness makes them the ideal complement to any burger, whether it’s a classic beef patty, a juicy turkey burger, or even a hearty veggie burger.
But the beauty of this recipe doesn’t stop there. It’s incredibly versatile! Feeling adventurous? Try adding a tablespoon of dried herbs like rosemary or thyme to the dough for an extra layer of savory flavor. A sprinkle of sesame seeds or poppy seeds before baking adds a delightful crunch and visual appeal. For a sweeter bun, brush the tops with a little melted butter and honey after they come out of the oven. You could even experiment with different flours – a blend of all-purpose and whole wheat flour will give you a slightly nuttier and healthier bun.
Beyond burgers, these buns are fantastic for so much more. Use them to make mini sandwiches for a party, stuff them with pulled pork for a delicious and easy meal, or even slice them and use them as a base for individual pizzas. The possibilities are truly endless!
Serving suggestions? Oh, where do I even begin? Obviously, a classic cheeseburger is a must. But consider pairing these buns with a gourmet burger featuring caramelized onions, brie cheese, and a balsamic glaze. Or, for a lighter option, try a grilled chicken sandwich with avocado, sprouts, and a lemon aioli. Don’t forget the sides! Crispy fries, a fresh salad, or even some homemade coleslaw will complete the meal perfectly.
I know what you’re thinking: “This sounds too good to be true!” But trust me, it’s not. This recipe is foolproof, even for beginner bakers. The instructions are clear and concise, and the ingredients are readily available. Plus, the satisfaction of biting into a homemade burger on a bun you made yourself is simply unmatched.
So, what are you waiting for? Gather your ingredients, preheat your oven, and get ready to bake some seriously delicious quick easy hamburger buns. I promise you won’t be disappointed. In fact, I’m willing to bet that this recipe will become a staple in your kitchen.
And once you’ve tried it, I’d love to hear about your experience! Share your photos and comments on social media using [Your Hashtag Here]. Let me know what variations you tried, what burgers you paired them with, and what your family and friends thought. I’m always looking for new ideas and inspiration, and I can’t wait to see what you create! Happy baking!
Quick Easy Hamburger Buns: The Ultimate Recipe Guide
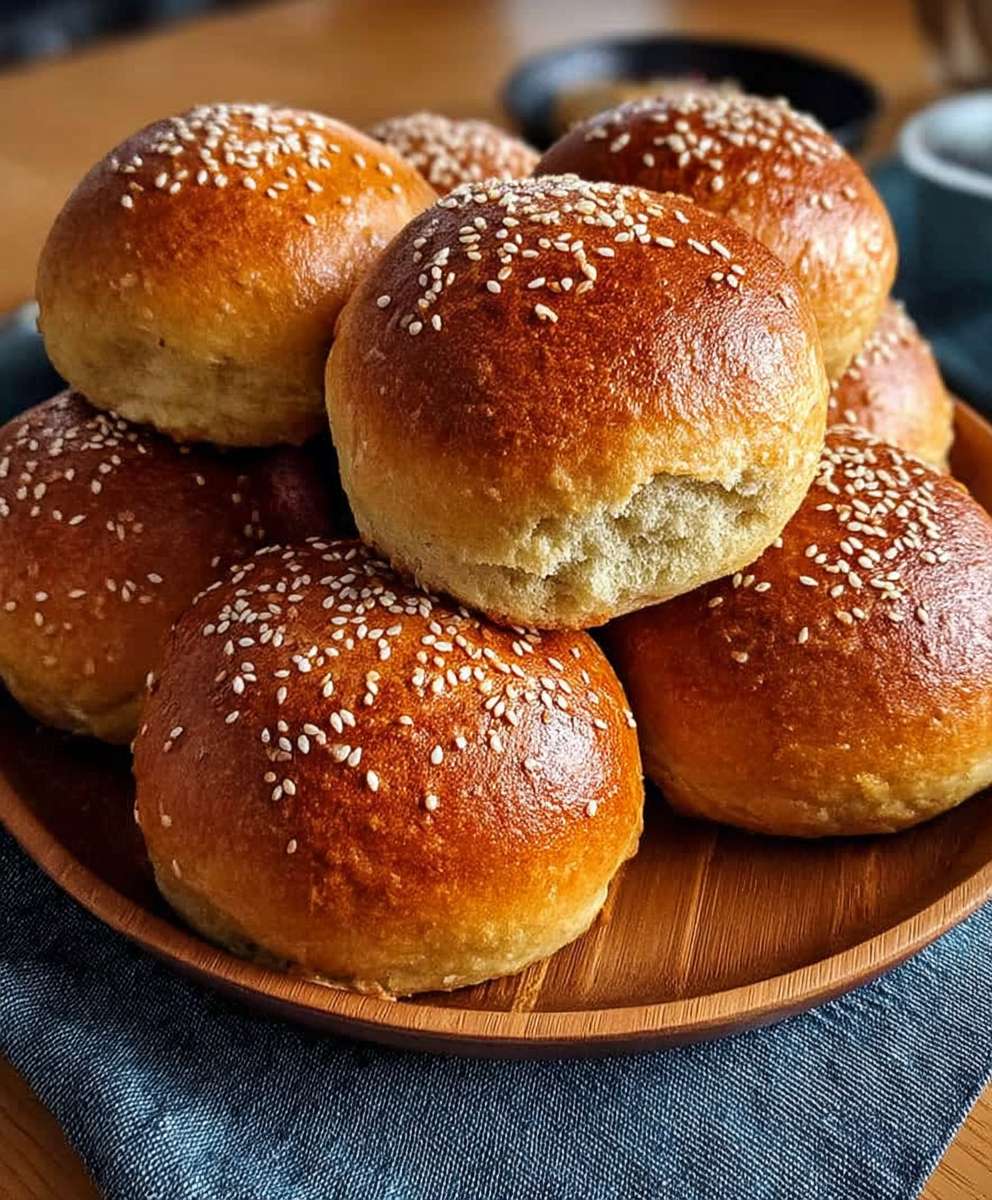
Soft and fluffy homemade buns, perfect for burgers, sandwiches, or enjoying on their own. Easy to make and incredibly delicious!
Ingredients
Instructions
Recipe Notes
- Use a thermometer to ensure the milk and water are between 105-115°F for optimal yeast activation.
- Don’t over-knead the dough. Knead until smooth and elastic.
- Ensure the dough rises in a warm, draft-free environment.
- Rotating the baking sheet halfway through baking can help ensure even browning.
- Store cooled buns in an airtight container at room temperature for up to 3 days, or freeze for longer storage.
- Get creative with toppings! Try poppy seeds, everything bagel seasoning, or coarse salt.
- For an even richer flavor, add an extra tablespoon or two of melted butter to the dough.


Leave a Comment