
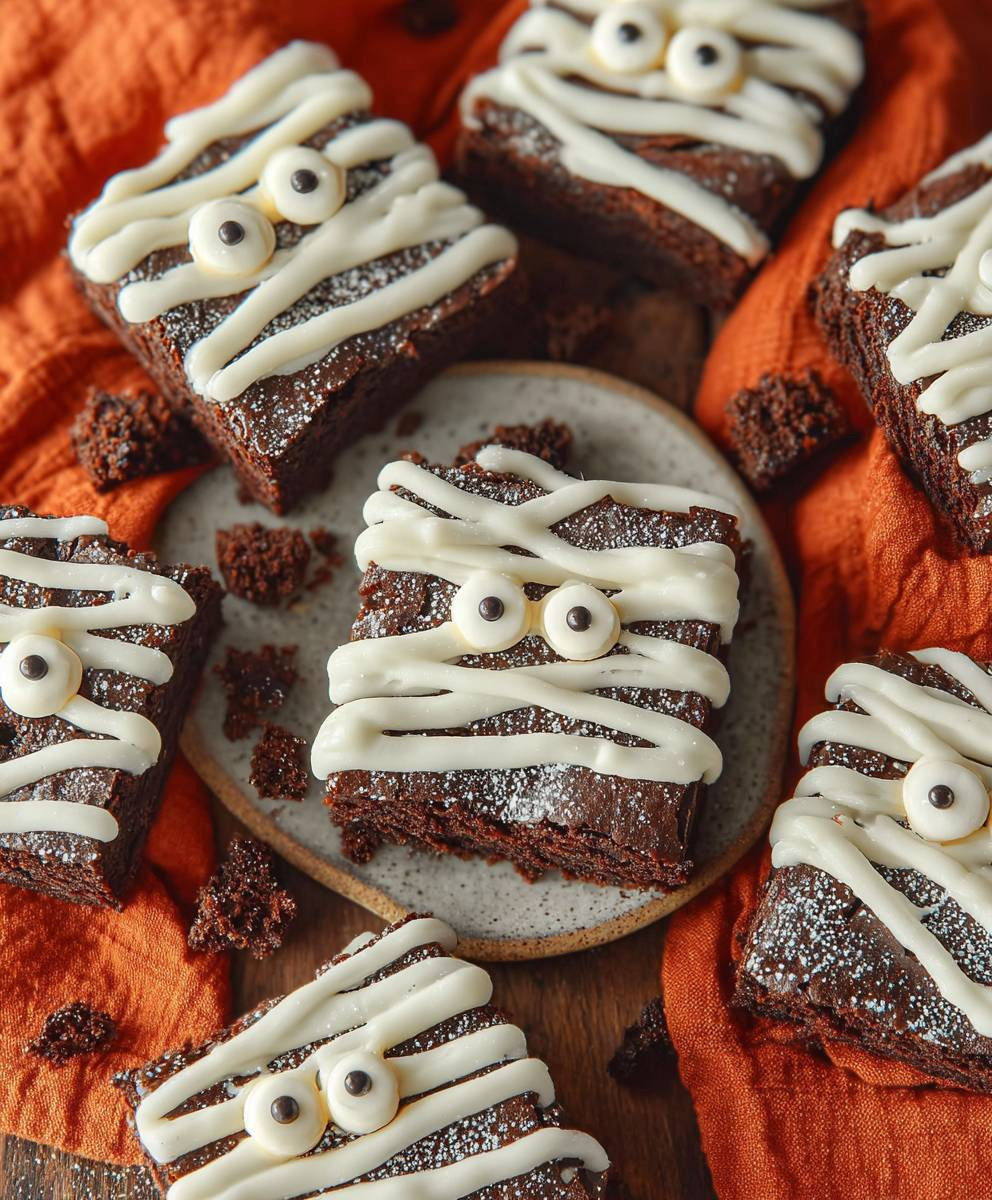
Mummy Brownies Halloween Dessert: Get ready to unwrap a spooktacular treat that’s guaranteed to be a hit at your Halloween gathering! Imagine sinking your teeth into a fudgy, decadent brownie, topped with creamy, sweet bandages that resemble adorable mummies. These aren’t just any brownies; they’re a festive and fun way to celebrate the season.
Brownies, in their classic form, have been a beloved dessert in American households for over a century. But this Halloween twist elevates them to a whole new level of ghoulish delight! While the origin of brownies themselves is well-documented, the “mummy” decoration is a modern, playful adaptation, perfect for adding a touch of whimsy to your Halloween spread. It’s a creative way to engage kids (and adults!) in the kitchen and create lasting memories.
What makes these Mummy Brownies Halloween Dessert so irresistible? It’s the perfect combination of rich, chocolatey goodness and a playful, festive design. People love them because they’re easy to make, visually appealing, and utterly delicious. The fudgy texture of the brownie contrasts beautifully with the smooth, sweet icing, creating a symphony of flavors and textures that will leave you wanting more. Plus, they’re incredibly convenient – perfect for potlucks, school parties, or a spooky movie night at home. So, let’s get baking and create some mummy magic!
Ingredients:
- 1 cup (2 sticks) unsalted butter, softened
- 1 ½ cups granulated sugar
- ¾ cup unsweetened cocoa powder
- 1 ½ teaspoons vanilla extract
- 3 large eggs
- ¾ cup all-purpose flour
- ½ teaspoon baking powder
- ¼ teaspoon salt
- 1 cup semi-sweet chocolate chips
- 1 container (16 oz) vanilla frosting
- Candy eyes (various sizes)
- Optional: Mini chocolate chips for extra decoration
Preparing the Brownie Batter:
Okay, let’s get started! First things first, we need to cream together the butter and sugar. Make sure your butter is nice and soft – it’ll make the whole process so much easier. If you forgot to take it out of the fridge, you can microwave it for a few seconds, but be careful not to melt it!
- In a large bowl, cream together the softened butter and granulated sugar until light and fluffy. You can use an electric mixer (stand mixer or hand mixer) for this, or if you’re feeling ambitious, you can do it by hand. It’ll just take a little longer!
- Once the butter and sugar are nicely creamed, add the cocoa powder and vanilla extract. Mix until well combined. The mixture will be a bit thick and pasty at this point, and that’s perfectly normal. Don’t worry, it’ll all come together!
- Now, add the eggs one at a time, mixing well after each addition. This is important to ensure that the eggs are fully incorporated into the batter. If you add them all at once, the batter might separate.
- In a separate bowl, whisk together the flour, baking powder, and salt. This helps to distribute the baking powder and salt evenly throughout the flour, which will result in a more consistent brownie texture.
- Gradually add the dry ingredients to the wet ingredients, mixing until just combined. Be careful not to overmix! Overmixing can develop the gluten in the flour, which can lead to tough brownies. We want them to be fudgy and delicious, not chewy!
- Finally, stir in the chocolate chips. I like to use semi-sweet chocolate chips, but you can use milk chocolate chips, dark chocolate chips, or even a combination of all three! It’s totally up to your personal preference.
Baking the Brownies:
Alright, the batter is ready to go! Now it’s time to bake these bad boys. Make sure your oven is preheated to the correct temperature, and that you have a baking pan ready to go.
- Preheat your oven to 350°F (175°C).
- Grease and flour a 9×13 inch baking pan. You can also line the pan with parchment paper, leaving an overhang on the sides. This will make it super easy to lift the brownies out of the pan once they’re cooled.
- Pour the brownie batter into the prepared pan and spread it evenly.
- Bake for 25-30 minutes, or until a toothpick inserted into the center comes out with moist crumbs attached. Be careful not to overbake the brownies, as they will become dry and crumbly.
- Let the brownies cool completely in the pan before frosting. This is important because if you try to frost them while they’re still warm, the frosting will melt and slide right off. Trust me, I’ve been there!
Creating the Mummy Decoration:
This is the fun part! Now we get to transform our brownies into spooky mummies. This is where your creativity can really shine. Don’t be afraid to experiment and have fun with it!
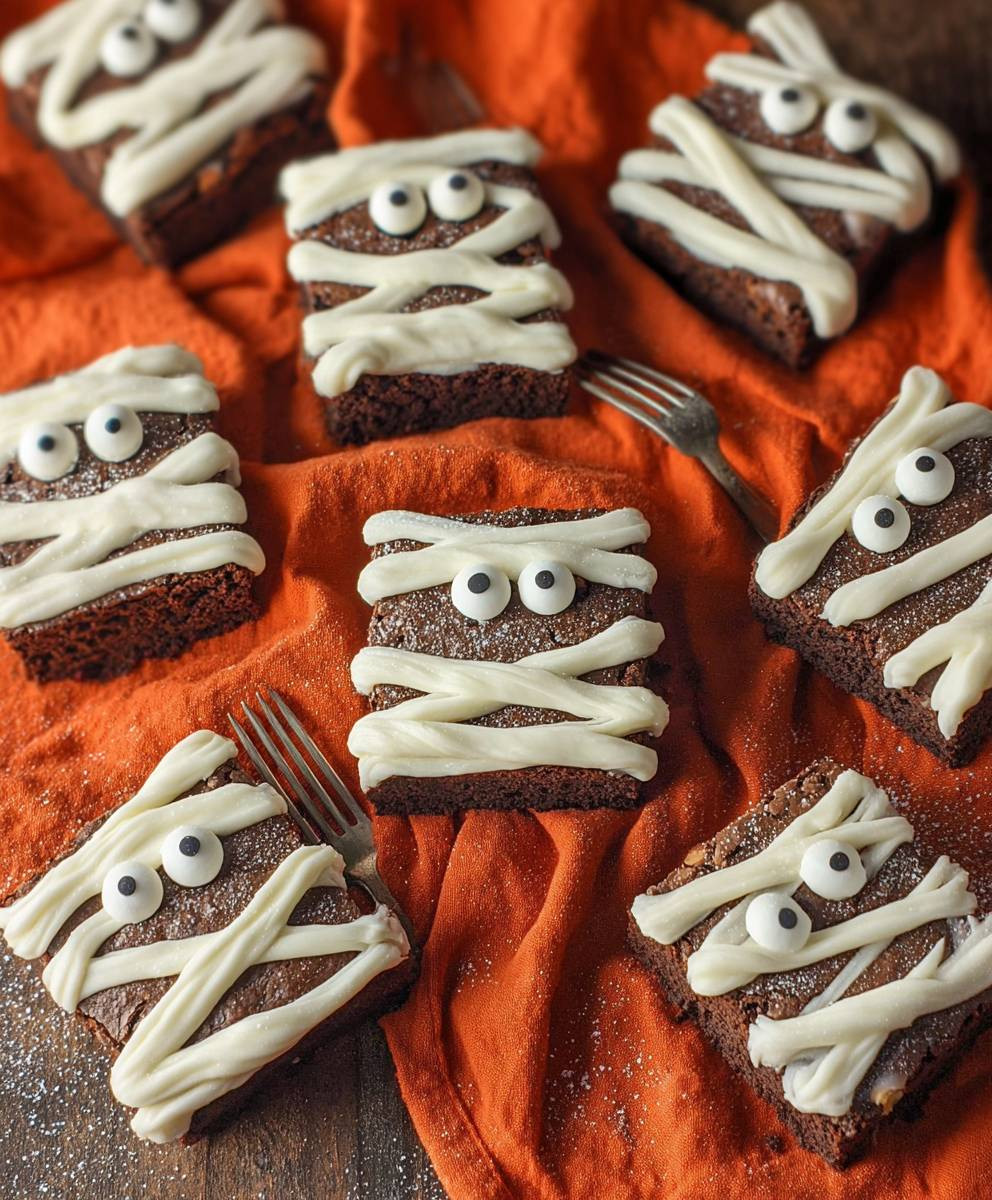
- Once the brownies are completely cooled, frost them with the vanilla frosting. You can use a knife or an offset spatula to spread the frosting evenly.
- Now, here’s the trick to creating the mummy bandages: Spoon the remaining frosting into a piping bag fitted with a small round tip (or you can just use a ziplock bag and snip off a tiny corner).
- Pipe lines of frosting across the brownies, leaving gaps for the candy eyes. Don’t worry about making them perfect – the more uneven the lines, the more realistic the mummy bandages will look!
- Place two candy eyes on each brownie, peeking out from under the frosting bandages. You can use different sizes of candy eyes for a more whimsical look.
- If desired, you can add mini chocolate chips around the candy eyes for extra decoration. This will give the mummies a bit more character.
- Let the frosting set for a few minutes before serving. This will help the bandages to stay in place.
Tips and Tricks for Perfect Mummy Brownies:
Here are a few extra tips to help you make the best mummy brownies ever:
- Use high-quality cocoa powder: The quality of your cocoa powder will have a big impact on the flavor of your brownies. I recommend using Dutch-processed cocoa powder for a richer, more intense chocolate flavor.
- Don’t overmix the batter: Overmixing can develop the gluten in the flour, which can lead to tough brownies. Mix the batter until just combined.
- Bake the brownies in a glass or ceramic pan: Glass and ceramic pans distribute heat more evenly than metal pans, which can help to prevent the brownies from burning around the edges.
- Let the brownies cool completely before frosting: This is important because if you try to frost them while they’re still warm, the frosting will melt and slide right off.
- Get creative with the decorations: Don’t be afraid to experiment with different types of candy eyes, sprinkles, and other decorations. The possibilities are endless!
- Make them ahead of time: You can bake the brownies a day or two in advance and store them in an airtight container at room temperature. Just wait to frost them until you’re ready to serve.
- For extra fudgy brownies: Reduce the baking time by a few minutes. The center of the brownies should still be slightly soft when you take them out of the oven.
- For cake-like brownies: Increase the baking time by a few minutes. The brownies should be firm to the touch when you take them out of the oven.
- Add a swirl of peanut butter: Before baking, dollop spoonfuls of peanut butter over the brownie batter and swirl it in with a knife.
- Add chopped nuts: Stir in chopped walnuts, pecans, or almonds to the brownie batter for added texture and flavor.
- Use different extracts: Experiment with different extracts, such as almond extract, peppermint extract, or orange extract, to add a unique flavor to your brownies.
- Make them gluten-free: Substitute the all-purpose flour with a gluten-free flour blend.
- Make them vegan: Substitute the butter with vegan butter, the eggs with flax eggs, and the chocolate chips with vegan chocolate chips.
Storing Your Mummy Brownies:
These mummy brownies are best stored in an airtight container at room temperature. They’ll stay fresh for up to 3 days. If you want to store them for longer, you can freeze them for up to 2 months. Just make sure to wrap them tightly in plastic wrap and then place them in a freezer-safe bag or container.
Serving Suggestions:
These mummy brownies are perfect for Halloween parties, school events, or just a fun treat for the family. You can serve them with a glass of milk, a scoop of ice cream, or a dollop of whipped cream. They’re also great for gifting! Just wrap them in cellophane bags and tie them with a ribbon.
I hope you enjoy making these spooky and delicious mummy brownies! They’re sure to be a hit with everyone. Happy Halloween!
Conclusion:
So there you have it! These adorable Mummy Brownies are more than just a Halloween treat; they’re a guaranteed crowd-pleaser that combines rich, fudgy goodness with a playful, spooky twist. I truly believe this recipe is a must-try this Halloween season, and here’s why: it’s incredibly easy to make, even with little helpers in the kitchen; it’s visually stunning and perfectly themed for the holiday; and most importantly, it tastes absolutely divine. The combination of the decadent brownie base and the sweet, creamy icing is simply irresistible.
But the fun doesn’t stop there! Feel free to get creative with your mummy designs. You can use different types of candy eyes for a more whimsical look, or add a sprinkle of edible glitter for extra sparkle. For a richer flavor, try using dark chocolate brownies or adding a swirl of peanut butter to the batter. If you’re feeling adventurous, you could even incorporate some chopped nuts or dried cranberries for added texture and flavor.
Serving Suggestions and Variations:
These Mummy Brownies are perfect for Halloween parties, school events, or simply a fun family night in. Serve them with a scoop of vanilla ice cream for an extra indulgent treat, or pair them with a glass of cold milk for a classic combination. You can also cut them into smaller squares and arrange them on a platter for a festive dessert display.
Here are a few more ideas to spark your creativity:
* Peanut Butter Mummies: Swirl peanut butter into the brownie batter before baking for a delicious peanut butter twist.
* Mint Chocolate Mummies: Add a few drops of peppermint extract to the brownie batter and use green-tinted icing for a minty fresh take.
* Caramel Mummies: Drizzle caramel sauce over the baked brownies before adding the icing for a sweet and gooey treat.
* Vegan Mummies: Use a vegan brownie recipe and vegan icing to create a plant-based version of this spooky dessert.
I’ve poured my heart into perfecting this recipe, and I’m confident that you’ll love it as much as I do. But the real magic happens when you make it your own! Don’t be afraid to experiment with different flavors, decorations, and serving suggestions to create a truly unique and memorable Halloween treat.
Ready to Bake Some Spooky Fun?
I urge you to give these Mummy Brownies a try. They are so simple to make, and the result is a delicious and festive treat that everyone will enjoy. I promise, you won’t be disappointed!
And now, for the most important part: I want to hear about your experience! Once you’ve made these Mummy Brownies, please share your photos and stories with me. Did you try any variations? Did you have any funny decorating mishaps? I’m eager to see your creations and learn from your experiences. You can tag me on social media or leave a comment below. Let’s spread the Halloween spirit and inspire others to get baking! Happy Halloween, and happy baking! I can’t wait to see your spooky creations!
Mummy Brownies Halloween Dessert: Spooky & Delicious Recipe
Spooky and delicious mummy brownies perfect for Halloween! Fudgy chocolate brownies decorated with vanilla frosting bandages and candy eyes.
Ingredients
Instructions
Recipe Notes
- Use high-quality cocoa powder for a richer flavor.
- Don’t overmix the batter to avoid tough brownies.
- Bake in a glass or ceramic pan for even heat distribution.
- Let the brownies cool completely before frosting.
- Get creative with decorations!
- Brownies can be made a day or two in advance.
- For extra fudgy brownies, reduce baking time slightly.
- For cake-like brownies, increase baking time slightly.
- Add a swirl of peanut butter for extra flavor.
- Stir in chopped nuts for added texture.
- Experiment with different extracts for unique flavors.
- Make them gluten-free by substituting the all-purpose flour with a gluten-free flour blend.
- Make them vegan by substituting the butter with vegan butter, the eggs with flax eggs, and the chocolate chips with vegan chocolate chips.

Leave a Comment