
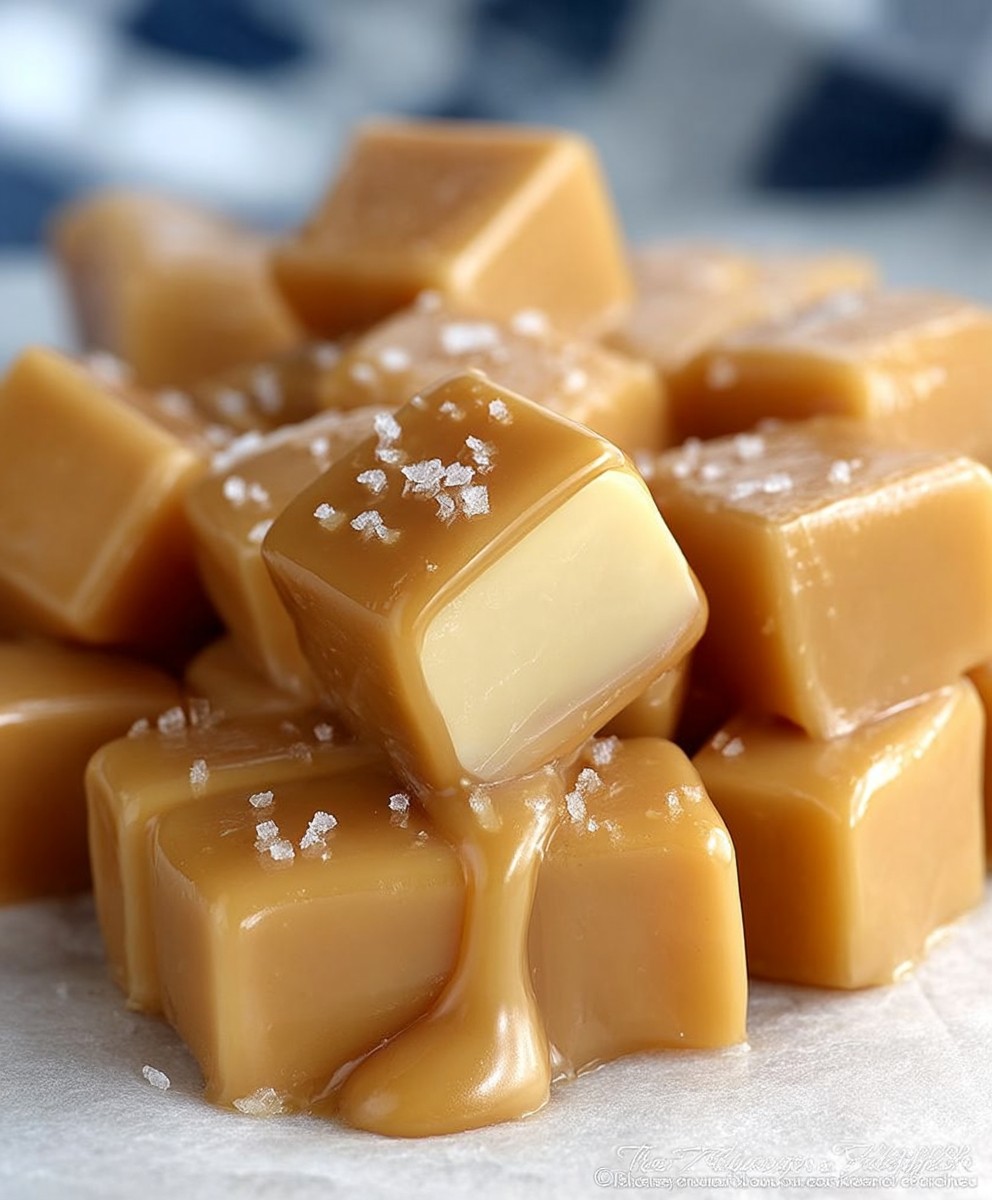
Microwave caramels ten minute – yes, you read that right! Imagine sinking your teeth into a perfectly chewy, buttery caramel, made entirely in your microwave in just ten minutes. Sounds too good to be true? I promise you, it’s not! This recipe is a game-changer for anyone craving that classic caramel flavor without the fuss of traditional candy-making.
While the exact origins of caramel are debated, its popularity exploded in the 19th century with the advent of mass-produced candies. For generations, caramel has been a beloved treat, often associated with warmth, comfort, and homemade goodness. But let’s be honest, the traditional stovetop method can be intimidating, requiring constant stirring and precise temperature control. That’s where this microwave caramels ten minute recipe comes in!
People adore caramel for its rich, sweet flavor and satisfyingly chewy texture. It’s incredibly versatile, perfect for topping ice cream, dipping apples, or simply enjoying on its own. This microwave version offers all the deliciousness of traditional caramel, but with unparalleled convenience. No candy thermometer needed! Get ready to impress your friends and family with these incredibly easy and unbelievably delicious microwave caramels. You won’t believe how simple it is to create such a decadent treat!
Ingredients:
- 1 cup (2 sticks) unsalted butter, softened
- 1 cup granulated sugar
- 1 teaspoon vanilla extract
- 1/2 teaspoon sea salt, plus more for sprinkling
- 1 cup all-purpose flour
- 1/2 cup packed light brown sugar
- 1/4 cup heavy cream
- 1 (14 ounce) package individually wrapped caramels, unwrapped
- 2 tablespoons milk
Preparing the Base:
- Cream the Butter and Sugars: In a large bowl, cream together the softened butter, granulated sugar, and light brown sugar until light and fluffy. I like to use an electric mixer for this, but you can definitely do it by hand if you’re feeling ambitious! Make sure the butter is truly softened, or you’ll end up with lumps.
- Add the Vanilla and Salt: Stir in the vanilla extract and 1/2 teaspoon of sea salt. The salt really enhances the sweetness of the caramel, so don’t skip it!
- Incorporate the Flour: Gradually add the flour to the butter mixture, mixing until just combined. Be careful not to overmix, as this can lead to a tough base. You want a nice, crumbly dough.
- Press into the Pan: Press the dough evenly into the bottom of a 9×13 inch baking pan. I find it easiest to use my fingers to press it down firmly. You can also use the bottom of a measuring cup to help smooth it out.
- Bake the Base: Bake in a preheated oven at 350°F (175°C) for 15-20 minutes, or until the edges are lightly golden brown. The center might still look a little soft, but that’s okay. It will firm up as it cools.
Melting the Caramels:
- Prepare the Caramels: While the base is baking, unwrap all of the caramels. This is definitely the most tedious part of the recipe, but it’s worth it!
- Microwave the Caramels: Place the unwrapped caramels in a microwave-safe bowl. Add the heavy cream and milk. This helps to thin out the caramel and make it easier to spread.
- Microwave in Intervals: Microwave on high in 30-second intervals, stirring well after each interval, until the caramels are completely melted and smooth. Be patient and don’t overheat the caramels, as they can burn easily. It usually takes me about 2-3 minutes total.
- Check for Smoothness: Make sure there are no lumps of caramel remaining. If there are, continue microwaving in shorter intervals until completely smooth.
Assembling the Caramel Bars:
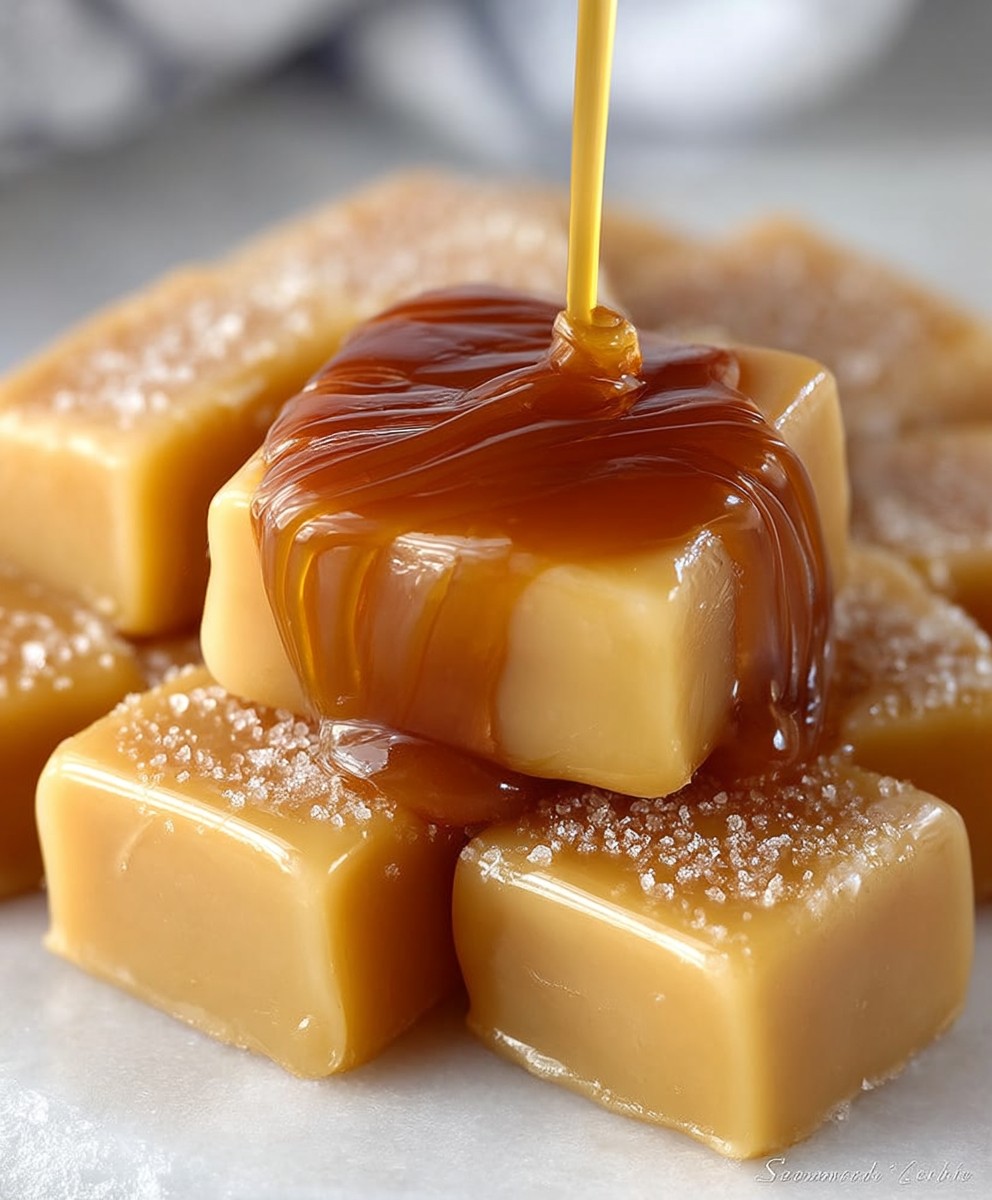
- Pour Caramel Over Base: Once the base is baked and the caramels are melted, pour the melted caramel mixture evenly over the warm base.
- Spread Evenly: Use a spatula to spread the caramel evenly over the entire surface of the base. Work quickly, as the caramel will start to set as it cools.
- Sprinkle with Salt: Sprinkle the top of the caramel with a generous pinch of sea salt. This adds a nice salty-sweet contrast to the bars.
- Chill to Set: Place the pan in the refrigerator to chill for at least 2 hours, or until the caramel is completely set. This is important, as it will make the bars easier to cut.
Cutting and Serving:
- Remove from Refrigerator: Once the caramel is set, remove the pan from the refrigerator.
- Cut into Bars: Use a sharp knife to cut the bars into squares. I like to run the knife under hot water and wipe it clean between each cut to prevent the caramel from sticking.
- Serve and Enjoy: Serve the caramel bars cold or at room temperature. They are delicious on their own, or you can serve them with a scoop of vanilla ice cream.
Tips and Variations:
- Use High-Quality Caramels: The quality of the caramels will affect the taste of the bars, so I recommend using a good brand.
- Add Chocolate: For a chocolatey twist, melt some chocolate chips and drizzle them over the top of the caramel before it sets.
- Add Nuts: Sprinkle chopped nuts, such as pecans or walnuts, over the caramel before it sets.
- Use Different Extracts: Experiment with different extracts, such as almond or peppermint, to add a unique flavor to the base.
- Make it Gluten-Free: Use a gluten-free flour blend to make these bars gluten-free.
- Storage: Store the caramel bars in an airtight container in the refrigerator for up to a week.
Troubleshooting:
- Caramel is too hard: If the caramel is too hard to cut, let it sit at room temperature for a few minutes to soften slightly.
- Caramel is too sticky: If the caramel is too sticky, chill the bars for a longer period of time.
- Base is too crumbly: If the base is too crumbly, add a tablespoon or two of melted butter to the dough.
- Caramel is burnt: If the caramel is burnt, unfortunately, you’ll have to start over. Be sure to microwave the caramels in short intervals and stir frequently to prevent burning.
Detailed Baking Explanation:
Let’s dive deeper into why each step is important for achieving the perfect microwave caramel bars. Understanding the science behind the baking process can help you troubleshoot any issues and customize the recipe to your liking.
The Importance of Softened Butter:
Using softened butter is crucial for creaming it properly with the sugars. When butter is softened, it can trap air as it’s beaten, creating a light and fluffy mixture. This air incorporation contributes to the tender texture of the base. If the butter is too cold, it won’t cream properly, resulting in a dense and tough base. If the butter is melted, the base will be greasy and may spread too much during baking.
Why Brown Sugar Matters:
Brown sugar contains molasses, which adds moisture and a caramel-like flavor to the base. The molasses also helps to keep the base soft and chewy. You can use either light or dark brown sugar, depending on your preference. Dark brown sugar will have a more intense molasses flavor.
The Role of Flour:
Flour provides structure to the base. It’s important not to overmix the flour, as this can develop the gluten and result in a tough base. Mix just until the flour is incorporated. Using a pastry blender or your fingertips to cut the butter into the flour can also help to prevent overmixing.
Baking Temperature and Time:
Baking the base at 350°F (175°C) allows it to cook evenly without burning. The baking time may vary depending on your oven, so keep an eye on the base and remove it when the edges are lightly golden brown. The center may still look a little soft, but it will firm up as it cools.
Melting Caramels Perfectly:
Microwaving the caramels in short intervals and stirring frequently is essential to prevent burning. Caramels can burn easily, so it’s important to be patient and monitor them closely. Adding heavy cream and milk helps to thin out the caramel and make it easier to spread. You can adjust the amount of cream and milk to achieve your desired consistency.
The Importance of Chilling:
Chilling the caramel bars allows the caramel to set completely, making them easier to cut. It also helps to prevent the caramel from sticking to the knife. If you’re in a hurry, you can chill the bars in the freezer for a shorter period of time.
Cutting Techniques:
Using a sharp knife and running it under hot water between cuts will help to prevent the caramel from sticking. You can also use a pizza cutter to cut the bars into squares.
Salt Enhancement:
The sea salt sprinkled on top of the caramel enhances the sweetness and creates a delicious salty-sweet contrast. You can use any type of salt, but I prefer sea salt for its flavor and texture.
Customizing Your Bars:
Feel free to experiment with different flavors and ingredients to customize these caramel bars to your liking. Adding chocolate chips, nuts, or different extracts can create unique and delicious variations.
Conclusion:
This isn’t just another caramel recipe; it’s your express ticket to decadent, homemade goodness in mere minutes! Seriously, who knew you could whip up such creamy, dreamy caramels in the microwave? If you’re looking for a quick and easy treat that delivers on flavor and satisfaction, then this ten-minute microwave caramel recipe is an absolute must-try. Forget slaving over a hot stove for hours – this method is foolproof and perfect for those moments when you need a sweet fix, stat!
But the best part? The possibilities are endless! These caramels are fantastic on their own, wrapped individually in squares of parchment paper for a classic treat. But don’t stop there! Imagine drizzling melted chocolate over them for a salted caramel chocolate bark. Or, chop them up and add them to your favorite cookie dough for an extra chewy, caramel-infused delight. They’re also incredible stirred into hot chocolate on a chilly evening.
For serving suggestions, consider offering them as part of a dessert platter alongside fresh fruit, nuts, and other candies. They make a wonderful addition to gift baskets, especially during the holidays. And if you’re feeling adventurous, try incorporating them into more complex desserts like caramel apple parfaits or even a caramel cheesecake.
Want to take your caramels to the next level? Consider these variations:
* Salted Caramel: Sprinkle a generous pinch of sea salt on top of the caramels immediately after they’re done cooking. The salt enhances the sweetness and creates a delightful contrast.
* Vanilla Bean Caramel: Add the seeds from one vanilla bean to the caramel mixture before microwaving for a richer, more aromatic flavor.
* Espresso Caramel: Stir in a teaspoon of instant espresso powder to the caramel mixture for a coffee-infused treat.
* Nutty Caramel: Add chopped pecans, walnuts, or almonds to the caramel mixture for a crunchy texture and nutty flavor.
* Spiced Caramel: Add a pinch of cinnamon, nutmeg, or ginger to the caramel mixture for a warm and cozy flavor.
I’m so excited for you to try this recipe! It’s truly a game-changer for anyone who loves caramels but doesn’t have a lot of time. I know you’ll be amazed at how easy and delicious these ten-minute microwave caramels are.
So, go ahead, give it a try! I promise you won’t be disappointed. And when you do, please share your experience! I’d love to hear what variations you tried, how you served them, and what your family and friends thought. Tag me in your photos on social media – I can’t wait to see your creations! Happy caramel-making! Let me know if you have any questions, and I’ll do my best to help. Enjoy!
Microwave Caramels Ten Minute: Easy Recipe & Tips
Easy microwave caramel bars with a buttery shortbread base, topped with gooey melted caramels and a sprinkle of sea salt. A perfect sweet and salty treat!
Ingredients
Instructions
Recipe Notes
- Use High-Quality Caramels: The quality of the caramels will affect the taste of the bars.
- Add Chocolate: Drizzle melted chocolate chips over the top of the caramel before it sets.
- Add Nuts: Sprinkle chopped nuts, such as pecans or walnuts, over the caramel before it sets.
- Use Different Extracts: Experiment with different extracts, such as almond or peppermint, to add a unique flavor to the base.
- Make it Gluten-Free: Use a gluten-free flour blend to make these bars gluten-free.
- Storage: Store the caramel bars in an airtight container in the refrigerator for up to a week.
- Caramel is too hard: If the caramel is too hard to cut, let it sit at room temperature for a few minutes to soften slightly.
- Caramel is too sticky: If the caramel is too sticky, chill the bars for a longer period of time.
- Base is too crumbly: If the base is too crumbly, add a tablespoon or two of melted butter to the dough.
- Caramel is burnt: If the caramel is burnt, unfortunately, you’ll have to start over. Be sure to microwave the caramels in short intervals and stir frequently to prevent burning.


Leave a Comment