
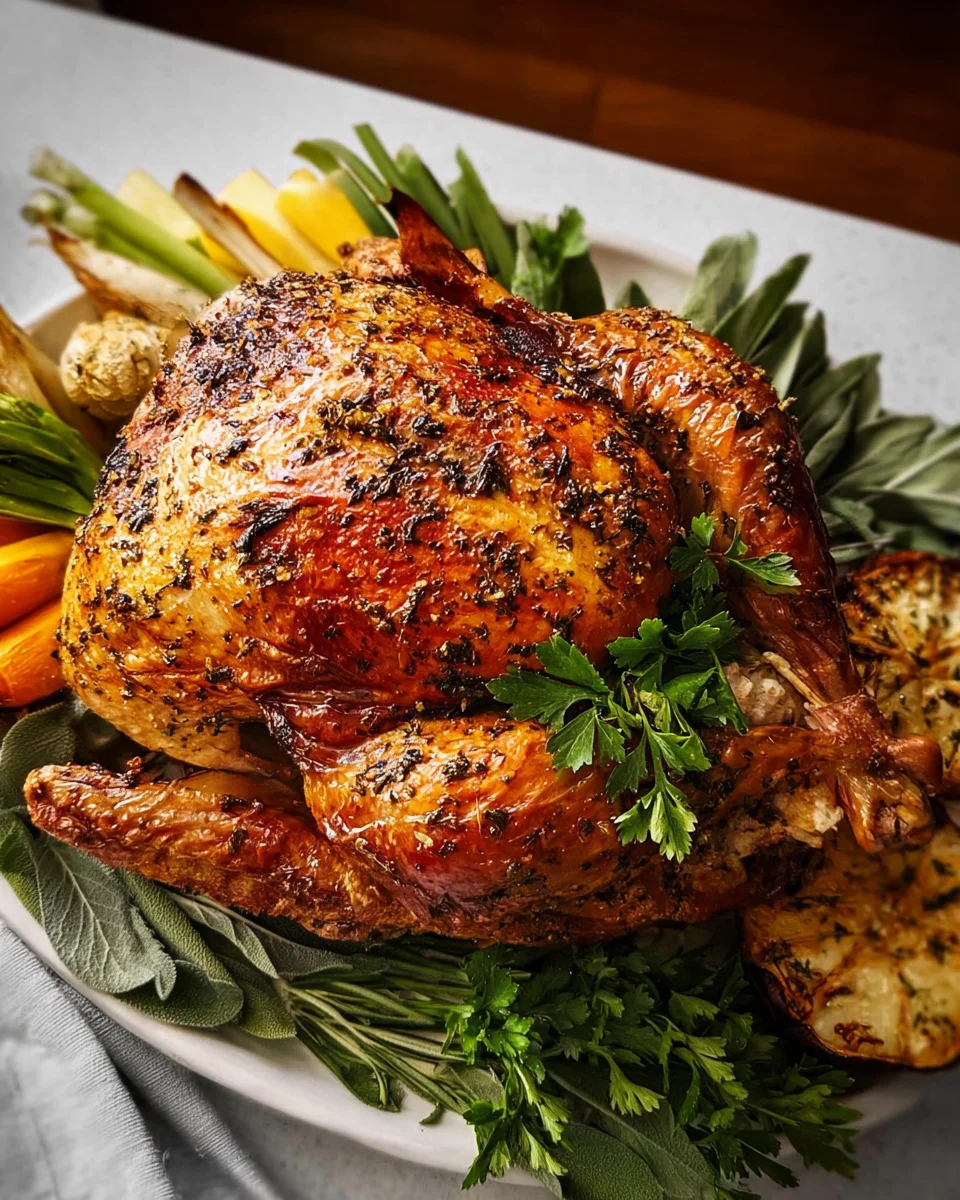
Thanksgiving Turkey Recipe is truly the undisputed star of the holiday table, isn’t it? That glorious, golden-brown bird, emerging from the oven with an aroma that instantly transports you to cherished memories of family, laughter, and gratitude. For many, the very thought of the holiday conjures images of this magnificent centerpiece, promising a feast unlike any other.
The Heart of the Thanksgiving Feast
For centuries, the roasted turkey has been the undeniable centerpiece of the Thanksgiving feast, a symbol of abundance and togetherness that gracefully brings generations around a single table. It’s more than just a meal; it’s a cherished tradition deeply woven into the fabric of American culture, with roots stretching back to the earliest celebrations of gratitude. The anticipation of slicing into a perfectly cooked turkey is a hallmark of the holiday season.
I find that what truly makes a perfect Thanksgiving Turkey Recipe so beloved is the incredible satisfaction of presenting a beautifully cooked bird – boasting moist, flavorful meat, irresistibly crispy skin, and a rich, savory gravy made from its succulent drippings. It’s the culmination of careful preparation and a sincere labor of love that consistently results in pure culinary joy. Every year, I eagerly look forward to perfecting this quintessential dish, and I know many of you share that same dedication. It embodies the warmth, comfort, and generous spirit of the holiday, guaranteed to bring smiles and full bellies to everyone gathered.
Ingredients:
- For the Turkey:
- 1 (12-16 pound) whole fresh or fully thawed turkey (allow 24 hours per 4-5 pounds for thawing in the refrigerator).
- Kosher salt and freshly ground black pepper, to taste.
- For the Brine (Highly Recommended for a Juicy Thanksgiving Turkey Recipe):
- 2 gallons cold water.
- 1 ½ cups Kosher salt.
- 1 cup packed light brown sugar.
- 6 bay leaves.
- 2 tablespoons whole black peppercorns.
- 2 large oranges, quartered.
- 2 lemons, quartered.
- 2 large sprigs fresh rosemary.
- 8 sprigs fresh thyme.
- 1 bunch fresh sage.
- 1 head garlic, halved horizontally.
- For the Herb Compound Butter:
- 1 cup (2 sticks) unsalted butter, softened to room temperature.
- ¼ cup finely chopped fresh parsley.
- 2 tablespoons finely chopped fresh rosemary.
- 2 tablespoons finely chopped fresh thyme.
- 1 tablespoon finely chopped fresh sage.
- 4 cloves garlic, minced.
- 1 tablespoon lemon zest.
- 1 ½ teaspoons Kosher salt.
- ½ teaspoon freshly ground black pepper.
- For the Roasting Pan & Cavity Aromatics:
- 2 large yellow onions, quartered.
- 4 carrots, peeled and roughly chopped into 2-inch pieces.
- 4 celery stalks, roughly chopped into 2-inch pieces.
- 2 oranges, halved.
- 2 lemons, halved.
- Several sprigs of fresh rosemary, thyme, and sage.
- 4 cups low-sodium chicken or vegetable broth.
The Brining Process (Your Secret to an Incredibly Moist Thanksgiving Turkey Recipe)
- Thaw Your Turkey Properly: If your turkey is frozen, ensure it is fully thawed before brining. The safest and best method is to thaw it in its original wrapper in the refrigerator, allowing approximately 24 hours for every 4-5 pounds. A 16-pound turkey will need at least 3-4 days to thaw completely. Avoid thawing at room temperature, as this can create a breeding ground for bacteria.
- Prepare the Brine: In a very large stockpot or an extra-large oven bag designed for brining, combine 1 gallon of the cold water with the Kosher salt, brown sugar, bay leaves, and black peppercorns. Stir this mixture vigorously until the salt and sugar are completely dissolved. This might take a few minutes of steady stirring.
- Infuse the Brine: Add the quartered oranges, lemons, fresh rosemary, thyme, sage, and halved garlic head to the brine mixture. Give it another good stir to ensure all the aromatics are submerged. Bring this mixture to a boil over high heat, then immediately reduce the heat to low and let it simmer for about 5 minutes. This step helps to dissolve the solids more thoroughly and extracts more flavor from the aromatics.
- Cool the Brine Completely: It is absolutely crucial that the brine is completely chilled before you add your turkey. If you put a warm or even lukewarm turkey into warm brine, you risk bacterial growth and food safety issues. Remove the stockpot from the heat and allow it to cool to room temperature, which could take several hours. For quicker cooling, you can place the pot in an ice bath in your sink, stirring occasionally. Once it reaches room temperature, add the second gallon of cold water to the brine.
- Brine the Turkey: Carefully remove the turkey from its packaging, making sure to remove the neck and giblets from both the main cavity and the neck cavity. Rinse the turkey thoroughly under cold running water, both inside and out, then pat it very dry with paper towels. Place the turkey, breast-side down, into your cooled brine mixture. Ensure the turkey is fully submerged. If it floats, you can use a plate or a clean, heavy object to weigh it down.
- Refrigerate and Brine: Place the entire brining container (pot or bag) into your refrigerator. Brine the turkey for 12 to 24 hours. Do not exceed 24 hours, as the turkey can become overly salty or develop a spongy texture. The brining process helps the turkey retain moisture, resulting in a significantly juicier and more flavorful bird.
- Rinse and Dry (Again!): After brining, remove the turkey from the brine solution. Discard the brine and all its contents. Rinse the turkey thoroughly under cold running water, inside and out, to remove any excess salt from the surface. This step is vital for ensuring your turkey isn’t too salty. Pat the turkey exceptionally dry with paper towels. A dry skin is key to achieving that wonderfully crispy, golden-brown skin we all love. You can even place the turkey on a wire rack set over a baking sheet, uncovered, in the refrigerator for a few hours (or even overnight) to further air-dry the skin. This step truly makes a difference for crispy skin.
Prepping Your Thanksgiving Turkey for Its Roasting Journey
- Make the Herb Compound Butter: In a medium bowl, combine the softened unsalted butter with the finely chopped parsley, rosemary, thyme, sage, minced garlic, lemon zest, Kosher salt, and black pepper. Use a fork or a rubber spatula to mix everything together until it is well combined and uniform. This herb butter is going to infuse incredible flavor and moisture into your turkey.
- Prepare Your Roasting Pan: Arrange your roughly chopped onions, carrots, and celery in the bottom of a large roasting pan. Pour in the 4 cups of low-sodium chicken or vegetable broth. This bed of aromatics and liquid will prevent the turkey from scorching, add moisture to the oven environment, and form the base for your delicious gravy. Place a V-rack or a sturdy flat roasting rack over the vegetables in the pan.
- Apply the Herb Butter (Under the Skin!): This is a game-changer! Gently separate the skin from the breast meat of the turkey, starting from the cavity opening. Use your fingers to create pockets over the breasts and thighs, being careful not to tear the skin. Take about two-thirds of the compound butter and carefully push it under the skin, spreading it evenly over the breast and thigh meat. This ensures the meat itself is seasoned and moisturized, not just the skin.
- Generously Butter the Exterior: Take the remaining one-third of the compound butter and rub it all over the exterior of the turkey, covering every part of the skin. This will help the skin crisp up and achieve a beautiful golden-brown color.
- Season the Cavity: Loosely stuff the turkey cavity with the halved oranges, lemons, and several sprigs of fresh rosemary, thyme, and sage. Do not pack the cavity tightly with traditional stuffing, as this can prevent the turkey from cooking evenly and safely reaching the proper internal temperature. These aromatics are purely for flavor and moisture, not for eating.
- Truss Your Turkey: Using kitchen twine, tie the turkey legs together. This helps the turkey cook more evenly and creates a more compact, attractive presentation. You can also tuck the wing tips under the turkey’s back to prevent them from burning.
- Position for Roasting: Place the prepared turkey, breast-side up, on the rack in your roasting pan. Double-check that it’s stable and centered.
The Roasting Journey to a Perfect Thanksgiving Turkey Recipe
- Preheat Your Oven: Preheat your oven to a high temperature of 425°F (220°C). Roasting at a higher temperature initially helps to crisp the skin and achieve that desirable golden color.
- Initial High Heat Roast: Place the turkey in the preheated oven and roast for 30-45 minutes at 425°F (220°C). Keep a close eye on it during this time. The skin should start to turn a beautiful golden brown.
- Reduce Temperature and Continue Roasting: After the initial high-heat period, reduce the oven temperature to 325°F (160°C). Do not open the oven door during this temperature adjustment; simply turn the dial down. Continue roasting, basting the turkey periodically.
- Basting Schedule: Every 30-45 minutes, open the oven and baste the turkey generously with the pan juices. If your pan juices start to evaporate too much, you can add another cup of chicken broth to the bottom of the pan. Basting helps to keep the skin moist and flavorful, although the compound butter under the skin is doing most of the work for the meat itself.
- Tent with Foil (If Needed): If the skin of your turkey starts to brown too quickly before the turkey is cooked through, loosely tent the turkey with aluminum foil. This will prevent further browning while allowing the meat to continue cooking. Remove the foil for the last 30-60 minutes of cooking to re-crisp the skin if necessary.
- Monitor Internal Temperature: This is the most important step for ensuring a perfectly cooked and safe Thanksgiving Turkey Recipe. Use a reliable meat thermometer. Insert the thermometer into the thickest part of the thigh, making sure it doesn’t touch the bone. The turkey is done when the internal temperature in the thigh reaches 170-175°F (77-79°C). For the breast, aim for 160-165°F (71-74°C). Remember, the temperature will rise another 5-10 degrees while the turkey rests.
- Total Roasting Time Guidelines: A 12-16 pound turkey typically takes about 3 to 4 hours to roast, but this can vary significantly based on your oven, the turkey’s initial temperature, and how often you open the oven door. Always rely on the meat thermometer, not just the clock.
Resting, Carving, and Gravy (The Grand Finale of Your Thanksgiving Turkey Recipe)
- The All-Important Rest: Once your turkey reaches the target internal temperature, remove it from the oven. Carefully transfer the turkey from the roasting pan to a large cutting board. Tent it loosely with aluminum foil and allow it to rest for at least 30 minutes, or even up to an hour. Do not skip this step! Resting allows the juices to redistribute throughout the meat, ensuring every slice is incredibly moist and tender. If you cut into it too soon, all those precious juices will run out onto your cutting board, leaving you with dry meat.
- Prepare for Gravy: While the turkey rests, carefully pour the pan drippings from the roasting pan through a fine-mesh sieve into a heatproof bowl. Press down on the roasted vegetables to extract all their flavorful juices. You can then let the drippings sit for a few minutes to allow the fat to separate and rise to the top. Skim off as much fat as you desire (a fat separator is excellent for this). These flavorful drippings are the foundation for an amazing gravy!
-
Carving Your Masterpiece: After the turkey has rested sufficiently, it’s time to carve.
- Remove the Legs and Thighs: First, locate the joint where the leg and thigh connect to the body. Slice through the skin and then twist or cut through the joint to remove the entire leg-thigh quarter. You can then separate the drumstick from the thigh by cutting through the joint.
- Remove the Wings: Cut through the joint where the wings attach to the breast.
- Slice the Breast Meat: Run your knife down along one side of the breastbone, cutting vertically to remove the entire breast half from the bone. Place the breast half skin-side up on the cutting board and slice it horizontally against the grain into desired thickness. Repeat with the other breast half.
- Arrange and Serve: Arrange your beautifully carved turkey on a large platter, garnished with some fresh herbs if you like.
Expert Tips for Your Best Thanksgiving Turkey Recipe Yet
-
Invest in a Good Meat Thermometer:
Seriously, this is non-negotiable for a perfect Thanksgiving Turkey Recipe. It takes all the guesswork out of roasting and ensures your turkey is cooked to perfection and safe to eat. Forget pop-up timers; they are unreliable.
-
Never Stuff the Cavity with Edible Stuffing:
As mentioned, packing edible stuffing into the turkey cavity prevents even cooking and can harbor bacteria if the stuffing doesn’t reach a safe internal temperature of 165°F (74°C). Cook your stuffing in a separate baking dish.
-
Consider the Brine:
While this recipe includes brining, if you’re short on time, you can skip it. However, I truly believe brining makes a significant difference in the final juiciness and flavor of your Thanksgiving Turkey Recipe. If you skip the brine, make sure to season the turkey very generously with salt and pepper, both inside and out, at least an hour before roasting.
-
Let it Rest, Really!
I cannot emphasize the importance of resting the turkey enough. It’s the final, crucial step that guarantees a moist and tender bird. Don’t rush it!
-
Have a Backup Plan for Gravy:
Even with the best drippings, sometimes you need a little more gravy. Keep some extra chicken or turkey broth on hand, along with flour or cornstarch, to whip up additional gravy if needed.
-
Don’t Be Afraid to Experiment:
While this recipe provides a solid foundation for an amazing Thanksgiving Turkey Recipe, feel free to adjust the herbs or aromatics to your family’s preferences. A little spice, different citrus, or even a splash of wine in the basting liquid can add your own unique touch.

Conclusion:
As we wrap up our journey through this incredible recipe, I truly hope you’re feeling as inspired and excited as I am about the prospect of bringing this masterpiece to your table. What makes this particular recipe an absolute must-try isn’t just its promise of a perfectly cooked bird, but the sheer simplicity and foolproof steps that guarantee success, even if you’re a novice in the kitchen. We’ve focused on techniques that lock in moisture and flavor, ensuring every bite is tender, juicy, and bursting with a symphony of aromatic herbs and spices. Forget dry, bland poultry; this method delivers a roast that is so profoundly delicious, it will effortlessly become the star of any gathering. The golden, crispy skin, the succulent meat, and the incredible fragrance that fills your home as it bakes are all testaments to a recipe designed to impress and delight. It’s about creating not just a meal, but an unforgettable culinary experience that lingers in memory long after the last morsel is savored.
I know firsthand the immense joy and satisfaction that comes from serving a dish that truly wows your guests, and I can confidently say this recipe is engineered for exactly that outcome. It’s about more than just a main course; it’s about crafting a centerpiece that speaks volumes about care and quality. The balanced seasoning, the meticulous cooking temperatures, and the crucial resting period all play a vital role in transforming simple ingredients into something truly extraordinary. Imagine the appreciative murmurs around the dinner table as everyone savors a slice of this magnificent roast. This isn’t just a good recipe; it’s an exceptionally reliable one, honed to perfection to ensure you achieve that ideal balance of savory flavors and melt-in-your-mouth texture every single time. Honestly, if you’re looking for a definitive, show-stopping center-of-the-plate option for any celebratory meal, particularly one as important as the fall feast, this is the one you absolutely need to try.
Serving Suggestions to Elevate Your Feast
Now, while the roast is undeniably the star, don’t forget the supporting cast! To truly complete your culinary tableau, I highly recommend serving generous slices alongside a creamy, buttery mashed potato dish, perhaps infused with roasted garlic or fresh chives. A rich, homemade gravy, made from the pan drippings, is non-negotiable – it adds another layer of decadent flavor that truly ties everything together. For a vibrant contrast, consider a bright, tangy cranberry sauce, either homemade with fresh cranberries and orange zest, or a high-quality store-bought option. Roasted root vegetables like carrots, parsnips, and sweet potatoes, tossed with a touch of olive oil, rosemary, and sea salt, would add beautiful color and earthy sweetness. And of course, a classic bread stuffing, moist and flavorful, is always a welcome accompaniment. For a fresh touch, a simple green salad with a light vinaigrette can cut through the richness beautifully. Consider a hearty red wine, such as a Pinot Noir or a Zinfandel, to complement the robust flavors of the meal, or a crisp hard cider for something lighter.
Variations to Keep Things Exciting
One of the beauties of a foundational recipe like this is its adaptability. While I adore the classic preparation, don’t hesitate to experiment! For a different flavor profile, you could infuse the butter rub with citrus zest – lemon, orange, or even a blend – for a brighter, more aromatic finish. If you enjoy a bit of heat, a pinch of cayenne pepper or a dash of smoked paprika in your seasoning blend would add a wonderful warmth. For a deeper, more herbaceous flavor, try stuffing the cavity with extra fresh herbs like sage, thyme, and rosemary, along with halved onions and garlic cloves. Leftovers, should you be so lucky, are a treasure trove of possibilities. Shred the meat for incredible sandwiches with a dollop of cranberry mayo, transform it into a hearty pot pie with a flaky crust, or use it as the base for a comforting soup or a creamy pasta dish. The possibilities are truly endless, extending the enjoyment of your magnificent creation well beyond the main event.
My hope is that you feel empowered and ready to tackle this recipe with confidence. There’s a profound sense of accomplishment that comes from mastering a dish like this, especially when it results in such spectacular flavor and presentation. Please, please give this Thanksgiving Turkey Recipe a try! I am genuinely confident that it will not only meet but exceed your expectations, becoming a cherished part of your culinary repertoire. When you do, I would absolutely love to hear about your experience! Did you stick to the recipe, or did you add your own unique twist? What were your favorite accompaniments? Share your triumphs, your photos, and any tips you discovered along the way in the comments. Your feedback not only inspires me but also helps other home cooks on their journey. Happy cooking, my friends, and prepare to create something truly memorable!
Thanksgiving Turkey Recipe
A delicious recipe for roasted Thanksgiving turkey, featuring an aromatic herb compound butter for moisture and flavor. This guide includes essential tips for achieving crispy skin and a perfectly cooked holiday centerpiece. Please note, while brining is a popular method for incredibly juicy turkey (as mentioned in the original article), this specific recipe’s ingredient list focuses on the core roasting process.
Ingredients
Instructions
Important Information
Nutrition Facts (Per Serving)
It is important to consider this information as approximate and not to use it as definitive health advice.
Allergy Information
Please check ingredients for potential allergens and consult a health professional if in doubt.
Leave a Comment