
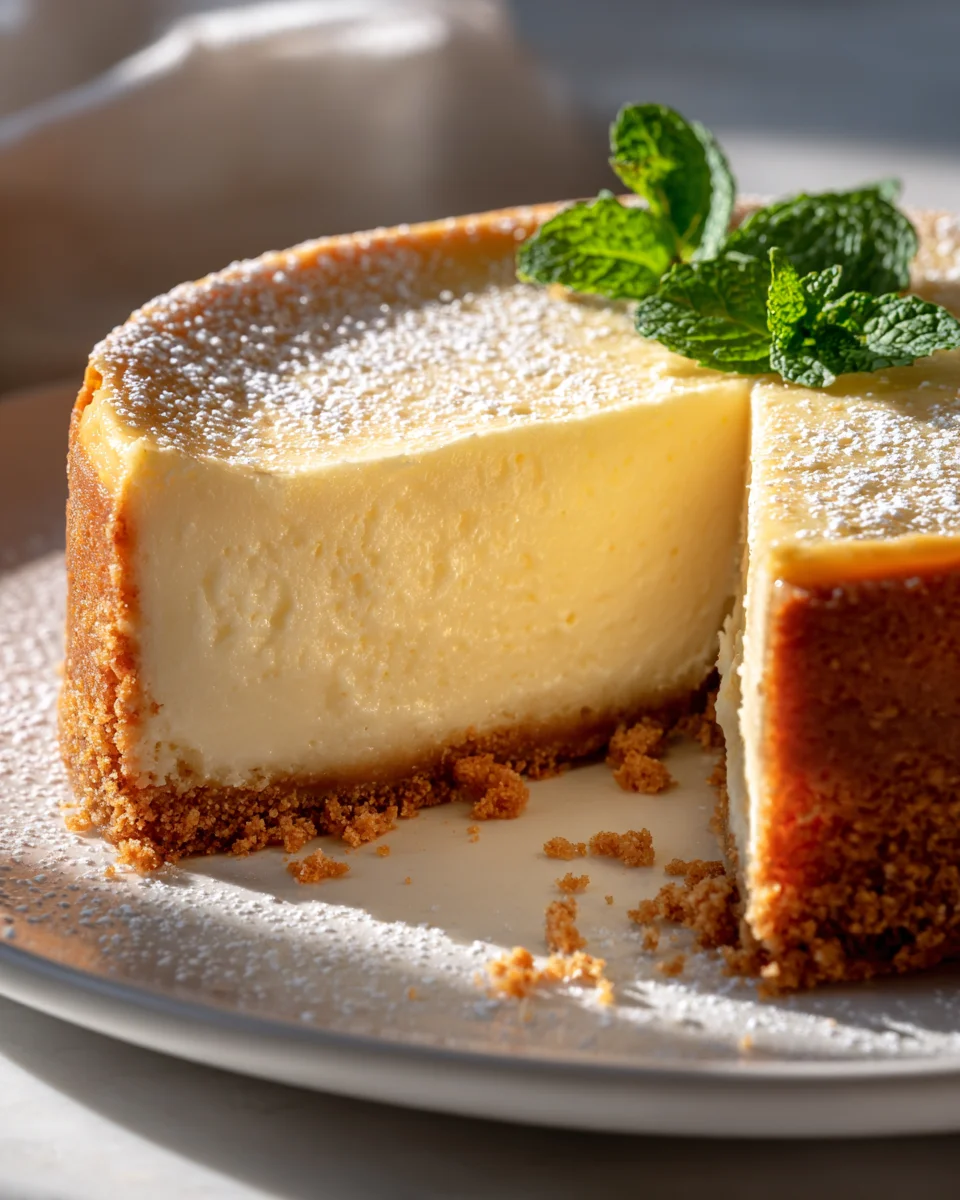
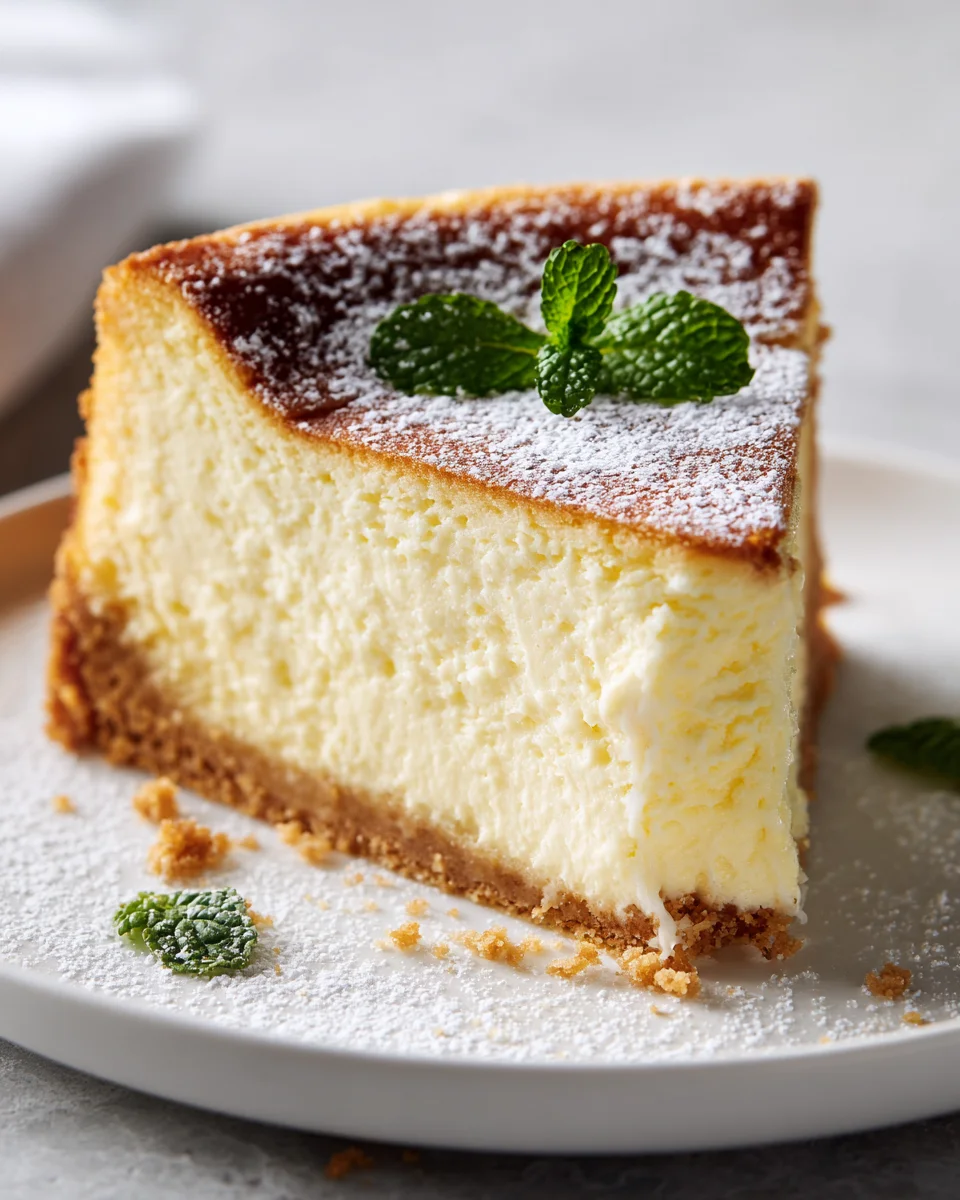
Basic Loaf Pan Cheesecake
Oh, do I have a treat for you today! The Basic Loaf Pan Cheesecake is about to become your new favorite dessert, especially if you’re like me and sometimes crave that luscious, creamy goodness without the fuss of a full-sized springform pan production. What makes this recipe so special, you ask? Well, it’s all in the name! This isn’t some overly complicated, multi-step dessert. Instead, it’s an incredibly approachable cheesecake that delivers all the rich, tangy, smooth satisfaction you expect, but in a perfectly portioned loaf pan.
You’ll absolutely love this because it’s a brilliant way to enjoy homemade cheesecake without needing special equipment or baking for a crowd. It’s perfect for a cozy dinner at home, a small get-together, or simply when you want a manageable amount of decadence to yourself (no judgment here!). We’re talking about a classic, velvety smooth cheesecake filling, nestled atop a simple crumb crust, all baked to perfection in your standard loaf pan. It’s an easy-to-make, utterly irresistible dessert that proves sometimes the most basic things are the most brilliant. Get ready to fall in love with stress-free cheesecake!
Ingredient Notes
Crafting a truly delicious Basic Loaf Pan Cheesecake starts with understanding your ingredients. While this recipe is designed to be straightforward, a few key choices and proper handling can make all the difference in achieving that perfectly smooth, creamy texture we all crave.
- Full-Fat Cream Cheese: This is the star of our show! I can’t stress enough how important it is to use full-fat cream cheese, not the reduced-fat or whipped varieties. The full-fat version provides the richness and structure necessary for a classic cheesecake. Make sure your cream cheese is completely softened to room temperature. This is absolutely critical for a smooth batter, free of lumps. If it’s too cold, you’ll end up overmixing your batter trying to smooth it out, which can lead to cracks in your finished cheesecake.
- Granulated Sugar: Simple granulated sugar is all you need here. It sweetens the cheesecake and contributes to its tender texture. You can adjust the amount slightly to your personal preference, but I find the suggested amount creates a lovely balance of sweet and tangy.
- Large Eggs: Eggs act as a binder, helping the cheesecake to set. Just like the cream cheese, make sure your eggs are at room temperature. Cold eggs don’t emulsify as well with the other ingredients, leading to a less uniform batter. Adding them one at a time and mixing just until combined is key to preventing too much air from incorporating into the batter, which can cause cracks.
- Sour Cream (Full-Fat): This ingredient is a game-changer for basic cheesecakes. Full-fat sour cream adds a wonderful tanginess that balances the sweetness and richness of the cream cheese. It also contributes to an incredibly silky-smooth texture. Again, ensure it’s at room temperature for the best results.
- Vanilla Extract: Pure vanilla extract enhances all the other flavors. It’s a foundational flavor in a basic cheesecake. If you’re looking for a non-alcohol alternative, there are many excellent alcohol-free vanilla extracts available that work beautifully without compromising flavor.
- Graham Cracker Crumbs: For our classic crust, finely crushed graham cracker crumbs are perfect. You can buy them pre-crushed or crush your own in a food processor. This creates a sturdy yet tender base for our cheesecake.
- Unsalted Butter (Melted): Melted butter binds the graham cracker crumbs together, forming a delicious, firm crust. I prefer unsalted butter so I can control the salt content myself, though salted butter would work in a pinch.
Step-by-Step Instructions
Baking a Basic Loaf Pan Cheesecake is incredibly rewarding, and by following these steps, you’ll be well on your way to a perfectly creamy dessert. Remember, patience is a virtue, especially when it comes to cheesecake!
-
Prepare Your Pan & Preheat Oven:
Preheat your oven to 325°F (160°C). Grease a standard 9×5-inch loaf pan, then line it with parchment paper, leaving an overhang on the longer sides to create a “sling.” This sling will be your best friend for lifting the cheesecake out of the pan once it’s chilled. It really makes removal simple and mess-free.
-
Make the Crust:
In a medium bowl, combine 1 cup of graham cracker crumbs, 1 tablespoon of granulated sugar, and 4 tablespoons of melted unsalted butter. Mix well until the crumbs are evenly moistened. Press the mixture firmly and evenly into the bottom of your prepared loaf pan. You can use the back of a spoon or the bottom of a glass to compact it. Bake the crust for 8-10 minutes, then remove it from the oven and let it cool completely while you prepare the filling.
-
Prepare the Cheesecake Filling:
In a large mixing bowl (or the bowl of a stand mixer fitted with the paddle attachment), beat the two 8-ounce blocks of softened cream cheese on medium speed until it’s completely smooth and creamy, with no lumps. This should take about 2-3 minutes. Next, add ¾ cup of granulated sugar and beat again until just combined and smooth, scraping down the sides of the bowl as needed. Beat in ½ cup of room temperature sour cream and 1 teaspoon of vanilla extract (or non-alcohol alternative) until just incorporated.
-
Add the Eggs:
Reduce the mixer speed to low. Add the two large, room-temperature eggs one at a time, mixing just until each egg is combined into the batter. Do not overmix at this stage! Overmixing once the eggs are added incorporates too much air, which can cause your cheesecake to puff up too much and then crack as it cools.
-
Bake the Cheesecake:
Pour the smooth cheesecake filling over the cooled graham cracker crust in the loaf pan. Gently tap the pan on the counter a few times to release any large air bubbles. Carefully transfer the loaf pan to the preheated oven. Bake for approximately 45-60 minutes. The cheesecake is done when the edges are set and slightly puffed, but the very center (about a 1-2 inch circle) still has a slight jiggle to it when you gently shake the pan. Don’t worry, it will set up completely as it cools.
-
Cool Slowly:
This is a crucial step for preventing cracks! Once the cheesecake is baked, turn off the oven but leave the cheesecake inside with the oven door propped open slightly (a wooden spoon works well for this) for 1 hour. This allows the cheesecake to cool down very gradually. After an hour, remove the cheesecake from the oven and transfer it to a wire rack to cool completely to room temperature, which will take another 1-2 hours.
-
Chill Thoroughly:
Once cooled to room temperature, cover the loaf pan tightly with plastic wrap. Transfer the cheesecake to the refrigerator and chill for a minimum of 4-6 hours, or ideally, overnight. Chilling is essential for the cheesecake to fully set and for the flavors to meld beautifully. Once chilled, use the parchment paper sling to lift the cheesecake out of the pan, slice, and serve!
Tips & Suggestions
Even though this is a basic recipe, a few clever tricks can elevate your Loaf Pan Cheesecake from good to absolutely fantastic. I’ve learned these over time, and they truly make a difference!
- Room Temperature is Your Mantra: I can’t emphasize this enough – every dairy ingredient (cream cheese, eggs, sour cream) must be at room temperature. This ensures a silky-smooth batter, free of lumps, and helps prevent overmixing. Plan ahead; it usually takes an hour or two for ingredients to warm up on the counter.
- The Art of Not Overmixing: When you’re making cheesecake, particularly after adding the eggs, think “gentle.” Overmixing incorporates too much air into the batter. This air causes the cheesecake to puff up dramatically in the oven, only to collapse and crack as it cools. Mix on low speed, just until ingredients are combined. A few tiny lumps are far better than an overmixed, airy batter.
- Consider a Water Bath (Bain-Marie): While a basic recipe might skip it for simplicity, using a water bath is my secret weapon for the most luxurious, crack-free cheesecake. For a loaf pan, simply place your prepared loaf pan inside a larger roasting pan. Fill the larger pan with about 1 inch of hot water, making sure the water doesn’t splash into your cheesecake. The steam from the water bath creates a moist, gentle baking environment, ensuring a super creamy texture and significantly reducing the risk of cracks.
- Don’t Peek! Resist the urge to open the oven door frequently during baking. Sudden changes in temperature can cause cracks. Trust the process, and only open the door when it’s time to check for doneness.
- The “Jiggle Test” for Doneness: Your cheesecake is perfectly baked when the edges look set and slightly golden, but the very center (about a 1-2 inch circle) still has a slight, delicate wobble or jiggle. It shouldn’t be liquidy, but more like firm gelatin. It will continue to cook and set as it cools.
- The Parchment Sling Advantage: That parchment paper sling isn’t just for show! It’s incredibly practical for easy removal. Once your cheesecake is fully chilled, you can simply lift the entire block of cheesecake out of the loaf pan, making it effortless to slice and serve neat portions.
- Serving Suggestions: A basic cheesecake is a beautiful blank canvas! Keep it simple with fresh seasonal berries like strawberries, raspberries, or blueberries. A dusting of powdered sugar adds an elegant touch. For something richer, a drizzle of warm chocolate fudge sauce, salted caramel, or even a dollop of homemade lemon curd would be divine.
- Flavor Variations: Feel free to experiment! Stir 1-2 tablespoons of fresh lemon zest into the batter along with the sour cream for a brighter, more citrusy flavor. You could also swirl in a few spoonfuls of your favorite fruit preserves (like raspberry or cherry) into the batter just before baking for a marbled effect.
Storage
Once you’ve poured your heart into making this delicious Basic Loaf Pan Cheesecake, you’ll want to ensure it stays fresh and delightful for as long as possible. Proper storage is key!
- Refrigeration is Mandatory: Cheesecake, being a dairy-rich dessert, is highly perishable and absolutely requires refrigeration. Never leave your cheesecake out at room temperature for more than two hours.
- Airtight is Best: Once your cheesecake is completely cooled and chilled (this usually takes several hours or overnight in the fridge), make sure to store it properly. You can either leave it in the loaf pan, covered tightly with plastic wrap to prevent it from drying out or absorbing refrigerator odors. Alternatively, use the parchment sling to lift it out, slice it, and store individual slices or the whole block in an airtight container. This keeps it fresh and moist.
- How Long Does It Last? When stored correctly in an airtight container in the refrigerator, your Basic Loaf Pan Cheesecake will remain fresh and delicious for about 5 to 7 days. The flavor actually tends to deepen slightly after the first day, so it’s a fantastic make-ahead dessert!
- Freezing for Future Enjoyment: Yes, cheesecake freezes beautifully! This is particularly convenient for a loaf pan size, as you might not eat the whole thing at once.
- To Freeze Whole: Ensure the cheesecake is completely chilled and firm. Wrap the entire cheesecake (either in the loaf pan or lifted out) tightly with several layers of plastic wrap, then an additional layer of aluminum foil. This double-wrapping prevents freezer burn.
- To Freeze Slices: If you prefer individual portions, slice the chilled cheesecake first. Place each slice on a small piece of parchment paper, then wrap each slice tightly in plastic wrap, followed by aluminum foil. Store the wrapped slices in a freezer-safe bag or container.
Frozen cheesecake will keep well for 1 to 2 months. To thaw, simply transfer it to the refrigerator overnight. Avoid thawing at room temperature, as this can affect the texture. Enjoy your perfectly preserved treat!
Final Thoughts
And there you have it! I truly believe this Basic Loaf Pan Cheesecake is a recipe you’ll be returning to time and time again. Its inherent simplicity, combined with the convenience of using a standard loaf pan, makes homemade cheesecake an absolute breeze, even for those who might feel intimidated by traditional methods. I love how easily it comes together, transforming simple ingredients into a rich, creamy, and utterly satisfying dessert. This isn’t just any cheesecake; it’s your ticket to effortless elegance, perfect for a cozy weeknight treat or a delightful addition to any gathering. I encourage you to whip up this Basic Loaf Pan Cheesecake and experience the joy of a perfectly portioned, incredibly delicious dessert that everyone will adore. Happy baking!
Easy Basic Loaf Pan Cheesecake: Simple, Creamy & Perfect!

This Basic Loaf Pan Cheesecake is a delightful and approachable dessert that offers rich, creamy goodness without the fuss of traditional methods. Perfectly portioned and easy to make, it’s sure to become your new favorite treat!
- Prep Time: 20 mins
- Cook Time: 60 mins
- Total Time: 1 hour 20 minutes
- Yield: 8 servings 1x
- Category: Dessert
- Method: Baking
- Cuisine: American
Ingredients
- 2 (8-ounce) blocks of full-fat cream cheese, softened
- 3/4 cup granulated sugar
- 2 large eggs, room temperature
- 1/2 cup full-fat sour cream, room temperature
- 1 teaspoon vanilla extract
- 1 cup graham cracker crumbs
- 1 tablespoon granulated sugar
- 4 tablespoons unsalted butter, melted
Instructions
- Preheat your oven to 325°F (160°C). Grease a standard 9×5-inch loaf pan, then line it with parchment paper, leaving an overhang on the longer sides.
- In a medium bowl, combine 1 cup of graham cracker crumbs, 1 tablespoon of granulated sugar, and 4 tablespoons of melted unsalted butter. Mix well and press into the bottom of the prepared loaf pan. Bake for 8-10 minutes and let it cool completely.
- In a large mixing bowl, beat the two blocks of softened cream cheese on medium speed until smooth and creamy, about 2-3 minutes. Add 3/4 cup of granulated sugar and beat until just combined. Then, mix in 1/2 cup of room temperature sour cream and 1 teaspoon of vanilla extract until just incorporated.
- Reduce the mixer speed to low. Add the two large, room-temperature eggs one at a time, mixing just until each egg is combined into the batter.
- Pour the cheesecake filling over the cooled graham cracker crust in the loaf pan. Gently tap the pan on the counter to release any large air bubbles. Bake for approximately 45-60 minutes until the edges are set but the center has a slight jiggle.
- Once baked, turn off the oven and leave the cheesecake inside with the door propped open slightly for 1 hour. Then, transfer to a wire rack to cool completely to room temperature.
- Once cooled, cover the loaf pan tightly with plastic wrap and chill in the refrigerator for a minimum of 4-6 hours, or ideally overnight. Use the parchment paper sling to lift the cheesecake out of the pan, slice, and serve.
Nutrition
- Serving Size: 1 slice
- Calories: 320
- Sugar: 20 g
- Sodium: 250 mg
- Fat: 22 g
- Saturated Fat: 12 g
- Unsaturated Fat: 8 g
- Trans Fat: 0 g
- Carbohydrates: 30 g
- Fiber: 1 g
- Protein: 5 g
- Cholesterol: 90 mg
Keywords: Ensure all dairy ingredients are at room temperature for a smooth batter. Avoid overmixing, especially after adding eggs, to prevent cracks in the cheesecake.
Leave a Comment