
Unleashing Joy with Every Bite: The Allure of Cookie Monster Cookies
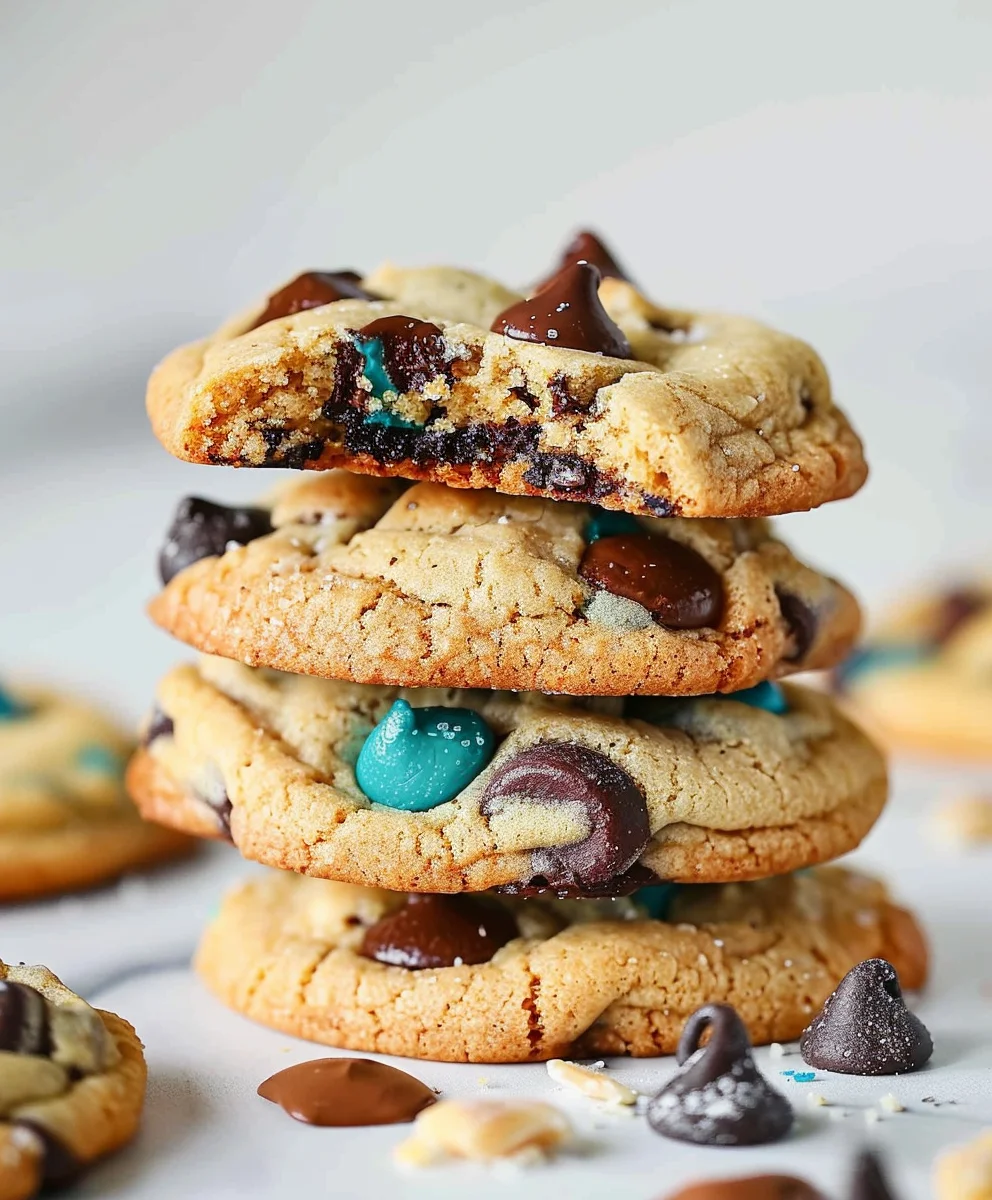
Cookie Monster Cookies, with their vibrant blue hue and irresistible medley of mix-ins, have long captured the imaginations and taste buds of dessert enthusiasts everywhere. There’s a particular magic to these whimsical treats, evoking a sense of nostalgic delight that harkens back to simpler times and the beloved, ravenous character from Sesame Street who famously adored his “nom nom nom” cookies. I find myself constantly captivated by how a single cookie can bring such a broad smile, instantly transforming an ordinary day into something truly special.
What makes these particular confections so universally adored? It’s not merely their eye-catching appearance, though that certainly plays a significant role, especially for children and those young at heart. People truly love the generous combination of textures and flavors; often loaded with various chocolate chips, crushed sandwich cookies, and even a playful sprinkle of candy, each bite of these Cookie Monster Cookies offers a delightful surprise. They embody pure comfort and joyful indulgence, making them a fantastic choice for celebrations, family gatherings, or simply when you crave a truly memorable and fun baking adventure.

Ingredients:
-
2 ½ cups (300g) all-purpose flour: I always make sure to spoon and level my flour to ensure an accurate measurement. This is crucial for the perfect Cookie Monster Cookies texture!
-
1 teaspoon baking soda: Our magical leavening agent that helps these cookies get that lovely rise.
-
¾ teaspoon salt: Don’t skip the salt! It perfectly balances the sweetness and enhances all the other flavors.
-
1 cup (226g) unsalted butter, softened to room temperature: This is absolutely non-negotiable for a creamy, well-incorporated dough. If it’s too cold, it won’t cream properly; too warm, and your dough might be greasy. Plan ahead and take it out of the fridge a couple of hours before you start!
-
¾ cup (150g) granulated sugar: For that crisp-chewy balance we adore.
-
1 cup (200g) packed light brown sugar: This is where a lot of the moisture and chewiness comes from, giving our Cookie Monster Cookies their delightful texture.
-
2 large eggs, at room temperature: Just like the butter, room temperature eggs emulsify better into the mixture, creating a smoother, more cohesive dough.
-
2 teaspoons pure vanilla extract: A generous splash of vanilla truly elevates the flavor profile of any cookie, and these Cookie Monster Cookies are no exception.
-
1-2 teaspoons royal blue gel food coloring: We’re aiming for that iconic, vibrant Cookie Monster blue! Gel food coloring is best here as it provides intense color without thinning your dough too much. You might need a little more or less depending on the brand and desired intensity.
-
1 ½ cups (about 150g) pre-made chocolate chip cookies, broken into pieces: I love using store-bought soft-baked chocolate chip cookies for ease, but feel free to bake a batch from scratch if you’re feeling ambitious! Break them into varying sizes, from small crumbs to half-cookie chunks.
-
1 cup (about 100g) Oreo cookies, broken into pieces: The classic crunch of Oreos adds another layer of texture and flavor that truly makes these Cookie Monster Cookies special. Again, break them into various sizes.
-
1 package (about 1 oz) edible candy eyes: These are the adorable finishing touch that brings our Cookie Monster Cookies to life! You’ll typically find these in the baking aisle.
Gathering Our Tools & Prepping for Monster Mayhem:
-
Preheat Your Oven: First things first, let’s get that oven ready! Preheat it to 375°F (190°C). A properly preheated oven is crucial for even baking, ensuring our Cookie Monster Cookies cook through perfectly without burning on the outside.
-
Prepare Your Baking Sheets: Line two large baking sheets with parchment paper or silicone baking mats. I always opt for parchment paper because it prevents sticking, promotes even browning, and makes cleanup an absolute breeze. Plus, it helps the cookies retain their shape beautifully.
-
Whisk Dry Ingredients: In a medium bowl, whisk together the all-purpose flour, baking soda, and salt. Whisking ensures these dry ingredients are thoroughly combined and evenly distributed throughout the flour. This prevents pockets of unmixed leavening agent or salt in your finished Cookie Monster Cookies, which trust me, isn’t very tasty!
Crafting the Perfect Blue Dough:
-
Cream Butter and Sugars: In a large bowl, using either a stand mixer fitted with the paddle attachment or an electric hand mixer, cream together the softened unsalted butter, granulated sugar, and packed light brown sugar. Beat on medium speed for about 2-3 minutes, or until the mixture is light, fluffy, and noticeably pale in color. This process incorporates air into the butter, which is key for a tender cookie. Don’t rush this step; it’s fundamental for the texture of our Cookie Monster Cookies!
-
Add Eggs and Vanilla: Scrape down the sides of the bowl with a rubber spatula. Then, add one large egg at a time, beating well after each addition until it is fully incorporated into the butter and sugar mixture. Finally, stir in the pure vanilla extract. Make sure to beat until the mixture is smooth and glossy. The room temperature eggs will blend much more seamlessly here, creating a lovely emulsion.
-
Introduce the Dry Ingredients: With the mixer on low speed, gradually add the whisked dry ingredients (flour, baking soda, salt) to the wet mixture. Mix just until combined. This means as soon as you see no more streaks of dry flour, stop the mixer. Overmixing the dough can lead to tough cookies because it develops the gluten too much. We want tender, chewy Cookie Monster Cookies, not hockey pucks!
-
The Blue Magic: Now for the fun part – transforming our dough into that iconic Cookie Monster blue! Add 1 teaspoon of royal blue gel food coloring to the dough. Mix on low speed until the color is fully distributed. If you desire a deeper, more vibrant blue, add another ½ teaspoon, or even a full teaspoon, of gel food coloring at a time, mixing thoroughly after each addition, until you achieve your desired shade. Remember, a little gel goes a long way, but for a true Cookie Monster hue, don’t be shy! I usually find 1 ½ to 2 teaspoons does the trick beautifully. Scrape down the bowl as needed to ensure an even color.
Mixing in the Monster’s Favorites:
-
Prepare the Chocolate Chip Cookies: Take your pre-made chocolate chip cookies and gently break them into varying sized pieces. Some can be small crumbs, others larger chunks. The variety of sizes adds wonderful texture to our Cookie Monster Cookies. I find it easiest to do this by hand right over the dough bowl.
-
Prepare the Oreos: Do the same with your Oreo cookies. Break them up into small to medium pieces. You want identifiable chunks of both types of cookies within your blue dough. Avoid crushing them into powder; we want that delightful bite!
-
Fold in the Mix-ins: Add the broken chocolate chip cookie pieces and Oreo pieces to the blue dough. Using your rubber spatula, gently fold them into the dough until they are evenly distributed. Be careful not to overmix here. The goal is to incorporate them without completely crushing them or overworking the dough further. We want visible, delicious chunks in every bite of our Cookie Monster Cookies!
Baking the Big Blue Wonders:
-
Portion the Dough: Using a medium cookie scoop (about 1.5-2 tablespoons) or by rolling approximately 2 tablespoons of dough per cookie, drop rounded balls onto your prepared baking sheets. Make sure to leave about 2 inches of space between each cookie dough ball, as they will spread during baking. Consistent sizing helps ensure all your Cookie Monster Cookies bake evenly.
-
Bake to Perfection: Place one baking sheet at a time in the preheated oven. Bake for approximately 9-12 minutes. The exact baking time can vary depending on your oven, so keep an eye on them. You’ll know they’re ready when the edges are set and lightly golden, but the centers still look slightly soft and gooey. For even baking, I often rotate the baking sheet halfway through the baking time.
-
Cool Briefly on the Sheet: Once baked, remove the baking sheet from the oven. Allow the Cookie Monster Cookies to cool on the baking sheet for about 5-7 minutes. This short cooling period allows them to set up a bit more and prevents them from falling apart when you transfer them. They will continue to cook slightly from the residual heat.
The Finishing Touches: Bringing Our Cookie Monsters to Life:
-
Add the Edible Eyes: This is my absolute favorite part! As soon as the cookies come out of the oven and are still warm and soft, gently press two edible candy eyes onto each cookie, near the top. The warmth of the cookie will help the eyes adhere without any need for additional frosting or glue. This is what truly transforms them into adorable Cookie Monster Cookies!
-
Complete Cooling: After adding the eyes, carefully transfer the cookies to a wire rack to cool completely. This allows air to circulate around them, preventing them from getting soggy bottoms and ensuring they achieve that perfect chewy-crisp texture. Patience is a virtue here; while it’s tempting to dig in immediately, fully cooled cookies have the best texture and flavor. Stacking them warm can ruin their shape and make them stick together.
-
Store Them Right: Once completely cool, store your delightful Cookie Monster Cookies in an airtight container at room temperature for up to 3-4 days. They tend to stay wonderfully fresh and delicious, perfect for sharing with friends or enjoying yourself. I promise, they won’t last long!
Conclusion:
After all our fun in the kitchen, experimenting with vibrant colors and delightful flavors, we arrive at this moment of sweet anticipation. I truly believe that these aren’t just any ordinary cookies; they are an experience, a joyful rebellion against the mundane, and an absolute triumph of taste and whimsy. What makes these particular treats an undeniable must-try isn’t just their striking, playful appearance, though that certainly grabs attention and sparks immediate smiles. It’s the perfect harmony of textures and flavors – that irresistible crunch at the edge giving way to a wonderfully soft, chewy center, generously studded with not one, but two types of chocolate chips that melt in your mouth with every bite. The hint of vanilla complements the rich chocolate beautifully, creating a classic, comforting flavor profile that belies their extraordinary look.
Beyond the aesthetics and the deliciousness, these cookies are a celebration of joy and creativity. They bring a burst of cheer to any occasion, instantly transforming a simple dessert into a memorable highlight. Whether you’re baking for a special party, a casual get-together, or simply to brighten a gloomy afternoon, these cookies deliver happiness in every single bite. They are surprisingly easy to make, a perfect project for bakers of all skill levels, and the sheer delight they bring is immeasurable. Trust me when I say, once you try them, you’ll understand why they quickly become a beloved staple in many homes. They truly stand out from the crowd, offering a playful twist on a timeless classic that appeals to both the young and the young-at-heart. The magic of these cookies lies in their ability to evoke a sense of childlike wonder, making every bite feel like a special treat.
Now, for serving suggestions and ways to make these delightful creations even more spectacular! While these cookies are utterly perfect straight out of the oven, or even after they’ve cooled to room temperature, there are numerous ways to elevate your experience. Imagine sinking your teeth into one alongside a tall, frosty glass of milk – a classic pairing that never disappoints. For an extra indulgent treat, try sandwiching a scoop of your favorite vanilla bean ice cream between two of these beauties, creating an instant, show-stopping dessert that’s perfect for a warm evening. Alternatively, crumble a few over a bowl of rich chocolate ice cream or a creamy panna cotta for an added textural dimension and a pop of vibrant color. They also make fantastic additions to a dessert platter, adding a playful element among more traditional confections.
Feeling adventurous with variations? The sky’s the limit! You could easily swap out some of the semi-sweet chocolate chips for white chocolate chunks, or even a mix of dark chocolate and peanut butter chips for a different flavor dynamic. For an extra layer of crunch and saltiness, try incorporating crushed pretzels into the dough, which pairs wonderfully with the sweet chocolate. A sprinkle of sea salt on top before baking can also enhance the chocolate flavors beautifully. If you’re hosting a themed event, consider adding different colored candies or sprinkles to the dough before baking – perhaps red and green for the holidays, or pastel shades for Easter. You could also experiment with different extracts; a touch of almond or even a hint of espresso powder could subtly deepen the flavor profile without overpowering the fun aesthetic. For those who love nuts, a handful of finely chopped pecans or walnuts could also be folded into the dough, adding another layer of texture and richness. Don’t be afraid to make them your own; this recipe is wonderfully forgiving and adaptable. You might even consider baking them into smaller mini cookies for bite-sized treats or, conversely, making colossal cookies for a truly monstrous indulgence!
So, what are you waiting for? I wholeheartedly encourage you to roll up your sleeves, gather your ingredients, and dive into the delightful process of baking these incredible Cookie Monster Cookies. There’s a special kind of joy that comes from creating something so wonderfully whimsical and delicious with your own hands. Don’t be shy about experimenting with the variations I’ve suggested, or even coming up with your own unique twists. The best part about baking is making a recipe your own and infusing it with your personal touch.
Once you’ve experienced the magic of baking and tasting these vibrant treats, I would absolutely love to hear about it! Please, share your baking journey with me. Did they turn out as wonderfully blue and delicious as you imagined? Did you try any fun variations? What kind of reactions did they get from your friends and family? Your stories and experiences truly make this culinary adventure even more rewarding. Let’s celebrate the joy of baking and the simple happiness that a batch of homemade cookies can bring. Happy baking, and I can’t wait to hear all about your delicious creations!
Cookie Monster Cookies Recipe: Easy & Fun Blue Treats
Cookie Monster Cookies, with their vibrant blue hue and irresistible medley of mix-ins, have long captured the imaginations and taste buds of dessert enthusiasts everywhere.
Ingredients
-
120g unsalted butter, softened
-
100g granulated sugar
-
50g light brown sugar
-
1 large egg, room temperature
-
1 tsp vanilla extract
-
1-2 tsp royal blue gel food coloring
-
230g all-purpose flour
-
¾ tsp salt
-
1 tsp baking powder
-
½ tsp baking soda
-
40g dark chocolate chips
-
40g white chocolate chips
-
30g crushed mini chocolate chip cookies
-
3 chopped Oreo cookies
-
12 whole Oreo cookies
-
1 package edible candy eyes
Instructions
-
Step 1
Preheat oven to 375°F (190°C). Line two baking sheets with parchment paper. -
Step 2
In a medium bowl, whisk together flour, baking powder, baking soda, and salt. -
Step 3
In a large bowl, cream softened butter, granulated sugar, and light brown sugar with an electric mixer for 2-3 minutes until light and fluffy. -
Step 4
Add the egg and vanilla extract, beating until well combined. -
Step 5
Gradually add the dry ingredients to the wet mixture, mixing on low speed until just combined. Do not overmix. -
Step 6
Add 1-2 teaspoons of royal blue gel food coloring and mix until the desired vibrant blue color is achieved and evenly distributed. -
Step 7
Gently fold in the dark chocolate chips, white chocolate chips, crushed mini chocolate chip cookies, and chopped Oreo cookies into the blue dough until evenly distributed. -
Step 8
Scoop dough (about 1.5-2 tablespoons per cookie) onto prepared baking sheets, spacing them 2 inches apart. -
Step 9
Bake for 9-12 minutes, or until edges are set and centers are slightly soft. Rotate baking sheets halfway through for even baking. -
Step 10
Let cookies cool on the baking sheet for 5-7 minutes. -
Step 11
While still warm, gently press two edible candy eyes onto each cookie. -
Step 12
Transfer cookies to a wire rack to cool completely. -
Step 13
Store cooled cookies in an airtight container at room temperature for up to 3-4 days.
Important Information
Nutrition Facts (Per Serving)
It is important to consider this information as approximate and not to use it as definitive health advice.
Allergy Information
Please check ingredients for potential allergens and consult a health professional if in doubt.


Leave a Comment