
Beefcheeseburritos.html is not just a file name on our website; it represents an incredibly delicious journey into the heart of comfort food that I am thrilled to guide you through today. Imagine a warm, tender tortilla generously filled with perfectly seasoned, succulent beef and an abundance of melty, gooey cheese, all rolled into a satisfying, handheld package of pure joy. This culinary masterpiece, with its rich Tex-Mex heritage, brilliantly combines the beloved elements of a hearty American cheeseburger with the convenient, versatile form of a Mexican burrito. The result is a fusion dish that has captivated taste buds around the world, making it a perennial favorite for good reason. People genuinely love this dish for its incredible satisfying flavor profile, its fantastic portability, and the sheer delight of biting into that perfect combination of savory meat and luscious, melting cheese. It’s perfect for a quick weeknight dinner, a vibrant family meal, or even as an exciting option for casual entertaining.
Get ready to discover why homemade beef cheeseburritos are a game-changer!
With my guidance, you’ll unlock the secrets to crafting your very own delectable Beefcheeseburritos.html right in your kitchen, promising a meal that’s both hearty and absolutely unforgettable.
Ingredients:
- For the Irresistible Beef Filling:
- 2 pounds (about 900g) ground beef (I prefer 80/20 for maximum flavor, but lean will work too)
- 1 large yellow onion, finely diced
- 4-5 cloves garlic, minced (or 2 tablespoons pre-minced)
- 2 tablespoons tomato paste
- 2 tablespoons chili powder (good quality, for depth)
- 1 tablespoon ground cumin
- 1 teaspoon smoked paprika (adds a lovely smoky depth!)
- 1 teaspoon dried Mexican oregano (or regular oregano)
- ½ teaspoon cayenne pepper (adjust to your preferred spice level, or omit for mild)
- 1 teaspoon salt (plus more to taste)
- ½ teaspoon black pepper (plus more to taste)
- 1 cup beef broth (or water)
- ½ cup fresh cilantro, chopped (for mixing into the filling and garnish)
- 1-2 tablespoons fresh lime juice
- 1-2 tablespoons vegetable oil (for browning beef)
- For Assembling the Beef and Cheese Burritos:
- 12-16 large flour tortillas (10-12 inches in diameter, choose flexible ones!)
- 3-4 cups shredded cheese blend (Monterey Jack, sharp cheddar, or a Mexican blend are fantastic)
- 2 cups cooked rice (white or brown, plain or a simple Mexican rice works wonders)
- 1 can (15 ounces) black beans, rinsed and thoroughly drained
- Optional additions for serving or inside: sour cream, salsa, guacamole, pico de gallo, pickled jalapeños, corn kernels.
Preparing the Flavorful Beef Filling
-
Browning the Beef and Aromatics to Perfection:
First up, let’s get that beautiful beef browning! I like to grab a large, heavy-bottomed skillet or a Dutch oven – something that can handle a good amount of heat and won’t crowd the meat. Drizzle about 1-2 tablespoons of vegetable oil into the pan and place it over medium-high heat. You want it nice and hot before you add the beef. Once it’s shimmering, carefully add your two pounds of ground beef. Now, this is important: don’t just dump it in and stir immediately. Let it sit for a minute or two to get a good sear on one side. This creates those lovely browned bits that are packed with flavor. Then, using a sturdy spoon or a potato masher, break the beef apart into small, uniform crumbles. Keep cooking, stirring occasionally, until all the beef is beautifully browned and no pink remains. This usually takes about 8-10 minutes. A crucial step here is to drain off any excess fat. Leaner beef will have less, but even 80/20 ground beef will release some liquid fat. I usually tilt the pan and use a spoon to scoop it out, or carefully transfer the beef to a colander set over a bowl. Removing this fat prevents your burritos from becoming greasy and ensures the other flavors really shine through.
Once the fat is drained, return the beef to the skillet (if you used a colander). Reduce the heat to medium. Add your finely diced onion to the pan with the beef. Sauté the onion, stirring often, for about 5-7 minutes, until it softens and becomes translucent. You’ll start to smell that wonderful aroma filling your kitchen! Next, add the minced garlic and cook for just one more minute until fragrant. Be careful not to burn the garlic; burnt garlic can turn bitter quickly.
-
Blooming the Spices and Building Flavor Depth:
Now for the magic part – the spices! Push the beef and onion mixture to one side of the skillet, creating a small space in the center. Add the tomato paste to this cleared space. Let it cook for about 1-2 minutes, stirring it occasionally, until it darkens slightly and caramelizes. This process, known as “blooming” the tomato paste, deepens its flavor significantly and removes any raw tinny taste. Trust me, it makes a difference!
Once the tomato paste has bloomed, sprinkle in the chili powder, ground cumin, smoked paprika, dried Mexican oregano, cayenne pepper (if using), salt, and black pepper directly onto the tomato paste. Stir the spices into the paste for about 30 seconds to a minute, letting them toast slightly. This “blooming” of the dry spices in the hot oil (or residual fat) releases their essential oils and dramatically enhances their aroma and flavor. You’ll notice a fantastic scent wafting up from the pan almost immediately. Then, stir the spiced tomato paste mixture into the beef and onion, ensuring everything is thoroughly combined and coated in those glorious spices. The color of your beef filling will transform into a rich, enticing hue.
-
Simmering to Melding Perfection:
Pour in the beef broth (or water) and bring the mixture to a gentle simmer. Once it’s simmering, reduce the heat to low, cover the skillet, and let it cook for at least 15-20 minutes. This simmering time is crucial for allowing all the flavors to meld together beautifully and for the beef to become incredibly tender. The liquid will also reduce, creating a rich, thick sauce that clings to every piece of ground beef. If you have more time, letting it simmer for even 30 minutes to an hour on low heat will only enhance the depth of flavor. The longer it simmers, the more amazing your beefcheeseburritos will taste!
-
Finishing Touches and Flavor Adjustment:
Once the beef filling has simmered and thickened to your liking, remove it from the heat. Stir in the fresh chopped cilantro and a generous squeeze of fresh lime juice. The cilantro adds a bright, fresh herbaceous note that cuts through the richness, while the lime juice brightens all the flavors. Give it a good stir and then, most importantly, taste it! This is your chance to adjust the seasoning. Does it need more salt? A pinch more pepper? A dash more cayenne for heat? Maybe another squeeze of lime? Don’t be shy about making it perfect for your palate. Set the finished beef filling aside; it’s ready to be the star of our Beef and Cheese Burritos!
Getting Your Components Ready for Assembly
While your beef filling is simmering, or cooling slightly, it’s the perfect time to get all your other burrito components organized. Having everything prepped and within reach will make the assembly process smooth and enjoyable.
-
Preparing the Rice:
If you don’t already have cooked rice on hand, now’s the time to prepare it. You can use plain white or brown rice, or for an extra layer of flavor, whip up a quick batch of Mexican rice. Regardless of your choice, ensure it’s cooked to perfection and ready to be incorporated into your burritos. I usually cook my rice with a little chicken broth instead of water for extra taste, and maybe a pinch of cumin.
-
Rinsing and Draining the Black Beans:
Open your can of black beans, pour them into a fine-mesh colander, and rinse them thoroughly under cold running water. This removes any excess sodium and the starchy liquid they’re packed in. After rinsing, make sure to drain them extremely well. You don’t want any extra moisture making your burritos soggy!
-
Shredding the Cheese:
If you’re using a block of cheese, now’s the time to shred it. Freshly shredded cheese melts much more smoothly and tastes better than pre-shredded varieties, which often contain anti-caking agents. Grab your box grater or food processor and shred about 3-4 cups of your chosen cheese blend. Monterey Jack, sharp cheddar, or a pre-mixed Mexican blend are all excellent choices for these beef and cheese burritos.
-
Warming the Tortillas for Flexibility:
This step is often overlooked but is absolutely essential for perfect, tear-free burritos. Cold tortillas are stiff and prone to cracking when you try to roll them. You want them warm and pliable. There are a few ways to do this:
- Microwave: Stack 3-4 tortillas, wrap them in a damp paper towel, and microwave for 30 seconds to 1 minute, until warm and soft. Repeat with the remaining tortillas.
- Skillet: Heat a dry skillet over medium-high heat. Place one tortilla at a time in the hot skillet for about 15-20 seconds per side, until it puffs slightly and becomes flexible.
- Oven: Wrap a stack of tortillas in foil and warm them in a 250°F (120°C) oven for about 10-15 minutes. This is great if you’re warming a large batch.
Once warmed, keep the tortillas covered with a clean kitchen towel to retain their warmth and flexibility until you’re ready to assemble.
Mastering the Art of Burrito Assembly
Now that all your components are ready, it’s time for the fun part – assembling your magnificent beef and cheese burritos!
-
Setting Up Your Burrito Assembly Line:
Efficiency is key here! Arrange all your ingredients in an assembly line fashion. You’ll want your warmed tortillas first, followed by your beef filling, then rice, black beans, and finally, the shredded cheese. If you’re adding other optional fillings like sour cream or salsa directly into the burrito, have those ready too. A clean, flat surface like a large cutting board or your countertop is ideal for rolling.
-
Layering the Ingredients with Care:
Take one warm tortilla and lay it flat on your working surface. I like to imagine the tortilla divided into thirds horizontally. We’ll be placing the fillings in the middle third.
- Start with the Beef: Spoon a generous amount of the beef filling (about ½ to ¾ cup, depending on your tortilla size and desired fullness) horizontally across the bottom third of the tortilla, leaving a small border at the bottom. Don’t overfill! This is probably the most common mistake. You need space to roll.
- Add the Rice: Next, spoon about ¼ to ½ cup of cooked rice over the beef.
- Layer the Beans: Sprinkle a couple of tablespoons of rinsed black beans over the rice.
- Pile on the Cheese: Finally, sprinkle a generous handful (about ¼ to ½ cup) of shredded cheese over all the other ingredients. The cheese will act as a delicious binder when melted.
Remember to keep your fillings relatively compact in the center of the tortilla, leaving about 1-2 inches of clear tortilla on the left and right sides, and a little more space at the top and bottom. This gives you enough “play” for a tight roll.
-
The Perfect Burrito Rolling Technique:
This is where practice makes perfect, but I’ll guide you through it! A well-rolled burrito is key to keeping all those delicious beef and cheese fillings inside.
- Fold in the Sides: First, take the left and right edges of the tortilla (the 1-2 inches you left clear) and fold them inward over the fillings. Pull them in snugly so they meet or almost meet in the middle.
- Fold Up the Bottom: Next, take the bottom edge of the tortilla (the part closest to you, below the fillings) and fold it up tightly over the fillings. Use your thumbs to tuck the edge underneath the fillings, pressing down firmly to compact everything.
- Roll Tightly: Once the bottom edge is tucked, use your fingers to pull the burrito back towards you slightly as you begin to roll it upwards, away from you. Continue rolling tightly, applying gentle pressure as you go, until you reach the top edge of the tortilla. You want a firm, compact cylinder. The tighter you roll, the less likely your Beef and Cheese Burritos are to burst open.
Repeat this process for all your remaining tortillas and fillings. You’ll become a burrito-rolling master in no time!
Finishing and Serving Your Perfect Beef and Cheese Burritos
While these burritos are technically ready to eat after assembly, a final step of cooking truly elevates them, especially for those who love a crispy, golden-brown exterior and gooey melted cheese.
-
Pan-Frying or Baking for a Golden Finish:
This step is optional but highly recommended for the best Beef and Cheese Burritos experience! It creates a wonderfully crispy exterior and perfectly melts the cheese inside.
- Pan-Frying Method (My Favorite!): Heat a large, non-stick skillet or cast-iron pan over medium heat. Add about ½ to 1 tablespoon of vegetable oil. Once the oil is shimmering, carefully place 1-2 burritos (seam-side down first) into the hot pan. Cook for 2-3 minutes per side, turning them gently with tongs, until each side is beautifully golden brown and crispy, and the cheese inside is gloriously melted. You’ll hear that satisfying sizzle! Remove from the pan and let them rest for a minute before serving.
- Baking Method (Great for a Crowd): Preheat your oven to 400°F (200°C). Lightly grease a baking sheet. Place the assembled burritos seam-side down on the prepared baking sheet. You can lightly brush the tops with a little oil for extra crispiness. Bake for 15-20 minutes, or until the tortillas are lightly browned and crisp, and the filling is heated through and the cheese is melted.
Whichever method you choose, the result will be a delightful beef and cheese burrito with a satisfying texture contrast.
-
Serving Suggestions and Enjoying Your Creation:
Your homemade Beef and Cheese Burritos are now ready to be devoured! Serve them immediately while they are hot and the cheese is gooey. I love to offer a selection of toppings on the side:
- Extra fresh cilantro
- Lime wedges for a fresh squeeze
- Cool sour cream or Greek yogurt
- Your favorite salsa or pico de gallo
- Creamy guacamole or sliced avocado
- Spicy pickled jalapeños for a kick
- A sprinkle of Cotija cheese
These burritos are a meal in themselves, but they also pair wonderfully with a simple side salad or extra rice and beans. Get ready to enjoy the fruits of your labor – these beef and cheese burritos are truly something special!
-
Storage and Reheating Tips:
If you happen to have any leftover burritos (a rare occurrence in my house!), they store beautifully. Wrap individual burritos tightly in plastic wrap, then place them in an airtight container or a freezer-safe bag. They will keep in the refrigerator for up to 3-4 days, or in the freezer for up to 2-3 months.
To reheat from the refrigerator, you can microwave them until heated through, or for a crispier result, warm them in a skillet over medium heat or bake them in a 350°F (175°C) oven until hot and slightly crisped. For frozen burritos, unwrap them and bake from frozen at 375°F (190°C) for about 30-40 minutes, or until heated through, turning halfway. Microwaving from frozen is also an option, but the texture won’t be as good.

Conclusion:
Well, there you have it, my friends! We’ve reached the delicious conclusion of our culinary journey together, and I truly hope you’re feeling as excited as I am about this incredible recipe. If you’ve followed along, you already know that what we’ve created here isn’t just another meal; it’s a testament to the power of simple ingredients coming together to form something truly spectacular. I genuinely believe this recipe is a must-try for anyone who appreciates bold flavors, comforting textures, and a meal that utterly satisfies on every level. It’s not often you find a dish that manages to be both incredibly easy to prepare and profoundly impressive in taste, making it perfect for a weeknight dinner, a casual gathering with friends, or even a special occasion where you want to serve something universally loved without hours of fuss.
The magic of these beef and cheese burritos lies in their perfect harmony. We’ve meticulously balanced the savory, richly seasoned ground beef with the creamy, melty cheese, ensuring every single bite is an explosion of pure comfort. There’s a certain joy that comes from biting into that warm tortilla, experiencing the tender, spiced meat, and then hitting that glorious pocket of gooey cheese. It’s the kind of meal that brings smiles to faces and quiet contentment to the table. Plus, let’s be honest, who can resist a handheld meal that’s bursting with so much flavor? It’s hearty, fulfilling, and delightfully customizable, which is precisely why it’s earned a permanent spot in my own recipe rotation and why I’m so eager for it to find a place in yours too. I truly believe that once you dive into creating and tasting what we affectionately call our ‘Beefcheeseburritos.html’ masterpiece, you’ll understand exactly what I mean.
Elevate Your Serving Experience:
Now, let’s talk about making this meal an unforgettable experience! While these burritos are absolutely fantastic on their own, a few thoughtful additions can really elevate your serving. For a classic spread, I highly recommend serving them alongside a generous bowl of crisp tortilla chips and your favorite salsa – chunky pico de gallo or a vibrant roasted tomato salsa would be divine. A dollop of cool sour cream or a spoonful of creamy guacamole on the side provides a refreshing contrast to the richness of the filling. If you’re looking to add a touch of freshness and balance, a simple side salad with a zesty lime vinaigrette would be perfect. Or, for a more substantial accompaniment, a black bean and corn salad brings an extra layer of texture and color to the plate. Don’t forget the drinks! A pitcher of refreshing agua fresca, some chilled Mexican sodas, or even a crisp lager (for the adults, of course!) would complete the feast beautifully.
Unleash Your Inner Chef with Variations:
One of the aspects I love most about this recipe is its incredible versatility. It’s a fantastic canvas for your own culinary creativity! Feeling adventurous? Here are a few variations you might want to explore. For a different protein, consider swapping the ground beef for seasoned ground chicken, shredded pork carnitas, or even a robust vegetarian filling using black beans, corn, and sautéed peppers. When it comes to cheese, don’t limit yourself to just one type; a blend of Monterey Jack, sharp cheddar, and a hint of pepper jack can add a wonderful depth of flavor and a slight kick. You could also experiment with adding some sautéed onions and bell peppers directly into your beef mixture for extra texture and sweetness, or a sprinkle of finely diced jalapeños for a spicy punch. Don’t shy away from incorporating a spoonful of your favorite refried beans or seasoned rice into the burritos themselves for an even heartier wrap. For a different finish, instead of simply warming them, you could brush the wrapped burritos with a little oil and pan-fry them until golden and slightly crispy, or even bake them in a hot oven for a few minutes to achieve a delightful crunch on the outside. The possibilities are truly endless, and each tweak offers a chance to make this recipe uniquely yours.
So, what are you waiting for? I wholeheartedly encourage you to roll up your sleeves, gather your ingredients, and give this recipe a try. Trust me, the aroma alone as these cook will be enough to get your taste buds tingling. There’s immense satisfaction in preparing a homemade meal that everyone at your table will devour with gusto. Once you’ve experienced the sheer deliciousness and ease of this dish, I would absolutely love to hear about it! Please don’t hesitate to share your experiences, your serving suggestions, or any inventive variations you came up with. Tag me in your photos, tell me about the smiles around your dinner table, and let’s celebrate the joy of good food together. Happy cooking, and I can’t wait to hear how much you loved these incredible beef and cheese burritos!
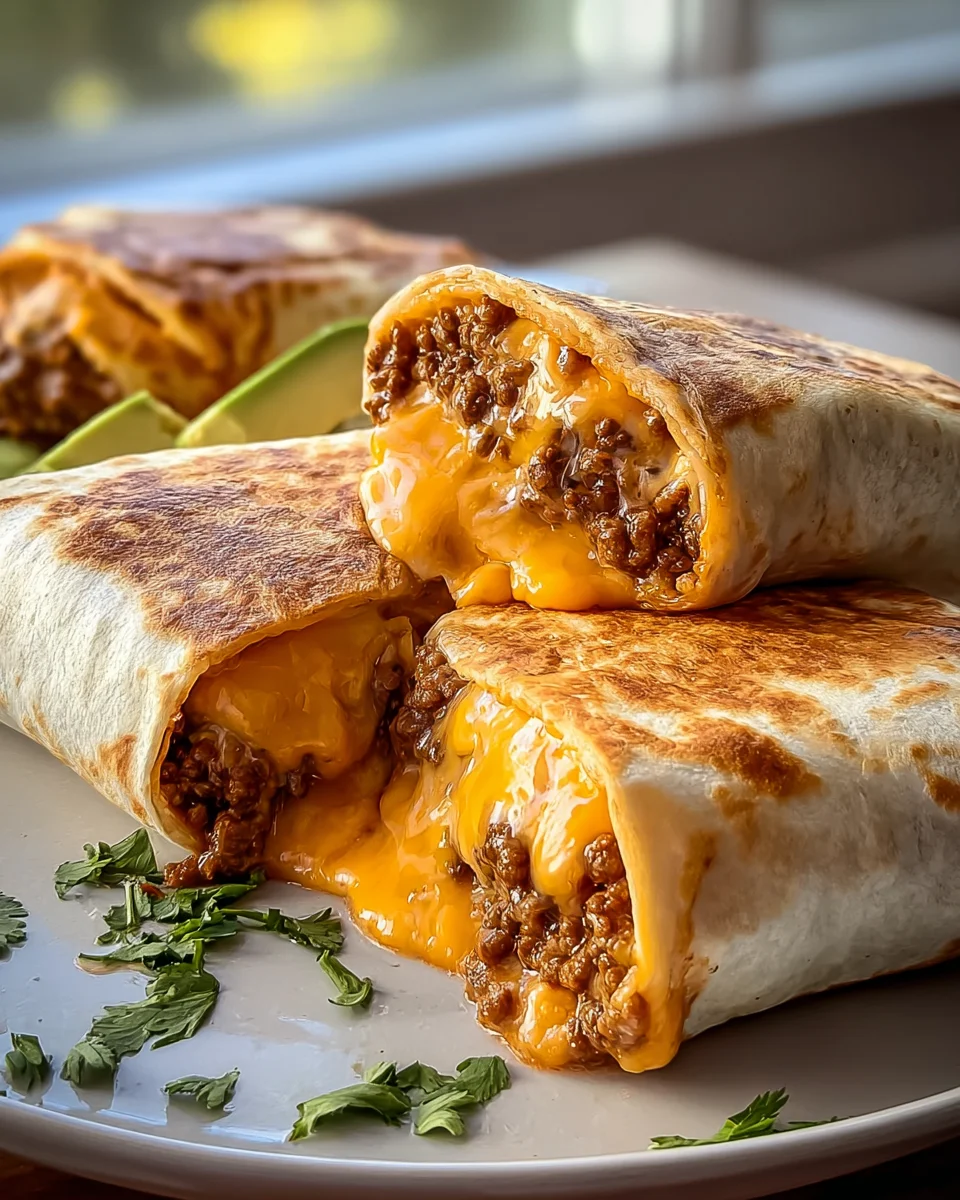
Beef Cheeseburritos: Easy, Cheesy & Delicious Recipe!
These incredible Beef Cheeseburritos are a restaurant-quality masterpiece combining juicy, seasoned beef with abundant melty cheese inside a golden, crispy tortilla. Every bite delivers a perfect balance of savory meat, gooey cheese, and creamy sauce, making it a satisfying, portable fusion of American cheeseburger and Mexican burrito. Easy to make at home, these burritos are pure food heaven and a perennial favorite for their incredible flavor and delightful cheese pull.
Ingredients
Instructions
Important Information
Nutrition Facts (Per Serving)
It is important to consider this information as approximate and not to use it as definitive health advice.
Allergy Information
Please check ingredients for potential allergens and consult a health professional if in doubt.


Leave a Comment