
Maple Bacon Cream Cheese Dip: Prepare to be utterly captivated! Imagine a symphony of sweet and savory, a delightful dance of creamy and crunchy, all culminating in a single, irresistible bite. This isn’t just a dip; it’s an experience, a conversation starter, and quite possibly the easiest way to become the star of your next gathering.
While the exact origins of combining maple, bacon, and cream cheese are shrouded in delicious mystery, the concept itself draws upon a long-standing appreciation for contrasting flavors. Think of the classic pairing of salty ham and sweet pineapple, or the enduring love for bacon-wrapped dates. This Maple Bacon Cream Cheese Dip takes that principle and elevates it to new heights of culinary bliss.
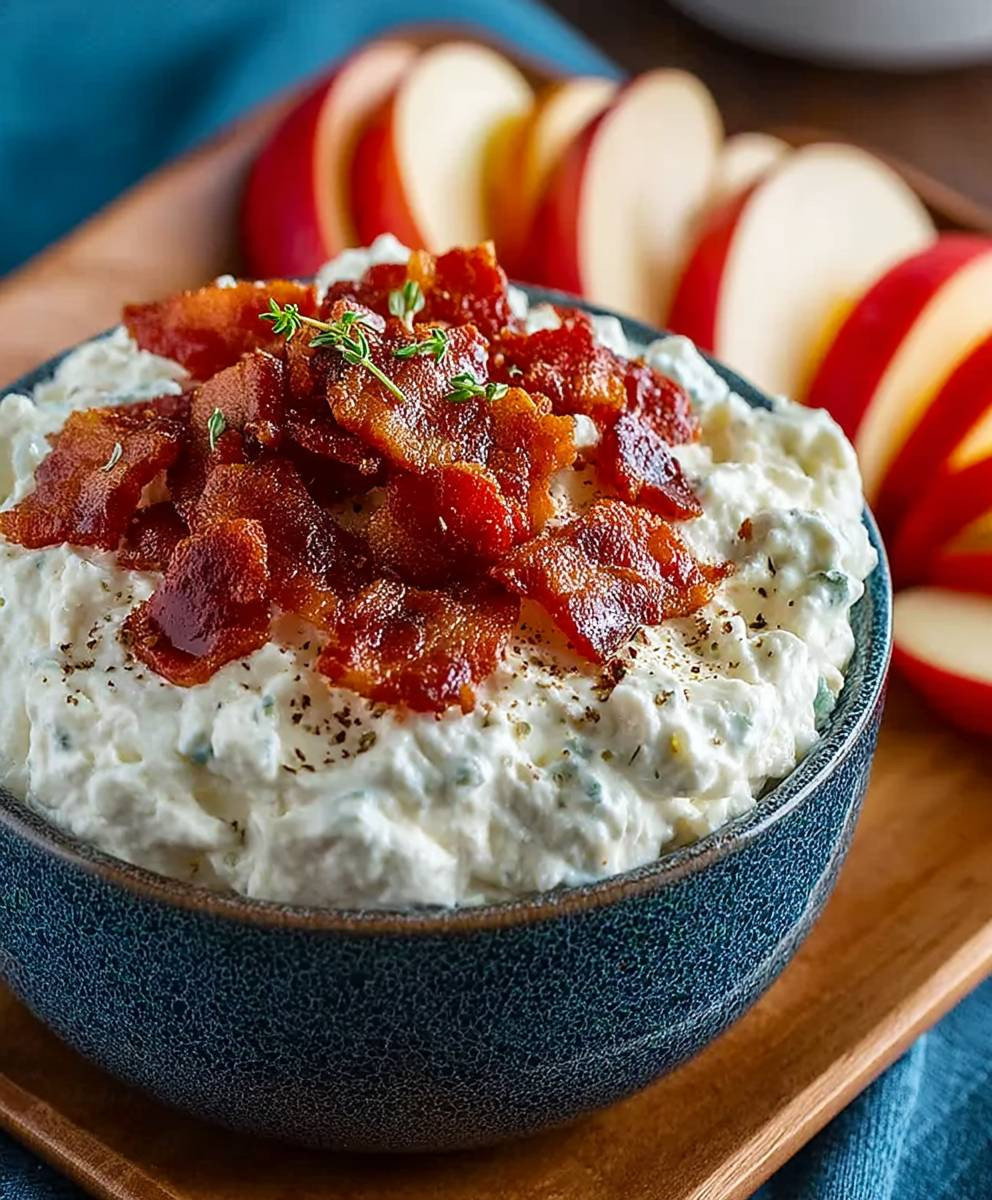
What makes this dip so universally adored? It’s the sheer versatility! The creamy base, enriched with the smoky, salty allure of bacon and the warm, comforting sweetness of maple syrup, creates a flavor profile that appeals to a wide range of palates. It’s incredibly easy to prepare, requiring minimal effort and readily available ingredients. Whether you’re serving it with crackers, pretzels, vegetables, or even apple slices, this dip is guaranteed to disappear in minutes. Trust me, once you try it, you’ll understand why everyone raves about this addictive appetizer!

Ingredients:
- 8 ounces cream cheese, softened
- 1/2 cup sour cream
- 1/4 cup maple syrup, pure
- 1/4 cup cooked bacon, crumbled (about 4-5 slices)
- 2 tablespoons chopped green onions
- 1/4 teaspoon black pepper
- Pinch of cayenne pepper (optional)
- Crackers, pretzels, apple slices, or vegetables for serving
Preparing the Bacon:
Okay, let’s start with the bacon! We want it nice and crispy for that perfect salty-sweet contrast. I prefer to bake my bacon because it’s less messy and cooks more evenly, but feel free to use your favorite method.
- Oven Method: Preheat your oven to 400°F (200°C). Line a baking sheet with parchment paper. This makes cleanup a breeze!
- Arrange the bacon strips in a single layer on the prepared baking sheet. Make sure they aren’t overlapping, or they won’t crisp up properly.
- Bake for 15-20 minutes, or until the bacon is crispy and golden brown. Keep a close eye on it, as ovens can vary.
- Remove the bacon from the oven and transfer it to a plate lined with paper towels to drain the excess grease.
- Once the bacon is cool enough to handle, crumble it into small pieces. You can use your hands, a knife, or even pulse it briefly in a food processor. Just don’t over-process it into bacon dust! We want some texture.
- Alternative: Skillet Method: If you prefer the skillet method, cook the bacon over medium heat in a large skillet until crispy. Be sure to drain off the excess grease as it cooks. Transfer to a paper towel-lined plate to cool and then crumble.
Preparing the Cream Cheese Base:
Now, let’s get that creamy base ready. The key here is to make sure your cream cheese is properly softened. This will ensure a smooth and lump-free dip. Trust me, nobody wants lumpy dip!
- Soften the Cream Cheese: Take the cream cheese out of the refrigerator at least 30 minutes before you plan to make the dip. If you’re short on time, you can soften it in the microwave. Remove the foil wrapper and place the cream cheese in a microwave-safe bowl. Microwave on 50% power in 30-second intervals, checking after each interval, until softened but not melted. Be careful not to overheat it!
- In a medium mixing bowl, combine the softened cream cheese and sour cream.
- Using an electric mixer (handheld or stand mixer) or a sturdy whisk, beat the cream cheese and sour cream together until smooth and creamy. Make sure there are no lumps! This is where that softened cream cheese really pays off.
Adding the Flavor:
This is where the magic happens! We’re going to add that delicious maple syrup, crispy bacon, and a few other goodies to really make this dip sing.
- Maple Syrup: Pour in the maple syrup. I highly recommend using pure maple syrup for the best flavor. The artificial stuff just doesn’t compare.
- Bacon: Add the crumbled cooked bacon. Don’t be shy! The bacon is the star of the show.
- Green Onions: Sprinkle in the chopped green onions. These add a nice fresh bite and a pop of color.
- Seasoning: Add the black pepper and cayenne pepper (if using). The cayenne pepper adds a subtle kick that balances the sweetness of the maple syrup and the saltiness of the bacon. If you’re not a fan of spice, feel free to omit it.
- Using a spatula or spoon, gently fold all the ingredients together until they are evenly distributed. Be careful not to overmix, as this can make the dip too thin.
Chilling and Serving:
Almost there! Chilling the dip allows the flavors to meld together and gives it a nice, firm consistency. Plus, who doesn’t love a cold dip?
- Cover the bowl with plastic wrap and refrigerate for at least 30 minutes. For the best flavor, I recommend chilling it for at least an hour, or even overnight.
- Before serving, give the dip a good stir.
- Transfer the dip to a serving bowl.
- Garnish with extra crumbled bacon and chopped green onions, if desired. This makes it look extra fancy!
- Serve with your favorite dippers. Crackers, pretzels, apple slices, and vegetables all work well. I personally love it with pretzel crisps!
Tips and Variations:
Want to customize this dip to your liking? Here are a few ideas:
- Smoked Bacon: Use smoked bacon for an even more intense smoky flavor.
- Brown Sugar: Add a tablespoon or two of brown sugar for extra sweetness and a hint of molasses flavor.
- Chopped Pecans or Walnuts: Add some chopped pecans or walnuts for a nutty crunch.
- Spicy Maple Syrup: Use a spicy maple syrup for an extra kick.
- Different Herbs: Try adding some chopped fresh chives or parsley for a different flavor profile.
- Greek Yogurt: Substitute some of the sour cream with Greek yogurt for a tangier and healthier dip.
- Make it Ahead: This dip can be made up to 2 days in advance. Just store it in an airtight container in the refrigerator.
Serving Suggestions:
This dip is incredibly versatile and can be served in a variety of ways:
- Appetizer: Serve it as an appetizer at your next party or gathering.
- Snack: Enjoy it as a snack with your favorite dippers.
- Brunch: Add it to your brunch spread for a sweet and savory treat.
- Sandwich Spread: Use it as a spread on sandwiches or wraps.
- Baked Potato Topping: Top a baked potato with this dip for a decadent and flavorful meal.
Storage Instructions:
Store leftover dip in an airtight container in the refrigerator for up to 3 days. The bacon may lose some of its crispness over time, but the dip will still taste delicious.
Why This Recipe Works:
This Maple Bacon Cream Cheese Dip is a crowd-pleaser for a reason! The combination of sweet maple syrup, salty bacon, and creamy cream cheese is simply irresistible. The green onions add a fresh bite, and the black pepper and cayenne pepper provide a subtle kick that balances the sweetness. It’s easy to make, customizable, and perfect for any occasion. Plus, who can resist bacon?
Conclusion:
This Maple Bacon Cream Cheese Dip isn’t just another appetizer; it’s a flavor explosion waiting to happen! The sweet maple syrup perfectly complements the salty, smoky bacon, all swirled into the creamy richness of the cream cheese. Trust me, your taste buds will thank you. It’s the kind of dish that disappears in minutes at parties, and honestly, I wouldn’t be surprised if you find yourself sneaking spoonfuls straight from the bowl (I know I do!).
But why is this dip a must-try? Because it’s incredibly easy to make, requires minimal ingredients, and delivers maximum flavor impact. You don’t need to be a culinary expert to whip this up; even a beginner can create a crowd-pleasing masterpiece. Plus, it’s incredibly versatile. Think about it: you can serve it warm or cold, with a variety of dippers, and even incorporate it into other dishes.
Speaking of serving suggestions, the possibilities are endless! For a classic pairing, try serving it with sturdy crackers, pretzels, or toasted baguette slices. For a healthier option, consider using apple slices, celery sticks, or carrot sticks. The sweetness of the apples and the crispness of the vegetables provide a delightful contrast to the rich dip. If you’re feeling adventurous, you could even serve it with mini waffles or pancakes for a brunch-inspired treat.
And don’t be afraid to experiment with variations! Want to add a little heat? A pinch of red pepper flakes or a dash of hot sauce will do the trick. Craving more sweetness? A drizzle of extra maple syrup or a sprinkle of brown sugar will satisfy your sweet tooth. You could even add chopped pecans or walnuts for a nutty crunch. For a savory twist, try incorporating some chopped chives or green onions. The beauty of this recipe is that it’s a blank canvas for your culinary creativity.
I personally love to serve this Maple Bacon Cream Cheese Dip warm with pretzel crisps and a side of apple slices. The combination of salty, sweet, and crunchy is simply irresistible. Another favorite variation of mine is to add a tablespoon of bourbon for an extra layer of flavor. The bourbon adds a subtle warmth and complexity that elevates the dip to a whole new level.
So, what are you waiting for? Gather your ingredients, put on your apron, and get ready to experience the magic of this incredible dip. I promise you won’t be disappointed. It’s the perfect appetizer for any occasion, from casual get-togethers to holiday parties. It’s also a great way to impress your friends and family with your culinary skills.
I’m confident that this recipe will become a staple in your kitchen. But don’t just take my word for it – try it yourself and see! And when you do, I’d love to hear about your experience. Share your photos, your variations, and your serving suggestions in the comments below. Let’s create a community of dip lovers and inspire each other with our culinary creations. I can’t wait to see what you come up with! Happy dipping!
Maple Bacon Cream Cheese Dip: The Ultimate Party Appetizer
Creamy, irresistible sweet and savory dip with maple syrup and bacon, perfect as an appetizer or snack.
Ingredients
- 8 ounces cream cheese, softened
- 1/2 cup sour cream
- 1/4 cup maple syrup, pure
- 1/4 cup cooked bacon, crumbled (about 4-5 slices)
- 2 tablespoons chopped green onions
- 1/4 teaspoon black pepper
- Pinch of cayenne pepper (optional)
- Crackers, pretzels, apple slices, or vegetables for serving
Instructions
- Prepare the Bacon: Preheat oven to 400°F (200°C). Line a baking sheet with parchment paper. Arrange bacon strips in a single layer and bake for 15-20 minutes, or until crispy. Alternatively, cook bacon in a skillet over medium heat until crispy. Drain excess grease and crumble.
- Soften Cream Cheese: Let cream cheese sit at room temperature for 30 minutes to soften. Alternatively, microwave on 50% power in 30-second intervals until softened.
- Prepare Cream Cheese Base: In a medium bowl, combine softened cream cheese and sour cream. Beat with an electric mixer or whisk until smooth and creamy.
- Add Flavor: Pour in maple syrup, add crumbled bacon, chopped green onions, black pepper, and cayenne pepper (if using). Gently fold all ingredients together until evenly distributed.
- Chill and Serve: Cover the bowl with plastic wrap and refrigerate for at least 30 minutes (or up to overnight). Stir before serving. Transfer to a serving bowl and garnish with extra bacon and green onions, if desired. Serve with crackers, pretzels, apple slices, or vegetables.
Notes
- Use pure maple syrup for the best flavor.
- Soften cream cheese thoroughly to avoid lumps.
- Don’t overmix the dip.
- Chill for at least 30 minutes to allow flavors to meld.
Leave a Comment