
One of my fondest memories growing up was the summer family reunions at my Aunt Clara’s house. As the sun dipped low in the sky, casting a warm golden light, the air filled with laughter and the enticing aroma of her famous pea salad. I can still picture the vibrant green peas glistening alongside crunchy red bell peppers and creamy dressing, all nestled in a large glass bowl. It was a dish that always drew me in, not just for its beauty but for the way it brought everyone together around the table.
Each bite is a delightful medley of textures and flavors; the sweet, fresh peas pop with every forkful, while the crisp veggies add a satisfying crunch. The dressing, tangy yet creamy, brings it all together, making it not just a salad but a celebration of summer itself. What makes my version of pea salad special is the addition of a handful of fresh herbs—basil and mint—that elevate it to a whole new level. They add a burst of freshness that dances on your palate, turning this dish into a vibrant side that could steal the spotlight at any meal.
This salad is more than just a recipe; it’s a nod to family, warmth, and the simple joys of life. So, let me show you exactly how to make it and create your own beautiful memories around the table.
Why You’ll Love This Recipe
- Whip it up in just 15 minutes, with minimal cooking required—perfect for busy weeknights or last-minute gatherings.
- Combines the sweetness of peas with the crunch of bacon and the creaminess of the dressing for a delightful texture contrast.
- Budget-friendly, using frozen peas and common pantry staples, making it accessible without sacrificing flavor.
- Great for meal prep as it tastes even better after chilling, allowing flavors to meld beautifully.
- Versatile enough to serve as a side dish for barbecues, potlucks, or even as a light lunch on its own.
Ingredients
- ¼ cup mayonnaise
- ¼ cup sour cream (or Greek yogurt)
- 1 tablespoon apple cider vinegar
- 1 teaspoon honey
- kosher salt and ground black pepper (to taste)
- 1 pound frozen peas (thawed and patted dry)
- 6 slices bacon (sliced into ½-inch pieces)
- ⅓ cup diced red onion
- 4 ounces sharp cheddar cheese (cut into cubes about the size of the peas)
- 2 to 3 tablespoons finely chopped fresh parsley
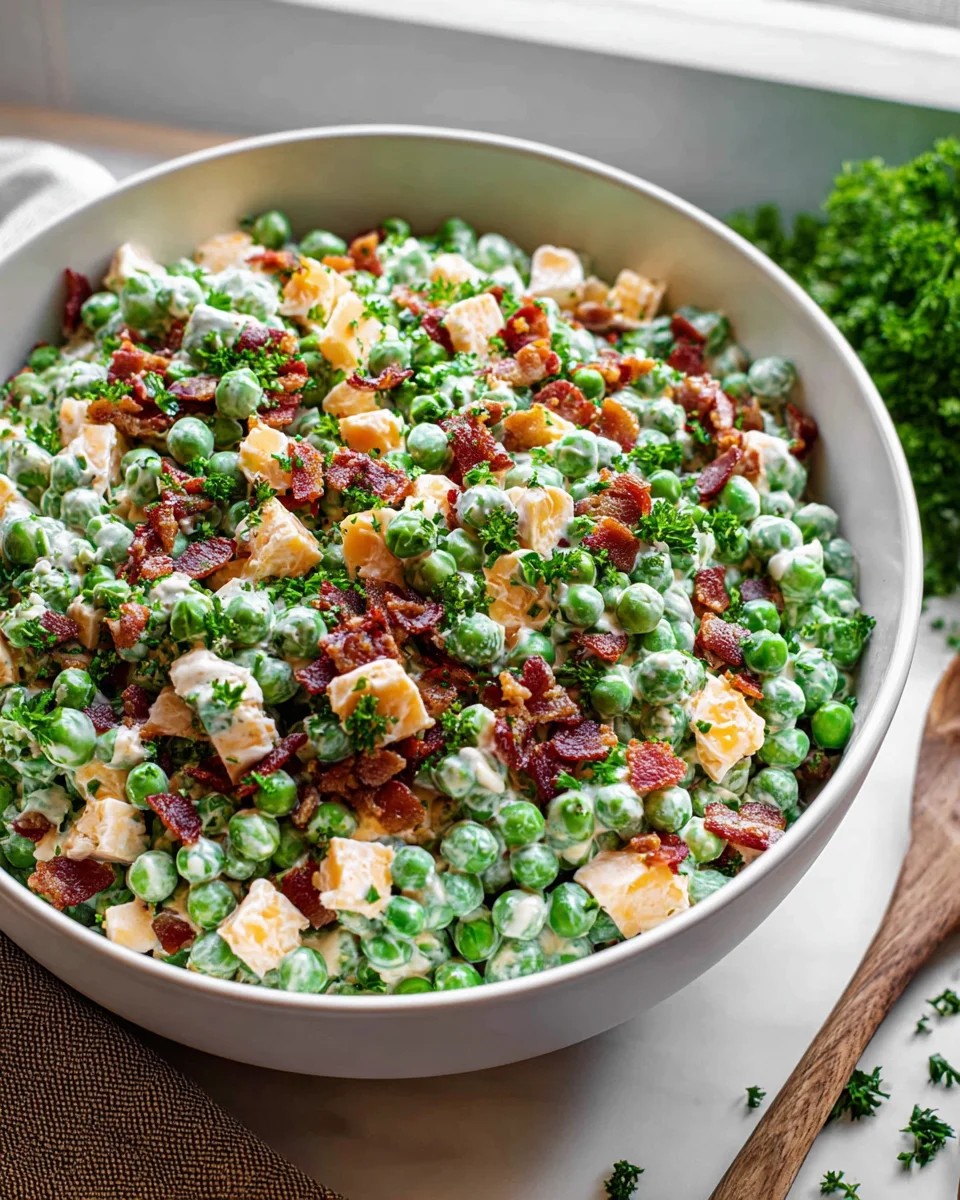
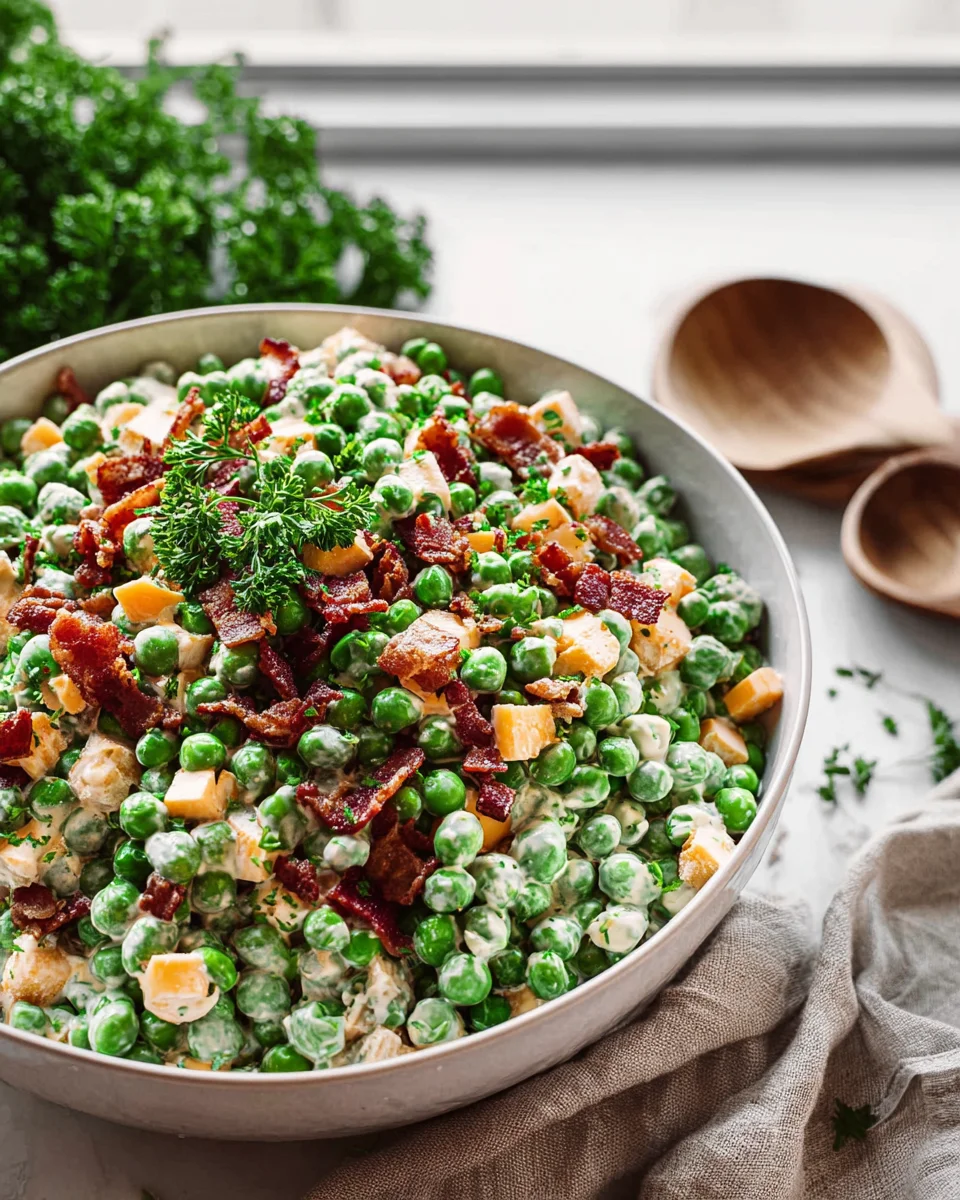
The key ingredients in this creamy pea salad each play a vital role in building flavor and texture. The mayonnaise and sour cream create a rich, velvety dressing that clings to the peas, enhancing their natural sweetness. Opt for full-fat versions for a creamier result; Greek yogurt can substitute well for a lighter option, bringing a tangy twist. The apple cider vinegar adds a hint of acidity, balancing the creaminess and enhancing the overall flavor profile, while honey provides a touch of sweetness that rounds out the dressing perfectly.
Next, the frozen peas are a convenient choice; they’re sweet, easy to use, and require no cooking. Make sure to thaw and dry them to avoid a watery salad. The bacon adds a salty, crispy element that contrasts beautifully with the creamy dressing, so don’t skip on cooking it until it’s crispy. Lastly, sharp cheddar cheese adds a delightful depth of flavor, while red onion introduces a crunchy bite and a mild sharpness, making the salad interesting and satisfying.
Step-by-Step Instructions
- Start by cooking the bacon. Add 6 slices of bacon, sliced into ½-inch pieces, to a skillet over medium heat. Cook for 6 to 8 minutes, stirring occasionally, until the bacon is crispy and golden brown. Remove with a slotted spoon and transfer to a paper towel-lined plate to drain excess grease. This will ensure your bacon stays crispy in the final salad.
- Next, prepare the dressing. In a small bowl, combine ¼ cup mayonnaise, ¼ cup sour cream (or Greek yogurt), 1 tablespoon apple cider vinegar, and 1 teaspoon honey. Season with kosher salt and ground black pepper to taste. Stir until the mixture is smooth and well blended. This dressing should be creamy with a balanced sweetness; adjust seasoning as needed.
- Now, it’s time to assemble the salad. In a medium bowl, add 1 pound of thawed and dried frozen peas, ⅓ cup diced red onion, and 4 ounces of sharp cheddar cheese cut into small cubes. Add the crispy bacon you cooked earlier. Make sure to keep the bacon grease aside for other uses or discard it appropriately.
- Pour the dressing over the pea mixture. Gently fold everything together using a spatula or large spoon until all ingredients are evenly coated. Be careful not to mash the peas; you want them to remain whole for texture.
- Cover the bowl with plastic wrap or a lid and refrigerate for at least 30 minutes. This chilling time is crucial as it allows the flavors to meld together, enhancing the overall taste of the salad. The salad should be cool and refreshing when served.
Pro Tips for the Best Pea Salad
- One common mistake is not allowing enough chilling time. The flavors really develop when the salad is allowed to sit, so don’t rush this step!
- Use a non-stick skillet when cooking the bacon to prevent sticking and ensure even cooking. This will also help avoid burnt bits that can alter the flavor of your salad.
- For an extra layer of flavor, try adding a sprinkle of smoked paprika or fresh lemon zest to the dressing. These small additions can elevate the flavor profile significantly.
- Pay attention to the ratio of dressing to peas; too much dressing can make the salad soggy. Aim to coat the peas lightly, adding more if necessary, but err on the side of less initially.
- For a crunchier texture, consider adding sunflower seeds or chopped nuts as a topping just before serving, giving your salad an attractive visual appeal and more depth of flavor.
Variations & Serving Ideas
Consider these creative variations to make this pea salad your own:
1. For a vegetarian twist, omit the bacon and add roasted chickpeas for crunch and protein.
2. Swap the cheddar for crumbled feta cheese for a tangy flavor that pairs wonderfully with the peas.
3. Add seasonal vegetables like diced bell peppers or cherry tomatoes for a pop of color and freshness.
4. For a zesty kick, mix in some diced jalapeños or a splash of hot sauce to the dressing.
When serving, pair this salad with grilled chicken for a protein-packed meal, or serve alongside barbecue ribs for a classic summer cookout. It also complements crusty bread for a fulfilling light lunch or picnic dish. Additionally, the salad works wonderfully as a side with creamy potato dishes, balancing out their heaviness with its fresh flavor.
Storage, Make-Ahead & Reheating
This pea salad can be stored in an airtight container in the refrigerator for up to 3 days. It does not freeze well due to the creamy dressing, which can separate upon thawing. The salad actually tastes better the next day as the flavors meld together, so feel free to make it ahead of time. When ready to serve, give it a good stir and adjust seasonings if needed; it can be enjoyed cold straight from the fridge.
Frequently Asked Questions
Can I make Pea Salad ahead of time?
Yes — in fact, it tastes even better the next day. The chilling time allows the flavors to meld, creating a more harmonious dish that’s perfect for picnics or potlucks.
Can I substitute Greek yogurt for sour cream?
Absolutely! Greek yogurt provides a similar creamy texture and adds a tangy flavor. It’s a healthier alternative, making the salad lighter while still delicious.
Is Pea Salad gluten-free?
Yes, this pea salad is gluten-free as long as you use gluten-free bacon. Always check labels to ensure that all ingredients meet your dietary needs.
How long can I store Pea Salad in the fridge?
You can store pea salad in the refrigerator for up to 3 days. Just be sure to keep it in an airtight container to maintain freshness and prevent absorption of other odors.
What can I serve with Pea Salad?
This salad pairs beautifully with grilled meats, such as chicken or steak, and works well alongside hearty dishes like baked potatoes or barbecue ribs, balancing their richness with its refreshing taste.
Final Thoughts
Pea Salad is a delightful blend of flavors and textures that brings a fresh, vibrant touch to any meal. The combination of sweet peas, crunchy vegetables, and a creamy dressing creates a satisfying dish that’s both nutritious and delicious.
This is the kind of recipe I come back to again and again, especially when I’m looking for a quick yet impressive side dish for gatherings or a light lunch on a warm day. It never fails to brighten up my table and put a smile on my face.
I encourage you to try this Pea Salad for yourself. Feel free to get creative and add your own twist, whether it’s a sprinkle of fresh herbs or a handful of nuts for extra crunch. Don’t forget to share your results—I’d love to hear how you made it your own!
Delicious Pea Salad Recipe with Fresh Ingredients and Flavor

This vibrant pea salad combines sweet peas, crunchy vegetables, and a creamy dressing, making it a delightful side dish for any occasion. Perfect for summer gatherings, it’s quick to prepare and even better after chilling.
- Prep Time: 15 mins
- Cook Time: 10 mins
- Total Time: 25 minutes
- Yield: 4 servings 1x
- Category: Side Dish
- Method: Cooking
- Cuisine: American
Ingredients
- ¼ cup mayonnaise
- ¼ cup sour cream (or Greek yogurt)
- 1 tablespoon apple cider vinegar
- 1 teaspoon honey
- kosher salt and ground black pepper (to taste)
- 1 pound frozen peas (thawed and patted dry)
- 6 slices bacon (sliced into ½-inch pieces)
- ⅓ cup diced red onion
- 4 ounces sharp cheddar cheese (cut into cubes about the size of the peas)
- 2 to 3 tablespoons finely chopped fresh parsley
Instructions
- Start by cooking the bacon. Add 6 slices of bacon, sliced into ½-inch pieces, to a skillet over medium heat. Cook for 6 to 8 minutes, stirring occasionally, until the bacon is crispy and golden brown. Remove with a slotted spoon and transfer to a paper towel-lined plate to drain excess grease.
- Next, prepare the dressing. In a small bowl, combine ¼ cup mayonnaise, ¼ cup sour cream (or Greek yogurt), 1 tablespoon apple cider vinegar, and 1 teaspoon honey. Season with kosher salt and ground black pepper to taste. Stir until the mixture is smooth and well blended.
- Now, it’s time to assemble the salad. In a medium bowl, add 1 pound of thawed and dried frozen peas, ⅓ cup diced red onion, and 4 ounces of sharp cheddar cheese cut into small cubes. Add the crispy bacon you cooked earlier.
- Pour the dressing over the pea mixture. Gently fold everything together using a spatula or large spoon until all ingredients are evenly coated. Be careful not to mash the peas; you want them to remain whole for texture.
- Cover the bowl with plastic wrap or a lid and refrigerate for at least 30 minutes. This chilling time is crucial as it allows the flavors to meld together, enhancing the overall taste of the salad.
Nutrition
- Serving Size: 1 bowl
- Calories: 320
- Sugar: 3 g
- Sodium: 500 mg
- Fat: 24 g
- Saturated Fat: 8 g
- Unsaturated Fat: 14 g
- Trans Fat: 0 g
- Carbohydrates: 20 g
- Fiber: 5 g
- Protein: 10 g
- Cholesterol: 30 mg
Keywords: Allow enough chilling time for the flavors to develop. Use a non-stick skillet for cooking bacon to prevent sticking. Consider adding smoked paprika or fresh lemon zest for extra flavor.
Leave a Comment