
One rainy afternoon, I found myself curled up on the couch, flipping through an old cookbook that belonged to my grandmother. The pages were slightly yellowed and splattered with ingredients from countless baking adventures. As I turned to a page marked with a frayed ribbon, I was met with a recipe for Samoa Brownies—a delightful fusion of rich chocolate, caramel, and toasted coconut that had always been a family favorite. I could almost taste the nostalgia in the air, and I knew I had to recreate that magic in my own kitchen.
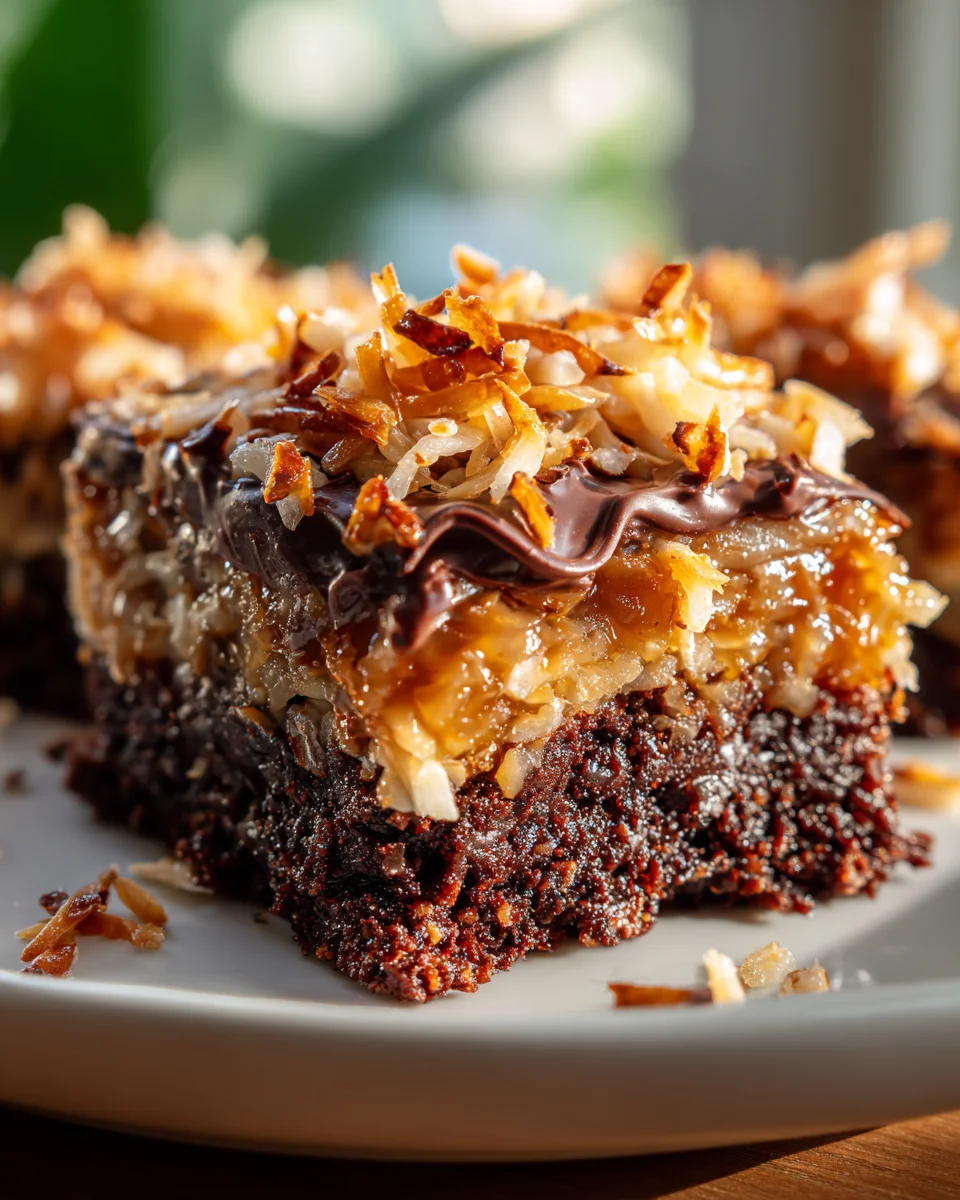
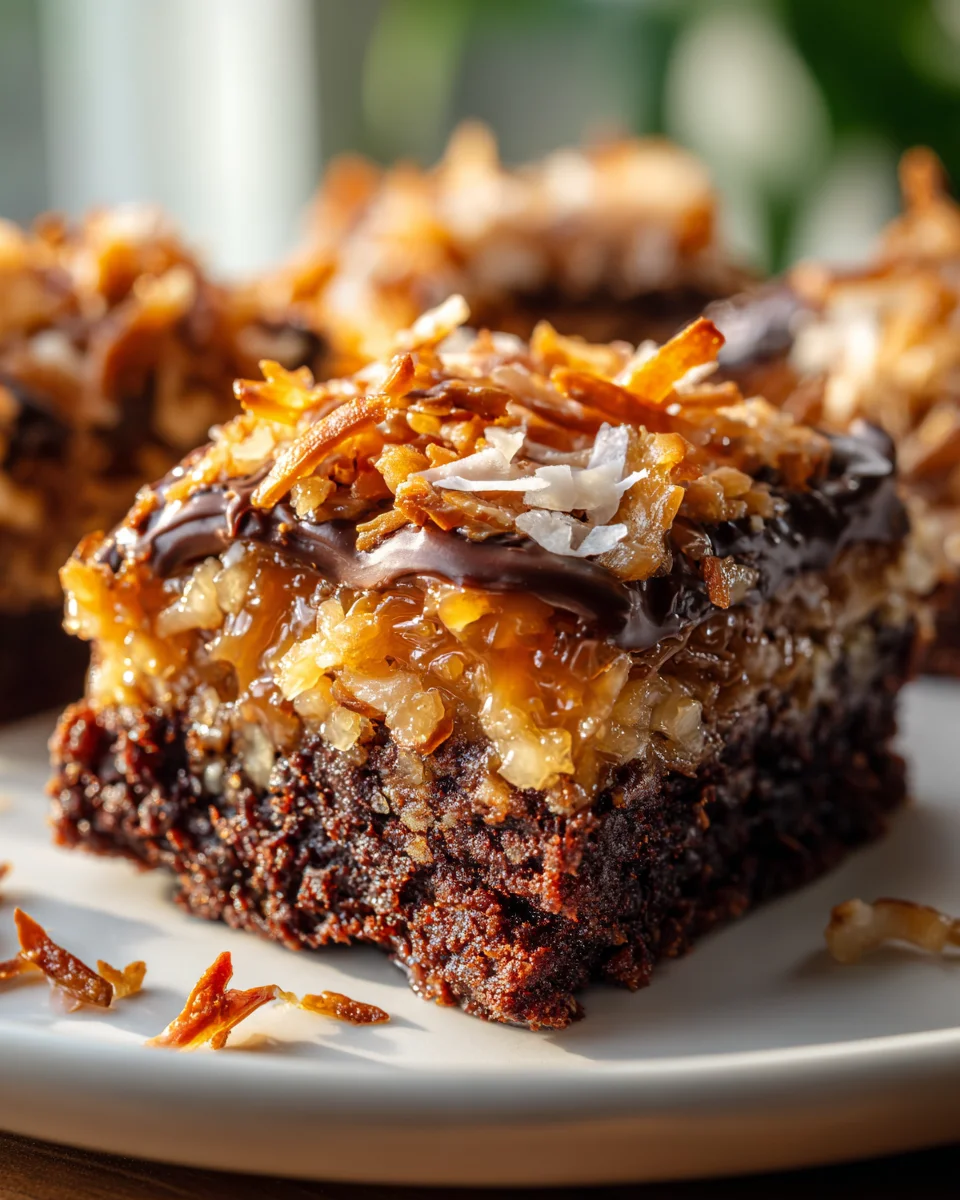
These Samoa Brownies are a sight to behold, with their glossy, dark chocolate top layer gleaming under the light, while the coconut and caramel drizzle adds a beautiful contrast. The aroma wafts through the kitchen, a heavenly blend of warm chocolate and the nutty scent of toasted coconut. When you take that first bite, the fudgy brownie melts in your mouth, followed by the chewy caramel and crunchy coconut—it’s a symphony of flavors that dances on your palate.
What makes my version special is the balance of textures—each bite is a harmonious blend of gooey, chewy, and crunchy. I’ve also added a hint of sea salt to enhance the flavors, making every mouthful even more indulgent. Trust me, once you try these Samoa Brownies, you’ll find yourself reaching for seconds (and thirds!).
Let me show you exactly how to make it.
Why You’ll Love This Recipe
- Indulge in a rich chocolate brownie base topped with a layer of sweet toasted coconut and gooey caramel, creating a delightful contrast in flavors.
- This recipe utilizes a boxed brownie mix, making it incredibly easy and convenient — perfect for busy bakers looking for quick satisfaction.
- Ready in just 60 minutes, you can whip up these Samoa Brownies without spending all day in the kitchen.
- With only a handful of ingredients, this recipe is budget-friendly while still delivering a gourmet dessert experience.
- The melty chocolate drizzle adds a finishing touch, making these brownies visually appealing and even more decadent.
Ingredients
- 1 box brownie mix (prepared according to the package directions)
- 2 cups coconut (shredded)
- 16 ounce bottle caramel ice cream topping
- ½ cup semi-sweet chocolate chips (melted)
The key ingredients for these Samoa Brownies are not only essential but also play a critical role in achieving the perfect texture and flavor. First, the brownie mix serves as the foundation — it provides a rich, fudgy base that complements the toppings beautifully. Opt for a high-quality mix that you enjoy; brands with fewer additives often yield the best results. For a homemade touch, consider substituting with your favorite homemade brownie recipe, but keep the baking time in mind as it may vary.
Next, the shredded coconut is toasted to enhance its nutty flavor and crunchy texture, adding a delightful contrast to the soft brownies. Choose unsweetened shredded coconut for a more balanced flavor, or sweetened if you prefer a sweeter treat. Finally, the caramel ice cream topping brings an irresistible gooeyness that binds the coconut to the brownies, creating a luscious layer of flavor. If you’re looking for a substitution, you can use homemade caramel sauce made from sugar, butter, and cream for a more personalized touch.
Step-by-Step Instructions
- Preheat your oven to the temperature indicated on your brownie mix box, typically around 350°F (175°C). This ensures even baking for your brownies.
- Prepare the brownie mix according to the package directions. Mix the ingredients well until smooth, ensuring no lumps remain. Pour the mixture into a greased baking pan.
- Bake the brownies for the time specified on the box (usually around 20-25 minutes). Keep an eye on them; they should look set at the edges but soft in the center. A toothpick inserted should come out with a few moist crumbs, not wet batter.
- While the brownies are baking, spread the shredded coconut evenly on a parchment-lined baking sheet. Toast the coconut in the oven for about 3-5 minutes, stirring every minute to prevent burning. It’s ready when it turns a golden brown.
- Remove the toasted coconut from the oven and allow it to cool slightly. Once cooled, mix the coconut with the caramel ice cream topping in a bowl until thoroughly combined.
- Once the brownies are done baking, remove them from the oven and let them cool for about 10 minutes in the pan. Spoon the coconut and caramel mixture evenly over the brownies, smoothing it out with a spatula.
- In a microwave-safe bowl, melt the semi-sweet chocolate chips until smooth, stirring every 30 seconds. Transfer the melted chocolate to a piping bag or a zip-top bag with a small corner snipped off.
- Drizzle the melted chocolate over the coconut and caramel layer in a zig-zag pattern for an appealing look. Allow the brownies to cool completely, then refrigerate them for at least 30 minutes to set.
- After chilling, slice the brownies into 16 squares. Serve chilled or at room temperature, and enjoy this deliciously decadent treat!
Pro Tips for the Best Samoa Brownies
- Be careful not to overbake your brownies. Check for doneness a few minutes early to ensure that they remain fudgy and moist.
- For the best texture, use a metal baking pan instead of glass, as metal conducts heat better and helps the brownies bake evenly.
- When toasting the coconut, keep a close eye on it — it can go from golden to burnt in a matter of seconds. Stirring frequently is key!
- If you want a more intense chocolate flavor, feel free to mix in some chocolate chips into the brownie batter before baking.
- To achieve the perfect drizzle, allow the melted chocolate to cool slightly before piping; this will help it hold its shape on top of the brownies.
Variations & Serving Ideas
For a fun twist on the classic Samoa Brownies, try adding crushed nuts like pecans or walnuts for extra crunch. You could also incorporate a layer of peanut butter or almond butter between the brownie and coconut layers for a nutty flavor explosion. For a seasonal touch, consider adding a sprinkle of pumpkin spice during fall for a festive flavor.
When it comes to serving, these brownies pair well with a scoop of vanilla ice cream for a delightful contrast in temperature and texture. A dollop of whipped cream can also lighten the richness of the brownies. For a more robust flavor pairing, serve them alongside a cup of coffee or espresso — the bitterness complements the sweetness beautifully.
Storage, Make-Ahead & Reheating
Store your Samoa Brownies in an airtight container in the refrigerator for up to 5 days. They can also be frozen for up to 3 months. To freeze, wrap individual brownies tightly in plastic wrap and then place them in a freezer-safe bag. When you’re ready to enjoy, simply thaw them in the fridge overnight. Many people find that these brownies taste even better the next day as the flavors meld together beautifully!
Frequently Asked Questions
Can I make Samoa Brownies ahead of time?
Yes — in fact, they taste even better the next day as the flavors have more time to develop. Just store them in an airtight container in the refrigerator for up to 5 days.
What if I don’t have a piping bag for the chocolate drizzle?
If you don’t have a piping bag, a zip-top bag works perfectly! Just snip a small corner off and use it to drizzle the melted chocolate over the brownies.
Can I use homemade brownie batter instead of boxed mix?
Absolutely! Just be mindful of the baking time, as homemade brownie recipes can vary. Aim for a fudgy texture, and keep an eye on them as they bake.
How can I make these brownies gluten-free?
To make gluten-free Samoa Brownies, use a gluten-free brownie mix. Many brands offer great alternatives that maintain the taste and texture you love.
What’s the best way to store leftover brownies?
Store leftover brownies in an airtight container in the fridge for up to 5 days. You can also freeze them for longer storage, wrapped tightly in plastic wrap to prevent freezer burn.
Final Thoughts
These Samoa Brownies are a delightful twist on classic flavors, combining rich chocolate brownie goodness with the irresistible combination of caramel, coconut, and toasted pecans. Each bite delivers a satisfying crunch and a burst of sweetness that will have you reaching for more.
This is the kind of recipe I come back to again and again, especially when I want to impress friends at gatherings or simply indulge in a sweet treat after a long day. The fusion of textures and flavors makes it a standout dessert that never fails to delight.
I invite you to try making these Samoa Brownies yourself! Whether you stick to the original recipe or add your own unique twist, I’d love to hear about your experience and see your delicious results!
Decadent Samoa Brownies: Coconut, Caramel, and Chocolate Delight

These Samoa Brownies are a delightful fusion of rich chocolate, caramel, and toasted coconut, creating a symphony of flavors that dances on your palate. Indulge in this easy-to-make dessert that is perfect for any occasion.
- Prep Time: 15 mins
- Cook Time: 25 mins
- Total Time: 40 minutes
- Yield: 16 servings 1x
- Category: Dessert
- Method: Baking
- Cuisine: American
Ingredients
- 1 box brownie mix (prepared according to the package directions)
- 2 cups coconut (shredded)
- 16 ounce bottle caramel ice cream topping
- ½ cup semi-sweet chocolate chips (melted)
Instructions
- Preheat your oven to the temperature indicated on your brownie mix box, typically around 350°F (175°C). This ensures even baking for your brownies.
- Prepare the brownie mix according to the package directions. Mix the ingredients well until smooth, ensuring no lumps remain. Pour the mixture into a greased baking pan.
- Bake the brownies for the time specified on the box (usually around 20-25 minutes). Keep an eye on them; they should look set at the edges but soft in the center. A toothpick inserted should come out with a few moist crumbs, not wet batter.
- While the brownies are baking, spread the shredded coconut evenly on a parchment-lined baking sheet. Toast the coconut in the oven for about 3-5 minutes, stirring every minute to prevent burning. It’s ready when it turns a golden brown.
- Remove the toasted coconut from the oven and allow it to cool slightly. Once cooled, mix the coconut with the caramel ice cream topping in a bowl until thoroughly combined.
- Once the brownies are done baking, remove them from the oven and let them cool for about 10 minutes in the pan. Spoon the coconut and caramel mixture evenly over the brownies, smoothing it out with a spatula.
- In a microwave-safe bowl, melt the semi-sweet chocolate chips until smooth, stirring every 30 seconds. Transfer the melted chocolate to a piping bag or a zip-top bag with a small corner snipped off.
- Drizzle the melted chocolate over the coconut and caramel layer in a zig-zag pattern for an appealing look. Allow the brownies to cool completely, then refrigerate them for at least 30 minutes to set.
- After chilling, slice the brownies into 16 squares. Serve chilled or at room temperature, and enjoy this deliciously decadent treat!
Nutrition
- Serving Size: 1 brownie
- Calories: 250
- Sugar: 20 g
- Sodium: 150 mg
- Fat: 10 g
- Saturated Fat: 5 g
- Unsaturated Fat: 3 g
- Trans Fat: 0 g
- Carbohydrates: 35 g
- Fiber: 2 g
- Protein: 3 g
- Cholesterol: 20 mg
Keywords: Be careful not to overbake your brownies. For the best texture, use a metal baking pan instead of glass, and keep a close eye on the coconut while toasting to prevent burning.
Leave a Comment