
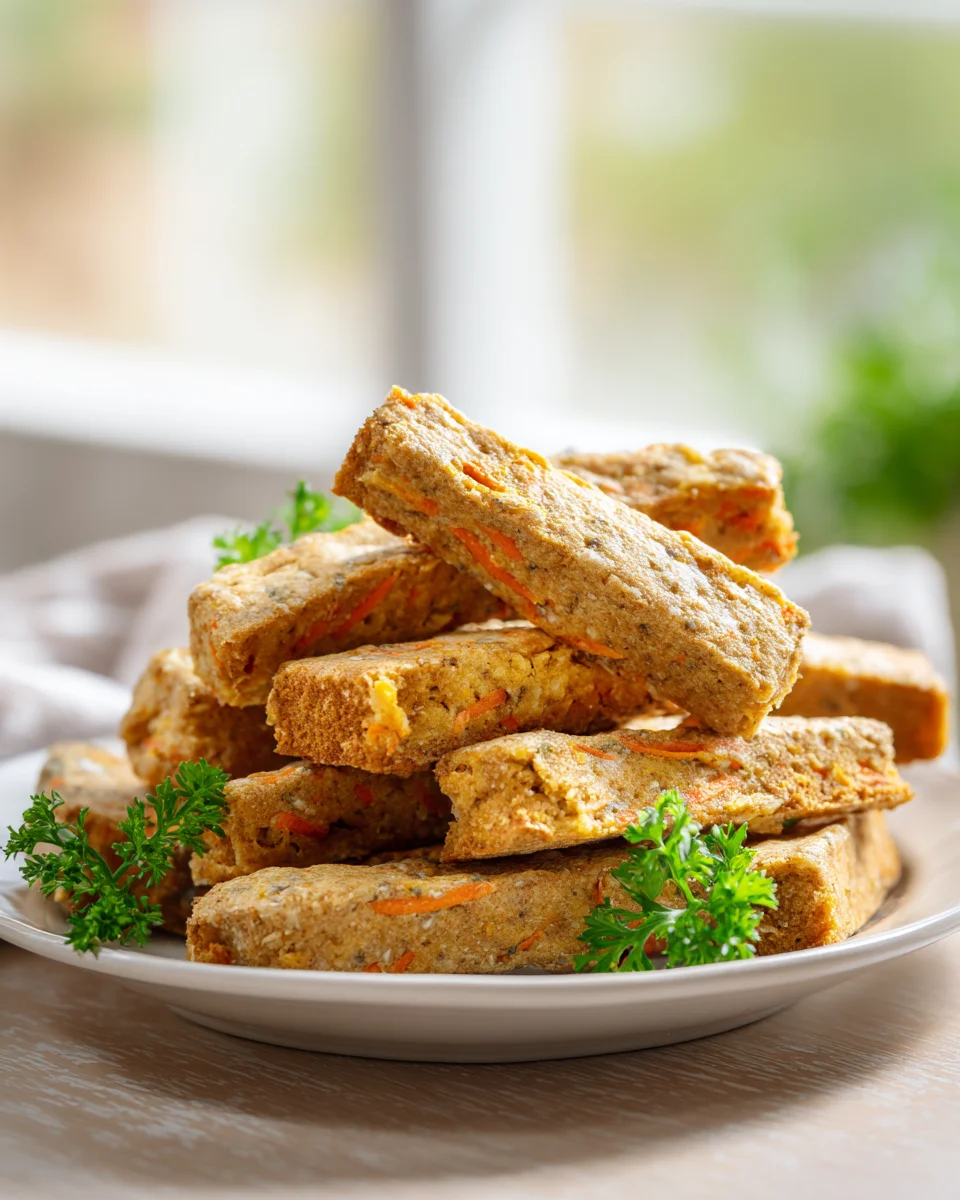
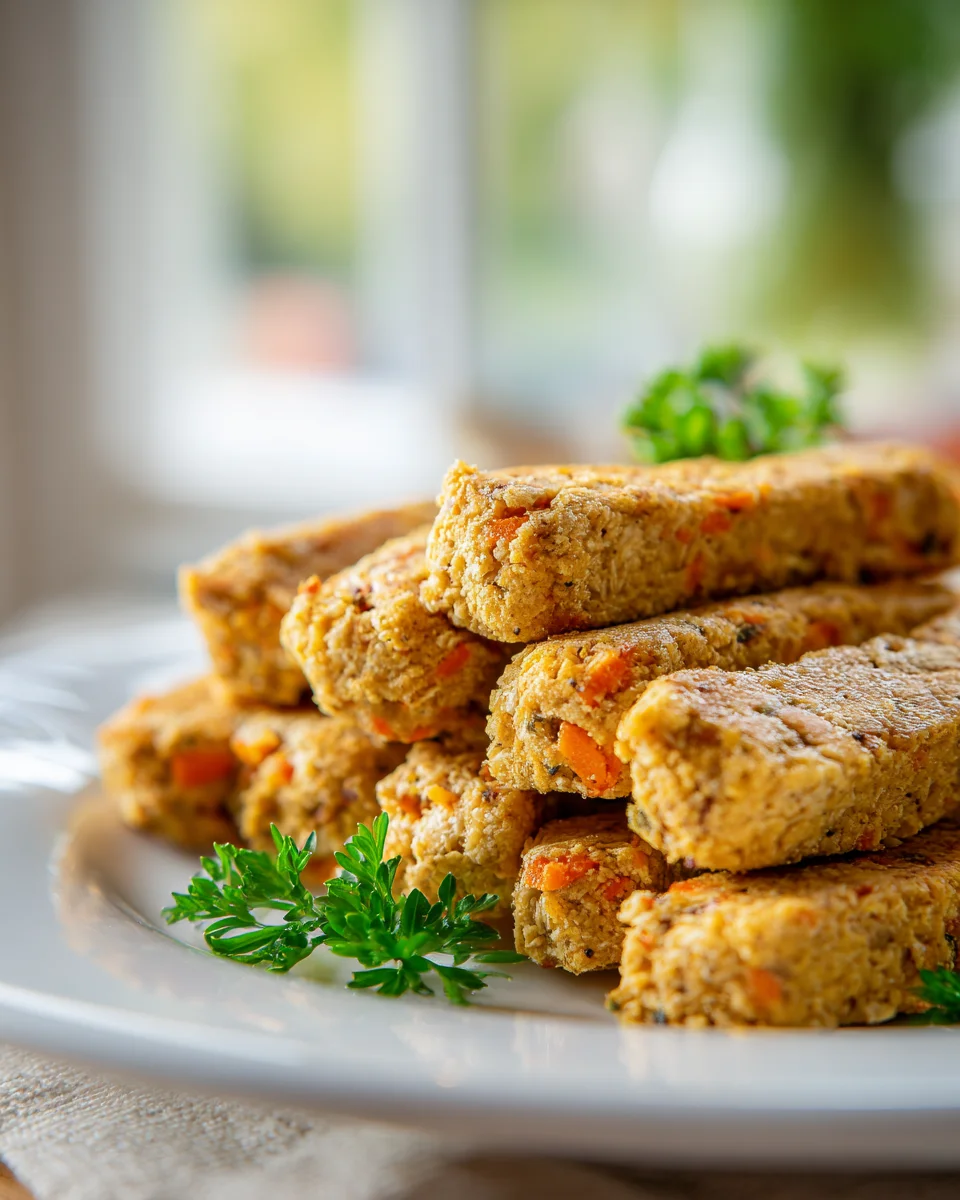
Mini Apple And Carrot Dog Treat Sticks
Oh boy, do I have a treat for your best friend! There’s nothing quite like seeing your dog’s tail wag furiously at snack time, and knowing you made that delicious treat yourself? Even better! That’s why I’m absolutely thrilled to share my recipe for Mini Apple And Carrot Dog Treat Sticks. These aren’t just any old dog biscuits; they’re little powerhouses of nutrition, brimming with the natural sweetness of apples and the vibrant goodness of carrots, all baked into perfectly sized, chewy-yet-firm sticks. You’re going to love how incredibly easy these are to make, giving you total control over what your furry companion eats, and your dog? Well, let’s just say they’ll be doing happy dances for these wholesome, homemade delights. Get ready to bake up some love and watch those happy tails go!
Ingredient Notes
Creating these delightful Mini Apple And Carrot Dog Treat Sticks for your furry friend is not just fun, but also incredibly rewarding. The beauty of homemade treats is knowing exactly what goes into them, ensuring they’re packed with wholesome, dog-friendly goodness. Here’s a closer look at the key ingredients I use and some helpful substitutions.
Apples
- Why I use them: Apples are a fantastic source of vitamins A and C, as well as fiber, which is great for digestion. They add a natural sweetness and moisture to the treats, making them super palatable for pups. Remember, always remove the core and any seeds, as apple seeds contain small amounts of cyanide and should not be consumed by dogs.
- Preparation: I typically grate the apple very finely or even run it through a food processor to create a smooth pulp. This ensures the apple disperses evenly throughout the dough and helps with texture for those mini sticks.
- Substitutions: If apples aren’t on hand, you can substitute with other dog-safe fruits or vegetables like unsweetened pumpkin puree (canned, not pie filling) or a small amount of mashed banana. Just be mindful of the moisture content; you might need to adjust the flour slightly.
Carrots
- Why I use them: Carrots are a superfood for dogs, loaded with beta-carotene (which converts to Vitamin A), fiber, and antioxidants. They add a lovely vibrant color and a subtle earthy sweetness that complements the apple perfectly. Plus, they contribute to the chewy texture of the sticks.
- Preparation: Similar to apples, I grate the carrots very finely or use a food processor to get a near-pureed consistency. This ensures they blend seamlessly into the dough. Peeling is optional; a good scrub is usually sufficient if you prefer to keep the extra fiber in the peel.
- Substitutions: Finely grated sweet potato or even a small amount of pureed green beans could work here. Again, observe the moisture balance of your dough.
Whole Wheat Flour
- Why I use it: Whole wheat flour is my go-to for dog treats because it offers more fiber and nutrients than all-purpose white flour. It provides the necessary structure for our treat sticks, allowing them to hold their shape and crisp up nicely.
- Substitutions: If your dog has sensitivities to wheat or you prefer a grain-free option, you can use oat flour, rice flour, or a 50/50 blend of coconut flour and another grain-free flour. Keep in mind that grain-free flours absorb liquids differently, so you might need to adjust the amount of water or oil slightly to achieve the right dough consistency.
Egg
- Why I use it: A single egg acts as a fantastic binder, helping to hold all our ingredients together to form a cohesive dough. It also adds a little extra protein boost to the treats.
- Substitutions: For an egg-free option, you can try a “flax egg” (1 tablespoon ground flaxseed mixed with 3 tablespoons warm water, let sit for 5 minutes) or a small amount of unsweetened applesauce, but you may need to add a touch more flour to compensate for the added moisture.
Olive Oil or Coconut Oil
- Why I use it: Just a small amount of healthy fat helps to create a tender crumb and makes the treats more palatable. Both olive oil and coconut oil are great options for dogs in moderation, offering various health benefits.
- Substitutions: Flaxseed oil is another excellent choice for healthy fats. Avoid oils high in saturated fats that aren’t specifically beneficial for dogs.
Water
- Why I use it: Water helps bring the dough together to the right consistency. It’s added gradually to ensure you don’t end up with overly sticky or dry dough.
- Substitutions: You could use unsweetened, diluted beef broth (check labels for dog-safe ingredients and low sodium) for an extra flavor boost, but plain water works perfectly well and keeps the focus on the apple and carrot.
Cinnamon (Optional)
- Why I use it: A pinch of ground cinnamon can add a lovely aroma and subtle warmth to the treats. It’s generally safe for dogs in small amounts and some studies suggest it can have health benefits.
- Substitutions: If you’re not a fan of cinnamon, you can simply omit it or add a tiny amount of dried ginger for a different warming spice.
Step-by-Step Instructions
Making these Mini Apple And Carrot Dog Treat Sticks is a straightforward process, perfect for a fun afternoon in the kitchen. Follow these steps, and you’ll have a batch of healthy, homemade treats ready for your pup in no time!
- Preheat and Prepare: First things first, let’s get the oven ready. Preheat your oven to 350°F (175°C). While it’s heating, line a large baking sheet with parchment paper or a silicone baking mat. This prevents sticking and makes cleanup a breeze.
- Prep Your Produce: Wash your apple thoroughly, then core it and remove any seeds. For the carrot, give it a good scrub. You can peel it if you like, but it’s not strictly necessary. Using a fine grater or food processor, finely grate or process both the apple and carrot until they resemble a fine pulp. The finer, the better, as this helps them incorporate smoothly into the dough.
- Combine Dry Ingredients: In a large mixing bowl, whisk together the whole wheat flour and the optional cinnamon until well combined. This ensures even distribution of flavor and leavening (if any) throughout the treats.
- Mix Wet Ingredients: In a separate medium bowl, lightly beat the egg. Then, add the olive oil (or coconut oil) and the finely grated apple and carrot pulp. Mix these wet ingredients together thoroughly.
- Form the Dough: Pour the wet ingredient mixture into the bowl with the dry ingredients. Use a sturdy spoon or your hands to mix everything together. Gradually add the water, one tablespoon at a time, mixing after each addition, until a firm, cohesive dough forms. The dough should be moist enough to come together but not overly sticky. You might not need all the water, or you might need a tiny bit more, depending on the moisture content of your apple and carrot.
- Roll Out the Dough: Lightly flour a clean work surface. Turn the dough out onto the floured surface and gently knead it a few times until smooth. Using a rolling pin, roll the dough out to an even thickness of about 1/4 inch (about 6mm). This thickness is ideal for creating sturdy, mini treat sticks that will bake up perfectly.
- Cut Into Sticks: Now for the fun part! Using a sharp knife or a pizza cutter, cut the rolled-out dough into small, thin sticks. Aim for approximately 1/2 inch wide and 2-3 inches long (about 1-1.5 cm wide and 5-7.5 cm long). The “mini” aspect is key here, so adjust the size according to your dog’s size and preference.
- Arrange and Bake: Carefully transfer the cut treat sticks to your prepared baking sheet, leaving a small space between each one to allow for even baking. Bake in the preheated oven for 20-25 minutes, or until the sticks are golden brown and feel firm to the touch. The baking time can vary depending on your oven and the exact thickness of your sticks. For extra crispiness, you can turn off the oven and leave the treats inside for another 15-20 minutes as the oven cools.
- Cool Completely: Once baked, remove the treats from the oven and transfer them to a wire rack to cool completely. This step is crucial for achieving that desired crisp texture and preventing sogginess.
Tips & Suggestions
Making homemade treats is all about personalization and learning what works best for your dog. Here are some extra tips and suggestions to help you perfect your Mini Apple And Carrot Dog Treat Sticks and make them truly special:
- Dough Consistency is Key: Pay close attention to your dough. It should be firm enough to roll out without sticking excessively to your hands or the counter, but not so dry that it cracks or crumbles. If it’s too sticky, add a little more flour, a teaspoon at a time. If it’s too dry, add a tiny splash more water or olive oil. The moisture content of your grated apple and carrot can vary, so be flexible with the flour and liquid amounts.
- Uniform Cutting for Even Baking: To ensure all your mini treat sticks bake evenly, try your best to cut them into similar sizes and thicknesses. If some are much thinner or smaller than others, they’ll likely brown faster. If you have any thinner pieces, you can remove them from the oven a few minutes earlier to prevent burning.
- Achieving That Perfect Crispness: For truly crunchy treat sticks, don’t be afraid to bake them a little longer at a slightly lower temperature if they aren’t quite firm after the initial baking time. After the primary bake, you can also turn off your oven and leave the treats inside as the oven cools down for an additional 15-30 minutes. This slow drying process helps to remove any residual moisture and makes them extra crispy, which is great for storage and canine dental health.
- Customize the Veggies: While apple and carrot are a winning combo, feel free to experiment! You can substitute part of the carrot with finely pureed sweet potato or even some finely chopped parsley for added freshness and breath-freshening benefits. Just ensure any additions are dog-safe.
- Add a Flavor Boost: For an extra special touch, you can add a tiny amount of xylitol-free peanut butter to the wet ingredients. Always double-check labels to ensure no xylitol, as it’s toxic to dogs. A sprinkle of dried, unflavored oats (not instant oats) can also add a nice texture and fiber.
- Adjust Size for Your Dog: These are “mini” sticks for a reason, perfect for smaller dogs or as training treats for any size. However, if you have a larger dog, you might want to make slightly longer or thicker sticks. Just remember to adjust baking time accordingly – larger treats will need longer to cook through.
- Texture Variations: If your dog prefers a chewier treat, you can reduce the baking time slightly and skip the extra drying step in the cooling oven. They might not store as long, but some pups love a softer bite.
Storage
Once you’ve gone to the effort of baking these wholesome Mini Apple And Carrot Dog Treat Sticks, you’ll want to make sure they stay fresh and delicious for your pup to enjoy. Proper storage is key to maintaining their texture and preventing spoilage.
- Cool Completely First: This is perhaps the most crucial step for storage. Before placing your treats in any container, ensure they are completely cool. Warm treats will create condensation inside an airtight container, leading to moisture buildup that can make them soggy and prone to mold. Let them cool on a wire rack for several hours, or even overnight, especially if you opted for extra crispiness.
- Room Temperature Storage: For immediate consumption within a few days, you can store the fully cooled, crispy treats in an airtight container at room temperature. A cookie jar or a plastic container with a tight-fitting lid works perfectly. Make sure they are truly crisp and dry; otherwise, they may soften quickly. Generally, they will last about 5-7 days this way.
- Refrigeration: If you prefer to extend their shelf life slightly or if your treats ended up a bit chewier rather than perfectly crisp, storing them in an airtight container in the refrigerator is a good option. This can keep them fresh for up to 1-2 weeks.
- Freezing for Long-Term Storage: For the longest shelf life, freezing is your best bet! Once the treats are completely cool, place them in a single layer on a baking sheet and freeze for about an hour until solid. This prevents them from sticking together. Then, transfer the frozen sticks to a freezer-safe airtight container or a heavy-duty freezer bag. Label with the date. Frozen treats will maintain their quality for up to 2-3 months.
- Thawing Frozen Treats: When you’re ready to treat your pup, simply take out the desired number of sticks from the freezer and let them thaw at room temperature for 15-30 minutes, or until soft enough for your dog to enjoy.
- Watch for Spoilage: Always check your homemade treats before giving them to your dog. Discard any treats that show signs of mold, have an off smell, or feel unusually soft or slimy. When in doubt, it’s always better to throw them out.
- If They Get Soft: If your treats start to lose their crispness over time, you can often revive them by placing them on a baking sheet and baking at a low temperature (around 200°F/95°C) for 10-15 minutes, or until crisp again. Let them cool completely before storing once more.
Final Thoughts
There you have it! I truly believe that whipping up these Mini Apple And Carrot Dog Treat Sticks will be one of the most rewarding kitchen experiences you’ll have with your furry friend in mind. It’s not just about creating a delicious snack; it’s about providing a wholesome, natural treat packed with the goodness of apples and carrots, made with love right in your own home.
Say goodbye to store-bought treats with mysterious ingredients and hello to the joy of knowing exactly what goes into your pup’s snack time. These Mini Apple And Carrot Dog Treat Sticks are incredibly simple to make, yet they deliver on big flavor and even bigger tail wags. So go ahead, give this recipe a try – I promise, your dog will thank you for these delightful, healthy, and perfectly portioned little sticks!
Homemade Apple Carrot Dog Treat Sticks – Your Pup’s Fave!

These Mini Apple And Carrot Dog Treat Sticks are nutritious and delicious, perfect for treating your furry friend. Easy to make and packed with wholesome ingredients, your dog will love these homemade delights!
- Prep Time: 15 mins
- Cook Time: 25 mins
- Total Time: 40 minutes
- Yield: Approximately 30 treats 1x
- Category: Dog Treats
- Method: Baking
- Cuisine: Homemade
Ingredients
- 1 apple, grated
- 1 carrot, grated
- 2 cups whole wheat flour
- 1 egg
- 1/4 cup olive oil or coconut oil
- 1/4 cup water (adjust as needed)
- 1/2 teaspoon cinnamon (optional)
Instructions
- Preheat your oven to 350°F (175°C) and line a large baking sheet with parchment paper or a silicone baking mat.
- Wash the apple thoroughly, core it, and remove any seeds. Scrub the carrot well. Finely grate or process both the apple and carrot until they resemble a fine pulp.
- In a large mixing bowl, whisk together the whole wheat flour and optional cinnamon until well combined.
- In a separate medium bowl, lightly beat the egg. Add the olive oil (or coconut oil) and the finely grated apple and carrot pulp. Mix these wet ingredients together thoroughly.
- Pour the wet ingredient mixture into the bowl with the dry ingredients. Mix everything together, gradually adding the water until a firm, cohesive dough forms.
- Lightly flour a clean work surface, turn the dough out onto it, and knead it a few times until smooth. Roll the dough out to an even thickness of about 1/4 inch (about 6mm).
- Cut the rolled-out dough into small, thin sticks, approximately 1/2 inch wide and 2-3 inches long.
- Transfer the cut treat sticks to your prepared baking sheet, leaving space between each one. Bake for 20-25 minutes, or until golden brown and firm to the touch.
- Remove the treats from the oven and transfer them to a wire rack to cool completely.
Nutrition
- Serving Size: 1 treat
- Calories: 50
- Sugar: 1 g
- Sodium: 5 mg
- Fat: 2 g
- Saturated Fat: 0 g
- Unsaturated Fat: 2 g
- Trans Fat: 0 g
- Carbohydrates: 8 g
- Fiber: 1 g
- Protein: 1 g
- Cholesterol: 20 mg
Keywords: Ensure the dough is firm enough to roll out without sticking excessively. For a chewier treat, reduce baking time slightly. Customize with other dog-safe veggies or add a tiny amount of xylitol-free peanut butter for extra flavor.
Leave a Comment