
Loaded Potato Taco Bowl
Oh boy, have I got a treat for you today! I’ve been dreaming up ways to combine my absolute favorite comfort foods, and let me tell you, this Loaded Potato Taco Bowl hits every single craving. Forget choosing between taco night and a hearty baked potato – with this recipe, you get the best of both worlds, all in one incredibly satisfying bowl!
What makes this dish so special? It’s the ultimate mash-up of textures and flavors. We’re talking about perfectly crispy, seasoned roasted potatoes serving as the base – no tortillas needed here, which means extra room for all the good stuff! Then we pile on richly seasoned ground beef, cooked to perfection. It’s the kind of meal that feels indulgent but is surprisingly simple to pull together on a weeknight. You’re going to adore how customizable it is; everyone at the table can build their perfect bowl with their favorite toppings.
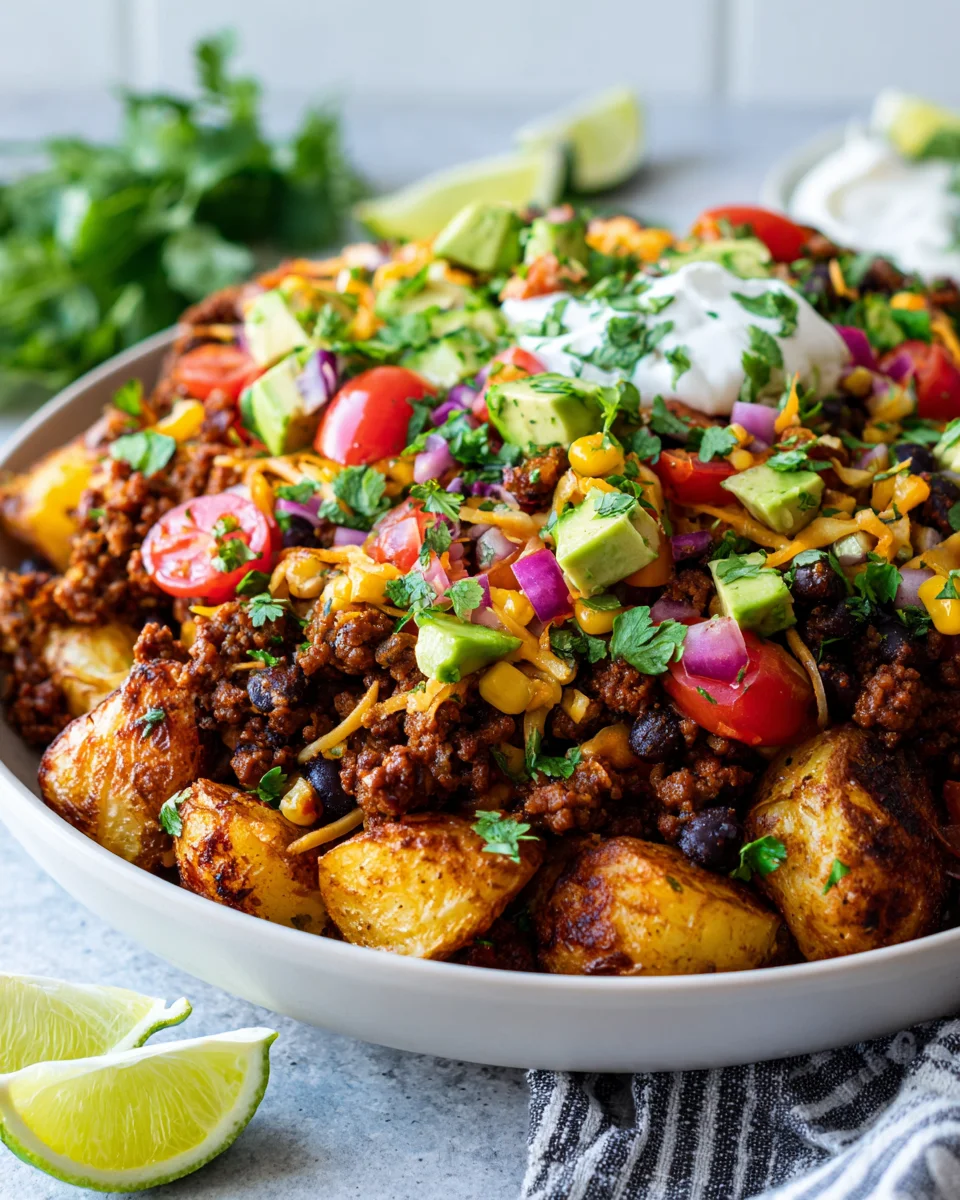
Think of it: golden-brown potatoes, savory beef, melty cheese, a dollop of sour cream (or Greek yogurt for a lighter touch!), fresh pico de gallo, maybe some avocado or guacamole… all scooped up and enjoyed with a fork. It’s comforting, it’s exciting, and it’s a brilliant way to shake up your dinner routine. Get ready to dive into a bowl of pure deliciousness!
Ingredient Notes
Creating my Loaded Potato Taco Bowl is all about layering incredible flavors. Here’s a breakdown of key ingredients and substitutions I find work best.
Potatoes
- Russet Potatoes: These are my go-to for a fluffy interior that holds up well. I usually aim for medium-sized ones, about one per person.
- Substitution: If you’re looking for a slightly different flavor or texture, sweet potatoes or Yukon Gold potatoes work beautifully. For a quicker option, pre-cooked frozen diced potatoes can save valuable prep time!
Protein
- Ground Beef: I love using lean ground beef for its rich flavor and heartiness in this bowl. It browns up perfectly and really soaks in that taco seasoning.
- Substitution: For a lighter option, ground turkey is fantastic. If you’re going vegetarian, seasoned black beans, lentils, or a mixture of both make a hearty and delicious substitute. Just be sure to season them well to capture that taco essence!
Taco Seasoning
- Store-Bought Taco Seasoning: Convenient and reliable! I always have a packet or a big container on hand.
- Substitution: You can easily make your own blend. I often mix chili powder, cumin, paprika, onion powder, garlic powder, and a pinch of cayenne for heat. This allows you to control the sodium and spice levels exactly to your liking.
Cheese & Toppings
- Shredded Cheese: A blend of shredded cheddar and Monterey Jack offers a perfect melt and a great balance of flavor for these “loaded” potatoes.
- Substitution: Any good melting cheese will do! Colby Jack, Pepper Jack (for a kick), or even a Mexican blend. For a dairy-free option, there are many excellent plant-based shredded cheeses available that melt quite nicely.
- Essential Toppings: For that true “loaded potato” vibe, sour cream (or plain Greek yogurt for a healthier twist), fresh green onions for a mild oniony bite, vibrant salsa, and crispy bacon bits (real or plant-based) are absolute musts for me!
- Other Ideas: Diced avocado or guacamole, pickled jalapeños for a spicy tang, corn, black beans, a squeeze of fresh lime juice, and chopped fresh cilantro are all fantastic additions that elevate the bowl’s flavor and texture.
Each ingredient plays a crucial role in making this Loaded Potato Taco Bowl an absolute winner. Don’t be afraid to experiment and find your favorite combinations!
Step-by-Step Instructions
Ready to whip up this incredibly satisfying Loaded Potato Taco Bowl? Follow these simple steps, and you’ll have a delicious meal on your table in no time. I promise, it’s easier than it looks!
Step 1: Prepare Your Potatoes
- First things first, I wash and scrub my russet potatoes thoroughly. I cook them until they are fork-tender, using my preferred method:
- Baking Method: Preheat my oven to 400°F (200°C). I pierce each potato several times with a fork, rub them lightly with a tiny bit of oil (like olive or avocado oil) and a sprinkle of salt, then bake for about 45-60 minutes, or until they’re tender.
- Microwave Method (for speed!): If I’m in a hurry, I’ll pierce them, place them on a microwave-safe plate, and microwave for 5-8 minutes, flipping halfway, until soft.
- Air Fryer Method: Rub with a little oil and salt, then air fry at 400°F (200°C) for 30-40 minutes, flipping halfway, until crispy outside and tender inside.
- Once cooked, let them cool slightly. I then dice them into bite-sized pieces or, for a more rustic feel, I sometimes lightly smash them with a fork. Set aside.
Step 2: Cook the Taco Beef
- While the potatoes are cooking, I grab a large skillet and place it over medium-high heat. I add my ground beef and break it up with a spoon.
- I cook the beef, stirring occasionally, until it’s completely browned and no pink remains. This usually takes about 5-7 minutes.
- Once browned, I carefully drain any excess fat from the skillet. This helps keep the dish from being greasy.
- Next, I stir in the taco seasoning and about 1/4 cup of water (or a non-alcoholic beef broth if I want extra richness). I bring it to a simmer and cook for another 2-3 minutes, or until the liquid has mostly absorbed and the beef is well-coated in the seasoning. Remove from heat.
Step 3: Assemble Your Bowls
- Now for the fun part – assembly! I grab my favorite serving bowls.
- I start by placing a generous portion of the prepared diced or smashed potatoes at the bottom of each bowl. These form the delicious foundation.
- Next, I spoon a hearty amount of the seasoned taco beef over the potatoes.
- Then, I sprinkle a good handful of shredded cheese over the beef.
Step 4: Melt the Cheese
- To get that gooey, melty cheese perfection, I have a couple of options:
- Microwave: Pop each bowl into the microwave for 30-60 seconds, or until the cheese is beautifully melted and bubbly.
- Oven (if using oven-safe bowls): If my bowls are oven-safe, I’ll place them back in the warm oven (or a preheated 350°F/175°C oven) for 5-10 minutes, just until the cheese is melted.
Step 5: Load It Up with Toppings
- This is where the “loaded” truly comes in! Once the cheese is melted, I add my favorite toppings.
- I spoon a dollop of sour cream or Greek yogurt on top, sprinkle with fresh green onions and crispy bacon bits, and add a generous scoop of salsa.
- If I’m using other toppings like avocado, black beans, corn, or cilantro, I’ll add them now too.
- Serve immediately and dig in! These bowls are best enjoyed fresh and warm.
Enjoy every delicious bite of your homemade Loaded Potato Taco Bowl!
Tips & Suggestions
Making a Loaded Potato Taco Bowl is always a treat, and over time, I’ve picked up a few tricks that really make a difference. Here are some of my top tips and suggestions to ensure your bowl is absolutely delicious every single time!
Perfect Potato Prep is Key
- Crispy Edges: If you love a little crispiness with your soft potatoes, try roasting or air frying them. After dicing the cooked potatoes, I sometimes toss them with a tiny bit of oil and a pinch of paprika before a quick bake or air fry for 10-15 minutes. This adds a lovely texture and flavor boost.
- Season Well: Don’t forget to season your potatoes! A simple sprinkle of salt and pepper after cooking (or before, if roasting) makes a world of difference.
Flavor Boosters for the Beef
- Aromatics: Before adding the ground beef, I sometimes sauté a diced onion and a couple of cloves of minced garlic in the skillet. This builds an incredible flavor base for the taco meat.
- Freshness: After cooking the beef, a squeeze of fresh lime juice and a handful of chopped fresh cilantro stirred in right before serving really brightens up the flavor profile.
- Heat Control: If you like a kick, add a pinch of red pepper flakes with your taco seasoning, or opt for a hot salsa and sliced pickled jalapeños as a topping.
Creative Toppings & Meal Prep
- Make it a Bar: If I’m serving a crowd, I love to set up a “taco bowl bar.” I lay out all the cooked components (potatoes, beef, melted cheese) and a variety of toppings in separate bowls. This lets everyone customize their own Loaded Potato Taco Bowl exactly how they like it!
- Beyond the Basics: Think outside the box! Try pickled red onions for a tangy crunch, cotija cheese for a salty crumbled texture, or even a drizzle of sriracha mayo for extra creaminess and heat.
- Meal Prep Prowess: This dish is fantastic for meal prep. You can cook the potatoes and the taco beef ahead of time (up to 3-4 days in advance) and store them separately in the fridge. When it’s mealtime, simply reheat, assemble, and add fresh toppings.
These little extra steps and ideas can really elevate your Loaded Potato Taco Bowl from good to absolutely amazing!
Storage
I always make extra of this Loaded Potato Taco Bowl because it’s just so good, and thankfully, it stores quite well! Here’s how I handle leftovers to keep them fresh and delicious for future cravings.
Storing Components Separately (Recommended)
- Cooked Potatoes: Once completely cooled, I store any leftover diced or smashed cooked potatoes in an airtight container in the refrigerator. They’ll stay fresh for about 3-4 days. When reheating, I find the oven or air fryer works best to bring back some crispiness, but the microwave is fine for a quick warm-up.
- Taco Beef: The cooked and seasoned ground beef also goes into a separate airtight container after cooling. It will last in the refrigerator for 3-4 days. It reheats wonderfully in the microwave or on the stovetop.
- Toppings: Most fresh toppings like sour cream, salsa, green onions, and avocado should be stored separately and added just before serving. Diced avocado, in particular, will brown quickly, so I always cut it fresh for each bowl. Bacon bits can be stored at room temperature or refrigerated, depending on the type.
Storing Assembled Bowls
- If you have a fully assembled Loaded Potato Taco Bowl with all the toppings (especially sour cream and salsa), it’s best consumed within 1-2 days. The potatoes can become a bit softer, and some toppings might lose their fresh texture.
- I usually cover the bowl tightly with plastic wrap or transfer it to an airtight container before refrigerating.
Reheating Leftovers & Freezing Considerations
- Reheating Assembled Bowls: I find the microwave is the easiest way to reheat an assembled bowl. Heat in 1-minute increments, stirring gently, until warmed through. Be aware that potatoes might soften more, and cheese might not be as gooey as fresh.
- Reheating Separate Components: This is my preferred method! I reheat the potatoes and beef first (oven, air fryer, or microwave for potatoes; stovetop or microwave for beef) until hot, then assemble a fresh bowl with new toppings. This yields a much better texture and flavor experience.
- Freezing Taco Beef: Cooked taco beef freezes excellently! Once cooled, I store it in a freezer-safe bag or container for up to 2-3 months. Thaw overnight in the fridge before reheating.
- Freezing Potatoes/Assembled Bowls: Cooked potatoes (especially diced or smashed) can be frozen, but their texture can change upon thawing, often becoming a bit mushier. If you do freeze them, they’re best used in dishes where texture isn’t paramount, but for this bowl, I generally recommend fresh or refrigerated. I do not recommend freezing a fully assembled Loaded Potato Taco Bowl. Dairy products like sour cream and cheese can separate and become grainy, and fresh toppings will not hold up well after thawing.
By storing your components thoughtfully, you can enjoy the deliciousness of your Loaded Potato Taco Bowl for days to come!

Final Thoughts
And there you have it – your very own Loaded Potato Taco Bowl! I truly believe this recipe is an absolute game-changer for anyone looking to shake up their meal routine. It takes all the irresistible comfort of a perfectly cooked potato and marries it with the vibrant, zesty flavors of your favorite tacos. The result? A hearty, satisfying, and utterly delicious bowl that’s packed with incredible textures and tastes.
What I love most about the Loaded Potato Taco Bowl is how it hits all the right notes: it’s comforting, exciting, and endlessly customizable. Whether you’re serving it up for a casual weeknight dinner or as a fun dish for friends, it’s guaranteed to be a hit. Don’t just take my word for it – give this unique fusion a try. I promise, once you experience the delightful combination of fluffy potatoes, savory beef, and all those glorious taco toppings, the Loaded Potato Taco Bowl will quickly become a cherished favorite in your kitchen. Happy cooking!
Savory Loaded Potato Taco Bowl Recipe – Must-Try!

This Loaded Potato Taco Bowl combines the best of taco night and a hearty baked potato into one satisfying meal. It’s customizable, comforting, and perfect for any weeknight dinner.
- Prep Time: 15 mins
- Cook Time: 30 mins
- Total Time: 45 minutes
- Yield: 4 servings
- Category: Dinner
- Method: Baking
- Cuisine: Mexican
Ingredients
- Russet Potatoes
- Ground Beef
- Store-Bought Taco Seasoning
- Shredded Cheese (blend of cheddar and Monterey Jack)
- Sour Cream or Plain Greek Yogurt
- Fresh Green Onions
- Salsa
- Crispy Bacon Bits (real or plant-based)
- Diced Avocado or Guacamole
- Pickled Jalapeños
- Corn
- Black Beans
- Fresh Lime Juice
- Chopped Fresh Cilantro
- Olive or Avocado Oil
- Salt
- Pepper
- Chili Powder
- Cumin
- Paprika
- Onion Powder
- Garlic Powder
- Cayenne
Instructions
- Wash and scrub the russet potatoes thoroughly.
- Preheat the oven to 400°F (200°C). Pierce each potato several times with a fork, rub them lightly with oil and sprinkle with salt, then bake for about 45-60 minutes until tender.
- Alternatively, microwave the potatoes for 5-8 minutes until soft, or air fry at 400°F (200°C) for 30-40 minutes until crispy outside and tender inside.
- Once cooked, let the potatoes cool slightly, then dice them into bite-sized pieces or lightly smash them with a fork. Set aside.
- In a large skillet over medium-high heat, add the ground beef and break it up with a spoon. Cook until completely browned, about 5-7 minutes.
- Drain any excess fat from the skillet, then stir in the taco seasoning and about 1/4 cup of water or beef broth. Bring to a simmer and cook for another 2-3 minutes until the liquid has mostly absorbed.
- Grab your serving bowls and place a generous portion of the prepared potatoes at the bottom of each bowl.
- Spoon a hearty amount of the seasoned taco beef over the potatoes.
- Sprinkle a good handful of shredded cheese over the beef.
- To melt the cheese, microwave each bowl for 30-60 seconds or place in a preheated oven at 350°F (175°C) for 5-10 minutes until melted.
- Once the cheese is melted, add your favorite toppings such as sour cream, green onions, bacon bits, and salsa.
- If using other toppings like avocado, black beans, corn, or cilantro, add them now.
- Serve immediately and enjoy!
Nutrition
- Serving Size: 1 bowl
- Calories: 650
- Sugar: 5 g
- Sodium: 800 mg
- Fat: 30 g
- Saturated Fat: 12 g
- Unsaturated Fat: 15 g
- Trans Fat: 0 g
- Carbohydrates: 70 g
- Fiber: 8 g
- Protein: 30 g
- Cholesterol: 80 mg
Keywords: For a lighter option, substitute ground turkey for beef. You can also use sweet potatoes or Yukon Gold potatoes instead of russet. Customize your toppings to suit your taste!
Leave a Comment