
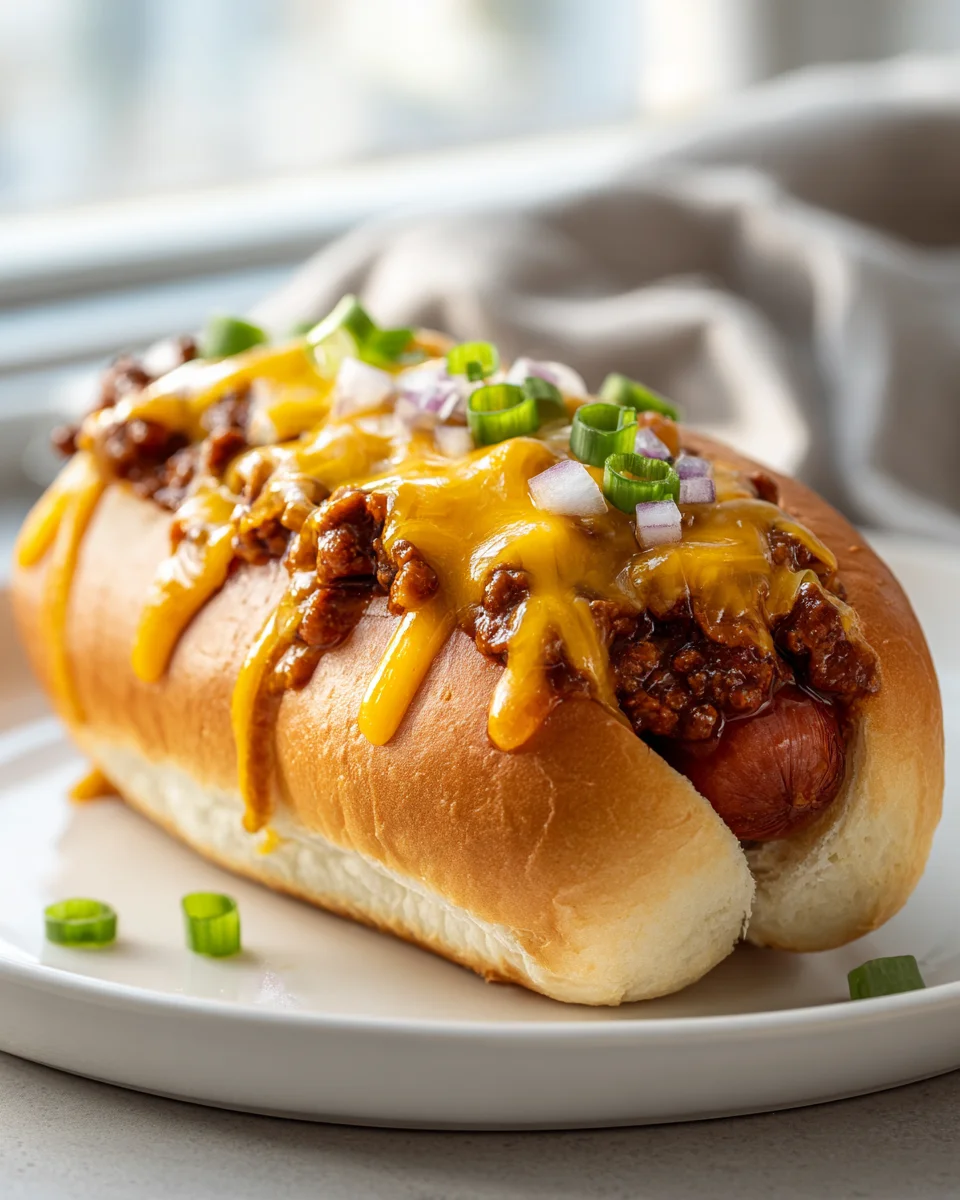
Classic Chili Cheese Hot Dog Buns
Oh, get ready for a game-changer! Forget everything you thought you knew about hot dog buns because we’re about to take them to a whole new level. Imagine sinking your teeth into a perfectly soft, fluffy bun that’s not just a vehicle for your hot dog, but a flavor explosion all on its own. That’s exactly what these Classic Chili Cheese Hot Dog Buns deliver!
I promise you, these aren’t just any buns; they’re an experience. What makes them so incredibly special? We’re infusing that irresistible, hearty beef chili and gooey, melted cheese right into the dough, creating an all-in-one bite of pure comfort food bliss. Every nibble offers that perfect balance of tender bread, savory chili warmth, and creamy, stretchy cheese. You and your guests will absolutely adore them because they elevate a simple hot dog into an extraordinary meal, making every BBQ, game day, or casual dinner feel like a celebration.
This recipe transforms the humble hot dog bun into a star in its own right. Get ready to bake up a batch of these glorious buns, which are so flavorful and satisfying, they might just steal the show!
Classic Chili Cheese Hot Dog Buns
Oh, prepare yourself for a game-changer! Forget everything you thought you knew about hot dog buns, because we’re about to elevate them to legendary status. This isn’t just a bun; it’s an experience. We’re talking about soft, fluffy hot dog buns infused with the warm, comforting spices of classic chili and studded with gooey cheddar cheese. Imagine a bun that brings the party before the hot dog even arrives! These Classic Chili Cheese Hot Dog Buns are savory, slightly spicy, and incredibly cheesy, making every bite an absolute delight. They are perfect for your next barbecue, picnic, or just a fun weeknight meal when you want to make things a little extra special. Trust me, once you try these, there’s no going back to plain old buns!
Ingredient Notes
Crafting the perfect Classic Chili Cheese Hot Dog Buns starts with understanding our key players. Each ingredient brings something vital to the table, ensuring that fluffy texture, rich flavor, and irresistible aroma we’re aiming for.
- All-Purpose Flour: This is the backbone of our buns, providing structure and chewiness. I always recommend using unbleached all-purpose flour for a slightly softer crumb.
- Substitution: For a heartier bun, you can substitute up to half of the all-purpose flour with whole wheat flour. Just know that your buns might be a bit denser and require a tiny bit more liquid.
- Active Dry Yeast: Our leavening agent! This is what makes our buns light and airy. Make sure your yeast is fresh and active for the best rise.
- Substitution: You can use instant yeast; just skip the proofing step and add it directly to the dry ingredients. You might use about 25% less instant yeast than active dry, but for this recipe, a direct swap usually works fine.
- Granulated Sugar: A small amount of sugar isn’t just for sweetness; it feeds the yeast, helping it activate and produce a robust rise. It also contributes to browning.
- Substitution: Honey or maple syrup can be used in equal amounts, though they might introduce a slight difference in flavor and texture.
- Fine Sea Salt: Essential for flavor balance, it highlights the chili and cheese notes and also helps control yeast activity.
- Substitution: Kosher salt can be used; just ensure you use slightly more by volume than fine sea salt, as it’s less dense.
- Warm Milk: Provides moisture and richness to the dough, contributing to a tender crumb. The warmth is crucial for activating the yeast.
- Substitution: Plant-based milks like almond, soy, or oat milk work beautifully here for a dairy-free option. Ensure they are unsweetened.
- Unsalted Butter (Melted): Adds incredible richness, flavor, and tenderness to the buns. It makes them melt-in-your-mouth delicious.
- Substitution: A good quality plant-based butter alternative can be used in equal measure for a dairy-free version. Olive oil or a neutral vegetable oil can also work, though they’ll impart a slightly different flavor and texture.
- Chili Powder: This is where the “chili” in our bun really shines! I use a good quality blend that’s not too spicy, but packed with flavor.
- Substitution: Feel free to adjust the spice level! Use a mild chili powder for a subtle warmth, or a spicier blend if you like more kick. Paprika (smoked or sweet) can also be added for an extra layer of flavor.
- Ground Cumin: Adds an earthy, warm note that’s classic in chili profiles.
- Substitution: If you don’t have ground cumin, a pinch of coriander can offer a similar aromatic quality, though the flavor will be slightly different.
- Garlic Powder & Onion Powder: These provide fundamental savory depth, mimicking the aromatics of a slow-simmered chili.
- Substitution: Fresh garlic or onion would be too chunky and moist for the dough, so stick with the powdered versions for even distribution and moisture control.
- Shredded Sharp Cheddar Cheese: The “cheese” component! Sharp cheddar melts beautifully and gives us that tangy, savory cheese flavor that pairs perfectly with chili.
- Substitution: Monterey Jack, a mild colby, or even a pepper jack for an extra kick would be fantastic alternatives. Freshly shredded cheese always melts better than pre-shredded.
- Egg Wash (Optional): An egg whisked with a splash of water or milk, brushed on before baking, gives the buns a beautiful golden-brown, shiny crust.
- Substitution: For an egg-free shine, a brush of milk or melted butter can also work, though the sheen won’t be as pronounced.
Step-by-Step Instructions
Let’s roll up our sleeves and get these amazing Classic Chili Cheese Hot Dog Buns made! Follow these steps carefully, and you’ll be rewarded with bakery-quality buns right from your own kitchen.
- Activate the Yeast: In a large mixing bowl (or the bowl of a stand mixer), combine the warm milk (ensure it’s between 105-115°F / 40-46°C) and granulated sugar. Sprinkle the active dry yeast over the top. Give it a gentle stir and let it sit for 5-10 minutes. You should see a foamy, bubbly layer form on the surface, which indicates your yeast is active and ready to work its magic. If it doesn’t foam, your yeast might be old, or your milk wasn’t the right temperature, and you should start over.
- Combine Wet Ingredients: Once the yeast is bubbly, add the melted butter to the milk mixture. Stir to combine.
- Mix Dry Ingredients: In a separate bowl, whisk together the all-purpose flour, fine sea salt, chili powder, ground cumin, garlic powder, and onion powder. Make sure the spices are evenly distributed throughout the flour.
- Form the Dough: Gradually add the dry ingredients to the wet ingredients, mixing with a wooden spoon or a dough hook on a stand mixer on low speed. Mix until a shaggy dough forms.
- Knead the Dough: Turn the dough out onto a lightly floured surface and knead for about 8-10 minutes, or until the dough is smooth, elastic, and no longer sticky. If using a stand mixer, knead on medium-low speed for 6-8 minutes. The dough should spring back when lightly poked.
- Add the Cheese: Once the dough is kneaded, flatten it slightly and sprinkle in the shredded cheddar cheese. Gently fold the dough over and continue kneading for another 1-2 minutes until the cheese is evenly incorporated. Be careful not to over-knead once the cheese is in, as it can start to break down.
- First Rise: Lightly grease a clean large bowl with a little oil. Place the dough in the bowl, turning it once to coat. Cover the bowl tightly with plastic wrap or a clean kitchen towel. Let the dough rise in a warm, draft-free place for 1 to 1.5 hours, or until it has doubled in size. This is a crucial step for developing flavor and a light texture.
- Punch Down and Divide: Gently punch down the risen dough to release the air. Turn it out onto a lightly floured surface. Divide the dough into 8-10 equal portions (about 3-4 ounces or 85-115 grams each, depending on how large you want your buns).
- Shape the Buns: Take each portion and flatten it into a rectangle. Fold the long sides towards the center, then roll the dough tightly from one short end to the other, pinching the seam closed firmly. Gently cup your hand over the dough and roll it back and forth a few times to smooth it out and create an oval shape, ensuring the ends are slightly tapered, just like a classic hot dog bun.
- Second Rise: Place the shaped buns seam-side down on a baking sheet lined with parchment paper, leaving about 2 inches between each bun. Cover loosely with plastic wrap or a clean kitchen towel. Let them rise again in a warm place for another 30-45 minutes, or until they look puffy and nearly doubled in size.
- Preheat Oven & Prepare for Baking: About 15 minutes before the second rise is complete, preheat your oven to 375°F (190°C). If using an egg wash, whisk one egg with a tablespoon of water or milk.
- Bake: Gently brush the tops of the risen buns with the egg wash (if using). Bake for 15-20 minutes, or until the buns are beautifully golden brown on top and sound hollow when tapped on the bottom.
- Cool: Transfer the baked buns to a wire rack immediately to cool completely. This prevents the bottoms from getting soggy. Resist the urge to cut into them right away; they’ll continue to set as they cool.
Tips & Suggestions
Making delicious homemade Classic Chili Cheese Hot Dog Buns is incredibly rewarding, and with a few extra pointers, you can ensure your buns are perfect every single time. Here are my favorite tips for success:
- Don’t Rush the Rise: Dough rising is all about patience. A slow, steady rise in a warm, draft-free spot develops more flavor and a better texture. If your kitchen is cool, you can place the bowl in a slightly warm (but not hot!) oven that’s been turned off, or even near a sunny window.
- Achieving the Perfect Shape: When shaping the buns, after flattening and rolling, practice gently rocking the dough back and forth under your cupped hand. This helps create tension on the surface, making the bun smooth and giving it that classic hot dog bun shape with tapered ends. A tight seam is key to preventing them from bursting open while baking.
- Spice Level Customization: The amount of chili powder, cumin, garlic powder, and onion powder I’ve suggested is a good starting point for a “classic” flavor profile. If you love things spicier, feel free to add a pinch of cayenne pepper to the dry ingredients. For a milder version, you can slightly reduce the chili powder. Taste your spices individually to understand their potency before adding.
- Cheese Choices Matter: While sharp cheddar is my go-to for its robust flavor and excellent melt, don’t be afraid to experiment! A blend of cheddar and Monterey Jack could offer a creamier melt, or a touch of smoked gouda could add an incredible smoky depth that complements the chili spices beautifully. Just ensure your cheese is finely shredded for even distribution in the dough.
- The Importance of Cooling: As tempting as it is to tear into these warm, cheesy buns straight from the oven, allowing them to cool completely on a wire rack is crucial. This lets the steam escape, preventing the buns from becoming gummy or soggy, and helps them maintain their shape and texture.
- Serving Suggestions (Beyond Hot Dogs): While these buns are, of course, divine with a classic hot dog and your favorite toppings, they’re also fantastic on their own as a savory side bread. They’d be incredible sliced horizontally and used for pulled beef sandwiches, or even as a unique base for mini meatball subs. Get creative!
- Prevent Sticking: Always use parchment paper on your baking sheet. The cheese in these buns has a tendency to melt out slightly, and parchment paper will prevent it from sticking to the pan and make cleanup a breeze.
Storage
Once you’ve gone to the effort of making these incredible Classic Chili Cheese Hot Dog Buns, you’ll want to make sure they stay fresh and delicious for as long as possible. Here’s how I like to store them:
- At Room Temperature:
- Once the buns are completely cooled, store them in an airtight container or a large zip-top bag at room temperature.
- They will stay fresh and soft for 2-3 days. To refresh them, you can pop them in a warm oven (around 300°F/150°C) for a few minutes, or briefly toast them in a toaster oven.
- In the Refrigerator:
- While refrigeration can sometimes dry out bread, if you need to extend their life a bit longer, you can store them in an airtight container in the refrigerator for up to 5 days.
- Just be aware they might dry out a little faster than at room temperature. Again, a quick warming in the oven will help restore some softness.
- Freezing for Longer Storage:
- This is my preferred method for keeping a batch of homemade buns on hand! Once completely cooled, wrap each bun individually in plastic wrap, then place them all into a large freezer-safe zip-top bag.
- They can be frozen for up to 2-3 months without a significant loss of quality.
- To Thaw: Simply remove the desired number of buns from the freezer and let them thaw at room temperature for a few hours.
- To Reheat from Frozen: You can also gently warm them directly from frozen. Wrap them loosely in foil and bake in a preheated oven at 300°F (150°C) for about 10-15 minutes, or until warmed through and soft. A quick zap in the microwave for 30-60 seconds can also work if you’re in a hurry, but be careful not to overcook, or they can become tough.
Final Thoughts
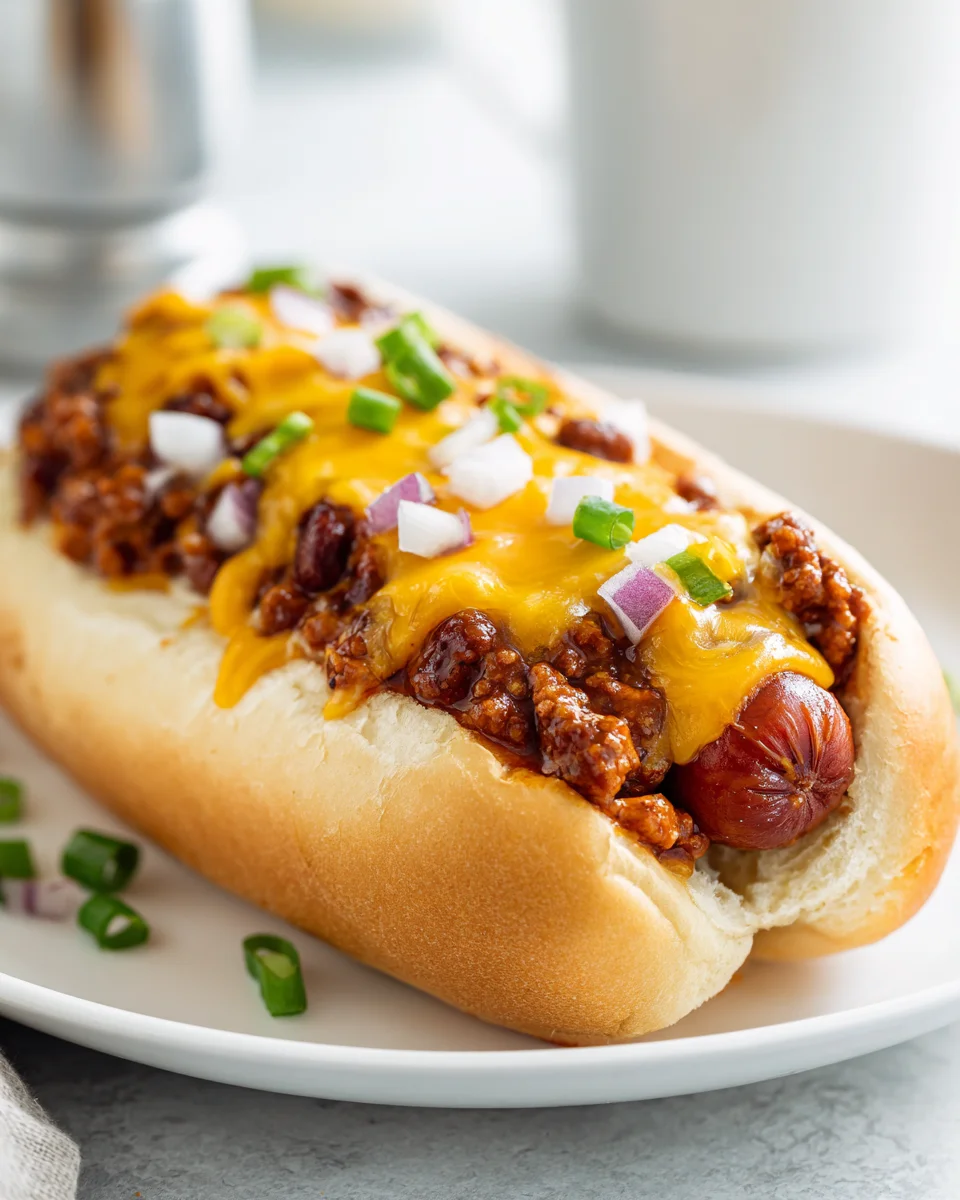
I truly hope you’ve enjoyed the journey of creating these incredible Classic Chili Cheese Hot Dog Buns. There’s something uniquely satisfying about bringing together that robust, savory beef chili, generously blanketed with melted, gooey cheese, atop a perfectly cooked hot dog, all nestled in a soft, warm bun. It’s not just a snack; it’s a hearty, comforting experience that elevates a simple hot dog into a culinary event.
What makes these Classic Chili Cheese Hot Dog Buns an absolute must-try, in my opinion, is the perfect marriage of rich flavors and textures. The deep notes of the beef chili, combined with the creamy cheese and the satisfying bite of the hot dog, create a harmonious explosion of taste that’s both nostalgic and incredibly delicious. I promise, once you take that first glorious bite, you’ll understand why these Classic Chili Cheese Hot Dog Buns are truly a classic for a reason.
So go ahead, share them with friends and family, or savor them all to yourself. I can’t wait for you to experience the pure joy and ultimate comfort these iconic buns bring!
Homemade Beef Chili Cheese Hot Dog Buns: Classic Comfort Food

These Classic Chili Cheese Hot Dog Buns are not just a vehicle for your hot dog; they’re a flavor explosion all on their own. Infused with hearty beef chili and gooey melted cheese, they elevate every meal into a celebration.
- Prep Time: 30 mins
- Cook Time: 20 mins
- Total Time: 50 minutes
- Yield: 8-10 servings 1x
- Category: Dinner
- Method: Baking
- Cuisine: American
Ingredients
- 4 cups unbleached all-purpose flour
- 2 1/4 teaspoons active dry yeast
- 2 tablespoons granulated sugar
- 1 teaspoon fine sea salt
- 1 cup warm milk (between 105-115°F / 40-46°C)
- 1/4 cup unsalted butter (melted)
- 2 teaspoons chili powder
- 1 teaspoon ground cumin
- 1 teaspoon garlic powder
- 1 teaspoon onion powder
- 1 cup shredded sharp cheddar cheese
- 1 egg (for egg wash, optional)
- 1 tablespoon water or milk (for egg wash, optional)
Instructions
- In a large mixing bowl (or the bowl of a stand mixer), combine the warm milk and granulated sugar. Sprinkle the active dry yeast over the top. Give it a gentle stir and let it sit for 5-10 minutes until foamy.
- Once the yeast is bubbly, add the melted butter to the milk mixture and stir to combine.
- In a separate bowl, whisk together the all-purpose flour, fine sea salt, chili powder, ground cumin, garlic powder, and onion powder.
- Gradually add the dry ingredients to the wet ingredients, mixing with a wooden spoon or a dough hook on a stand mixer on low speed until a shaggy dough forms.
- Turn the dough out onto a lightly floured surface and knead for about 8-10 minutes until smooth and elastic. If using a stand mixer, knead on medium-low speed for 6-8 minutes.
- Once kneaded, flatten the dough slightly and sprinkle in the shredded cheddar cheese. Gently fold the dough over and continue kneading for another 1-2 minutes until the cheese is evenly incorporated.
- Lightly grease a clean large bowl with oil. Place the dough in the bowl, turning it to coat. Cover tightly with plastic wrap or a kitchen towel and let it rise in a warm place for 1 to 1.5 hours until doubled in size.
- Gently punch down the risen dough to release the air. Turn it out onto a lightly floured surface and divide into 8-10 equal portions.
- Take each portion and flatten it into a rectangle. Fold the long sides towards the center, then roll tightly from one short end to the other, pinching the seam closed.
- Place the shaped buns seam-side down on a baking sheet lined with parchment paper, leaving about 2 inches between each bun. Cover loosely and let them rise again for another 30-45 minutes until puffy.
- About 15 minutes before the second rise is complete, preheat your oven to 375°F (190°C). If using an egg wash, whisk one egg with a tablespoon of water or milk.
- Gently brush the tops of the risen buns with the egg wash (if using). Bake for 15-20 minutes until golden brown and sound hollow when tapped on the bottom.
- Transfer the baked buns to a wire rack immediately to cool completely.
Nutrition
- Serving Size: 1 bun
- Calories: 220
- Sugar: 2 g
- Sodium: 250 mg
- Fat: 8 g
- Saturated Fat: 4 g
- Unsaturated Fat: 3 g
- Trans Fat: 0 g
- Carbohydrates: 30 g
- Fiber: 1 g
- Protein: 6 g
- Cholesterol: 20 mg
Keywords: Dough rising takes time; a warm, draft-free spot develops better flavor. Experiment with different cheeses for varied flavors, and ensure to cool the buns completely to prevent sogginess.
Leave a Comment