
Italian Herb And Cheese Bread A Golden Cheesy Loaf Bursting With Flavor
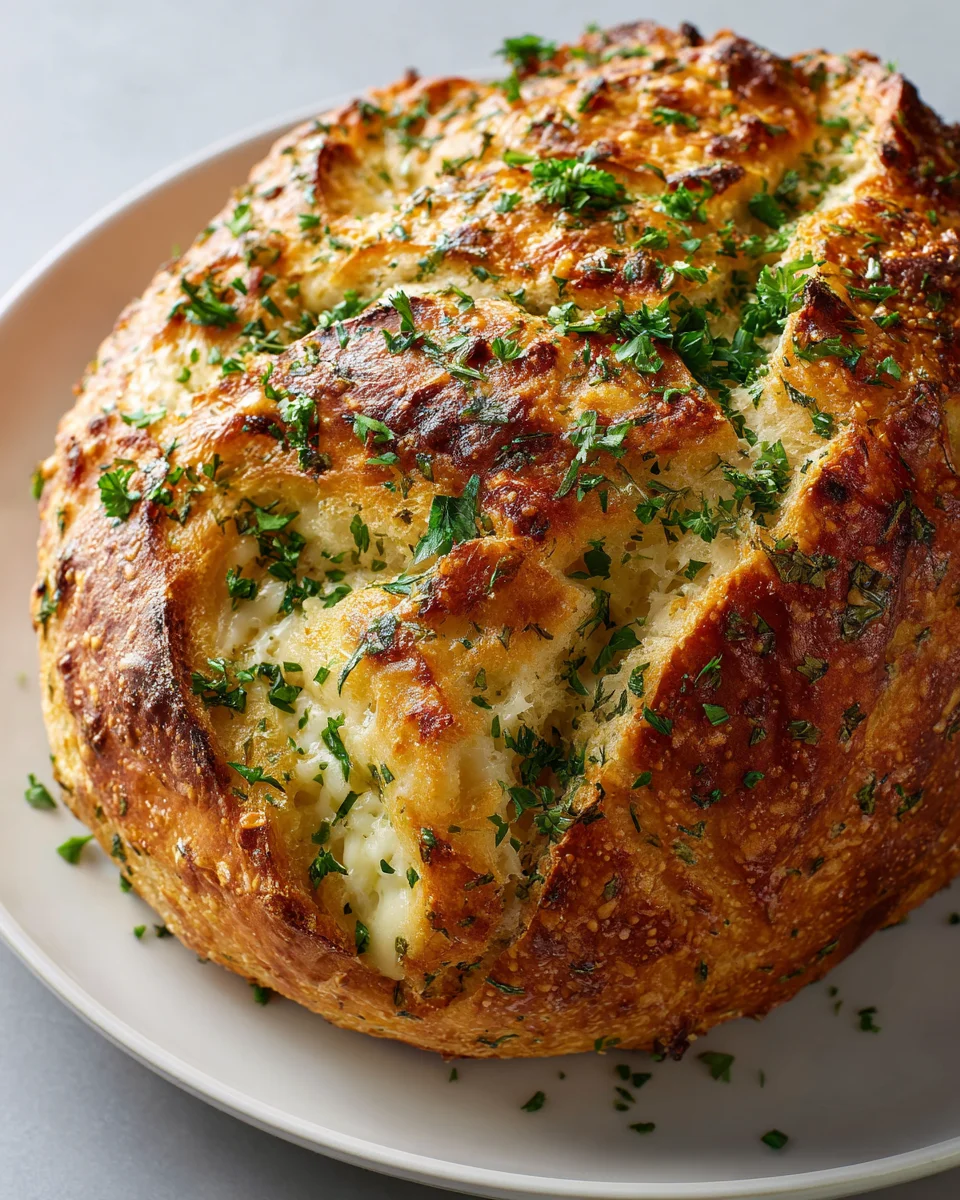
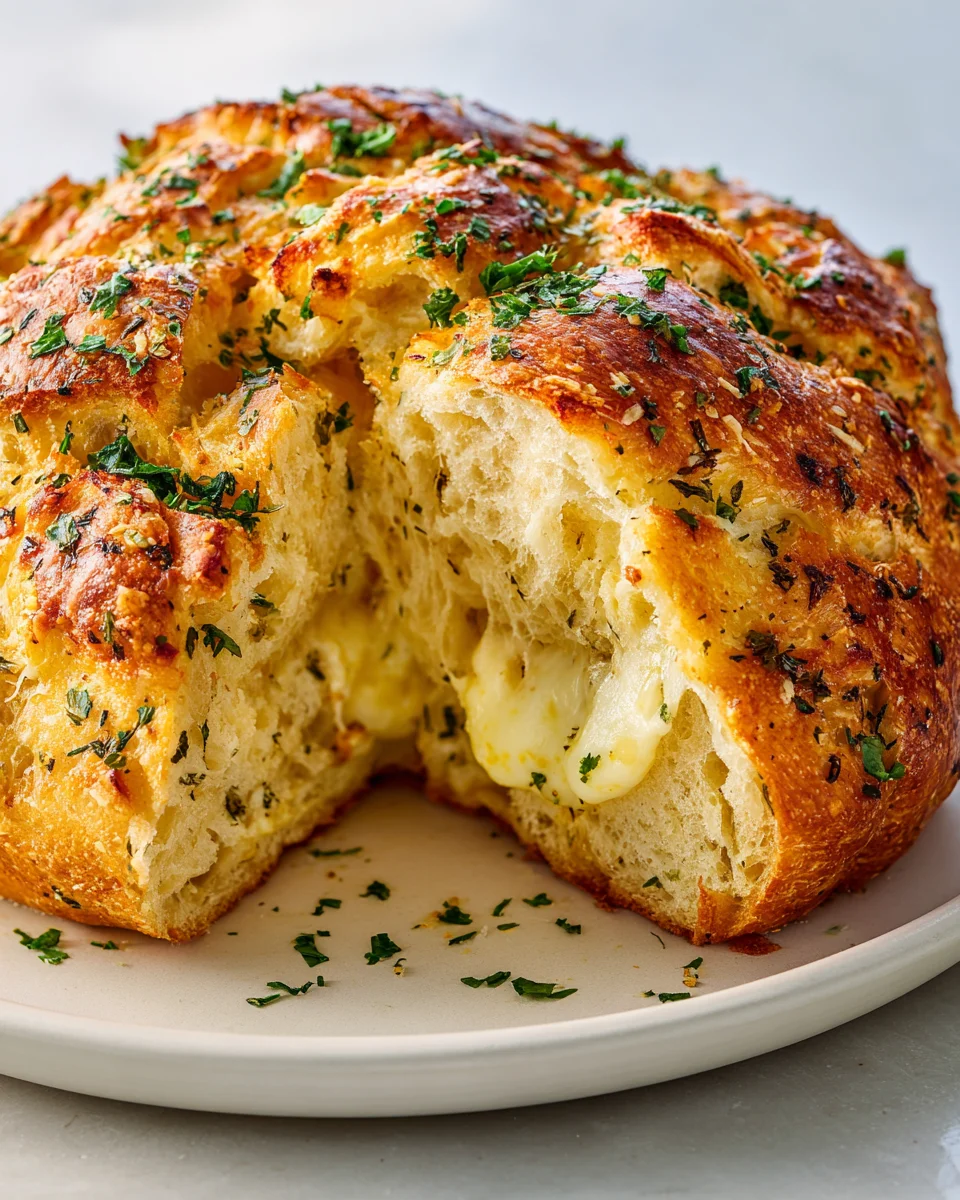
Oh, buckle up, because I’m about to introduce you to a bread that will change your life (or at least your dinner table!). When I set out to create something truly special, something that screams comfort and joy, I knew it had to be this. This isn’t just any bread; it’s a celebration in every slice. Imagine biting into a slice that’s perfectly golden on the outside, incredibly soft and tender on the inside, and absolutely packed with the aromatic embrace of classic Italian herbs and pockets of gooey, savory cheese. It’s pure magic.
What makes this Italian Herb And Cheese Bread A Golden Cheesy Loaf Bursting With Flavor so utterly irresistible? Well, it’s the perfect harmony of robust Italian seasonings – think oregano, basil, thyme – expertly folded into a tender dough, then generously studded with a delightful blend of cheeses that melt into glorious, flavorful pockets as it bakes. The aroma alone will have everyone flocking to your kitchen! You’ll absolutely adore how straightforward it is to make, yet it yields such an impressive, bakery-quality result every single time. It’s perfect as a side for your favorite pasta dish, a fantastic companion to a hearty beef stew, or simply divine on its own with a smear of butter. Trust me, once you experience that first warm, cheesy, herb-infused bite, you’ll understand why this golden loaf is destined to become a staple in your home. Get ready to bake some serious happiness!
Ingredient Notes
Crafting the perfect Italian Herb and Cheese Bread starts with understanding the role each ingredient plays in creating that golden, cheesy loaf bursting with flavor. Here are the key players and some helpful notes:
- All-Purpose Flour: This is the foundation of our bread. I find unbleached all-purpose flour works beautifully, giving a tender crumb and good structure. If you’re looking for a slightly chewier bread, you could substitute up to a quarter of the all-purpose flour with bread flour, but it’s not strictly necessary for a fantastic result.
- Active Dry Yeast: My go-to for consistent rises! Remember to “bloom” it first in warm water (around 105-115°F or 40-46°C) with a pinch of sugar to ensure it’s active. If you’re using instant yeast, you can often skip the blooming step and mix it directly with your dry ingredients, but I still prefer to proof it just to be sure.
- Warm Water: Crucial for activating the yeast. As mentioned, aim for that sweet spot of 105-115°F. Water that’s too hot will kill the yeast; too cold, and it won’t activate properly.
- Granulated Sugar: A small amount not only feeds the yeast, helping your bread rise beautifully, but also contributes to that lovely golden-brown crust we’re aiming for. Don’t worry, it won’t make your bread overtly sweet.
- Salt: Essential for flavor! I use fine sea salt. It balances the sweetness, enhances the cheese and herb flavors, and also helps control yeast activity. Don’t skimp on the salt, as bland bread is a missed opportunity.
- Extra Virgin Olive Oil: Adds richness, moisture, and a subtle authentic Italian flavor to the dough. It also helps with the texture, making the bread soft and tender. A good quality olive oil truly makes a difference here.
- Italian Cheese Blend: This is where the magic happens! I love a mix of freshly grated Parmesan or Pecorino Romano for sharp, salty notes, combined with shredded low-moisture mozzarella for its meltiness and mild creaminess. You can also experiment with a bit of provolone for extra depth. Always opt for block cheese that you grate yourself—pre-shredded cheeses often contain anti-caking agents that can hinder their melt and sometimes dry out the bread.
- Dried Italian Herb Blend: This is your shortcut to incredible flavor. Look for a blend that typically includes oregano, basil, thyme, rosemary, and marjoram. If you have fresh herbs on hand (like fresh oregano, basil, or finely chopped rosemary), you can certainly use them! Just remember that fresh herbs are less potent than dried, so you’ll need to use about three times the amount.
- Fresh Garlic: Minced garlic is non-negotiable for that aromatic Italian essence. I usually use 3-4 cloves, but if you’re a garlic lover like me, feel free to add an extra one!
- Egg (for egg wash, optional): A beaten egg mixed with a splash of water or milk, brushed over the loaf before baking, gives that irresistible glossy, deep golden crust. It also helps any extra cheese or herbs sprinkled on top adhere beautifully.
Substitutions:
For the cheese, feel free to get creative! A sharp cheddar or a Monterey Jack could work if you’re out of Italian varieties, though the flavor profile will shift. If you need a dairy-free option, use a high-quality plant-based shredded mozzarella and Parmesan substitute. For herbs, dried individual herbs like oregano and basil can be combined if you don’t have a blend.
Step-by-Step Instructions
Let’s get baking! Here’s how I make my favorite Italian Herb and Cheese Bread – a truly golden, cheesy loaf bursting with flavor.
- Activate the Yeast: In a large mixing bowl (or the bowl of your stand mixer), combine the warm water and granulated sugar. Sprinkle the active dry yeast over the top. Let it sit for 5-10 minutes until it becomes foamy and fragrant. This tells us the yeast is alive and ready to work its magic!
- Combine Wet Ingredients: Once the yeast is activated, stir in the olive oil and minced fresh garlic. Give it a good whisk to ensure everything is well combined.
- Mix Dry Ingredients: In a separate bowl, whisk together the all-purpose flour, salt, and dried Italian herb blend. This ensures the seasonings are evenly distributed throughout the dough.
- Form the Dough: Gradually add the dry ingredients to the wet ingredients, mixing with a wooden spoon or a dough hook on low speed (if using a stand mixer). Continue mixing until a shaggy dough forms and all the flour is incorporated.
- Knead the Dough: Turn the dough out onto a lightly floured surface. Knead by hand for 8-10 minutes, or use your stand mixer with a dough hook on medium-low speed for 6-8 minutes, until the dough is smooth, elastic, and no longer sticky. It should spring back slowly when poked.
- First Rise: Lightly grease a clean large bowl with a little olive oil. Place the dough in the bowl, turning it once to coat. Cover the bowl with plastic wrap or a clean kitchen towel and place it in a warm, draft-free spot. Let it rise for 1 to 1.5 hours, or until it has doubled in size. This is crucial for developing flavor and texture.
- Add the Cheese: Once the dough has doubled, gently punch it down to release the air. Turn the dough out onto a lightly floured surface. Flatten it into a rectangle. Sprinkle about 1.5 cups of your Italian cheese blend evenly over the dough. Fold the dough over itself and gently knead for just 1-2 minutes until the cheese is mostly incorporated. Don’t overmix at this stage; we want pockets of cheesy goodness!
- Shape the Loaf: Lightly grease a 9×5-inch loaf pan. Gently shape the dough into a log that fits snugly into the prepared pan. Try not to handle it too much to keep those airy pockets.
- Second Rise: Cover the loaf pan loosely with plastic wrap or a kitchen towel. Place it back in that warm, draft-free spot for another 30-45 minutes, or until the dough has risen significantly and nearly reaches the top of the pan.
- Preheat Oven & Prepare for Baking: While the dough is on its second rise, preheat your oven to 375°F (190°C). If using an egg wash, whisk one egg with a tablespoon of water or milk in a small bowl.
- Bake the Loaf: Just before baking, gently brush the top of the risen loaf with the egg wash (if using). If desired, sprinkle the remaining ½ cup of cheese and a pinch more dried herbs over the top for an extra golden, cheesy crust. Bake for 30-35 minutes, or until the top is a deep golden brown and the internal temperature reaches 200-210°F (93-99°C). If the top is browning too quickly, you can loosely tent it with aluminum foil.
- Cool: Once baked, immediately remove the bread from the loaf pan and transfer it to a wire rack. Let it cool completely (or at least for 20-30 minutes) before slicing. This allows the internal structure to set and prevents a gummy texture. Enjoy your golden, cheesy masterpiece!
Tips & Suggestions
Achieving that perfectly golden, cheesy loaf bursting with flavor takes a little attention to detail. Here are my favorite tips and suggestions to make your Italian Herb and Cheese Bread truly exceptional:
- Don’t Rush the Rise: Patience is key in bread making! The rising times are estimates and can vary depending on the temperature of your kitchen. If it’s a bit cooler, your dough might take longer to double. Don’t rush it; a slow rise develops better flavor and texture. Look for the visual cue (doubled in size) rather than strictly adhering to the clock.
- The Secret to a Golden Crust: For that truly irresistible, deep golden crust, an egg wash is your best friend. Brush it on right before baking. For an extra boost of cheesy goodness and a beautiful melt, sprinkle a bit more grated Parmesan or an Italian cheese blend on top of the egg wash just before it goes into the oven. It creates a crunchy, savory topping that’s simply divine.
- Internal Temperature for Perfect Doneness: While a golden-brown exterior is a good indicator, the best way to ensure your bread is fully baked through is to use an instant-read thermometer. The bread is done when the internal temperature reaches 200-210°F (93-99°C). This prevents a gummy interior and ensures a perfectly cooked loaf.
- Flavor Boosters: Want to take the “bursting with flavor” to the next level?
- Roasted Garlic: Instead of minced raw garlic, try adding a few cloves of roasted garlic to the dough. It offers a milder, sweeter, and deeply savory garlic flavor.
- Infused Olive Oil: Drizzle a little garlic-infused or chili-infused olive oil over the shaped loaf before baking for an extra layer of aromatic complexity.
- Fresh Herbs: While dried Italian herbs are convenient, a sprinkle of fresh, finely chopped basil or oregano over the top before baking (or even after, for garnish) adds a vibrant, fresh aroma.
- Experiment with Cheese: Don’t be afraid to mix and match cheeses! Beyond Parmesan and mozzarella, consider adding a little fontina for its nutty flavor and excellent melt, or some sharp provolone for a more robust taste.
- Serving Suggestions: This bread is incredibly versatile! It’s fantastic served warm alongside a hearty bowl of pasta or a comforting soup. It also makes an amazing accompaniment to a charcuterie board or simply enjoyed on its own, perhaps with a good quality olive oil for dipping. I also love to use slightly day-old slices for garlic bread or delicious grilled cheese sandwiches.
Storage
You’ve baked a magnificent Italian Herb and Cheese Bread, a golden, cheesy loaf bursting with flavor. Now, let’s ensure you can enjoy it for as long as possible!
- At Room Temperature:
Your freshly baked bread is best enjoyed on the day it’s made, especially when it’s still slightly warm. However, it will keep well at room temperature for 2-3 days. To maintain its freshness and prevent it from drying out, I recommend:
- Cool Completely: Always allow the loaf to cool completely on a wire rack before storing. Storing warm bread will trap moisture, making it soggy and promoting mold growth.
- Wrap Tightly: Once cool, wrap the bread tightly in plastic wrap, aluminum foil, or place it in an airtight bread bag. This helps keep the crust from getting too hard and the interior soft.
- Avoid the Refrigerator: I generally advise against storing bread in the refrigerator, as it tends to dry out bread and make it stale faster, especially for yeast breads.
- Freezing for Longer Storage:
If you want to enjoy your delicious bread for longer, freezing is an excellent option! This bread freezes beautifully for up to 2-3 months.
- Whole Loaf: Once the loaf is completely cool, wrap it very tightly in plastic wrap, then an additional layer of aluminum foil. Place it in a large freezer-safe bag to protect it from freezer burn.
- Sliced Portions: For individual servings, slice the cooled bread and then layer parchment paper between slices before wrapping the entire stack tightly in plastic wrap and then foil. This way, you can grab just a few slices as needed.
- Thawing and Reheating:
- Whole Loaf: To thaw a whole loaf, remove it from the freezer and let it sit at room temperature for several hours, or overnight. For a “freshly baked” experience, you can then reheat it in a preheated oven at 350°F (175°C) for 10-15 minutes, until warmed through and the crust is crisp again.
- Sliced Portions: Individual slices can be toasted directly from frozen, or thawed quickly in the microwave for 30 seconds to a minute before toasting or warming.
- Revitalizing Day-Old Bread:
Even if your bread isn’t quite as fresh as day one, you can often bring it back to life! Lightly dampen the crust of the loaf with a little water (don’t soak it!). Place it in a preheated oven at 300°F (150°C) for 5-10 minutes. The moisture will rehydrate the crust, and the heat will warm the interior, making it taste almost as good as fresh from the oven!
Final Thoughts
There’s truly nothing quite like the aroma of freshly baked bread filling your home, and with Italian Herb And Cheese Bread A Golden Cheesy Loaf Bursting With Flavor, that experience reaches a whole new level of deliciousness. I can honestly say that this recipe is more than just bread; it’s a culinary hug, a golden marvel that’s incredibly satisfying to make and even more delightful to eat.
From the first bite, you’ll understand why I’m so excited about this loaf. The perfect blend of aromatic Italian herbs dances with the rich, melted cheese, all encased in a beautifully golden crust and a soft, tender interior. Whether you’re serving it alongside a hearty beef stew, dipping it into your favorite olive oil and balsamic vinegar, or simply enjoying a slice on its own, its robust flavor profile makes every moment a special one.
So, I wholeheartedly encourage you to give Italian Herb And Cheese Bread A Golden Cheesy Loaf Bursting With Flavor a try. Prepare to be amazed by its irresistible charm and become utterly smitten with its cheesy, herby goodness. Trust me, your taste buds will thank you!
Italian Herb & Cheese Bread: Golden, Cheesy, Flavorful!

This Italian Herb and Cheese Bread is a golden, cheesy loaf bursting with flavor, perfect for any meal. With its soft texture and aromatic herbs, it’s destined to become a staple in your home.
- Prep Time: 15 mins
- Cook Time: 35 mins
- Total Time: 50 minutes
- Yield: 1 loaf 1x
- Category: Bread
- Method: Baking
- Cuisine: Italian
Ingredients
- 4 cups unbleached all-purpose flour
- 2 teaspoons active dry yeast
- 1 1/2 cups warm water (105-115°F)
- 1 tablespoon granulated sugar
- 2 teaspoons fine sea salt
- 1/4 cup extra virgin olive oil
- 2 cups Italian cheese blend (freshly grated Parmesan or Pecorino Romano and shredded low-moisture mozzarella)
- 2 teaspoons dried Italian herb blend (oregano, basil, thyme, rosemary, marjoram)
- 3–4 cloves fresh garlic (minced)
- 1 egg (for egg wash, optional)
Instructions
- In a large mixing bowl, combine the warm water and granulated sugar. Sprinkle the active dry yeast over the top. Let it sit for 5-10 minutes until it becomes foamy.
- Stir in the olive oil and minced fresh garlic into the activated yeast mixture.
- In a separate bowl, whisk together the all-purpose flour, salt, and dried Italian herb blend.
- Gradually add the dry ingredients to the wet ingredients, mixing until a shaggy dough forms.
- Turn the dough out onto a lightly floured surface and knead by hand for 8-10 minutes, or use a stand mixer with a dough hook on medium-low speed for 6-8 minutes until smooth and elastic.
- Lightly grease a clean large bowl with olive oil, place the dough in, cover it, and let it rise in a warm spot for 1 to 1.5 hours until doubled in size.
- Once doubled, punch the dough down and turn it out onto a floured surface. Flatten it into a rectangle and sprinkle 1.5 cups of cheese over it. Fold the dough over itself and knead gently for 1-2 minutes.
- Lightly grease a 9×5-inch loaf pan and shape the dough into a log that fits snugly in the pan.
- Cover the loaf pan loosely and let it rise for another 30-45 minutes until it has risen significantly.
- Preheat your oven to 375°F (190°C). If using an egg wash, whisk one egg with a tablespoon of water or milk.
- Brush the top of the loaf with the egg wash and sprinkle the remaining ½ cup of cheese and a pinch of dried herbs on top. Bake for 30-35 minutes until golden brown and the internal temperature reaches 200-210°F.
- Remove the bread from the pan and let it cool completely on a wire rack before slicing.
Nutrition
- Serving Size: 1 slice
- Calories: 200
- Sugar: 1 g
- Sodium: 300 mg
- Fat: 7 g
- Saturated Fat: 2 g
- Unsaturated Fat: 5 g
- Trans Fat: 0 g
- Carbohydrates: 30 g
- Fiber: 1 g
- Protein: 8 g
- Cholesterol: 30 mg
Keywords: For a different flavor, try mixing in other cheeses like sharp cheddar or Monterey Jack. Fresh herbs can be used instead of dried, but use three times the amount.
Leave a Comment