
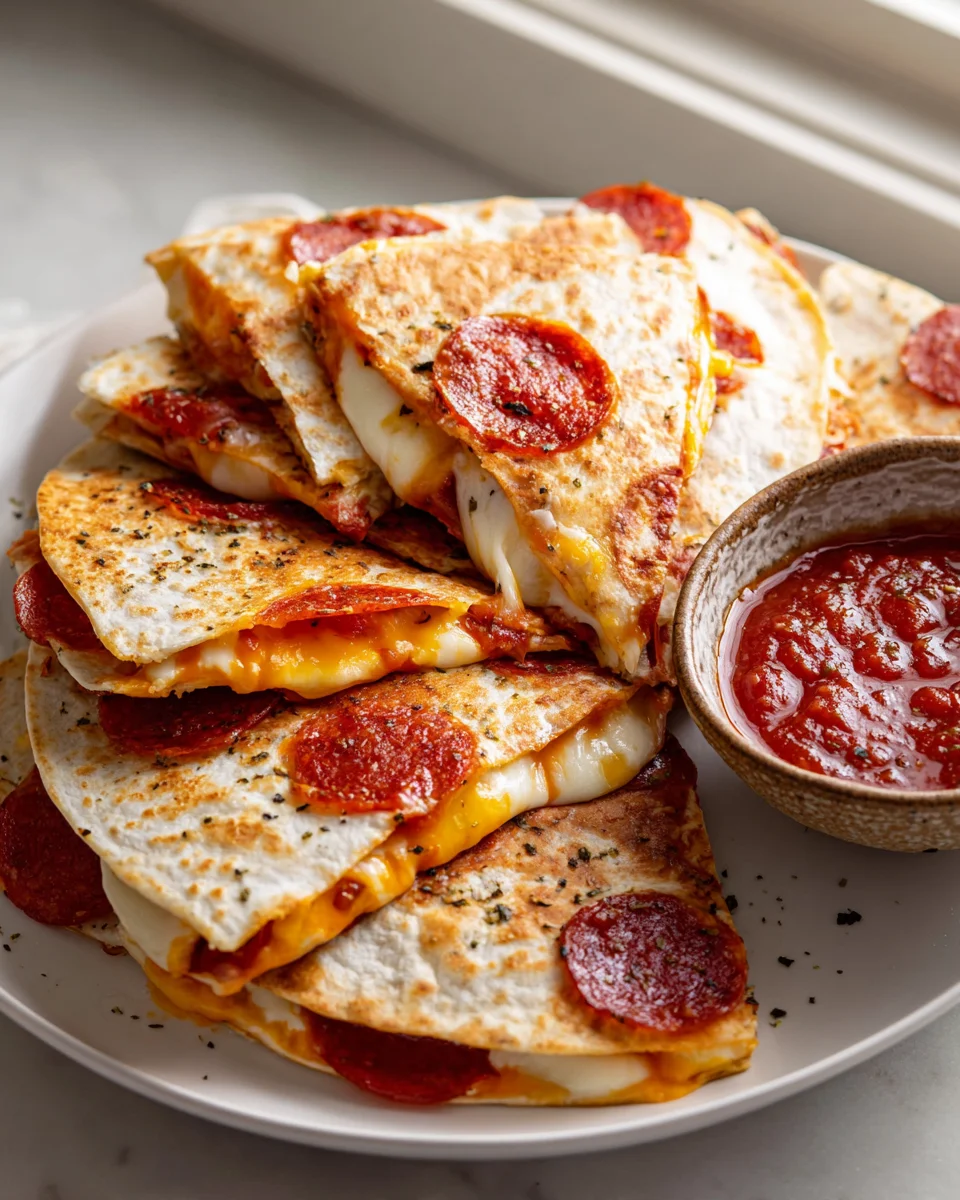
Beef Pepperoni Pizza Quesadillas
Oh boy, do I have a treat for you today! You know how much I love taking two amazing things and smashing them together to create something even more spectacular? Well, today, we’re doing just that with our incredible Beef Pepperoni Pizza Quesadillas! Forget choosing between pizza night and quesadilla night – now you can have the best of both worlds, all in one deliciously satisfying package.
What makes these so special? It’s the ultimate comfort food mashup! Imagine all the gooey, cheesy, beef pepperoni goodness of your favorite pizza, tucked neatly inside a perfectly crisp tortilla. This isn’t just a meal; it’s a flavor adventure that’s going to make your taste buds sing. Readers, you are going to absolutely adore this recipe because it’s ridiculously easy to make, comes together in a flash, and is guaranteed to be a hit with everyone at the table, from picky eaters to gourmet enthusiasts. It’s perfect for a speedy weeknight dinner, a fun lunch, or even an epic snack for game day!
So, what exactly are we whipping up? We’re taking two flour tortillas, slathering them with vibrant pizza sauce, layering on plenty of melty mozzarella and your favorite savory beef pepperoni, then pressing them until golden, crispy, and oozing with cheesy perfection. It’s got that delightful crunch on the outside and all the warm, savory comfort on the inside. Get ready to ditch the takeout menu and dive into a truly unique and unbelievably tasty culinary creation!
Ingredient Notes
Hey there, fellow food adventurers! If you’re anything like me, you love a good fusion dish that brings together two of your favorite things. And trust me, these Beef Pepperoni Pizza Quesadillas are exactly that – the best of both worlds! When I first dreamt up this recipe, I knew I wanted to capture the cheesy, savory goodness of a pizza while keeping the crispy, easy-to-handle charm of a quesadilla. Here’s a rundown of the key ingredients I always reach for and some thoughts on substitutions to make it your own.
The Tortillas
- Flour Tortillas: I find that medium to large flour tortillas (around 8-10 inches) work best for these quesadillas. They’re pliable, hold up well to fillings, and get wonderfully crispy when cooked.
- Substitutions: You could try whole wheat tortillas for a slightly nuttier flavor and more fiber. Corn tortillas tend to be a bit more fragile, but if you prefer them, ensure you don’t overfill to prevent tearing.
The Cheese
- Low-Moisture Part-Skim Mozzarella: This is my go-to for that classic pizza stretch and flavor. Its low moisture content helps prevent a soggy quesadilla.
- Provolone: A fantastic addition for extra sharpness and a great melt.
- Substitutions: Feel free to experiment with a blend! Cheddar, Monterey Jack, or even a sprinkle of Parmesan would work beautifully to add different depths of flavor. The key is to use a good melting cheese.
The Sauce
- Pizza Sauce: A good quality, thick pizza sauce is essential. I prefer one with a rich tomato flavor and a hint of herbs.
- Substitutions: Marinara sauce can absolutely stand in for pizza sauce. If you’re feeling adventurous, a little pesto could add a fresh twist, but remember it will change the classic ‘pizza’ profile.
The Star: Beef Pepperoni
- Sliced Beef Pepperoni: This is what gives our quesadilla that unmistakable pepperoni pizza flavor! I always opt for good quality, thinly sliced beef pepperoni. Some brands offer a spicier version if you like a little kick, or you can find regular mild beef pepperoni.
- Substitutions: If you’re looking to mix it up, you could add cooked ground beef seasoned with Italian herbs, or even some thinly sliced cooked beef sausage. Just make sure whatever you add is cooked through and not too wet.
Optional Add-Ins
- Bell Peppers & Onions: A small amount, very finely diced, can add great flavor and a pop of color without overwhelming the quesadilla. Sauté them briefly before adding to ensure they soften.
- Olives: Sliced black olives are a classic pizza topping that translates well here.
- Dried Oregano or Italian Seasoning: A little sprinkle over the sauce and cheese really enhances the pizza aroma.
Remember, the beauty of a quesadilla is its versatility. Don’t be afraid to play around with these ingredients to suit your taste, but keep in mind the core components for that perfect Beef Pepperoni Pizza Quesadilla experience!
Step-by-Step Instructions
Alright, let’s get cooking! Making these Beef Pepperoni Pizza Quesadillas is super straightforward, and you’ll be enjoying them in no time. I’ve broken down my process into simple steps to ensure you get a perfectly crispy, cheesy, and delicious result every time.
-
Prep Your Ingredients
Before you even think about heating the pan, make sure all your ingredients are ready to go. I like to shred my cheese (if not pre-shredded), have my beef pepperoni slices laid out, and my pizza sauce open and ready. If you’re adding any finely diced veggies, have those prepped too. This mise en place makes the assembly process smooth and quick.
-
Heat the Pan
Place a large non-stick skillet or a griddle over medium heat. I usually add about a teaspoon of olive oil or a small pat of butter to the pan. You want enough to lightly coat the bottom for crispiness, but not so much that it’s greasy. Let it get nice and warm – a drop of water should sizzle and evaporate quickly.
-
First Tortilla Down
Once the pan is hot, lay one flour tortilla flat in the pan. I often start with a slightly lower heat to ensure it doesn’t brown too quickly before I’ve added the fillings.
-
Layer the Cheese (The Foundation!)
Sprinkle about a quarter to a third of your shredded cheese evenly over one half of the tortilla. This initial layer of cheese is crucial as it acts as the “glue” that holds everything together once melted. Don’t spread it too close to the edges; leave about a half-inch border.
-
Add the Pizza Sauce
Next, spoon about 1-2 tablespoons of pizza sauce over the cheese layer. Again, keep it to one half of the tortilla and avoid the very edge. Too much sauce will make your quesadilla soggy, so be mindful!
-
Arrange the Beef Pepperoni
Now, arrange your delicious beef pepperoni slices over the sauce. I usually place them in a single layer to ensure even distribution and to avoid overfilling. If you have any other desired toppings like finely diced bell peppers or olives, this is the time to add them, again, sparingly.
-
More Cheese, Please!
Sprinkle another generous layer of cheese over the beef pepperoni and other toppings. This top layer will help bind everything together once it melts and adds to that irresistible cheesy pull.
-
Fold and Cook
Carefully fold the empty half of the tortilla over the filled half, creating a half-moon shape. Gently press down with your spatula. Let it cook for about 3-5 minutes on the first side, or until the bottom is golden brown and the cheese is visibly melting.
-
Flip and Finish
With a wide spatula, carefully flip the quesadilla to the other side. Cook for another 3-5 minutes, or until that side is also golden brown and crispy, and all the cheese is gooey and melted. You might need to press down gently with your spatula a few times to ensure good contact with the pan and even browning.
-
Slice and Serve
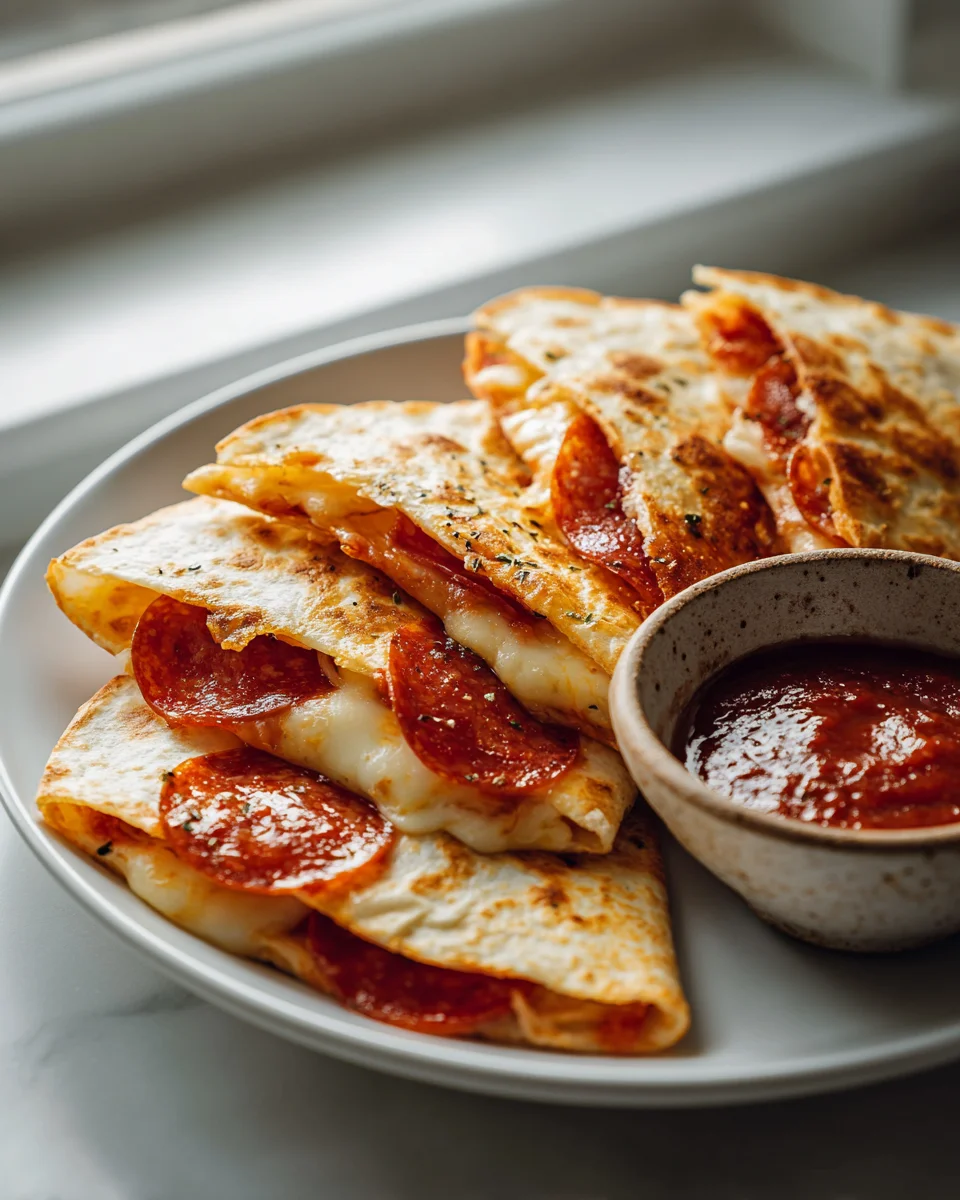
Once both sides are perfectly golden and the cheese is thoroughly melted, transfer the quesadilla to a cutting board. Let it rest for just a minute or two, then slice it into wedges (a pizza cutter works wonders here!). Serve immediately with extra pizza sauce, ranch, or your favorite dip. Enjoy your amazing Beef Pepperoni Pizza Quesadillas!
Tips & Suggestions
After making countless batches of these Beef Pepperoni Pizza Quesadillas, I’ve picked up a few tricks that really elevate them from good to absolutely fantastic. Here are my top tips and suggestions to help you achieve quesadilla perfection:
Mastering the Cook
- Medium-Low Heat is Key: Don’t rush it! Cooking on a medium-low heat allows the cheese ample time to melt thoroughly and the tortilla to get beautifully crispy without burning. If the heat is too high, your tortilla will brown (or burn!) before the cheese inside has a chance to fully melt.
- Don’t Overfill: This is a common pitfall! While it’s tempting to load up on fillings, too much will make your quesadilla hard to fold, prone to breaking, and difficult to cook evenly. A thin, even layer of cheese, sauce, and beef pepperoni is all you need for maximum flavor.
- Press Gently: Once you fold the quesadilla, use your spatula to gently press down on it. This ensures good contact with the hot pan, promoting even browning and helping the cheese melt and adhere to the tortilla. Don’t press too hard, though, or you might squeeze out the fillings!
- Oil or Butter for Crispiness: A small amount of oil or butter in the pan is essential for that golden, crispy exterior. Don’t skimp, but don’t drown it either. Just enough to lightly coat the surface.
Flavor Enhancements & Customization
- Garlic Powder for Extra Zing: Before adding the cheese, I sometimes like to sprinkle a tiny pinch of garlic powder directly onto the tortilla or over the sauce. It adds a lovely subtle aromatic kick that complements the pepperoni beautifully.
- Herb Boost: A dash of dried oregano or Italian seasoning sprinkled over the sauce and cheese really amplifies that classic pizza flavor.
- Spicy Kick: If you love a little heat, consider using a spicy beef pepperoni or adding a tiny sprinkle of red pepper flakes with your toppings.
- Dipping Delight: While these are delicious on their own, don’t forget the dipping sauces! Classic marinara sauce is always a hit, but I also love serving them with a side of creamy ranch dressing. The cool, tangy ranch is a fantastic contrast to the savory, warm quesadilla.
- Greenery for Freshness: A sprinkle of fresh chopped basil or parsley after cooking can add a nice burst of color and fresh flavor.
Serving Suggestions
- Cut with a Pizza Cutter: For clean, easy-to-handle wedges, a pizza cutter is your best friend. It slices through the crispy tortilla and melted cheese effortlessly.
- Perfect for Any Meal: These aren’t just for dinner! They make a fantastic quick lunch, a fun after-school snack, or even a casual appetizer for game night.
By keeping these tips in mind, I’m confident you’ll be making Beef Pepperoni Pizza Quesadillas that are crispy on the outside, gooey on the inside, and bursting with flavor every single time!
Storage
It’s rare to have leftovers of these incredibly delicious Beef Pepperoni Pizza Quesadillas, but if you do, don’t worry! They store and reheat quite well, so you can enjoy that cheesy, pepperoni goodness even after the initial cooking. Here’s how I handle storage and reheating to keep them tasty.
Cooling Down
First things first, always allow your cooked Beef Pepperoni Pizza Quesadillas to cool down completely before storing them. Stacking warm quesadillas in a container will create condensation, which can lead to sogginess and affect their texture when you reheat them. I usually place them on a wire rack for about 15-20 minutes until they reach room temperature.
Refrigeration
- Airtight Container: Once cooled, transfer the quesadillas (either whole or sliced into wedges) to an airtight container.
- Layering: If you’re stacking multiple pieces, I recommend placing a piece of parchment paper or wax paper between each quesadilla. This prevents them from sticking together, especially if some cheese is exposed.
- Duration: Stored properly in the refrigerator, these quesadillas will stay fresh for up to 3-4 days.
Freezing (for longer storage)
If you’ve made a big batch or want to prep some for later, these quesadillas can be frozen. This is perfect for a quick future meal!
- Pre-freeze: Once cooled, lay the quesadilla wedges in a single layer on a baking sheet lined with parchment paper. Place the sheet in the freezer for about 1-2 hours, or until the quesadillas are solid. This prevents them from sticking together in the container.
- Transfer to Bag/Container: Once frozen solid, transfer the quesadillas to a freezer-safe airtight container or a heavy-duty freezer bag. Again, you can place parchment paper between layers if desired.
- Duration: They can be stored in the freezer for up to 1-2 months.
Reheating for Best Results
The key to reheating is bringing back that delightful crispiness!
- Skillet/Pan (My Top Pick!): This is my favorite method for reheating quesadillas. Heat a dry non-stick skillet over medium-low heat (no oil needed for reheating). Place the quesadilla in the pan and cook for 3-5 minutes per side, or until it’s heated through, crispy again, and the cheese is melted. For frozen quesadillas, you might need to increase the cooking time slightly, and you can reheat them directly from frozen.
- Toaster Oven/Conventional Oven: Preheat your oven or toaster oven to 350°F (175°C). Place the quesadillas directly on the oven rack or on a baking sheet. Bake for about 8-12 minutes for refrigerated ones, or 15-20 minutes for frozen ones, until they’re hot and crispy.
- Air Fryer: Preheat your air fryer to 350°F (175°C). Place the quesadilla pieces in a single layer in the basket (don’t overcrowd). Cook for 4-7 minutes, flipping halfway through, or until heated through and crispy. Frozen quesadillas will take a few minutes longer.
- Microwave (Use with Caution): While technically possible, I generally avoid the microwave for reheating quesadillas unless I’m in a huge rush. It will heat them through, but they tend to come out soft and sometimes a bit rubbery, losing that wonderful crispy texture. If you must use it, heat in 30-second intervals until warm, then consider a quick finish in a pan to crisp up.
No matter how you reheat them, you’ll be delighted by how well these Beef Pepperoni Pizza Quesadillas hold up, allowing you to enjoy their fantastic flavor again and again!
Final Thoughts
I truly hope you’re as excited about these Beef Pepperoni Pizza Quesadillas as I am! This isn’t just another snack; it’s a brilliant mash-up that brings together the best of two worlds. Imagine that irresistible combination: the classic, savory deliciousness of pizza, complete with melted cheese and zesty beef pepperoni, all nestled within a perfectly golden, crispy quesadilla.
What makes Beef Pepperoni Pizza Quesadillas a definite must-try? It’s the sheer joy of creating something so wonderfully familiar yet excitingly new. It’s quick enough for a weeknight, fun enough for a weekend treat, and guaranteed to put a smile on everyone’s face, whether you’re feeding a family or just treating yourself. So go ahead, gather your ingredients, and experience the gooey, cheesy, beef pepperoni goodness. I promise you, it’s a culinary adventure you won’t regret!
Beef Pepperoni Pizza Quesadillas: Quick & Cheesy Meal

Indulge in the ultimate comfort food mashup with these Beef Pepperoni Pizza Quesadillas! Enjoy all the cheesy, savory goodness of pizza tucked inside a crispy tortilla, perfect for any meal.
- Prep Time: 15 mins
- Cook Time: 10 mins
- Total Time: 25 minutes
- Yield: 2 servings 1x
- Category: Dinner
- Method: Cooking
- Cuisine: American
Ingredients
- 2 medium to large flour tortillas (around 8–10 inches)
- 1/4 to 1/3 cup low-moisture part-skim mozzarella cheese, shredded
- 1/4 to 1/3 cup provolone cheese, shredded
- 1–2 tablespoons pizza sauce
- Sliced beef pepperoni
- Optional: finely diced bell peppers
- Optional: finely diced onions
- Optional: sliced black olives
- Optional: dried oregano or Italian seasoning
- Olive oil or butter for cooking
Instructions
- Before you even think about heating the pan, make sure all your ingredients are ready to go. Shred your cheese (if not pre-shredded), have your beef pepperoni slices laid out, and your pizza sauce open and ready.
- Place a large non-stick skillet or a griddle over medium heat. Add about a teaspoon of olive oil or a small pat of butter to the pan.
- Once the pan is hot, lay one flour tortilla flat in the pan.
- Sprinkle about a quarter to a third of your shredded cheese evenly over one half of the tortilla.
- Spoon about 1-2 tablespoons of pizza sauce over the cheese layer, keeping it to one half of the tortilla.
- Arrange your beef pepperoni slices over the sauce in a single layer.
- Sprinkle another generous layer of cheese over the beef pepperoni and other toppings.
- Carefully fold the empty half of the tortilla over the filled half, creating a half-moon shape. Gently press down with your spatula.
- Let it cook for about 3-5 minutes on the first side, or until the bottom is golden brown and the cheese is visibly melting.
- With a wide spatula, carefully flip the quesadilla to the other side. Cook for another 3-5 minutes, or until that side is also golden brown and crispy.
- Once both sides are perfectly golden and the cheese is thoroughly melted, transfer the quesadilla to a cutting board. Let it rest for just a minute or two, then slice it into wedges and serve immediately.
Nutrition
- Serving Size: 1 quesadilla
- Calories: 450
- Sugar: 3 g
- Sodium: 800 mg
- Fat: 25 g
- Saturated Fat: 10 g
- Unsaturated Fat: 10 g
- Trans Fat: 0 g
- Carbohydrates: 40 g
- Fiber: 2 g
- Protein: 20 g
- Cholesterol: 50 mg
Keywords: Feel free to experiment with different cheeses, sauces, and toppings to customize your quesadilla. Remember to avoid overfilling to ensure even cooking and a crispy texture.
Leave a Comment