
Granola Recipe You Can Customize Ways
Oh boy, have I got a treat for you! If you’re tired of bland, store-bought granola that never quite hits the spot, then you’ve come to the right place. This Granola Recipe You Can Customize Ways is truly a game-changer. What makes it so special, you ask? Well, it’s all in the name! I’m not just giving you a recipe; I’m giving you a framework, a canvas, a jumping-off point to create the granola of your dreams. No more feeling constrained by specific ingredients or wishing you could add just a little more of your favorite spice. This recipe empowers you to be the master granola chef, tailoring every batch to your exact cravings and pantry staples.
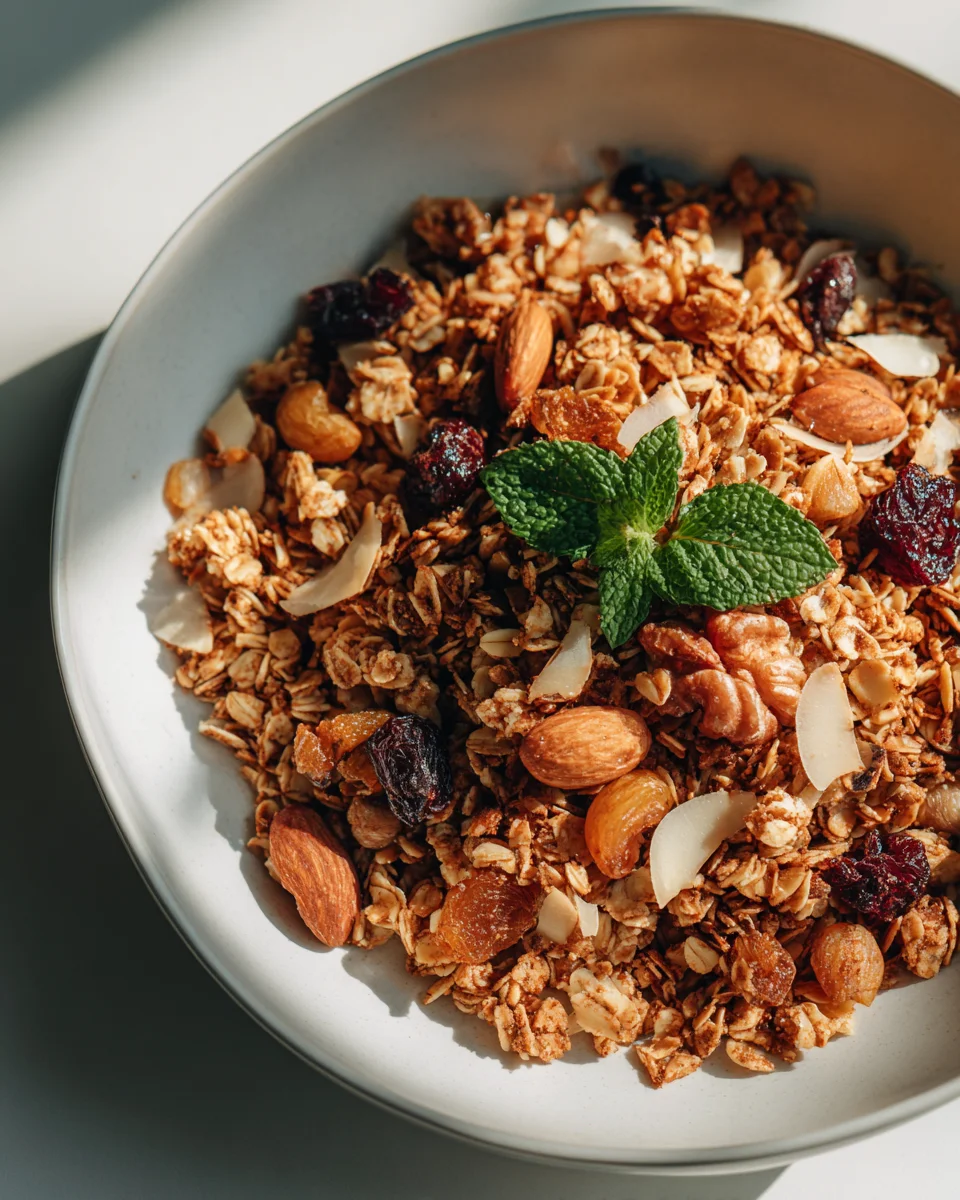
You’re going to absolutely love this because it means you’ll never have a boring breakfast or snack again. Imagine perfectly golden, crunchy clusters bursting with flavors you chose – whether it’s tropical dried fruit, a medley of your favorite nuts, a hint of cinnamon and vanilla, or even a touch of cocoa. Granola, at its heart, is a simple yet incredibly satisfying dish: a delightful mixture of oats, nuts, seeds, and sweeteners, baked until gloriously crisp. But with my custom approach, you’ll be whipping up batches that are precisely to your taste, every single time. Get ready to ditch the grocery aisle and say hello to your new favorite homemade treat!
Ingredient Notes
One of my favorite things about making homemade granola is how incredibly adaptable it is. This isn’t just a recipe; it’s a template for your perfect batch, tailored exactly to your cravings. Let’s break down the core components and how you can truly make them your own.
The Base: Oats
- Old-Fashioned Rolled Oats: These are the foundation of great granola. They provide that classic chewy-crisp texture. I highly recommend sticking with rolled oats as quick oats can become too mushy, and steel-cut oats won’t cook properly in the same timeframe.
The Sweetener
This is where your granola gets its delicious golden hue and wonderful sweetness. You have plenty of options here, each lending a slightly different flavor profile:
- Maple Syrup: My personal go-to for its rich, earthy flavor that pairs beautifully with almost any mix-in. It also helps create lovely clusters.
- Honey: Offers a distinct floral sweetness. If using honey, you might find it browns a little faster, so keep an eye on it.
- Agave Nectar: A good vegan option, providing a more neutral sweetness than maple syrup or honey.
- Brown Sugar (packed): While not a liquid sweetener, you can combine it with a liquid fat and a touch of water or a non-alcohol extract to create a syrup. It offers a deep, molasses-like flavor.
- Molasses: A little goes a long way. Use sparingly in combination with another sweetener for a darker, more robust flavor.
The Fat
Fat is essential for crispness and flavor, and it helps bind everything together. Your choice can subtly influence the overall taste:
- Coconut Oil (melted): My top recommendation. It contributes a wonderful richness and helps achieve that irresistible crunch. You can use refined coconut oil for a neutral flavor or unrefined for a hint of coconut aroma.
- Olive Oil: Choose a light, mild-flavored olive oil if you go this route. A strong, peppery olive oil might overpower your granola. It creates a very crisp texture.
- Vegetable Oil (canola, sunflower): A neutral choice that lets other flavors shine.
- Melted Butter: For a rich, dairy-forward flavor. Keep in mind it’s not vegan.
Flavorings & Spices
These are the quiet heroes that elevate your granola from good to spectacular. Don’t skip them!
- Vanilla Extract: A must-have for warmth and depth.
- Cinnamon: The classic granola spice. I love a generous teaspoon!
- Salt: Crucial for balancing the sweetness and enhancing all the flavors. Don’t underestimate its importance.
- Other Spices: Nutmeg, cardamom, ginger, allspice – feel free to experiment with combinations based on your preferred flavor profile. A pinch of ground cloves can be lovely in an autumn-themed granola.
Mix-ins (The Ultimate Customization!)
This is where the real fun begins! Remember to add most of these after baking and cooling to prevent burning or drying out.
- Nuts: Almonds (sliced, slivered, or chopped), pecans, walnuts, cashews, pistachios. Toasting them lightly before adding to the granola mixture can deepen their flavor, or add them with the oats during the last 15 minutes of baking for a milder toast.
- Seeds: Pumpkin seeds (pepitas), sunflower seeds, chia seeds, flax seeds, hemp seeds. These add extra nutrition and texture.
- Shredded Coconut: Unsweetened or sweetened. Add with the oats for the last 10-15 minutes of baking for a lovely toasted flavor and aroma.
- Dried Fruit: Cranberries, raisins, chopped apricots, dried cherries, chopped dates, goji berries, chopped figs. Add these AFTER the granola has completely cooled to keep them soft and chewy.
- Chocolate: Chocolate chips, chunks, or chopped dark chocolate. Again, add AFTER cooling so they don’t melt into a mess.
- Nut Butters: A spoonful or two of almond, peanut, or cashew butter can be whisked into your wet ingredients for a richer, more substantial granola that’s great for clusters.
Step-by-Step Instructions
Making your own customizable granola is surprisingly simple. Follow these steps, and don’t forget the moments where you can make it truly yours!
- Preheat & Prep: Preheat your oven to 300°F (150°C). Line a large baking sheet (or two smaller ones, depending on your batch size) with parchment paper or a silicone baking mat. This prevents sticking and makes cleanup a breeze.
- Combine Dry Ingredients: In a very large bowl, combine your old-fashioned rolled oats, salt, and any spices you’re using (like cinnamon, nutmeg, etc.). Give it a good stir to ensure everything is evenly distributed. This is your base, ready for flavor.
- Whisk Wet Ingredients: In a separate smaller bowl, whisk together your chosen sweetener (maple syrup, honey, etc.), melted fat (coconut oil, olive oil), and vanilla extract. If you’re adding any nut butter, whisk it in here until smooth.
- Combine Wet & Dry: Pour the wet ingredients over the dry oat mixture. Stir very thoroughly with a large spoon or spatula until every single oat flake is coated. This is critical for even browning and crispness. Don’t be shy – get in there and mix well!
- Spread Evenly: Transfer the granola mixture to your prepared baking sheet(s). Spread it out into a single, even layer. If you want larger clusters, press the mixture down firmly with the back of your spatula. The more compressed it is, the more likely it is to form satisfying clumps.
- Bake to Perfection: Place the baking sheet in the preheated oven. Bake for 30-45 minutes, stirring halfway through the baking time (around 15-20 minutes in) for a more uniformly crisp granola. If you’re aiming for larger clusters, try to stir less, or even skip stirring altogether, just rotating the pan. The granola is ready when it’s golden brown and smells absolutely divine. It will still feel a little soft when hot but will crisp up as it cools.
- Cool Completely: This step is non-negotiable for achieving that perfect crunch! Remove the baking sheet from the oven and let the granola cool completely on the baking sheet on a wire rack. This can take anywhere from 1 to 2 hours. As it cools, it will harden and become wonderfully crisp. If you want big clusters, resist the urge to touch or stir it until it’s fully cooled.
- Add Your Mix-ins: Once the granola is completely cool, break it apart (if you have clusters) and transfer it back to your large bowl. Now, it’s time for the ultimate customization! Stir in your chosen dried fruits, chocolate chips, nuts (if not pre-baked), and seeds (if not pre-baked). Mix gently until everything is well combined.
Tips & Suggestions
Here are a few extra pointers to help you master your customizable granola and truly make it your signature recipe:
- Achieving Clusters: For glorious granola clusters, ensure you press the mixture firmly onto the baking sheet before baking. During baking, resist stirring until at least two-thirds of the way through, or skip stirring entirely. Most importantly, do NOT touch or stir the granola as it cools – let it cool completely undisturbed on the baking sheet. It will harden into a slab that you can then break into desired cluster sizes.
- Flavor Profiles Are Your Canvas:
- Tropical Granola: Use coconut oil, agave, a pinch of ginger, and add toasted shredded coconut, dried mango, and pineapple chunks after baking.
- Autumn Spiced: Maple syrup, melted butter (optional), cinnamon, nutmeg, ground ginger, and stir in chopped pecans and dried cranberries post-bake.
- Chocolate Lover’s: Coconut oil, brown sugar or maple syrup, a tablespoon of cocoa powder in the wet mixture, and copious amounts of chocolate chips or chunks added after cooling.
- Nut Butter Boost: Whisk 1/4 cup of your favorite creamy nut butter (peanut, almond, cashew) into the wet ingredients for extra richness and binding power for clusters.
- Don’t Overcrowd the Pan: For best results and even baking, ensure your granola is spread in a relatively thin, even layer. If you have too much mixture for one baking sheet, use two. Overcrowding can lead to steaming instead of toasting, resulting in soft granola.
- Low and Slow is the Way: Baking at a lower temperature (300°F/150°C) prevents burning while allowing the oats to toast slowly and evenly. This results in maximum crispness and flavor development. If you notice it browning too quickly, you can reduce the oven temperature slightly.
- Adjust Sweetness: Feel free to adjust the amount of sweetener to your preference. If you prefer less sweet granola, start with a slightly lower amount and increase it next time if desired.
- Oil Matters: The type of oil you use can subtly impact the final flavor. Coconut oil adds a hint of tropical richness (unless refined), while a neutral oil lets other flavors dominate. Olive oil gives a very crisp result.
- Check for Doneness: The granola should be visibly golden brown. Remember it will crisp up considerably as it cools. If it still feels a little soft after cooling, you can pop it back in a 250°F (120°C) oven for another 10-15 minutes, then cool again.
Storage
Proper storage is key to keeping your homemade customizable granola fresh, crisp, and delicious for weeks!
- Airtight Container is Essential: Once your granola is completely cooled (this is crucial!), transfer it to an airtight container. A glass jar with a tight-fitting lid, a Tupperware-style container, or even a heavy-duty zip-top bag will work perfectly.
- Room Temperature: Store the granola at room temperature in a cool, dry place away from direct sunlight. Your pantry or a cupboard is ideal.
- Longevity: Properly stored homemade granola will stay fresh and crunchy for up to 2-3 weeks. The fresher the ingredients you start with, the longer it will last.
- If It Softens: If your granola starts to lose its crispness over time (especially in humid environments), you can easily revive it! Simply spread it back out on a baking sheet and bake it in a preheated oven at 250°F (120°C) for 10-15 minutes, then let it cool completely. It should crisp right back up.
- Freezing (Optional): While generally not necessary for granola, you can freeze it for longer storage. Place it in a freezer-safe airtight container or bag for up to 3 months. Thaw at room temperature before serving.

Final Thoughts
And there you have it! I truly believe that the Granola Recipe You Can Customize Ways is more than just a recipe; it’s a foundation for endless delicious possibilities right in your own kitchen. Forget about settling for store-bought and embrace the sheer joy of creating a granola that’s perfectly tailored to your unique cravings and dietary needs. Whether you’re dreaming of extra crunchy clusters, a chewy mix bursting with specific dried fruits, or a delightful blend of your favorite nuts and seeds, this recipe empowers you to make it uniquely yours.
There’s an incredible satisfaction that comes from pulling a batch of your homemade, perfectly customized granola from the oven. So go ahead, gather your preferred ingredients, let your culinary creativity shine, and discover the absolute delight of preparing your very own batch of the Granola Recipe You Can Customize Ways. I promise, your breakfast — or any snack time — will never be quite the same, and it will be all the better for it!
Granola Recipe: Customize Endless Delicious Snack Combos

This customizable granola recipe allows you to create the perfect blend tailored to your cravings. Say goodbye to store-bought granola and hello to your new favorite homemade snack!
- Prep Time: 15 mins
- Cook Time: 30-45 mins
- Total Time: 35 minute
- Yield: 8 servings
- Category: Snack
- Method: Baking
- Cuisine: American
Ingredients
- Old-Fashioned Rolled Oats
- Maple Syrup
- Honey
- Agave Nectar
- Brown Sugar (packed)
- Molasses
- Coconut Oil (melted)
- Olive Oil
- Vegetable Oil (canola, sunflower)
- Melted Butter
- Vanilla Extract
- Cinnamon
- Salt
- Nutmeg
- Cardamom
- Ginger
- Allspice
- Nuts (Almonds, sliced, slivered, or chopped; pecans; walnuts; cashews; pistachios)
- Seeds (Pumpkin seeds (pepitas); sunflower seeds; chia seeds; flax seeds; hemp seeds)
- Shredded Coconut (unsweetened or sweetened)
- Dried Fruit (Cranberries; raisins; chopped apricots; dried cherries; chopped dates; goji berries; chopped figs)
- Chocolate (Chocolate chips; chunks; or chopped dark chocolate)
- Nut Butters (almond, peanut, or cashew butter)
Instructions
- Preheat your oven to 300°F (150°C). Line a large baking sheet (or two smaller ones) with parchment paper or a silicone baking mat.
- In a very large bowl, combine your old-fashioned rolled oats, salt, and any spices you're using (like cinnamon, nutmeg, etc.). Stir to ensure everything is evenly distributed.
- In a separate smaller bowl, whisk together your chosen sweetener (maple syrup, honey, etc.), melted fat (coconut oil, olive oil), and vanilla extract. If adding nut butter, whisk it in until smooth.
- Pour the wet ingredients over the dry oat mixture. Stir thoroughly until every oat flake is coated.
- Transfer the granola mixture to your prepared baking sheet(s). Spread it out into a single, even layer. Press down firmly if you want larger clusters.
- Place the baking sheet in the preheated oven. Bake for 30-45 minutes, stirring halfway through for a more uniformly crisp granola. The granola is ready when it's golden brown and smells divine.
- Remove the baking sheet from the oven and let the granola cool completely on the baking sheet on a wire rack for 1 to 2 hours.
- Once the granola is completely cool, break it apart and transfer it back to your large bowl. Stir in your chosen dried fruits, chocolate chips, nuts, and seeds.
Nutrition
- Serving Size: 1/2 cup
- Calories: 250
- Sugar: 10 g
- Sodium: 50 mg
- Fat: 10 g
- Saturated Fat: 5 g
- Unsaturated Fat: 5 g
- Trans Fat: 0 g
- Carbohydrates: 35 g
- Fiber: 5 g
- Protein: 6 g
- Cholesterol: 15 mg
Keywords: For glorious granola clusters, press the mixture firmly onto the baking sheet before baking and resist stirring until at least two-thirds of the way through. Let it cool completely undisturbed to achieve the perfect crunch.
Leave a Comment