
Grinch Oreo Truffles
Are you ready to add a little bit of mischievous fun to your holiday dessert spread? I know I am! These Grinch Oreo Truffles are about to become your new favorite festive treat. They’re not just incredibly cute; they’re also ridiculously easy to make, making them perfect for busy holiday bakers (or even non-bakers!). Get ready for some serious holiday cheer, one bite at a time!
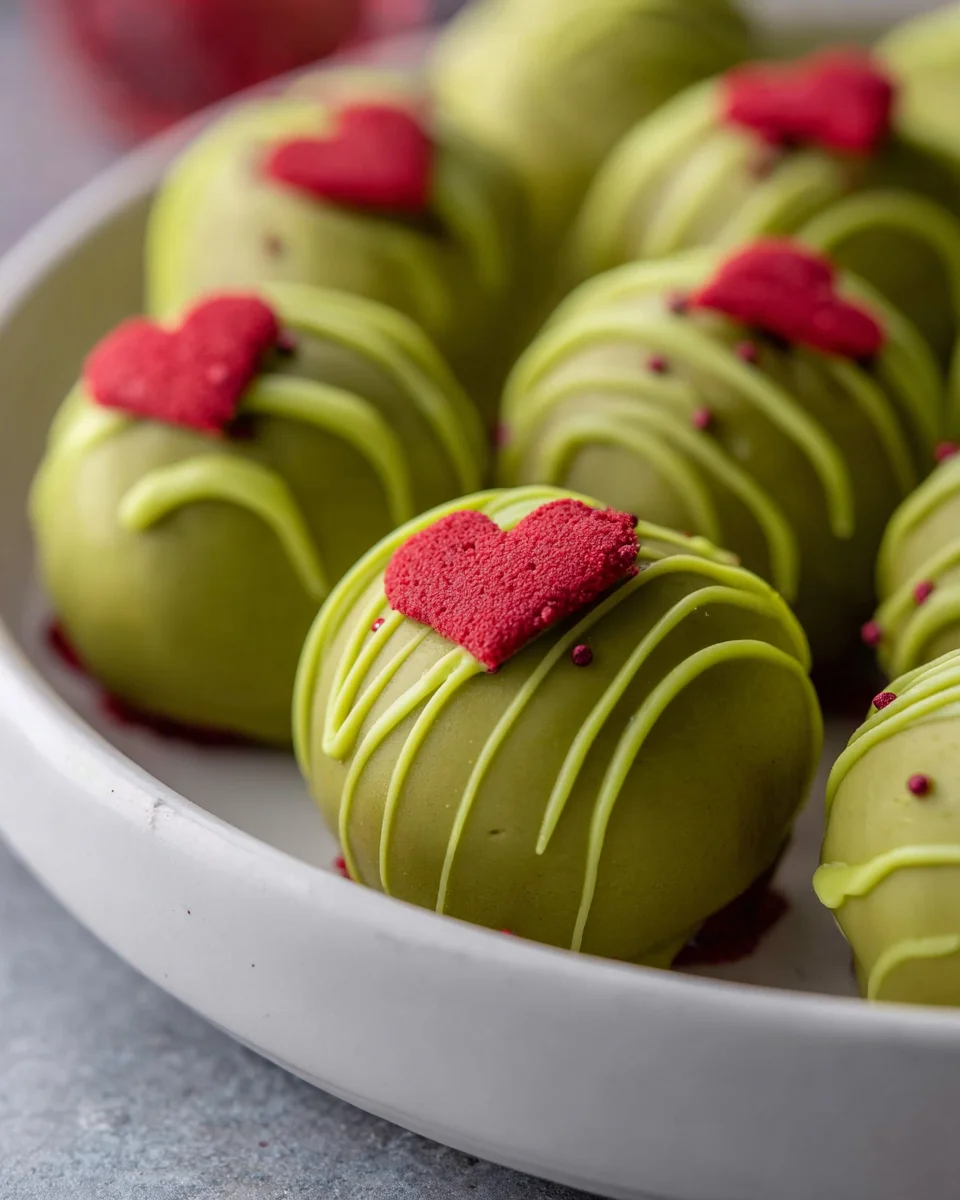
What makes these Grinch Oreo Truffles so special? Well, for starters, they’re vibrant green, just like everyone’s favorite Christmas curmudgeon, and each one is topped with an adorable little red heart, signifying how the Grinch’s heart grew three sizes that day! Imagine crushing up your favorite Oreos, blending them with creamy cream cheese, and then dipping those perfectly round, green balls into a luscious white chocolate coating. The result is a delightful, bite-sized burst of sweet, creamy goodness that’s impossible to resist. They’re a no-bake wonder that everyone from kids to adults will adore, and they’re guaranteed to bring a smile to even the most Grinchy of hearts this season!

Ingredient Notes
Making Grinch Oreo Truffles is such a fun and festive activity, and it all starts with a few simple ingredients. I love how these come together, and getting the right components ensures your truffles are as delicious and Grinch-y as possible!
- Golden Oreos: This is my go-to choice for these truffles. I find that using Golden Oreos provides a lighter-colored crumb base, which allows the green food coloring to really pop and create that vibrant Grinch green we’re aiming for. You’ll need about one full family-sized package (around 36 cookies).
- Substitution: You can absolutely use regular Chocolate Oreos if you prefer! Just be aware that the darker cookie crumb will result in a deeper, perhaps more muted green color. It will still taste fantastic, just a slightly different aesthetic.
- Cream Cheese: You’ll want a block of full-fat cream cheese, softened to room temperature. This is crucial for achieving that smooth, creamy texture that binds everything together. Don’t use whipped cream cheese, as it has too much air and moisture.
- Substitution: If you’re looking for an even richer, slightly tangier truffle, mascarpone cheese can be used. It's denser than cream cheese, so you might need slightly less, but it offers a wonderful creamy texture.
- Green Gel Food Coloring: For that iconic Grinch green, gel food coloring is your best friend. It provides a much more concentrated color without adding excess liquid to your truffle mixture, which can alter the consistency. A few drops go a long way!
- Substitution: Liquid food coloring can work in a pinch, but you'll need to use more drops to achieve a similar vibrancy. Be cautious, as too much liquid can make your truffle mixture sticky.
- White Chocolate or White Candy Melts: This forms the beautiful, smooth coating for our truffles. I often opt for good quality white chocolate baking bars or chips, as they melt smoothly and have a rich flavor. White candy melts are also an excellent choice, as they are designed to melt perfectly and set quickly with a beautiful finish.
- Substitution: If you want to skip the coloring step for the coating, you can buy pre-colored green candy melts. This makes the dipping process incredibly easy and ensures a consistent Grinch green exterior.
- Red Heart Sprinkles or Small Red Candies: To give our Grinch truffles that final touch – his tiny, growing heart! Small heart-shaped sprinkles are perfect.
- Substitution: If you can't find heart sprinkles, you can use small red nonpareils, regular red sprinkles, or even carefully cut a red gummy candy into tiny heart shapes.
- Optional: Shortening or Coconut Oil: A teaspoon or two of shortening or refined coconut oil can be added to your melting white chocolate or candy melts. This helps create a smoother, thinner consistency, making the dipping process much easier and resulting in a glossy finish.
Step-by-Step Instructions
Creating these Grinch Oreo Truffles is wonderfully straightforward, and I promise you’ll have a blast seeing them come to life! Here’s how I make them:
- Prepare the Oreos: First things first, we need to transform those Golden Oreos. I usually grab my food processor for this – it’s the quickest way! Pulse the entire package of Golden Oreos (yes, including the cream filling!) until they resemble fine crumbs. You want them very fine, almost like sand, with no large chunks remaining. If you don’t have a food processor, you can place the Oreos in a sturdy zip-top bag and crush them with a rolling pin. Just be thorough!
- Combine with Cream Cheese and Color: Transfer your finely crushed Oreos into a large mixing bowl. Add the softened cream cheese. Now comes the fun part – adding the green gel food coloring! Start with about 8-10 drops, or half a teaspoon if you’re using a dropper bottle, and mix everything together thoroughly. I find a sturdy spoon or even clean hands work best to really incorporate the cream cheese and coloring evenly. You want a uniformly green mixture where no white streaks of cream cheese remain. Add more coloring a few drops at a time until you achieve your desired vibrant Grinch green. The mixture should be thick and moldable.
- Chill the Mixture: This is a crucial step for easy handling. Cover the bowl with plastic wrap and refrigerate the green Oreo mixture for at least 30 minutes, or even up to an hour. Chilling allows the mixture to firm up, making it much easier to roll into neat balls.
- Roll the Truffles: Once chilled, remove the mixture from the fridge. Using a small cookie scoop (about 1 tablespoon in size) or simply your hands, scoop out portions of the mixture and roll them into smooth, bite-sized balls. Try to make them as uniform in size as possible for even dipping. As you roll, place the finished truffles on a baking sheet lined with parchment paper or a silicone mat.
- Second Chill: After rolling all your truffles, return the baking sheet to the refrigerator for another 15-20 minutes. This second chill helps the truffles hold their shape perfectly when they hit the warm chocolate coating.
- Melt the Chocolate Coating: While your truffles are chilling, it’s time to prepare the white chocolate or candy melts. I prefer to melt mine in a microwave-safe bowl in 30-second intervals, stirring well after each interval, until completely smooth. Be careful not to overheat it, as white chocolate can seize. If using white chocolate, you can add 1-2 teaspoons of shortening or coconut oil to help achieve a smoother, thinner consistency, which makes dipping easier. If using candy melts, this usually isn’t necessary.
- Dip and Decorate: Take a few chilled truffles out of the fridge at a time (keeping the rest cold is important). Using a fork or a candy dipping tool, carefully drop one truffle into the melted white chocolate, ensuring it’s fully coated. Lift it out, tapping the fork gently against the side of the bowl to allow any excess chocolate to drip off. Immediately place the coated truffle back onto your parchment-lined baking sheet. Before the chocolate sets, gently place a small red heart sprinkle or candy on top of each truffle to represent the Grinch’s heart. Repeat with the remaining truffles, working relatively quickly so the chocolate doesn’t set before you add the hearts.
- Final Set: Once all your Grinch Oreo Truffles are dipped and decorated, return the baking sheet to the refrigerator for at least 15-30 minutes to allow the chocolate coating to fully set and harden.
Tips & Suggestions
I’ve made my fair share of truffles over the years, and I’ve picked up a few tricks that really help make these Grinch Oreo Truffles shine. Here are my favorite tips for you:
- Don’t Skimp on the Chilling Time: Seriously, this is probably the most important tip! A well-chilled truffle mixture is much easier to roll, less sticky, and holds its shape beautifully. Trying to roll warm, soft mixture is a recipe for frustration and messy hands. Same goes for chilling the rolled truffles before dipping – it prevents them from melting into your warm chocolate.
- Use a Cookie Scoop for Uniformity: If you want all your truffles to be roughly the same size and look professionally made, a small cookie scoop (about 1 tablespoon) is your best friend. It makes portioning quick and easy, ensuring an even appearance.
- Melting Chocolate Wisely: When melting your white chocolate or candy melts, go low and slow. Overheating can cause white chocolate to seize and become thick and unusable. If using the microwave, heat in short bursts (20-30 seconds), stirring well in between, until just smooth. A double boiler method over simmering water also works wonderfully for a gentler melt.
- Thinning the Chocolate (If Needed): If your melted white chocolate seems too thick for dipping, don’t panic! Adding a teaspoon or two of shortening (like Crisco) or refined coconut oil (not virgin, as it can impart a flavor) can thin it out beautifully without affecting the taste or setting. Stir it in until fully incorporated and smooth.
- Dipping Technique Matters: For dipping, I find a sturdy fork or a specific candy dipping tool works best. Let excess chocolate drip off by tapping the fork gently against the side of the bowl. If you want a perfectly smooth bottom, you can carefully scrape the bottom of the truffle against the edge of the bowl before placing it on parchment paper.
- Decorate Quickly: Have your heart sprinkles ready and waiting right next to your dipping station. Once you dip a truffle, you need to place the heart on it almost immediately, before the chocolate sets. If the chocolate hardens, your heart won’t stick!
- Batch Your Dipping: To keep your truffles cold and the dipping process efficient, I usually only take out about 5-7 rolled truffles from the fridge at a time to dip. This ensures they stay firm while you’re working.
- Get Creative with Grinch Faces: While the heart is classic, if you’re feeling extra artistic, you could use a tiny bit of yellow and black edible marker after the truffles are set to draw little Grinch eyes. This adds another layer of fun!
- Make Ahead Option: These Grinch Oreo Truffles are perfect for making ahead! They need to be stored in the fridge anyway, so feel free to prepare them a day or two before your event.
Storage
One of the best things about these Grinch Oreo Truffles is how well they store, making them a perfect make-ahead treat for holiday gatherings!
- Refrigeration is Key: Because these truffles contain cream cheese, it’s absolutely essential to store them in the refrigerator. The cold also helps keep their shape and ensures the chocolate coating stays firm.
- Airtight Container: Place your set Grinch Oreo Truffles in an airtight container. This prevents them from drying out or absorbing any unwanted odors from your fridge. You can layer them between sheets of parchment paper if you’re stacking them, to prevent sticking.
- How Long They Last: When stored properly in the refrigerator, these truffles will stay fresh and delicious for up to 1 week. Beyond that, the quality might start to decline slightly, but they will still be safe to eat for a few more days.
- Serving Temperature: While they need to be stored cold, I find they are often best enjoyed after sitting at room temperature for about 10-15 minutes. This allows the cream cheese center to soften just slightly, enhancing their creamy texture and flavor.
- Freezing Option: Yes, you can freeze Grinch Oreo Truffles! This is a fantastic option if you want to make a big batch well in advance. Place the set truffles in a single layer on a parchment-lined baking sheet and freeze for about an hour until solid. Then, transfer them to an airtight freezer-safe container or freezer bag. They can be stored in the freezer for up to 1 month. When you’re ready to enjoy them, simply transfer them to the refrigerator overnight to thaw, or let them sit at room temperature for about 30 minutes before serving.
Final Thoughts
I genuinely hope you’ve found joy in creating these whimsical Grinch Oreo Truffles. They’re more than just a simple sweet treat; they’re a delightful splash of holiday cheer, perfectly capturing that playful, Grinch-y spirit. With their vibrant green color and the irresistible combination of creamy Oreo goodness, these Grinch Oreo Truffles are truly a standout. Whether you’re aiming to impress guests at your next festive gathering or simply want a fun, no-bake project to do with family, this recipe is an absolute winner.
Trust me, once you experience the ease and deliciousness of these unique Grinch Oreo Truffles, they’re sure to become a beloved part of your holiday traditions. Get ready to watch faces light up with every bite!
Grinch Oreo Truffles: Fun, Easy Festive Holiday Recipe

These Grinch Oreo Truffles are a delightful, no-bake treat that adds a splash of festive cheer to any holiday gathering. With their vibrant green color and creamy Oreo filling, they’re sure to bring smiles to everyone’s faces!
- Prep Time: 15 mins
- Cook Time: 30 mins
- Total Time: 45 minutes
- Yield: 24 truffles 1x
- Category: Dessert
- Method: No-bake
- Cuisine: American
Ingredients
- 1 family-sized package of Golden Oreos (around 36 cookies)
- 1 block of full-fat cream cheese, softened to room temperature
- Green gel food coloring
- White chocolate or white candy melts
- Red heart sprinkles or small red candies
- Optional: 1-2 teaspoons of shortening or refined coconut oil
Instructions
- Prepare the Oreos: Pulse the entire package of Golden Oreos in a food processor until they resemble fine crumbs. If you don't have a food processor, crush them in a zip-top bag with a rolling pin.
- Combine with Cream Cheese and Color: In a large mixing bowl, mix the crushed Oreos with the softened cream cheese and green gel food coloring until you achieve a uniformly green mixture.
- Chill the Mixture: Cover the bowl with plastic wrap and refrigerate for at least 30 minutes to firm up the mixture.
- Roll the Truffles: Scoop out portions of the mixture and roll them into smooth, bite-sized balls, placing them on a baking sheet lined with parchment paper.
- Second Chill: Refrigerate the rolled truffles for another 15-20 minutes.
- Melt the Chocolate Coating: Melt the white chocolate or candy melts in a microwave-safe bowl in 30-second intervals until smooth, adding shortening or coconut oil if desired.
- Dip and Decorate: Dip each chilled truffle into the melted chocolate, allowing excess to drip off, and place them back on the baking sheet. Immediately add a small red heart sprinkle or candy on top.
- Final Set: Refrigerate the dipped truffles for at least 15-30 minutes to allow the chocolate coating to set.
Nutrition
- Serving Size: 1 truffle
- Calories: 120
- Sugar: 10 g
- Sodium: 50 mg
- Fat: 7 g
- Saturated Fat: 4 g
- Unsaturated Fat: 2 g
- Trans Fat: 0 g
- Carbohydrates: 14 g
- Fiber: 0 g
- Protein: 1 g
- Cholesterol: 10 mg
Keywords: Ensure to chill the mixture well for easy rolling and dipping. Use a cookie scoop for uniform truffle sizes, and have your heart sprinkles ready for quick decorating.
Leave a Comment