
Baked Beef Ham And Cheese Sliders are truly a game-changer for any gathering, big or small. I’ve always been on the lookout for dishes that deliver maximum flavor with minimal fuss, and this recipe absolutely hits the mark. Imagine soft, buttery rolls encasing savory beef and ham, generously layered with melting cheese, all brought together with a delectable sweet and tangy glaze, baked to golden perfection. While sliders might evoke images of classic diners and quick bites, the concept of a gourmet, oven-baked version elevates this humble finger food to an entirely new level. They’ve become a staple at potlucks, game days, and family dinners precisely because they’re designed for sharing and pure enjoyment. The magic truly happens in the oven, where the rolls become wonderfully soft, the cheese gooey, and the topping creates an irresistible crust. It’s this irresistible combination of textures and flavors that makes these Baked Beef Ham And Cheese Sliders a perennial favorite. I am thrilled to share my go-to recipe for these incredible sliders, guaranteeing smiles all around.
Ingredients:
Creating these delightful Baked Beef Ham And Cheese Sliders begins with selecting the finest ingredients. Each component plays a crucial role in building layers of flavor and texture that make these sliders absolutely irresistible. Trust me, sourcing good quality deli meats and fresh rolls makes all the difference!
- 1 (12-count) package King’s Hawaiian Sweet Rolls: These are the absolute gold standard for sliders! Their inherent sweetness and soft, fluffy texture are the perfect complement to the savory fillings. I always find they hold up incredibly well to the baking process without becoming soggy.
- 1 pound thinly sliced deli roast beef: Opt for a good quality roast beef, thinly sliced. The thinner the better, as it allows for easy layering and prevents the sliders from becoming too bulky. I love the savory depth it adds.
- 1/2 pound thinly sliced deli ham: A classic deli ham works wonderfully here. You can choose from honey ham, black forest ham, or even a simple smoked ham. The combination of ham and beef is truly magical in these Baked Beef Ham And Cheese Sliders.
- 8 slices Provolone cheese: Provolone is a fantastic melting cheese with a mild yet distinctive flavor that pairs beautifully with the meats. Its smooth texture when melted is pure comfort.
- 8 slices Swiss cheese: Swiss cheese brings a slightly nutty and robust flavor to the party, adding another dimension of taste. The combination of Provolone and Swiss creates a wonderful cheese pull!
- 1/2 cup (1 stick) unsalted butter, melted: Butter is the carrier for all the delicious flavors in our topping. Unsalted butter gives us control over the overall saltiness of the dish.
- 1 tablespoon Dijon mustard: This adds a subtle tang and a touch of sophisticated spice to the butter topping, cutting through the richness of the cheese and meats. It’s a secret ingredient for that extra “oomph”!
- 1 teaspoon Worcestershire sauce: For an umami punch! Worcestershire sauce enhances the savory notes of the beef and ham, deepening the overall flavor profile of your Baked Beef Ham And Cheese Sliders.
- 1 teaspoon garlic powder: A pantry staple that provides aromatic depth without the harshness of raw garlic.
- 1 teaspoon onion powder: Similar to garlic powder, onion powder contributes a mellow, sweet onion flavor that rounds out the savory topping.
- 1 tablespoon poppy seeds: These tiny seeds add a delightful visual appeal and a slight crunch to the top of your sliders. They’re classic for a reason!
- 1/2 teaspoon black pepper: Freshly ground black pepper, if you have it, adds a wonderful aroma and a gentle heat.
- Pinch of salt (optional, to taste): Depending on the saltiness of your deli meats and butter, you might want a tiny pinch. Taste as you go!
- Fresh parsley, chopped (for garnish, optional): A sprinkle of fresh green at the end adds a touch of brightness and makes your sliders look even more inviting.
Equipment You’ll Need:
Having the right tools on hand makes the process of preparing your Baked Beef Ham And Cheese Sliders smooth and enjoyable. You won’t need anything fancy, just standard kitchen items.
- 9×13 inch baking dish: This size is perfect for a 12-pack of Hawaiian rolls.
- Sharp serrated knife: Essential for cleanly slicing through the rolls without tearing them.
- Small microwave-safe bowl or saucepan: For melting the butter.
- Whisk or fork: To combine the butter topping ingredients thoroughly.
- Pastry brush: For evenly distributing the delicious butter topping over the rolls.
- Aluminum foil: To cover the sliders during the initial baking phase, ensuring the cheese melts perfectly and the rolls don’t brown too quickly.
- Cutting board: For slicing rolls and preparing fillings.
Preparing Your Baked Beef Ham And Cheese Sliders:
This is where the magic begins! Assembling these sliders is straightforward and actually quite fun. I always find it satisfying to layer all those delicious ingredients.
- Preheat Your Oven and Prepare Your Baking Dish:
Before we dive into assembling, let’s get our oven ready. Preheat your oven to 350°F (175°C). While it’s heating up, grab your 9×13 inch baking dish. I like to give mine a light spray with cooking oil or butter it just slightly, though with the butter topping, it’s not strictly necessary, it just helps with potential sticking for any cheese that might escape. This ensures a clean release and easy serving of your future Baked Beef Ham And Cheese Sliders. - The Art of Slicing the Rolls:
Take your package of King’s Hawaiian Sweet Rolls. The beauty of these rolls is that they come in a connected block. Using a sharp serrated knife, carefully slice the entire block of rolls horizontally, creating a top half and a bottom half. You want to keep all the rolls connected at this stage. Think of it like slicing a giant sandwich loaf. The serrated knife is key here to avoid squishing the soft bread. Place the bottom half of the connected rolls into your prepared 9×13 inch baking dish. This will be the sturdy base for our flavorful fillings. - Layering the Cheesy Foundation:
Now, let’s build our cheese base. Arrange the 8 slices of Provolone cheese evenly over the bottom half of the rolls. Make sure each roll section gets a good share of cheese. Don’t worry if the cheese extends a little beyond the edges of the rolls; it will melt down beautifully. This layer of Provolone will act as a delicious barrier and help hold the meats in place as they bake, contributing significantly to the ooey-gooey goodness of your Baked Beef Ham And Cheese Sliders. - Adding the Hearty Roast Beef:
Next, layer the thinly sliced roast beef over the Provolone cheese. I like to fan out the slices slightly, ensuring good coverage across all the rolls. The key here is even distribution so every bite is packed with savory beef flavor. If your roast beef slices are very large, you might need to fold or tear them slightly to fit neatly. We want generous, but not overwhelming, layers. - Introducing the Delicious Ham:
Following the roast beef, add the thinly sliced ham. Again, arrange it evenly over the roast beef layer. The combination of these two deli meats creates a classic flavor pairing that is simply irresistible. This is where the “Beef Ham” in Baked Beef Ham And Cheese Sliders truly comes to life! The savory notes of the ham complement the robust flavor of the roast beef perfectly. - The Final Cheese Layer:
Top the ham layer with the remaining 8 slices of Swiss cheese. Just like with the Provolone, spread these out evenly. The Swiss cheese adds a lovely nutty counterpoint to the richer meats and the sweeter rolls. This double layer of cheese is what gives these sliders their iconic melty, stretchy interior once baked. - Capping It Off:
Carefully place the top half of the connected rolls back over the fillings, aligning them as best as you can with the bottom halves. Gently press down on the top layer to compact everything slightly. This helps to make sure the fillings are snug and the sliders are ready for their flavorful topping.
Crafting the Flavorful Butter Topping:
The topping for these Baked Beef Ham And Cheese Sliders is what truly elevates them from good to absolutely phenomenal. It’s a savory, aromatic glaze that permeates the rolls as they bake, adding incredible depth and a beautiful golden finish.
- Melt the Butter:
In a small microwave-safe bowl or a small saucepan, melt your 1/2 cup (1 stick) of unsalted butter. You want it completely liquid but not boiling hot. If using the microwave, heat in 20-30 second intervals, stirring in between, until smooth. If using a saucepan, melt over low heat on the stovetop. - Whisk in the Aromatic Spices and Zesty Goodness:
Once the butter is melted, whisk in the Dijon mustard, Worcestershire sauce, garlic powder, onion powder, and black pepper. This is where all those incredible savory and tangy flavors come together. I often take a moment to smell this mixture – it’s so fragrant and promises a delicious outcome! If you’re using a pinch of salt, add it here now, but remember to taste first. You want a well-balanced flavor, a harmony of savory, sweet, and tangy that will seep into every crevice of your Baked Beef Ham And Cheese Sliders. - Stir in the Poppy Seeds:
Finally, stir in the poppy seeds. They add a lovely visual texture and a subtle, pleasant crunch. Make sure they are well distributed throughout the butter mixture. If you want, you could also add a sprinkle of sesame seeds here for a bit of extra texture and flavor. - Generously Apply the Topping:
Using a pastry brush, liberally brush the butter mixture over the entire top surface of the rolls. Don’t be shy here! Ensure every part of the top bun is coated. The butter will naturally seep into the tiny gaps between the rolls, carrying all those amazing flavors down into the fillings. This coating is crucial for developing that wonderfully golden, slightly crisp top crust that is so characteristic of perfect Baked Beef Ham And Cheese Sliders. Let some of it drip down the sides; it will only add to the deliciousness.
Baking Your Sliders to Golden Perfection:
The baking process is where all the components of your Baked Beef Ham And Cheese Sliders marry together. The cheese melts into a gooey masterpiece, the meats warm through, and the rolls absorb that incredible butter topping, becoming wonderfully soft and savory on the inside, with a perfectly golden-brown top.
- Initial Covered Bake:
Cover the baking dish tightly with aluminum foil. This step is super important! Covering the sliders creates a steamy environment that helps the cheese melt beautifully and prevents the rolls from browning too quickly before the inside is perfectly warm and gooey. Place the covered baking dish into your preheated 350°F (175°C) oven and bake for 20 minutes. During this time, the magic happens beneath the foil: the cheese will become luxuriously melted, and the flavors will start to meld. - Uncovered Bake for Golden Finish:
After 20 minutes, carefully remove the aluminum foil. The sliders should be looking warm and inviting, with the cheese visibly melted. Return the uncovered baking dish to the oven and continue baking for another 5-10 minutes, or until the tops of the rolls are beautifully golden brown and slightly crispy. Keep a close eye on them during this phase, as ovens can vary, and you don’t want them to burn. That golden hue is the hallmark of perfectly baked Baked Beef Ham And Cheese Sliders.
Serving Suggestions and Enjoying Your Sliders:
You’ve put in the effort, now it’s time for the delicious reward! Serving these sliders correctly ensures everyone gets a perfect, cheesy, meaty bite.
- Resting Period:
Once your sliders are out of the oven and looking perfectly golden, resist the urge to immediately dive in! Let the baking dish rest on a wire rack for 5-10 minutes. This resting time allows the cheese to set slightly, making the sliders easier to cut and preventing all that glorious melted cheese from oozing out excessively. It also allows the internal temperatures to equalize a bit, making them ideal for handling and eating. - Cutting and Serving:
After the brief rest, use that same sharp serrated knife to cut along the original seams of the rolls, separating them into individual sliders. You can also just cut them into groups of two or three for easier serving, whatever your preference. If you like, sprinkle with some fresh chopped parsley for a pop of color and freshness. Arrange them on a platter and serve immediately. They are truly best served warm, while the cheese is still gooey and the rolls are soft and infused with that delicious butter topping. - Pairing Perfection:
These Baked Beef Ham And Cheese Sliders are fantastic on their own as a party appetizer or a casual meal. For a complete meal, I love serving them with a simple green salad, some crispy potato chips, or even a bowl of warm tomato soup for dipping. They’re also incredible alongside a creamy coleslaw or some pickles for a tangy contrast.
Tips for the Best Baked Beef Ham And Cheese Sliders:
To truly master these Baked Beef Ham And Cheese Sliders and make them your go-to recipe, consider these friendly tips and variations. These little insights can take your sliders from great to absolutely legendary!
Customizing Your Fillings:
While the beef and ham combination is a classic for a reason, don’t hesitate to get creative!
- Different Meats: Feel free to experiment with other deli meats. Turkey and Swiss, pepperoni and mozzarella, or even thinly sliced cooked chicken could be delicious. For a breakfast twist, try thinly sliced sausage patties or crispy bacon with cheddar cheese!
- Cheese Variations: Swap out Provolone and Swiss for cheddar, Monterey Jack, colby, or even a spicy pepper jack if you like a little kick. The key is to use good melting cheeses.
- Adding Veggies: Want to sneak in some vegetables? Thinly sliced caramelized onions or bell peppers would be a delightful addition, adding extra flavor and texture. Just make sure they are cooked down first so they don’t release too much moisture.
Enhancing the Topping:
The butter topping is already amazing, but there are always ways to tweak it!
- Spicy Kick: Add a pinch of red pepper flakes to the butter mixture for a subtle heat that complements the savory flavors beautifully.
- Herbaceous Notes: Incorporate some dried Italian seasoning or a touch of dried oregano into the butter for an extra layer of savory herb flavor. Fresh chives or green onions, sprinkled on top with the parsley after baking, also add a lovely fresh oniony bite.
- Honey-Mustard Twist: For a slightly sweeter and tangier profile, you could add a teaspoon of honey to the butter topping along with the Dijon mustard. This creates a wonderful sweet and savory glaze.
Make-Ahead Magic:
One of the best things about these Baked Beef Ham And Cheese Sliders is how wonderfully they can be prepared in advance!
- Assemble Ahead: You can assemble the entire pan of sliders (including brushing on the butter topping) up to 12-24 hours in advance. Simply cover the baking dish tightly with plastic wrap and refrigerate.
- Baking from Cold: When you’re ready to bake, pull them out of the fridge about 30 minutes before baking to allow them to come closer to room temperature. You might need to add an extra 5-10 minutes to the covered baking time (Step 12) if baking straight from the fridge, to ensure everything is heated through and melted properly.
This make-ahead option makes them a fantastic choice for parties, game days, or busy weeknights when you want minimal fuss closer to mealtime.
Storage and Reheating:
If by some miracle you have leftovers (it rarely happens in my house!), here’s how to store and reheat them.
- Storage: Store any leftover sliders in an airtight container in the refrigerator for up to 2-3 days.
- Reheating: To reheat, you can either pop them in the microwave for 30-60 seconds until warmed through (though they might lose some crispness), or for best results, reheat them in a preheated oven or toaster oven at 300°F (150°C) for about 10-15 minutes, or until heated through and the cheese is melty again. Covering them loosely with foil can help prevent them from drying out in the oven.
Achieving the Perfect Cheese Pull:
Everyone loves a good cheese pull!
- Layering is Key: Using multiple layers of different melting cheeses, like Provolone and Swiss, contributes to this.
- Don’t Overbake: Baking just until the cheese is fully melted and bubbly, without letting it get too crispy or dry, will ensure maximum stretchiness.
- Serve Warm: Cheese is most pliable and stretchy when warm. So, serving these Baked Beef Ham And Cheese Sliders fresh out of their resting period is ideal!
These sliders are incredibly versatile and always a crowd-pleaser. Enjoy making and sharing them!

Conclusion:
Well, my friends, we’ve reached the end of our culinary journey, and I genuinely hope you’re feeling as excited as I am about the incredible potential of this recipe. This isn’t just another item to add to your rotation; it’s an experience, a moment of pure, unadulterated comfort food bliss that’s surprisingly easy to achieve. I truly believe that once you taste the harmonious blend of flavors and textures, you’ll understand why this dish is an absolute game-changer for casual gatherings, busy weeknights, or any time you crave something utterly delicious and satisfying.
What makes these sliders an absolute must-try? It’s the ingenious combination of rich, savory beef and tender ham, perfectly complemented by the gooey, melting embrace of cheese, all nestled within soft, sweet rolls. The magic truly happens when these glorious Baked Beef Ham And Cheese Sliders emerge from your oven, golden brown and radiating an aroma that will instantly make mouths water. The gentle warmth from the baking process melts the cheese to perfection, infusing the buns with a buttery, garlicky sweetness that creates an irresistible crust, while keeping the interior wonderfully soft and tender. It’s the kind of comfort food that wraps you in a warm hug, offering an irresistible combination of savory meats, gooey melted cheese, and tender, buttery rolls. Moreover, the ease of preparation is a huge selling point; assemble them ahead of time and simply pop them in the oven when you’re ready to serve, making them a fantastic option for entertaining without the stress.
Now, let’s talk about taking your slider experience to the next level with some fantastic serving suggestions and variations. For a classic pairing, you absolutely can’t go wrong with a side of crispy potato chips or perfectly golden French fries. However, if you’re looking to balance the richness, a vibrant green salad with a zesty vinaigrette, or a refreshing coleslaw, makes for an excellent companion. And for those who love a good dunk, a warm bowl of creamy tomato soup or a tangy pickle spear offers a delightful contrast. But why stop there? The beauty of sliders is their versatility!
Personalize Your Sliders: Endless Variations Await!
Feel free to experiment with different cheeses; while Swiss or Provolone are classics, Monterey Jack for extra melt, or even a smoked Gouda for a deeper flavor, would be phenomenal. Want a little kick? A touch of Pepper Jack cheese or a few thinly sliced pickled jalapeños before baking can add an exciting zing. You could also swap out the ham or beef for other deli meats like smoked turkey, pastrami, or even a thinly sliced salami. For an extra layer of flavor on top, consider brushing the buns with a mixture of melted butter, a hint of Dijon mustard, and a sprinkle of poppy seeds or everything bagel seasoning before baking. If you’re feeling adventurous, add some caramelized onions or a thin layer of pesto before the cheese for an elevated taste profile. The possibilities are truly endless, limited only by your imagination!
So, what are you waiting for? I wholeheartedly encourage you to carve out some time this week to bring these delectable sliders to life in your own kitchen. Gather your ingredients, follow the simple steps, and prepare to transform humble components into something truly spectacular that will undoubtedly become a new favorite. And please, please, don’t keep your culinary triumphs to yourself! I absolutely adore hearing about your experiences. Share your personal twists, what sides you paired them with, or any fantastic feedback you received from your delighted guests. Your creativity is always an inspiration, and your insights help make our cooking community even richer. Happy baking, and get ready to enjoy some seriously delicious sliders!
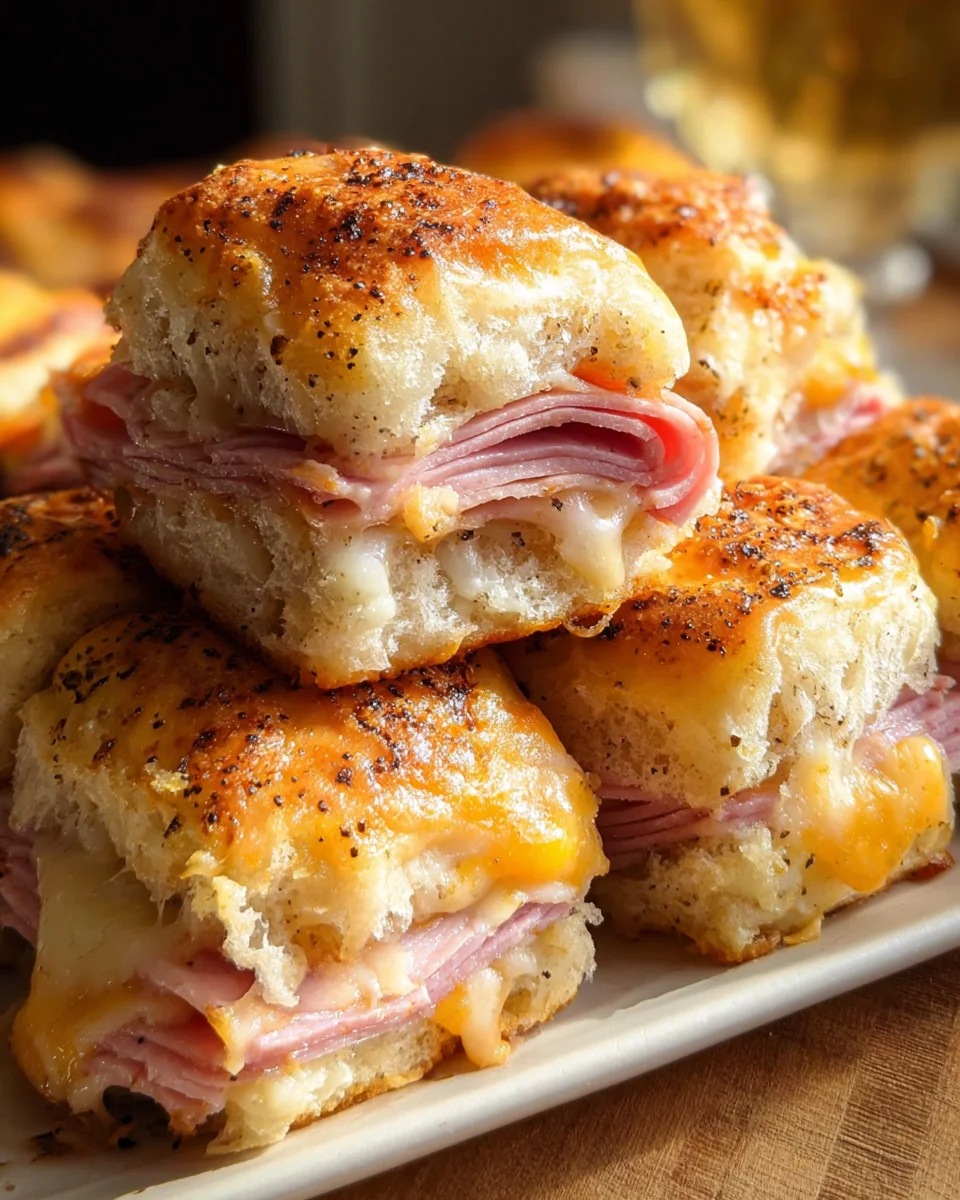
Baked Beef Ham & Cheese Sliders – Easy Party Appetizer
Baked Beef Ham And Cheese Sliders are truly a game-changer for any gathering, big or small. Imagine soft, buttery rolls encasing savory beef and ham, generously layered with melting cheese, all brought together with a delectable sweet and tangy glaze, baked to golden perfection. They’ve become a staple at potlucks, game days, and family dinners precisely because they’re designed for sharing and pure enjoyment.
Ingredients
Instructions
Important Information
Nutrition Facts (Per Serving)
It is important to consider this information as approximate and not to use it as definitive health advice.
Allergy Information
Please check ingredients for potential allergens and consult a health professional if in doubt.
Leave a Comment