
Halloween Buffalo Chicken Dip is truly the ultimate spooky season snack that will have all your ghoulish guests clamoring for more!
I absolutely adore how a dish can transform a simple gathering into an unforgettable feast, and this particular recipe never fails to deliver. While classic buffalo chicken dip has cemented its place as a quintessential American party food, bringing vibrant flavors and a comforting warmth to game nights and celebrations alike, we’ve given it a delightful, eerie twist just in time for October 31st. It’s a modern classic that everyone looks forward to, often disappearing faster than ghosts at sunrise!
People simply can’t get enough of this creamy, cheesy, and perfectly spicy concoction because it hits all the right notes. The shredded chicken steeped in that tangy buffalo sauce, perfectly balanced with cool ranch or blue cheese dressing and a generous blanket of melted cheese, offers a flavor explosion in every bite. It’s incredibly easy to prepare, making it a fantastic, stress-free addition to any Halloween party spread, ensuring you spend more time enjoying the festivities and less time in the kitchen. Get ready to impress your trick-or-treaters (or their parents!) with this sensational Halloween Buffalo Chicken Dip.

Ingredients:
- For the Creamy Base:
- 2 (8-ounce) packages cream cheese, full-fat, softened to room temperature
- 1 cup high-quality Buffalo wing sauce (I always recommend Frank’s RedHot Original for that authentic flavor!)
- ½ cup ranch dressing (or blue cheese dressing, if you’re a purist and love that pungent kick!)
- For the Chicken:
- 3 cups cooked chicken, shredded (this usually comes from about 2 large chicken breasts or one store-bought rotisserie chicken)
- For the Cheesy Topping:
- 2 cups shredded sharp cheddar cheese, or a Monterey Jack blend for extra melty goodness
- ½ cup crumbled blue cheese (optional, but highly recommended for an extra layer of flavor!)
- For Garnish and Serving:
- ¼ cup sliced green onions or fresh chives, for a pop of color and mild oniony flavor
- 1 (2.25-ounce) can sliced black olives, drained (for spooky spider decorations – perfect for your Halloween Buffalo Chicken Dip!)
- Celery sticks, carrot sticks, tortilla chips, sturdy crackers, or even slices of toasted baguette for dipping
Preparing Your Chicken for the Ultimate Dip
One of the most crucial foundational steps for creating the most delectable Halloween Buffalo Chicken Dip is ensuring your chicken is perfectly prepared. The texture of the chicken truly dictates the overall mouthfeel of the dip. You want tender, easily shreddable pieces that blend seamlessly into the creamy base, rather than tough, chunky bits.
-
Choosing and Cooking Your Chicken:
You have a few excellent options here, depending on your time and preference. My personal go-to for convenience is a good quality store-bought rotisserie chicken. They are seasoned beautifully, already cooked, and incredibly tender, making shredding an absolute breeze. If you prefer to cook your own chicken, boneless, skinless chicken breasts or thighs work wonderfully.
- Boiling Method: Place your chicken breasts in a pot, cover with water or chicken broth, and bring to a gentle simmer. Cook for about 15-20 minutes, or until the internal temperature reaches 165°F (74°C). This method yields very tender chicken that’s easy to shred.
- Baking Method: Season chicken breasts with a little salt, pepper, and garlic powder. Bake at 375°F (190°C) for 20-25 minutes, or until cooked through. This method can add a bit more flavor and slightly firmer texture, which some people prefer.
- Instant Pot Method: For a super speedy and hands-off approach, place chicken breasts in your Instant Pot with ½ cup of chicken broth. Cook on high pressure for 8-10 minutes, then allow a natural release for 5 minutes before quick releasing the remaining pressure. This produces incredibly moist and fall-apart tender chicken.
-
Shredding the Chicken Like a Pro:
Once your chicken is cooked and cool enough to handle, it’s time for shredding. You’re aiming for about 3 cups, which should be roughly the equivalent of two large chicken breasts or most of the meat from a medium rotisserie chicken. There are a couple of methods I swear by:
- Two-Fork Method: This is the classic. Place the chicken on a cutting board or in a shallow dish. Using two forks, pull the chicken apart in opposite directions. This creates lovely, irregular strands that are perfect for absorbing all the delicious dip flavors.
- Stand Mixer Method (My Secret Weapon!): For a truly effortless and quick shred, especially if you’re making a double batch or are pressed for time, a stand mixer with the paddle attachment is a game-changer. Place warm (not hot!) cooked chicken breasts into the mixer bowl. Turn the mixer on low speed and watch as the paddle attachment shreds the chicken into perfect strands in mere seconds. It’s truly magical and makes prepping for this Halloween Buffalo Chicken Dip a breeze!
Regardless of the method you choose, make sure your chicken is shredded into manageable pieces – not too fine that it disappears, but not so chunky that it’s difficult to scoop.
Crafting the Creamy, Flavorful Dip Base
This is where the magic truly happens, transforming simple ingredients into that irresistible, tangy, and rich dip that everyone absolutely adores. The key here is to build layers of flavor and ensure a perfectly smooth, homogenous base before baking. This makes your Halloween Buffalo Chicken Dip stand out!
-
Softening the Cream Cheese:
First things first, let’s talk about the cream cheese. It is absolutely paramount that your two 8-ounce packages of cream cheese are at room temperature and nicely softened. Why? Because cold cream cheese will resist blending, leading to lumps in your dip – and nobody wants a lumpy dip! To achieve perfect softness, simply take it out of the fridge at least an hour before you plan to start cooking. If you’re short on time, you can carefully microwave it on low power (30% or 50%) for 15-30 second intervals, flipping and checking until it’s pliable but not melted.
-
Whipping the Base Ingredients:
In a large mixing bowl, combine your softened cream cheese, the full cup of Buffalo wing sauce, and the half-cup of ranch dressing (or blue cheese dressing, if you’re leaning that way). Now, grab your electric hand mixer or a sturdy whisk. Begin beating the mixture on a medium speed until it is utterly smooth, creamy, and completely uniform in color. This process should take about 2-3 minutes. You want to ensure there are no streaks of unmixed cream cheese or dressing. This perfectly emulsified base is what gives your Halloween Buffalo Chicken Dip its signature velvety texture and intense flavor.
Pro Tip for Flavor Balance:
After mixing, give it a quick taste. Do you want it a little spicier? Add another splash of Buffalo sauce. Prefer it a bit tangier? A tiny squeeze of fresh lemon juice can work wonders. This is your chance to fine-tune the base to your personal preference before adding the chicken and cheese.
-
Folding in the Shredded Chicken:
Now, gently fold your beautifully shredded chicken into the creamy mixture. Use a spatula to incorporate it thoroughly, making sure every strand of chicken is coated in that luscious Buffalo-cream cheese goodness. Be gentle so you don’t break down the chicken too much, but ensure even distribution. This creates a cohesive mixture where every bite is packed with flavor.
Assembling and Baking Your Spooktacular Dip
With the chicken perfectly coated in that fiery, creamy base, we’re just a few steps away from a bubbling, cheesy delight. This phase focuses on getting our Halloween Buffalo Chicken Dip into the oven and baked to perfection, ready to be devoured by ghouls and goblins alike!
-
Preparing Your Baking Dish:
Preheat your oven to 375°F (190°C). Choose a medium-sized baking dish; an 8×8-inch square dish or a 9-inch round pie plate works perfectly for this recipe. Lightly grease the dish with cooking spray or a thin layer of butter. This simple step helps prevent sticking and makes cleanup much easier later.
-
Layering the Dip:
Spoon the entire chicken and cream cheese mixture into your prepared baking dish. Use the back of your spoon or a spatula to spread it evenly from edge to edge. You want a consistent layer so that the dip bakes uniformly.
-
Adding the Cheesy Topping:
Now for the best part – the cheese! Sprinkle the 2 cups of shredded cheddar cheese generously over the top of the chicken mixture. If you opted for the crumbled blue cheese, scatter that over the cheddar now as well. The combination of cheddar and blue cheese creates an incredible flavor profile that perfectly complements the Buffalo sauce. Ensure the cheese covers the entire surface; this will create a beautiful, golden, bubbly crust.
-
Baking to Perfection:
Place the baking dish into your preheated oven. Bake for 20-25 minutes, or until the dip is hot and bubbly around the edges, and the cheese on top is completely melted, golden brown, and delightfully gooey. The exact baking time can vary slightly depending on your oven, so keep an eye on it during the last 5-10 minutes. You’re looking for that undeniable sign of pure deliciousness – vigorous bubbling around the edges and a perfectly bronzed, irresistible cheese crust. This indicates your Halloween Buffalo Chicken Dip is ready!
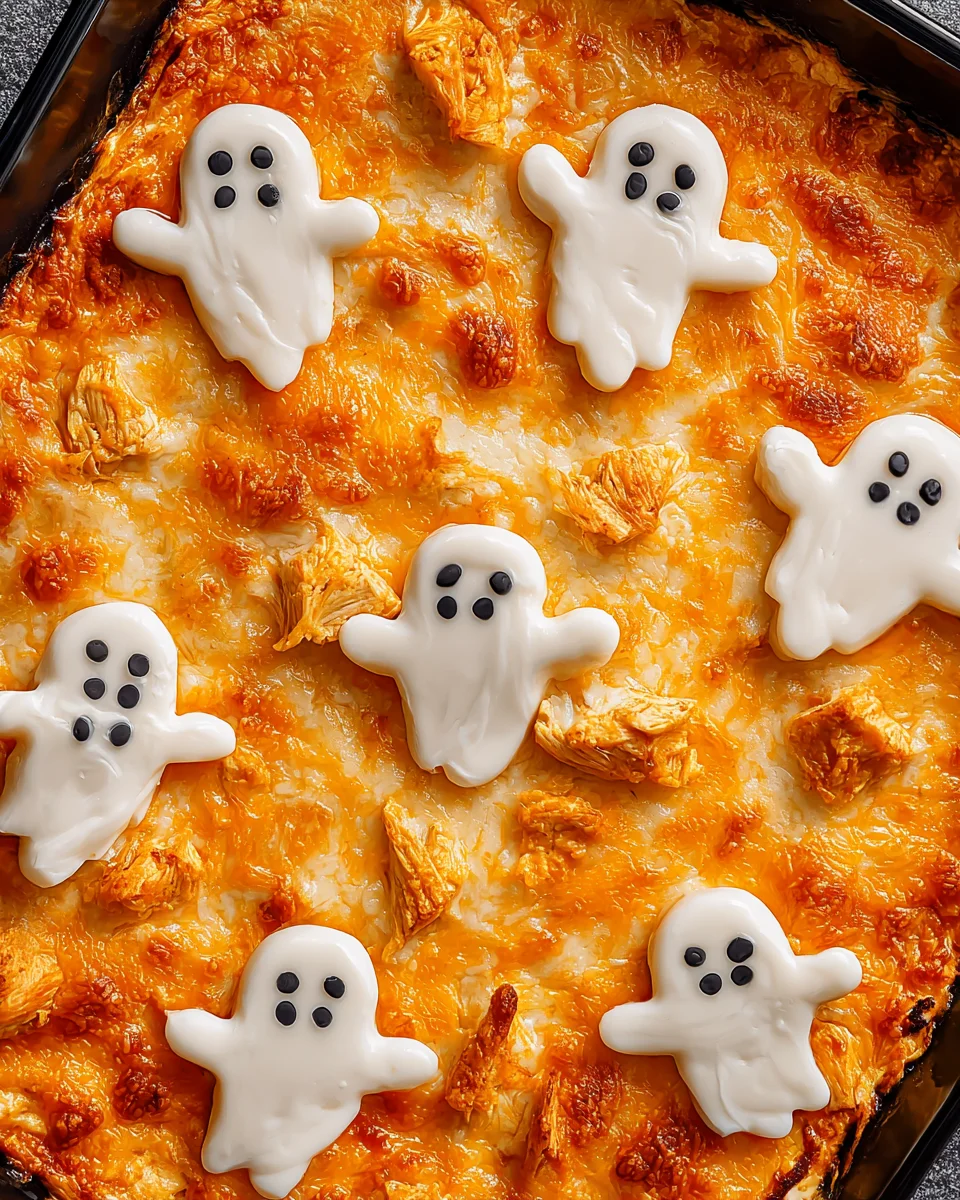
The Grand Finale: Garnish, Decorate, and Serve!
Once your glorious Halloween Buffalo Chicken Dip emerges from the oven, it’s time for the final touches. This is where you can truly embrace the Halloween spirit with some fun, easy decorations, and prepare it for serving to your eager party guests.
-
The Spooky Garnish – Black Olive Spiders:
Immediately after removing the dip from the oven, while it’s still piping hot and the cheese is soft, it’s time to add your spooky flair. Take your drained sliced black olives. You can arrange them to look like little spiders or spiderwebs. For spiders, simply place one full-sliced olive for the body, and then cut another olive into thin strips to create the legs, arranging four on each side of the body. For a spiderweb effect, you can create concentric circles with the olive slices and then drag a toothpick from the center outwards to create the “web” lines. This simple trick transforms your delicious dip into a festive centerpiece for any Halloween gathering.
-
Adding Freshness:
Sprinkle the sliced green onions or fresh chives over the top of the dip. Not only do they add a lovely pop of vibrant green color, but their mild, fresh oniony flavor provides a beautiful contrast to the rich, spicy dip. This also helps balance the richness and brings a fresh aroma to your Halloween Buffalo Chicken Dip.
-
Serving Suggestions:
Allow the dip to cool for just 5-10 minutes before serving. This brief resting period helps the dip set slightly, making it easier to scoop and less likely to burn your guests’ mouths. Arrange your dip on a festive platter surrounded by an array of dippers. My absolute favorites include:
- Crunchy Vegetables: Crisp celery sticks and sweet carrot sticks are classic pairings, offering a refreshing crunch and cooling element to the spicy dip.
- Sturdy Chips: Tortilla chips, especially the scoop-style ones, are perfect for scooping up generous portions.
- Crackers and Bread: A variety of sturdy crackers (like Ritz or Triscuits) or slices of toasted baguette can also be excellent vehicles for this incredible dip.
Remember, this Halloween Buffalo Chicken Dip is best served warm, so if you’re preparing it for a longer party, consider keeping it in a slow cooker on the “warm” setting or using a chafing dish to maintain its bubbly, cheesy goodness throughout your spooky festivities. Enjoy the cheers and praises from your happy guests!
Conclusion:
Well, we’ve reached the delicious culmination of our culinary journey, and I genuinely hope you’re feeling inspired to whip up this incredible dish! I truly believe this isn’t just another appetizer; it’s a guaranteed crowd-pleaser that brings warmth, spice, and pure joy to any gathering. What makes this recipe an absolute must-try, in my humble opinion, is its irresistible combination of creamy textures, bold flavors, and the perfect amount of kick. It’s comforting yet exciting, familiar yet utterly captivating. You’ll find yourself reaching for another scoop, and then another, and trust me, your guests will be doing the same. It’s incredibly easy to make, requires minimal fuss, and delivers maximum flavor payoff, making it an ideal choice for busy hosts who still want to impress.
This particular iteration of our beloved dip is designed to be the star of the show, but its versatility is truly one of its greatest assets. When it comes to serving, there are so many fantastic options! I love pairing it with classic crisp celery sticks and carrot batons, offering a cool, refreshing contrast to the rich, spicy dip. For those who love a bit of crunch, sturdy tortilla chips or pita chips are always a hit. Don’t shy away from serving it with slices of toasted baguette or even some robust crackers for an elevated touch. For a healthier twist, bell pepper strips or cucumber slices make excellent dippers. And remember, it’s best served warm, so keeping it in a small slow cooker on the “keep warm” setting at a party is a genius move that ensures every bite is as gooey and delicious as the first. The aroma alone will have everyone gravitating towards the snack table.
Now, let’s talk about variations, because I absolutely love encouraging creativity in the kitchen! If you prefer a milder dip, feel free to reduce the amount of hot sauce or use a less potent brand. Conversely, for those who crave a fiery kick, a few extra dashes or a bolder hot sauce will do the trick. You can experiment with different cheeses too; a blend of Monterey Jack and sharp cheddar can add another layer of flavor, or a touch of smoked gouda could introduce an interesting depth. Some people swear by adding blue cheese crumbles directly into the mix for an even more pungent tang, while others prefer to sprinkle them on top as a garnish. Don’t forget the power of fresh herbs – a scattering of chopped chives or green onions on top not only adds a pop of color but also a fresh, oniony bite that cuts through the richness beautifully. You could even bake this dip into small pastry cups for individual servings, or spoon it over baked potatoes for a hearty meal. And while it’s perfectly themed as a Halloween Buffalo Chicken Dip, its appeal extends far beyond October 31st. Imagine it as the star appetizer for game day, a festive potluck, or just a cozy movie night in – it fits every occasion beautifully.
I genuinely encourage you to give this recipe a try. It’s more than just food; it’s an experience waiting to be shared. The satisfaction you’ll get from seeing the smiles on your friends’ and family’s faces as they enjoy this incredible dip is truly unmatched. And once you’ve made it, I would absolutely love to hear about your experience! Did you stick to the recipe, or did you add your own unique twist? What were your favorite dippers? Did your guests rave about it? Please don’t hesitate to share your thoughts, photos, and any brilliant variations you came up with in the comments section or on social media. Your feedback and creativity inspire me and fellow home cooks alike. Let’s make some amazing food and create some unforgettable memories together! Happy cooking, and I can’t wait to hear how your Halloween Buffalo Chicken Dip turns out!
Halloween Buffalo Chicken Dip
The ultimate spooky season snack! This creamy, cheesy, and perfectly spicy buffalo chicken dip features a fun Halloween twist, perfect for impressing your ghoulish guests.
Ingredients
Instructions
Important Information
Nutrition Facts (Per Serving)
It is important to consider this information as approximate and not to use it as definitive health advice.
Allergy Information
Please check ingredients for potential allergens and consult a health professional if in doubt.
Leave a Comment