
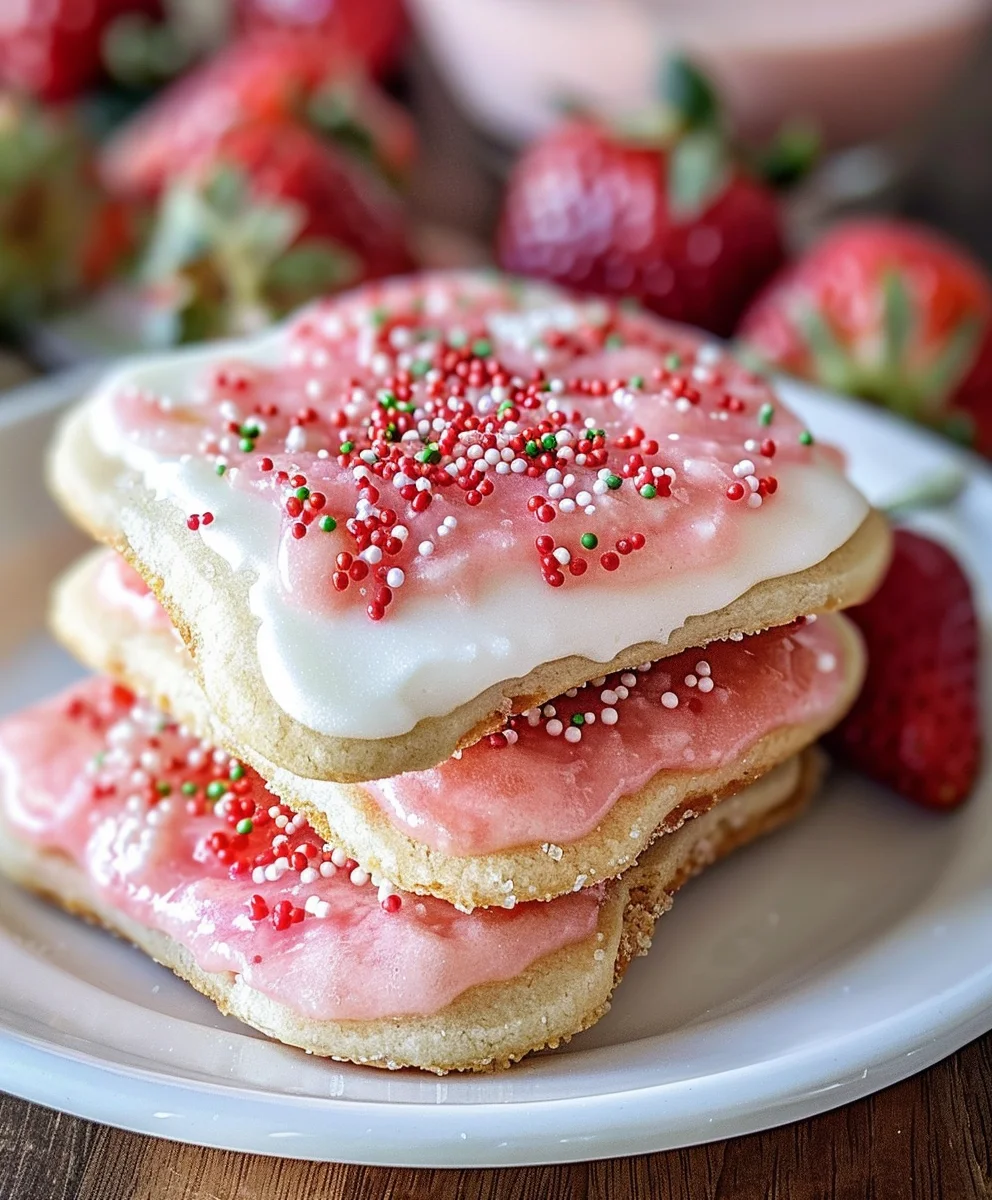
<p><strong>Strawberry Pop Tart Sugar Cookies</strong> – what an incredible concept! Imagine taking everything you adore about a classic frosted toaster pastry and transforming it into a delightful, chewable cookie. This isn’t just a recipe; it’s an invitation to <strong>recreate cherished childhood memories with a sophisticated, homemade twist</strong>. The original Pop-Tart has been an iconic breakfast staple and a source of simple joy for generations, a true symbol of American comfort food. We’re elevating that nostalgic experience, seamlessly merging the comforting simplicity of a perfectly baked sugar cookie with the vibrant, fruity burst of strawberry filling and that signature sweet glaze, all finished with playful sprinkles.</p>
<p>People absolutely adore this unique dessert because it offers the very best of both worlds. <h4>You get the unmistakable nostalgic flavor of a Strawberry Pop-Tart in a convenient, handheld cookie form that’s perfect for sharing.</h4> The soft, buttery sugar cookie base provides the ideal canvas for a luscious strawberry jam filling, all crowned with a simple yet delicious vanilla icing and, of course, those colorful sprinkles that just scream “fun!” It’s a guaranteed conversation starter, a wonderful addition to any party, and a fantastic way to surprise your loved ones with something uniquely delicious. Get ready to bake a batch of these unforgettable Strawberry Pop Tart Sugar Cookies; they’re sure to become a new favorite!</p>
Ingredients:
-
For the Classic Sugar Cookies:
- 2 ½ cups (300g) all-purpose flour: I always recommend sifting it for the lightest cookies, but whisking it well works too!
- 1 teaspoon baking powder: This gives our cookies a slight lift and tender crumb.
- ½ teaspoon salt: Crucial for balancing the sweetness and enhancing all the flavors.
- 1 cup (226g) unsalted butter, softened: Make sure it’s truly room temperature – not melted, not cold. This is key for a smooth dough.
- 1 cup (200g) granulated sugar: For that perfect classic sugar cookie sweetness.
- 1 large egg: Again, room temperature is best for emulsification.
- 1 teaspoon pure vanilla extract: Don’t skimp on good quality vanilla; it makes a big difference!
-
For the Luscious Strawberry Filling:
- 2 cups (approx. 300g) fresh or frozen strawberries, hulled and chopped: If using frozen, no need to thaw them beforehand.
- ¼ cup (50g) granulated sugar: Adjust this based on the sweetness of your strawberries.
- 1 tablespoon fresh lemon juice: A little acidity brightens the strawberry flavor beautifully.
- 1 tablespoon cornstarch: Our secret weapon for a perfectly thick, spreadable filling.
- 2 tablespoons cold water: To create a slurry with the cornstarch.
-
For the Signature Pop Tart Glaze:
- 2 cups (240g) powdered sugar (confectioners’ sugar), sifted: Sifting prevents lumps and ensures a super smooth glaze.
- 3-4 tablespoons milk (or heavy cream): Start with less and add more a teaspoon at a time until you reach the desired consistency.
- ½ teaspoon pure vanilla extract: For that extra touch of deliciousness.
- Pinch of salt: A tiny bit of salt in the glaze really enhances its flavor.
- Optional: 1-2 drops red or pink gel food coloring: For that classic strawberry Pop Tart look.
-
For the Fun Decoration:
- Rainbow sprinkles (jimmie style): These are non-negotiable for the iconic “Strawberry Pop Tart Sugar Cookies” aesthetic!
- Preparing the Perfectly Tender Sugar Cookie Base
-
Whisk the Dry Ingredients: In a medium bowl, whisk together your 2 ½ cups of all-purpose flour, 1 teaspoon of baking powder, and ½ teaspoon of salt. Make sure these are thoroughly combined. Whisking ensures an even distribution of the leavening agent and salt throughout the dough, which means uniformly delicious cookies. Set this bowl aside for a moment.
-
Cream the Wet Ingredients: In a large mixing bowl, using either a stand mixer fitted with the paddle attachment or a hand mixer, cream together your 1 cup (226g) of softened unsalted butter and 1 cup (200g) of granulated sugar. Beat them on medium speed until the mixture is light and fluffy, usually about 3-5 minutes. You’ll notice the color lightening and the texture becoming very airy – this aeration is what helps create a tender cookie crumb. Don’t rush this step; it’s a crucial foundation for perfect sugar cookies.
-
Incorporate Egg and Vanilla: Scrape down the sides of your bowl with a spatula, then add your 1 large room temperature egg and 1 teaspoon of pure vanilla extract. Beat on medium speed until fully combined, scraping the bowl down again to ensure everything is incorporated evenly. The mixture might look slightly curdled at first, but keep mixing until it comes together smoothly. The quality of your vanilla extract truly shines here, so choose a good one!
-
Combine Wet and Dry: With your mixer on low speed, gradually add the dry ingredient mixture to the wet ingredients, a third at a time. Mix only until just combined and no streaks of flour remain. Be careful not to overmix the dough! Overmixing develops the gluten in the flour too much, which can lead to tough cookies. As soon as you see the last bit of flour disappear, stop the mixer. The dough will be soft but shouldn’t be overly sticky.
-
Chill the Dough: Turn the dough out onto a piece of plastic wrap, flatten it into a disc, and wrap it tightly. Place it in the refrigerator to chill for at least 1 hour, or up to 2 days. Chilling the dough is an absolutely essential step for cut-out cookies. It firms up the butter, which prevents the cookies from spreading too much in the oven, and makes the dough much easier to handle when rolling and cutting. Trust me, patience here will pay off with beautifully shaped cookies!
- Crafting the Luscious Homemade Strawberry Filling
-
Cook the Strawberries: In a small saucepan, combine your 2 cups of chopped strawberries (fresh or frozen), ¼ cup of granulated sugar, and 1 tablespoon of fresh lemon juice. Place the saucepan over medium heat and bring the mixture to a gentle simmer. Cook, stirring occasionally, for about 5-7 minutes, or until the strawberries have softened and released their juices. If using frozen strawberries, it might take a couple of extra minutes for them to break down. You’ll smell that wonderful strawberry aroma filling your kitchen!
-
Prepare the Cornstarch Slurry: While the strawberries are simmering, whisk together 1 tablespoon of cornstarch and 2 tablespoons of cold water in a small bowl until completely smooth. This is your cornstarch slurry, and it’s what will thicken our filling to a spreadable, jam-like consistency. It’s important to use cold water to prevent lumps when mixing with the cornstarch.
-
Thicken the Filling: Once the strawberries are soft and juicy, pour the cornstarch slurry into the simmering strawberry mixture, whisking constantly. Continue to cook and stir for another 1-2 minutes, or until the mixture has thickened significantly and coats the back of a spoon. It should resemble a thick jam. The cornstarch needs a minute or two to properly activate and thicken, so don’t be tempted to add more right away.
-
Cool the Filling: Remove the saucepan from the heat. For a smoother filling, you can gently mash some of the strawberries with the back of a spoon, or for a very smooth filling, use an immersion blender for a few pulses. I personally love a few small chunks of strawberry in mine for texture. Transfer the strawberry filling to a clean bowl and let it cool completely to room temperature. For quicker cooling, you can place it in the refrigerator. It’s absolutely crucial that the filling is completely cool before you spread it onto your baked cookies; otherwise, it will melt your beautiful glaze.
- Baking and Assembling Our Strawberry Pop Tart Sugar Cookies
-
Preheat Oven and Prep Baking Sheets: Preheat your oven to 375°F (190°C). Line two large baking sheets with parchment paper or silicone baking mats. This prevents sticking and makes for easy cleanup.
-
Roll Out the Dough: Remove your chilled cookie dough from the refrigerator. If it’s been chilling for a long time and is very firm, let it sit at room temperature for 5-10 minutes to soften slightly, but not too much. Lightly flour your work surface and your rolling pin. Roll out the dough to about ¼ inch thick. This thickness is perfect for a sturdy cookie that won’t be too thin or too thick. Work quickly so the dough doesn’t get too warm.
-
Cut Out the Cookies: Using a rectangular cookie cutter (approximately 2×3 inches is ideal for a Pop Tart look), cut out as many cookies as you can. Gather the scraps, gently re-roll them, and cut out more cookies until you’ve used all the dough. Carefully transfer the cut-out cookies to your prepared baking sheets, leaving about an inch between each cookie. For a truly authentic look, you can gently score a border around the edge of each cookie with the back of a knife, but don’t cut all the way through.
-
Bake the Cookies: Bake the cookies for 8-10 minutes, or until the edges are lightly golden and the centers are set. Baking times can vary slightly depending on your oven, so keep an eye on them. You want them to be cooked through but still slightly soft in the middle for that perfect tender texture. Don’t let them get too dark, as sugar cookies taste best when lightly baked.
-
Cool Completely: Once baked, remove the cookie sheets from the oven and let the cookies cool on the sheets for about 5 minutes before carefully transferring them to a wire rack to cool completely. It’s absolutely essential that the cookies are fully cooled before adding the strawberry filling and glaze. Warm cookies will melt everything and make a big mess!
-
Fill the Cookies: Once the cookies are completely cool, and your strawberry filling is also at room temperature or chilled, it’s time to assemble! Take a small spoon or an offset spatula and spread a generous dollop of the strawberry filling over the top of each cookie, leaving a small border around the edge, just like a real Pop Tart. You’ll find the rich color of the filling truly makes these cookies pop!
- Whipping Up the Pop Tart Glaze and Decorating
-
Prepare the Glaze: In a medium bowl, combine your 2 cups of sifted powdered sugar, ½ teaspoon of pure vanilla extract, and a pinch of salt. Start by adding 3 tablespoons of milk (or heavy cream). Whisk thoroughly until a smooth, thick, but pourable glaze forms. If the glaze is too thick, add more milk, half a teaspoon at a time, until it reaches a consistency that drizzles easily but isn’t watery. If it’s too thin, add a little more sifted powdered sugar. We’re aiming for a consistency similar to white craft glue – thick enough to hold its shape but fluid enough to spread.
-
Add Optional Color: If you’re going for that classic strawberry Pop Tart look, now is the time to add 1-2 drops of red or pink gel food coloring. Mix it in until you achieve your desired shade of pink. I find that gel food coloring works best as it adds color without thinning the glaze too much. A pale pink is often perfect, but you can go bolder if you like!
-
Glaze the Cookies: One by one, take your filled cookies and carefully spoon the glaze over the strawberry filling, allowing it to spread gently to the edges of the border you created (or just to the edge of the strawberry filling). You can use the back of the spoon or a small offset spatula to gently spread the glaze evenly. Try to ensure the glaze covers the entire top surface of the strawberry filling for a neat finish. Work relatively quickly in the next step, as the glaze can start to set.
-
Add the Sprinkles: Immediately after glazing each cookie, generously shower it with rainbow sprinkles. The wet glaze will hold the sprinkles firmly in place as it sets. This is where the true “Pop Tart” magic happens! Don’t be shy with the sprinkles; they add both visual appeal and a delightful crunch. I love using the “jimmie” style sprinkles because they look most like the classic Pop Tart ones.
-
Allow Glaze to Set: Carefully transfer your decorated Strawberry Pop Tart Sugar Cookies back to the wire rack. Let them sit undisturbed for at least 1-2 hours, or until the glaze has fully set and hardened. This is important for easy handling and stacking. Depending on the humidity in your kitchen, this might take a bit longer. Once set, they are ready to be enjoyed! Store them in an airtight container at room temperature for up to 5 days, though I doubt they’ll last that long!
-
2 ¾ cups all-purpose flour
-
1 teaspoon baking soda
-
½ teaspoon baking powder
-
½ teaspoon salt
-
1 cup unsalted butter, softened
-
1 cup granulated sugar
-
1 cup powdered sugar
-
2 large eggs
-
1 teaspoon vanilla extract
-
½ teaspoon almond extract (optional)
-
¾ cup strawberry jam or preserves
-
Sprinkles (for decoration)
-
1-2 tablespoons milk or water (for glaze)
-
Step 1
Whisk together flour, baking soda, baking powder, and salt. In a large mixing bowl, cream softened butter and granulated sugar until light and fluffy (about 3-5 minutes). Beat in eggs, vanilla extract, and optional almond extract until fully combined. Gradually add the dry ingredients to the wet, mixing on low speed until just combined and no streaks of flour remain. Do not overmix. Flatten the dough into a disc, wrap tightly in plastic, and chill in the refrigerator for at least 1 hour (or up to 2 days). -
Step 2
Preheat oven to 375°F (190°C). Line two large baking sheets with parchment paper. On a lightly floured surface, roll out the chilled dough to about ¼ inch thick. Using a rectangular cookie cutter (approximately 2×3 inches), cut out cookie shapes. Gather and re-roll scraps to cut more cookies. Carefully transfer the cut-out cookies to the prepared baking sheets, leaving about an inch between each. Bake for 8-10 minutes, or until the edges are lightly golden and the centers are set. Remove from oven and let cool on the baking sheets for about 5 minutes before transferring to a wire rack to cool completely. Ensure cookies are fully cooled before proceeding. -
Step 3
Once the cookies are completely cool, spread about a teaspoon of strawberry jam or preserves evenly over the top of each cookie, leaving a small border around the edge. -
Step 4
In a medium bowl, whisk together the 1 cup powdered sugar, the remaining vanilla extract (if any, otherwise use a small amount more), and start with 1 tablespoon of milk or water. Add more liquid, half a teaspoon at a time, until a smooth, thick but pourable glaze forms (consistency of white craft glue). Spoon the glaze over the strawberry filling on each cookie, spreading gently to the edges. Immediately after glazing each cookie, generously shower it with rainbow sprinkles. Carefully transfer decorated cookies back to the wire rack and let the glaze set completely for at least 1-2 hours before serving. Store in an airtight container at room temperature for up to 5 days.
Alright, let’s get started on the foundation of our delightful Strawberry Pop Tart Sugar Cookies: the sugar cookie dough! This recipe yields a wonderfully tender cookie that holds its shape beautifully, which is exactly what we need for our Pop Tart-inspired creation. I always get excited at this stage because it’s where the magic truly begins.
While our cookie dough is chilling, let’s turn our attention to the star of the show: the bright and fruity strawberry filling! This homemade version is so much better than anything store-bought, with its vibrant flavor and perfect consistency that won’t make our cookies soggy. It’s truly what elevates these from simple sugar cookies to authentic Strawberry Pop Tart Sugar Cookies.
Now for the exciting part – transforming our chilled dough and cooled filling into the recognizable shape of Strawberry Pop Tart Sugar Cookies! This phase requires a little attention to detail, but the results are so rewarding. I love watching the cookies bake and seeing their edges turn golden.
This is the fun part, where our Strawberry Pop Tart Sugar Cookies truly come to life with their iconic glaze and vibrant sprinkles! The glaze is super simple to make and sets beautifully, providing the perfect canvas for our colorful decorations.
Conclusion:
And there you have it, friends! We’ve journeyed together through the delightful process of creating something truly magical in our kitchens. I honestly believe that if you’re looking for a recipe that combines comforting nostalgia with utterly irresistible flavor, then your search ends here. These Strawberry Pop Tart Sugar Cookies are more than just a dessert; they are a celebration of childhood joy, reimagined in a sophisticated, incredibly delicious way that will surprise and delight everyone who takes a bite. Forget everything you thought you knew about cookies, because this recipe elevates the humble sugar cookie to an entirely new level, infusing it with that iconic fruity, frosted goodness we all secretly crave.
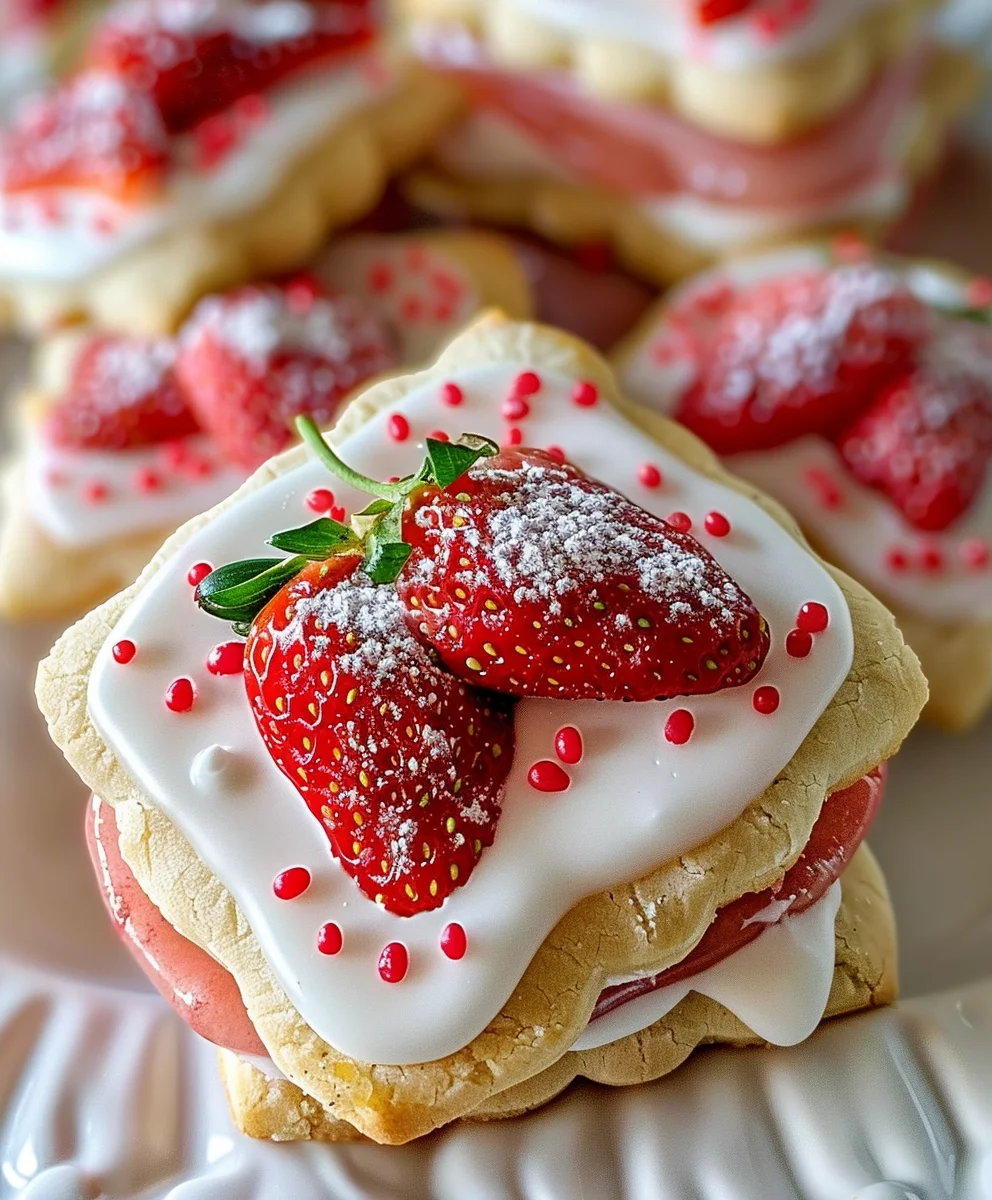
I can’t emphasize enough how much of a crowd-pleaser these cookies are. From the moment the aroma of baking sugar and warm strawberry jam fills your home, you’ll know you’re onto something special. They’re perfect for brightening up a gloomy afternoon, a fantastic addition to any potluck or bake sale, and an absolute showstopper at children’s parties – and let’s be honest, adult parties too! Imagine serving these alongside a tall, frosty glass of milk, a steaming mug of coffee, or a delicate cup of tea. They are surprisingly versatile, fitting in beautifully as a casual snack or a charming end to a celebratory meal. The vibrant red of the strawberry peeking through the golden cookie, topped with that creamy glaze and colorful sprinkles, makes them incredibly Instagram-worthy, ensuring they’re as pleasing to the eye as they are to the palate.
Elevate Your Cookie Game with These Irresistible Variations:
One of the things I love most about baking is the opportunity to get creative, and this recipe offers a fantastic canvas for your culinary artistry. While the classic strawberry filling is phenomenal, don’t hesitate to experiment with different jam flavors. Imagine a batch made with raspberry jam for a tangier twist, or even a apricot preserve for a more sophisticated, slightly less sweet profile. Blueberry jam would also be absolutely divine, transforming these into a whole new experience. You could also play around with the glaze; instead of a simple vanilla icing, consider adding a hint of lemon zest to cut through the sweetness, or even a touch of almond extract for an extra layer of flavor. For a festive touch, swap out the rainbow sprinkles for seasonal ones – perhaps red and green for the holidays, or pastel colors for spring. If you’re feeling particularly adventurous, try adding a light dusting of finely crushed graham cracker crumbs over the top of the icing before it sets, mimicking a pie crust for an added textural dimension. Or, for the ultimate indulgence, dip half of the cooled cookie in melted dark chocolate before the glaze, allowing it to set for an extra layer of decadence. These simple tweaks can transform your cookies into something uniquely yours, making each batch a delightful new adventure.
Your Kitchen Awaits: Share Your Creations!
So, what are you waiting for? I promise you, diving into this recipe will be one of the most rewarding baking experiences you’ll have all year. The joy of creating these delightful treats, the incredible aroma that fills your home, and the sheer pleasure of seeing faces light up with every bite, is truly unparalleled. Don’t be shy; embrace the fun and get baking! I am absolutely confident that once you whip up your first batch of these incredible Strawberry Pop Tart Sugar Cookies, they’ll quickly become a cherished favorite in your recipe repertoire. I would absolutely love to hear about your experience and see your beautiful creations. Please, please, please share your photos, tell me about any variations you tried, and let me know how much you and your loved ones adored them in the comments below. Happy baking, everyone, and get ready to taste pure bliss!
Strawberry Pop Tart Sugar Cookies
A delightful, chewable cookie merging the comforting simplicity of a sugar cookie with vibrant strawberry filling and signature sweet glaze, finished with playful sprinkles. Recreate cherished childhood memories with a homemade twist, offering the nostalgic flavor of a Strawberry Pop-Tart in a convenient, handheld cookie form.
Ingredients
Instructions
Important Information
Nutrition Facts (Per Serving)
It is important to consider this information as approximate and not to use it as definitive health advice.
Allergy Information
Please check ingredients for potential allergens and consult a health professional if in doubt.
Leave a Comment