
Vampire Bite Trail Mix?utm_source=pinabd79 – the very name conjures images of mysterious midnight cravings and delightfully spooky gatherings, doesn’t it? I am absolutely thrilled to share with you a recipe that promises to be more than just a snack; it’s an experience, a playful nod to the darker, more whimsical side of our culinary adventures. Forget bland, uninspired nibbles; this vibrant mix is designed to awaken your taste buds with every delightful crunch and chew, ensuring that every handful is packed with intriguing flavor and satisfying texture.
The concept for this unique blend, which I’ve affectionately dubbed Vampire Bite Trail Mix?utm_source=pinabd79, draws inspiration from the timeless fascination with all things ethereal and enchanting. While there isn’t an ancient lore specifically detailing vampire preferences for chocolate chips and dried cranberries, I like to imagine this mix as the perfect fuel for a night of spirited storytelling or an adventurous moonlit stroll. It’s a modern classic in the making, perfect for those who appreciate a snack with both character and convenience.
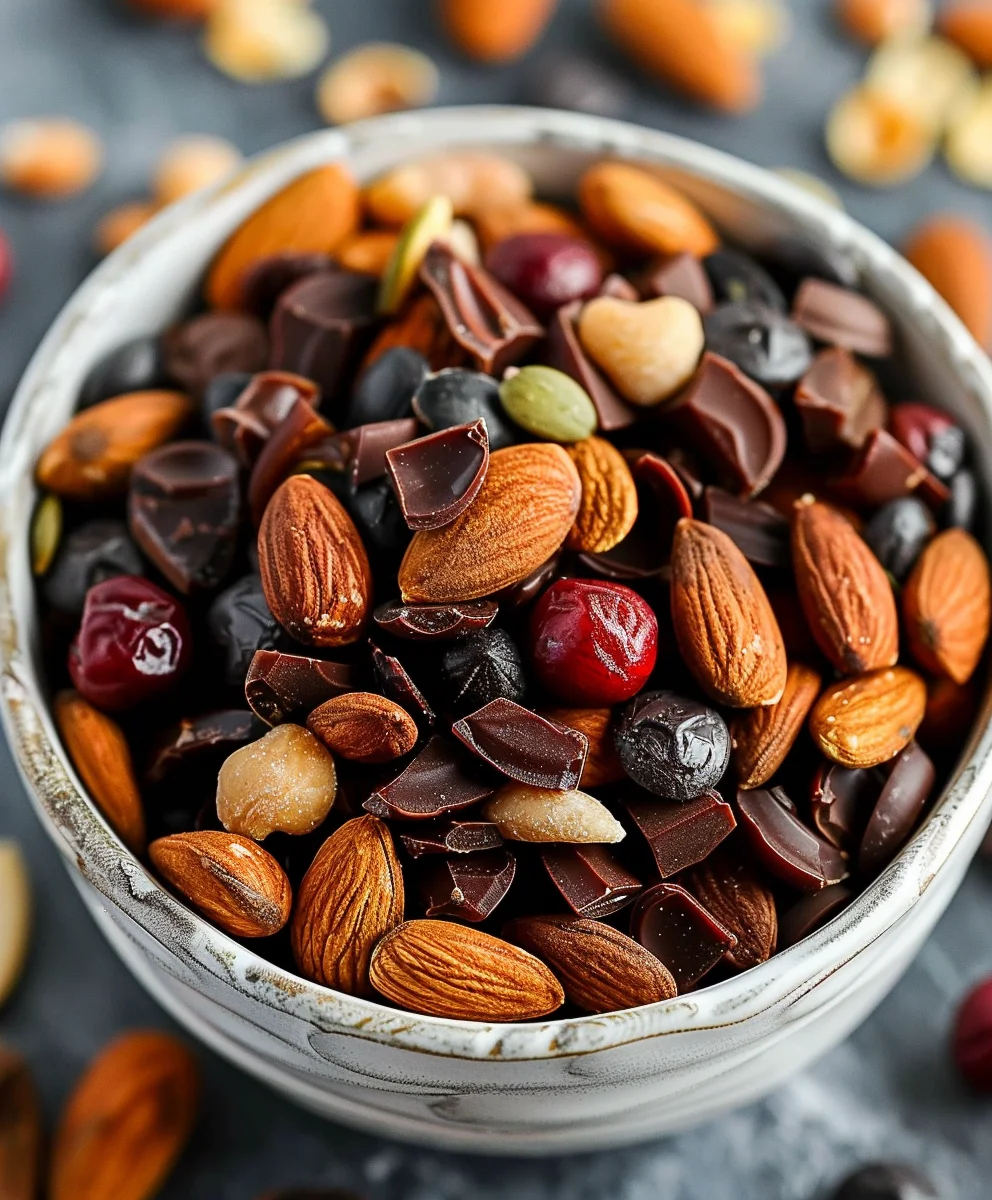
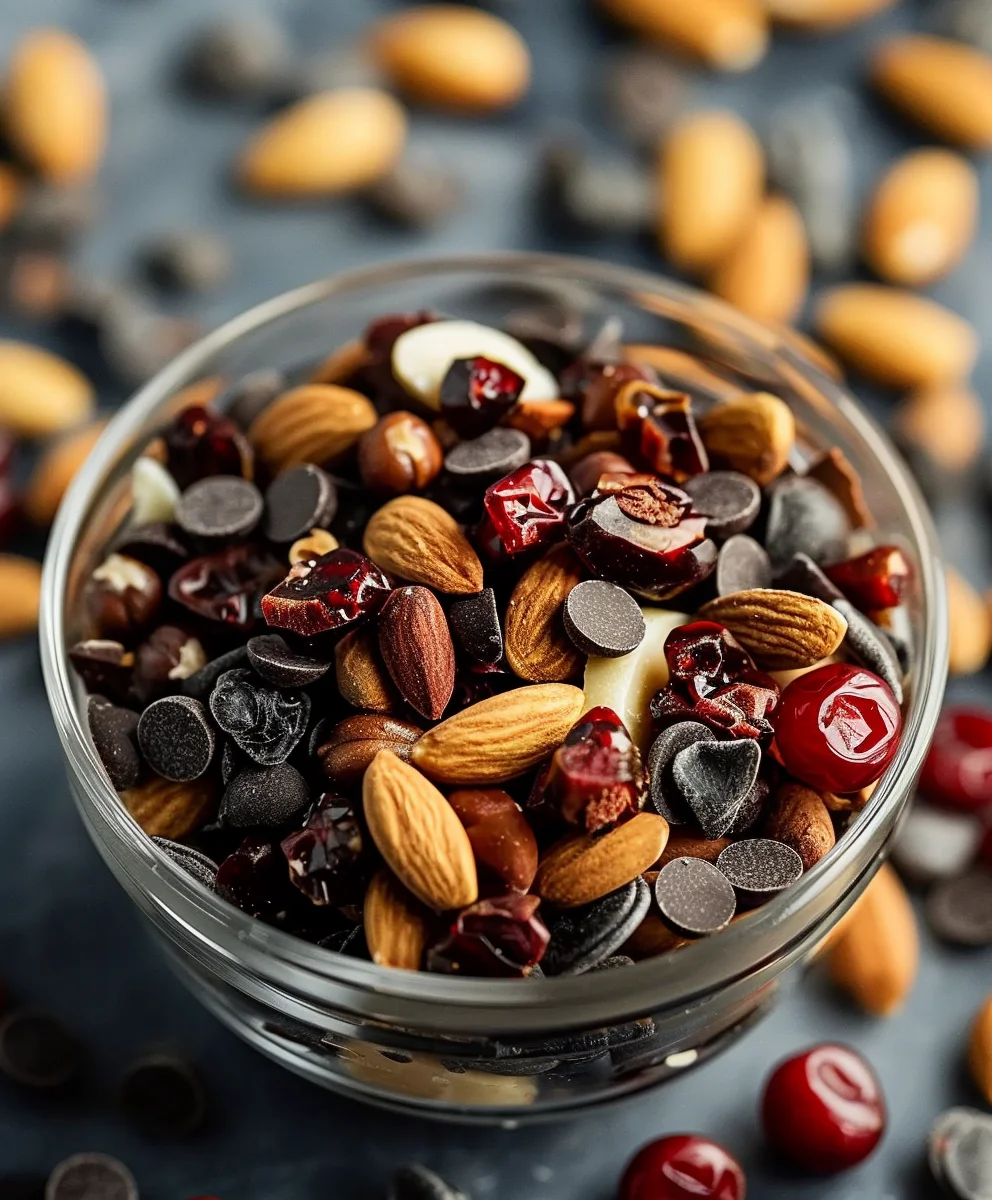
People absolutely adore this dish for its irresistible blend of textures and flavors – the rich sweetness of dark chocolate pieces, the satisfying saltiness of pretzels, the chewy tang of dried cherries or cranberries, and the hearty crunch of nuts and seeds. It’s incredibly versatile, effortlessly customizable, and astonishingly simple to prepare, making it the ultimate grab-and-go snack for busy days, thrilling movie nights, or a standout contribution to any festive occasion. Get ready to sink your teeth into something truly special!
Ingredients:
- 3 cups Mixed Nuts: I love a robust blend here! Think 1 cup whole almonds, 1 cup pecan halves, and 1 cup cashew pieces. These provide a fantastic foundational crunch and a variety of nutty flavors that will really sing in our Vampire Bite Trail Mix.
- 1 cup Raw Pumpkin Seeds (Pepitas): These vibrant green seeds add a delightful chewiness and a pop of color, reminiscent of a mysterious forest. They’re also packed with nutrients!
- ½ cup Raw Sunflower Seeds: Smaller than pepitas but equally mighty, sunflower seeds offer a subtle, earthy flavor and another layer of texture.
- 1 cup Dried Cranberries: Ah, our “Vampire Bite” component! These tart, ruby-red berries are crucial. Their color immediately brings to mind those iconic fangs, and their chewy sweetness perfectly balances the savory nuts. They are truly the star visual element for our Vampire Bite Trail Mix.
- ½ cup Dried Cherries: For a deeper, darker red and a more intense fruit flavor, dried cherries are a wonderful addition. They complement the cranberries beautifully.
- 1 ½ cups Small Pretzel Sticks or Mini Pretzels, broken into pieces: These add a fantastic salty crunch and a playful, almost “bone-like” visual texture. Breaking them ensures they integrate well into every handful of Vampire Bite Trail Mix.
- 1 cup Dark Chocolate Chips or Chunks: Because what’s a delicious snack without a hint of rich, indulgent chocolate? Dark chocolate provides a lovely bittersweet contrast and melds wonderfully with the other flavors.
- ½ cup White Chocolate Chips: These are optional, but I find they add a beautiful visual contrast, looking almost like ghostly elements amidst the darker mix. You could even drizzle them with a tiny bit of red food coloring if you’re feeling extra spooky!
- ¼ cup Maple Syrup: This acts as our sticky binder, helping all the ingredients cling together and imparting a wonderful, warm sweetness.
- 2 tablespoons Coconut Oil (melted): Helps create a crisp texture and aids in even roasting. You can use any neutral oil like vegetable or grapeseed if you prefer.
- 1 teaspoon Vanilla Extract: A touch of vanilla elevates all the flavors, adding warmth and complexity to our Vampire Bite Trail Mix.
- ½ teaspoon Ground Cinnamon: For a hint of spice and an inviting aroma that will fill your kitchen as this bakes.
- ½ teaspoon Fine Sea Salt: Crucial for balancing all the sweetness and enhancing the nutty flavors. Don’t skip this!
- Pinch of Cayenne Pepper (optional): For those who like a little “bite” in their Vampire Bite Trail Mix, a tiny pinch of cayenne adds a surprising, subtle warmth that’s truly delightful.
Preparation Phase: Gathering and Initial Steps
Before we dive into mixing up our truly spectacular Vampire Bite Trail Mix, there are a few important preparatory steps to ensure everything runs smoothly. Trust me, a little organization goes a long way in the kitchen!
-
Preheat Your Oven: My very first step, always, is to get the oven ready. We want a perfectly even temperature for toasting. Preheat your oven to 300°F (150°C). This lower temperature is key for gently toasting the nuts and seeds without burning them, allowing them to develop their full flavor and a beautiful golden hue.
Why Low Temperature is Key:
A lower oven temperature might seem slow, but it’s essential for achieving that ideal crunchy texture in your nuts and seeds. High heat can burn them on the outside before they’re properly toasted through, leading to a bitter taste. Patience here will be rewarded with superior flavor!
-
Prepare Your Baking Sheets: Next, we’ll need some space to spread out our trail mix for even baking. Line two large baking sheets with parchment paper or silicone baking mats. I highly recommend parchment paper because it prevents sticking entirely, making cleanup an absolute breeze. Plus, it ensures that none of our precious Vampire Bite Trail Mix gets stuck to the pan. If you only have one large baking sheet, you might need to bake in two batches to avoid overcrowding, which can steam your ingredients instead of toasting them.
Ensuring Even Toasting:
Spreading the mix thinly across two sheets prevents steaming and allows hot air to circulate freely around each individual piece. This circulation is what gives us that irresistible crispness we’re aiming for.
-
Measure All Ingredients: This might sound obvious, but it’s a step I never skip, especially when developing a new recipe like this Vampire Bite Trail Mix. Go through your ingredient list and measure out everything before you start combining. This is what we call “mise en place” – everything in its place. It significantly reduces stress during the mixing process and ensures you haven’t forgotten anything crucial.
The Joy of Mise en Place:
Having everything pre-measured allows you to focus purely on the assembly and enjoy the process without scrambling for a measuring spoon or a bag of nuts. It transforms cooking from a chore into a more meditative and enjoyable experience.
- Melt the Coconut Oil: If your coconut oil isn’t already liquid, gently melt it. You can do this by placing it in a small microwave-safe bowl and heating it for 15-30 seconds, or by setting the bowl in a larger bowl of hot water. We want it fully liquid so it can be easily incorporated into our binding mixture.
Mixing and Assembling the Vampire Bite Trail Mix
This is where the magic truly begins to happen! Combining all these wonderful ingredients will start to give us a preview of the amazing Vampire Bite Trail Mix we’re creating. We’ll work in stages to ensure everything is perfectly coated and evenly distributed.
-
Combine Dry Ingredients (First Batch): In a very large mixing bowl – you’ll need more space than you think! – combine your mixed nuts (almonds, pecans, cashews), pumpkin seeds, and sunflower seeds. Give them a good stir with a large spoon or spatula to ensure they are well mixed. These are the elements that will benefit most from toasting, so they get a head start.
Importance of a Large Bowl:
Using a surprisingly large bowl is one of my top tips for making trail mix. It gives you plenty of room to toss and combine ingredients without them spilling over, ensuring everything gets a uniform coating of our delicious binding mixture.
-
Whisk Together Wet Ingredients and Spices: In a separate, medium-sized bowl, combine the melted coconut oil, maple syrup, vanilla extract, ground cinnamon, fine sea salt, and the optional pinch of cayenne pepper. Whisk these ingredients together vigorously until they are thoroughly combined and emulsified. You want this mixture to be homogenous, as it’s the delicious glue that will hold our Vampire Bite Trail Mix together.
Creating the Perfect Binder:
This sweet and savory liquid mixture is what transforms plain nuts and seeds into an irresistible, flavorful snack. The maple syrup provides sweetness and stickiness, while the oil helps distribute it evenly and promotes crispiness.
-
Coat the Dry Ingredients: Pour the wet mixture over the nuts and seeds in the large mixing bowl. Now, using your large spoon or spatula, or even your clean hands (which I find works best for this!), toss and stir everything until the nuts and seeds are completely and evenly coated. You want every single piece to have a glimmer of that delicious maple-cinnamon coating. Take your time with this step; thorough coating means thorough flavor in every bite of our Vampire Bite Trail Mix.
The Art of Even Coating:
This is a critical step for flavor distribution. Ensure there are no dry spots. The coating will caramelize slightly in the oven, creating a wonderful depth of flavor and a lovely sheen.
-
Spread onto Baking Sheets: Divide the coated nut and seed mixture evenly between your two prepared baking sheets. Spread the mixture out into a single layer. It’s really important that the mixture isn’t piled up, otherwise, it won’t toast properly and evenly.
Remember: A single layer is essential for optimal roasting and crispness. If the ingredients are too crowded, they will steam instead of getting that desired golden crunch.
Baking and Infusing the Flavors
Now comes the aroma-filling part! As our Vampire Bite Trail Mix bakes, your kitchen will be filled with the most incredible smells of toasted nuts, sweet maple, and warm cinnamon. This phase requires a little attention, but it’s well worth it for the results.
-
First Bake Cycle: Place the baking sheets in your preheated oven. Bake for 15 minutes.
Initial Toasting:
This initial period allows the nuts and seeds to start toasting and the maple syrup mixture to begin caramelizing. You’ll already begin to smell the wonderful transformation happening!
-
Stir and Continue Baking: After 15 minutes, carefully remove the baking sheets from the oven. Using your spatula, give the mixture on each sheet a thorough stir, flipping and mixing the ingredients around. This prevents the edges from burning and encourages even toasting. Return the sheets to the oven and continue baking for another 10-15 minutes, or until the nuts and seeds are lightly golden brown and fragrant. Keep a close eye on them during the last few minutes, as nuts can go from perfectly toasted to burnt very quickly!
The Importance of Stirring:
Stirring is non-negotiable for perfectly toasted trail mix. It ensures that all sides of the nuts and seeds are exposed to the heat, preventing some pieces from getting too dark while others remain pale. It also helps break up any clusters that might be forming.
-
Remove from Oven and Add Dried Fruits and Pretzels: Once the nuts and seeds are beautifully golden and fragrant, remove the baking sheets from the oven. While the mixture is still warm, but not scorching hot, sprinkle the dried cranberries, dried cherries, and pretzel pieces over the baked mixture. Gently stir everything together. The residual warmth will help the dried fruits soften slightly and meld with the other flavors.
Timing the Fruit and Pretzels:
We add the dried fruits and pretzels after baking the nuts and seeds because the fruits can dry out and become rock hard if baked for too long, and pretzels can become overly brittle. Adding them now ensures they retain their delightful chewiness and crunch.
-
Add Chocolate Chips: While the mixture is still warm, but definitely not straight out of the oven hot (we don’t want completely melted chocolate right now, just softened), sprinkle the dark chocolate chips and white chocolate chips over the trail mix. Give it another gentle stir. The warmth of the mix will slightly soften the chocolate, making it adhere to the other ingredients and creating delicious little pockets of melty goodness. If you prefer your chocolate fully solid, wait until the mix has cooled a bit more. However, a slight melt means a more integrated flavor!
Pro Tip for Chocolate: If you want the chocolate chips to remain distinct, wait until the Vampire Bite Trail Mix has cooled significantly, almost to room temperature, before stirring them in. If you add them when the mix is quite hot, they will melt completely and coat everything, which is also delicious but a different texture!
Cooling, Storing, and Enjoying Your Vampire Bite Trail Mix
The hard part is over! Now comes the crucial step of cooling, which locks in all that amazing crunch and flavor, and then, of course, the best part – tasting your incredible homemade Vampire Bite Trail Mix.
-
Cool Completely: Leave the Vampire Bite Trail Mix spread out on the baking sheets to cool completely to room temperature. This step is incredibly important for achieving that satisfying crunch. As it cools, the maple syrup coating will harden, crisping up the entire mix. Resist the urge to snack on it while it’s still warm – I know it’s hard, but it will be worth the wait! This usually takes at least 1-2 hours.
The Science of Cooling:
Cooling is not just about temperature; it’s about texture. As the mix cools, any residual moisture evaporates, and the sugary coating solidifies, creating that delightful snappy texture that makes a trail mix truly addictive. If you store it warm, it can become soft and clumped.
-
Break Apart and Store: Once completely cool, the Vampire Bite Trail Mix might have formed some delightful clusters. Gently break these apart into smaller, snackable pieces. Transfer the finished Vampire Bite Trail Mix to an airtight container.
Best Storage Practices:
An airtight container is your best friend here. It protects your trail mix from moisture and air, which can cause it to lose its crispness and flavor. I love using glass jars or sturdy plastic containers with tight-fitting lids.
-
Enjoy Your Vampire Bite Trail Mix!: Your homemade Vampire Bite Trail Mix is now ready to be enjoyed! It’s perfect for a quick snack, a boost of energy on a hike, a thoughtful gift, or a spooky treat for a themed gathering.
Storage Duration: Stored in an airtight container at room temperature, this Vampire Bite Trail Mix will stay fresh and crunchy for up to 2-3 weeks. However, in my experience, it rarely lasts that long because it’s just too delicious!
Creative Serving Ideas:
Beyond just snacking straight from the jar, try sprinkling your Vampire Bite Trail Mix over yogurt, oatmeal, or even a scoop of vanilla ice cream for an extra textural and flavorful delight. It also makes a fantastic topping for a fall-themed salad or a fun addition to a packed lunch for school or work.
I hope you love making and sharing this Vampire Bite Trail Mix as much as I do. Happy snacking, my friends!
Conclusion:
And there you have it, my wonderful friends! We’ve journeyed through the simple, yet utterly delightful, creation of a snack that I truly believe will become a staple in your culinary repertoire. This isn’t just another mix; it’s a vibrant explosion of flavors and textures, meticulously balanced to offer that perfect crunch and chew in every single bite. I’ve poured my heart into perfecting this recipe, ensuring it’s not only incredibly easy to follow but also delivers an unparalleled snacking experience. The beauty of this recipe lies in its ability to transcend occasions – whether you’re planning a spooky soirée, a casual movie night with loved ones, or simply need a quick, satisfying pick-me-up during a busy day, this mix rises to the challenge with effortless grace. It’s a guaranteed crowd-pleaser, appealing to discerning palates of all ages, from the pickiest eaters to the most seasoned snack aficionados. Imagine the joy of assembling something so delicious with minimal effort, leaving you more time to savor the moments that truly matter. I am genuinely excited for you to experience the magic of this concoction firsthand.
I am confident that once you whip up a batch of what I’ve proudly coined as Vampire Bite Trail Mix?utm_source=pinabd79, it will become a new favorite in your snack arsenal. But beyond just making it, let’s talk about how to truly make this snack shine! While it’s absolutely fantastic straight from the bowl, there are countless ways to elevate your enjoyment. For parties or gatherings, consider portioning individual servings into small, decorative bags – they make fantastic, edible party favors that your guests will adore. Imagine a Halloween bash where everyone gets their own little bag of this delightful mix to munch on as they mingle. It’s also an incredible companion for a cozy night in; picture yourself snuggled up with a blanket, a scary movie on, and a big bowl of this spooky-themed trail mix within arm’s reach. You could even use it as an unexpected yet utterly delicious topping! Sprinkle a generous handful over a bowl of plain yogurt for a textural breakfast treat, or add a crunch to your favorite vanilla ice cream for an instantly upgraded dessert. It also makes for a fantastic and energizing mid-afternoon snack, giving you that boost you need to power through the rest of your day with a smile.
Endless Possibilities and Creative Twists
Now, let’s talk about unleashing your inner culinary artist! This recipe, while perfect as is, is also incredibly forgiving and open to a myriad of delightful variations. Don’t be afraid to experiment and make it truly your own. If you’re catering to different dietary needs or simply want to explore new flavor profiles, the possibilities are virtually endless. For those with nut allergies, you can easily substitute the peanuts with roasted pumpkin seeds, sunflower seeds, or even crispy baked chickpeas for a similar crunch without the allergens. If you’re looking for a different kind of sweetness, consider swapping out some of the traditional dried fruits for dried cherries, blueberries, or even finely chopped dried apricots. Chocolate lovers, rejoice! Feel free to mix and match your favorite chocolate components – dark chocolate chips can add a sophisticated bitter note, white chocolate chunks can bring a creamy sweetness, or you could even use mini chocolate-covered pretzels for an extra layer of salty-sweet indulgence. For those who enjoy a little extra savory kick, adding a handful of small pretzels or even some cheese crackers could be a delightful twist. And if you’re feeling extra adventurous, a pinch of cinnamon or a tiny dash of nutmeg could introduce a warm, cozy dimension, especially as we head into cooler months. This recipe truly invites you to play and customize until it’s perfectly tailored to your unique tastes and preferences. It’s not just a recipe; it’s a canvas for your snack-time creativity.
Your Adventure Starts Now!
So, what are you waiting for? I wholeheartedly encourage you to roll up your sleeves, gather your ingredients, and give this incredible recipe a try this week. I promise you, the joy of creating something so utterly delicious and the satisfaction of sharing it with others is an experience not to be missed. There’s something profoundly rewarding about making food that brings smiles to faces, and I have no doubt this mix will do just that. Once you’ve embarked on your culinary journey and whipped up your very own batch, I would absolutely love to hear all about your experience. Did you stick to the original recipe, or did you venture into some exciting variations? What were your favorite parts? How did your family and friends react? Your feedback is incredibly valuable, and I genuinely look forward to seeing your creations and reading your comments. Please feel free to share your thoughts and photos – let’s inspire each other with our delicious snack adventures! Happy mixing, my friends, and enjoy every single bite!
Vampire Bite Trail Mix: Spooky Sweet & Salty Snack!
A delightfully spooky and sweet & salty snack, Vampire Bite Trail Mix combines crunchy nuts, chewy dried fruits, salty pretzels, and indulgent chocolate for an irresistible treat. Perfect for Halloween or any festive occasion, it’s easy to make and customize, designed to awaken your taste buds with every delightful crunch and chew.
Ingredients
-
3 cups Mixed Nuts (1 cup whole almonds, 1 cup pecan halves, 1 cup cashew pieces)
-
1 cup Raw Pumpkin Seeds (Pepitas)
-
½ cup Raw Sunflower Seeds
-
1 cup Dried Cranberries
-
½ cup Dried Cherries
-
1 ½ cups Small Pretzel Sticks or Mini Pretzels, broken into pieces
-
1 cup Dark Chocolate Chips or Chunks
-
½ cup White Chocolate Chips (optional)
-
¼ cup Maple Syrup
-
2 tablespoons Coconut Oil (melted)
-
1 teaspoon Vanilla Extract
-
½ teaspoon Ground Cinnamon
-
½ teaspoon Fine Sea Salt
-
Pinch of Cayenne Pepper (optional)
Instructions
-
Step 1
Preheat oven to 300°F (150°C). Line two large baking sheets with parchment paper. Gently melt coconut oil until liquid. -
Step 2
In a very large bowl, combine mixed nuts, pumpkin seeds, and sunflower seeds. In a separate medium bowl, whisk together melted coconut oil, maple syrup, vanilla extract, ground cinnamon, fine sea salt, and the optional pinch of cayenne pepper. Pour this wet mixture over the nuts and seeds, then toss and stir until all dry ingredients are completely and evenly coated. -
Step 3
Divide the coated nut and seed mixture evenly between your two prepared baking sheets, spreading it out into a single layer to ensure proper toasting and crispness. -
Step 4
Place the baking sheets in the preheated oven. Bake for 15 minutes. Carefully remove, stir the mixture thoroughly, then return to the oven and bake for another 10-15 minutes, or until the nuts and seeds are lightly golden brown and fragrant. Watch closely during the last few minutes to prevent burning. -
Step 5
Once the nuts and seeds are baked and beautifully golden, remove the baking sheets from the oven. While the mixture is still warm (but not scorching hot), sprinkle the dried cranberries, dried cherries, pretzel pieces, dark chocolate chips, and optional white chocolate chips over the mixture. Gently stir everything together to combine; the residual warmth will help the chocolate soften slightly and adhere. -
Step 6
Leave the trail mix spread out on the baking sheets to cool completely to room temperature (this typically takes 1-2 hours) to achieve optimal crunch. Once fully cooled, gently break apart any clusters into smaller, snackable pieces. Transfer the finished Vampire Bite Trail Mix to an airtight container for storage. It will stay fresh and crunchy for up to 2-3 weeks at room temperature.
Important Information
Nutrition Facts (Per Serving)
It is important to consider this information as approximate and not to use it as definitive health advice.
Allergy Information
Please check ingredients for potential allergens and consult a health professional if in doubt.
Leave a Comment