
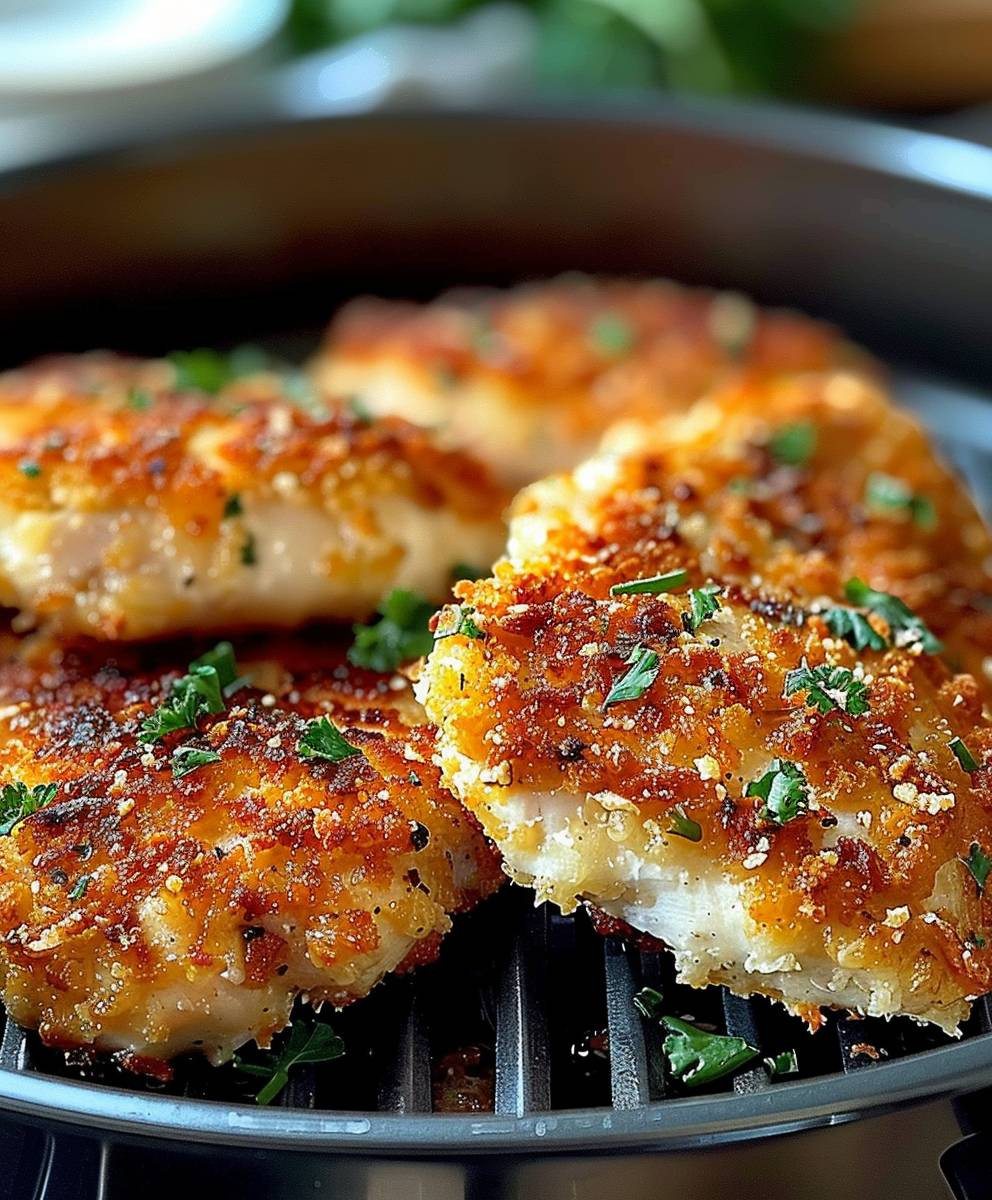
Air Fryer Parmesan Chicken is about to revolutionize your weeknight dinners! Forget slaving over a hot stove or dealing with messy pans. Imagine perfectly crispy, golden-brown chicken, coated in a flavorful Parmesan crust, ready in under 20 minutes. Sounds too good to be true? It’s not! This recipe delivers all the satisfying crunch and cheesy goodness you crave, without the guilt or the hassle.
While Parmesan chicken itself isn’t steeped in ancient history, the combination of breadcrumbs, cheese, and protein has been a culinary staple for centuries across various cultures. Think of Italian cutlets or schnitzel – all variations on the same delicious theme. We’ve simply taken this classic concept and given it a modern, healthy twist by utilizing the magic of the air fryer.
So, why do people adore Air Fryer Parmesan Chicken? It’s simple: the taste is incredible! The Parmesan cheese creates a savory, umami-rich crust that perfectly complements the juicy, tender chicken inside. The air fryer ensures maximum crispiness without the need for excessive oil, making it a healthier alternative to traditional frying methods. Plus, it’s incredibly convenient. Busy weeknights demand quick and easy meals, and this recipe delivers on both fronts. Get ready to enjoy a restaurant-quality dish in the comfort of your own home, with minimal effort and maximum flavor!
Ingredients:
- 1.5 lbs boneless, skinless chicken breasts, about 4-6 breasts
- 1 cup grated Parmesan cheese
- 1/2 cup Italian breadcrumbs
- 1/4 cup all-purpose flour
- 1 teaspoon garlic powder
- 1 teaspoon onion powder
- 1/2 teaspoon dried oregano
- 1/4 teaspoon red pepper flakes (optional, for a little kick!)
- 1/2 teaspoon salt
- 1/4 teaspoon black pepper
- 2 large eggs
- 1 tablespoon milk or water
- Cooking spray (olive oil or avocado oil preferred)
- Optional: Fresh parsley, chopped, for garnish
Preparing the Chicken and Breading Station
- Prepare the Chicken: First, we need to get our chicken ready for its Parmesan makeover! Pat the chicken breasts dry with paper towels. This is crucial because it helps the breading adhere better. If your chicken breasts are particularly thick (more than about 3/4 inch), I recommend pounding them to an even thickness. You can do this by placing each breast between two sheets of plastic wrap and gently pounding with a meat mallet or rolling pin until they are about 1/2 inch thick. This ensures even cooking and prevents the outside from drying out before the inside is cooked through.
- Set Up the Breading Station: Now, let’s create our breading assembly line. This will make the whole process much smoother. You’ll need three shallow dishes or plates.
- Flour Power: In the first dish, place the all-purpose flour. This will be our first layer of coating, helping the egg mixture stick to the chicken.
- Egg Wash: In the second dish, whisk together the eggs and milk (or water). The milk thins the eggs slightly, making them easier to coat the chicken with. Whisk until the yolks and whites are fully combined.
- Parmesan Perfection: In the third dish, combine the grated Parmesan cheese, Italian breadcrumbs, garlic powder, onion powder, dried oregano, red pepper flakes (if using), salt, and pepper. Mix everything together thoroughly with a fork or your fingers to ensure the spices are evenly distributed. This is where all the flavor magic happens!
Breading the Chicken
- Flour Coating: Take one chicken breast at a time and dredge it in the flour, making sure to coat it evenly on both sides. Shake off any excess flour. We don’t want a thick layer of flour; just a light coating.
- Egg Dip: Next, dip the floured chicken breast into the egg mixture, ensuring it’s completely coated. Let any excess egg drip off.
- Parmesan Crust: Finally, transfer the chicken breast to the Parmesan breadcrumb mixture. Press the chicken firmly into the breadcrumbs, making sure to coat it completely on both sides. You want a nice, thick layer of Parmesan goodness! Gently pat the breadcrumbs onto the chicken to help them adhere.
- Repeat: Repeat this breading process with the remaining chicken breasts.
Air Frying the Chicken
- Preheat the Air Fryer: Preheat your air fryer to 375°F (190°C). This is the optimal temperature for cooking the chicken through while getting a crispy, golden-brown crust. Preheating is important for even cooking.
- Prepare the Air Fryer Basket: Lightly spray the air fryer basket with cooking spray. This will prevent the chicken from sticking and help it crisp up nicely.
- Arrange the Chicken: Place the breaded chicken breasts in the air fryer basket in a single layer. Don’t overcrowd the basket! If necessary, cook the chicken in batches. Overcrowding will steam the chicken instead of frying it, resulting in a soggy crust.
- Cook the Chicken: Air fry for 10-12 minutes, then flip the chicken breasts and cook for another 8-10 minutes, or until the internal temperature reaches 165°F (74°C). The cooking time may vary depending on the thickness of your chicken breasts and the model of your air fryer, so it’s essential to use a meat thermometer to ensure they are cooked through.
- Check for Doneness: Use a meat thermometer to check the internal temperature of the thickest part of the chicken breast. It should register 165°F (74°C). If the chicken is not cooked through, continue cooking for a few more minutes, checking the temperature every minute or two.
- Crisp it Up (Optional): If you want an extra crispy crust, you can increase the air fryer temperature to 400°F (200°C) for the last 1-2 minutes of cooking. Watch the chicken carefully to prevent it from burning.
Serving and Enjoying
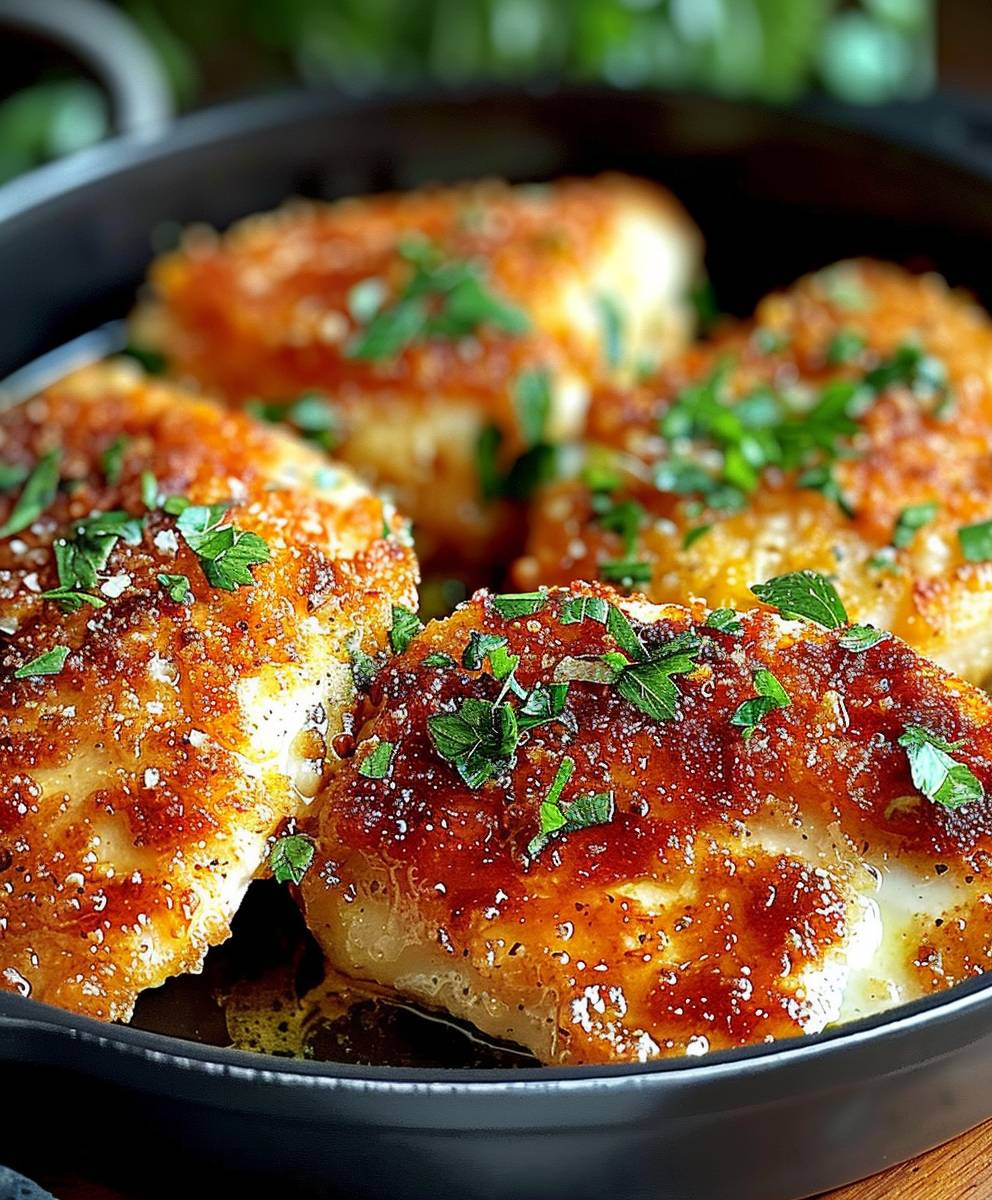
- Rest the Chicken: Once the chicken is cooked through, remove it from the air fryer and let it rest for a few minutes before serving. This allows the juices to redistribute, resulting in a more tender and flavorful chicken breast.
- Garnish (Optional): Garnish with fresh chopped parsley for a pop of color and freshness.
- Serve: Serve immediately and enjoy! This Air Fryer Parmesan Chicken is delicious on its own, or you can serve it with your favorite sides.
Serving Suggestions:
- Pasta: Serve over your favorite pasta with marinara sauce or Alfredo sauce.
- Salad: Pair with a fresh garden salad or Caesar salad for a light and healthy meal.
- Vegetables: Serve with roasted vegetables like broccoli, asparagus, or green beans.
- Mashed Potatoes: Enjoy with creamy mashed potatoes for a comforting and satisfying meal.
- Rice: Serve with rice pilaf or quinoa for a complete and balanced meal.
Tips and Tricks for Perfect Air Fryer Parmesan Chicken:
- Don’t Overcrowd the Basket: As mentioned earlier, overcrowding the air fryer basket will steam the chicken instead of frying it. Cook in batches if necessary.
- Use a Meat Thermometer: A meat thermometer is your best friend when it comes to ensuring the chicken is cooked through. Don’t rely solely on cooking time.
- Adjust Cooking Time as Needed: Cooking times may vary depending on your air fryer and the thickness of your chicken breasts. Keep an eye on the chicken and adjust the cooking time accordingly.
- Spray with Oil: Spraying the chicken with cooking spray before air frying helps it crisp up nicely.
- Experiment with Spices: Feel free to experiment with different spices and herbs to customize the flavor of your Parmesan chicken. Try adding a pinch of paprika, cayenne pepper, or Italian seasoning.
- Use Freshly Grated Parmesan: Freshly grated Parmesan cheese melts better and has a richer flavor than pre-grated Parmesan.
- Pound the Chicken: Pounding the chicken to an even thickness ensures even cooking and prevents the outside from drying out before the inside is cooked through.
- Let it Rest: Letting the chicken rest for a few minutes before serving allows the juices to redistribute, resulting in a more tender and flavorful chicken breast.
Variations:
- Spicy Parmesan Chicken: Add more red pepper flakes to the breadcrumb mixture for a spicier kick.
- Lemon Parmesan Chicken: Add lemon zest to the breadcrumb mixture for a bright and citrusy flavor. You can also squeeze a little lemon juice over the chicken after it’s cooked.
- Garlic Parmesan Chicken: Add extra garlic powder to the breadcrumb mixture for a more intense garlic flavor.
- Herb Parmesan Chicken: Add a mix of dried herbs like basil, thyme, and rosemary to the breadcrumb mixture for a more complex flavor.
- Gluten-Free Parmesan Chicken: Use gluten-free breadcrumbs and gluten-free flour for a gluten-free version of this recipe.
Storage and Reheating:
- Storage: Store leftover Air Fryer Parmesan Chicken in an airtight container in the refrigerator for up to 3-4 days.
- Reheating: Reheat the chicken in the air fryer at 350°F (175°C) for 5-7 minutes, or until heated through. You can also reheat it in the oven at 350°F (175°C) for 10-15 minutes. Microwaving is not recommended, as it can make the chicken soggy.
Enjoy your delicious and easy Air Fryer Parmesan Chicken! I hope you love it as much as I do!
Conclusion:
This isn’t just another chicken recipe; it’s a game-changer! I truly believe that once you experience the crispy, juicy perfection of this Air Fryer Parmesan Chicken, you’ll be adding it to your regular dinner rotation. The combination of the savory Parmesan crust and the incredibly tender chicken, all achieved with minimal oil and maximum flavor, makes it a must-try for anyone looking for a quick, healthy, and delicious meal. Forget slaving over a hot stove or dealing with messy frying pans; the air fryer makes this recipe unbelievably easy and cleanup is a breeze.
But the best part? It’s incredibly versatile! While I’ve shared my go-to method, feel free to experiment and make it your own.
Serving Suggestions and Variations:
* Classic Comfort: Serve your Air Fryer Parmesan Chicken with a side of creamy mashed potatoes and steamed green beans for a comforting and satisfying meal. A simple garden salad also pairs beautifully.
* Pasta Perfection: Toss the chicken with your favorite pasta – spaghetti, penne, or even fettuccine – and a light tomato sauce for a quick and easy Italian-inspired dinner. A sprinkle of fresh basil adds a touch of freshness.
* Chicken Parmesan Sandwiches: Slice the cooked chicken and layer it onto toasted ciabatta rolls with marinara sauce and melted mozzarella cheese for a delicious and satisfying sandwich.
* Mediterranean Twist: Serve the chicken with a side of quinoa, roasted vegetables (like bell peppers, zucchini, and eggplant), and a dollop of tzatziki sauce for a healthy and flavorful Mediterranean-inspired meal.
* Spice It Up: Add a pinch of red pepper flakes to the Parmesan mixture for a little extra heat.
* Cheese Variations: Experiment with different types of cheese in the coating. Asiago, Romano, or even a blend of Italian cheeses would work wonderfully.
* Herb Infusion: Add some dried herbs, such as oregano, thyme, or rosemary, to the Parmesan mixture for a more complex flavor profile.
* Lemon Zest: A little lemon zest in the Parmesan mixture adds a bright and zesty flavor that complements the chicken perfectly.
* Gluten-Free Option: Use gluten-free breadcrumbs and Parmesan cheese to make this recipe gluten-free.
I’m so excited for you to try this recipe! It’s a guaranteed crowd-pleaser, and I know you’ll love how easy and delicious it is. Don’t be afraid to get creative and experiment with different variations to find your perfect Air Fryer Parmesan Chicken.
Once you’ve given it a try, I’d absolutely love to hear about your experience! Share your photos and comments on social media using [Your Hashtag Here] or leave a review on the recipe page. Let me know what variations you tried and how they turned out. Your feedback is invaluable and helps me create even better recipes for you in the future. Happy cooking, and enjoy! I can’t wait to see your delicious creations!
Air Fryer Parmesan Chicken: Crispy, Delicious & Easy Recipe
Quick & easy Air Fryer Parmesan Chicken! Crispy, cheesy, and herby boneless chicken breasts cooked to golden perfection. Perfect for a weeknight meal.
Ingredients
Instructions
Recipe Notes
- Don’t overcrowd the air fryer basket. Cook in batches if necessary.
- Use a meat thermometer to ensure the chicken is cooked through to 165°F (74°C).
- Cooking times may vary depending on your air fryer and the thickness of the chicken breasts.
- Spraying the chicken with cooking spray helps it crisp up nicely.
- Experiment with different spices and herbs to customize the flavor.
- Freshly grated Parmesan cheese melts better and has a richer flavor.
- Pounding the chicken to an even thickness ensures even cooking.
- Letting the chicken rest for a few minutes before serving allows the juices to redistribute.
Leave a Comment