
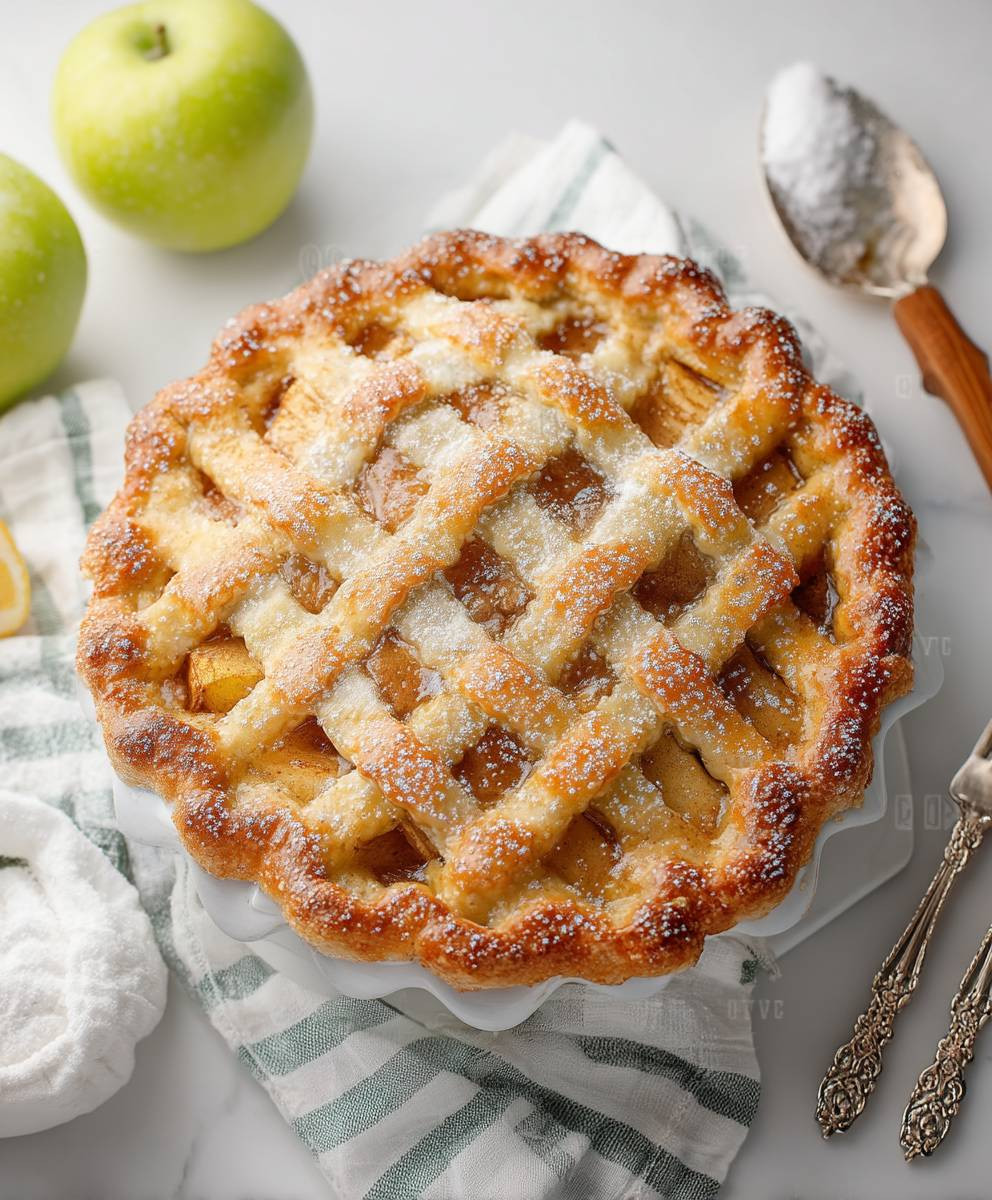
Apple Pie: Is there anything more comforting than the aroma of cinnamon-spiced apples baking in a flaky, golden crust? I think not! This quintessential dessert evokes feelings of warmth, nostalgia, and home, making it a beloved treat across generations. Imagine sinking your fork into a slice, the sweet and tart filling melting in your mouth, perfectly complemented by the buttery, crisp pastry. It’s a symphony of textures and flavors that’s simply irresistible.
The history of apple pie is as rich and layered as the dessert itself. While apples aren’t native to North America, the pie quickly became a symbol of American culinary identity. Early settlers brought apple seeds and recipes from Europe, adapting them to the new world. Over time, apple pie evolved, with countless variations reflecting regional ingredients and personal preferences. It’s more than just a dessert; it’s a cultural icon, representing tradition and shared experiences.
But what is it about apple pie that makes it so universally adored? Perhaps it’s the perfect balance of sweet and tart, the satisfying crunch of the crust, or the comforting warmth it provides on a chilly day. Or maybe it’s the memories it evokes – of family gatherings, holiday celebrations, and cozy evenings spent with loved ones. Whatever the reason, apple pie continues to reign supreme as one of the world’s most cherished desserts, and I’m thrilled to share my foolproof recipe with you!
Ingredients:
- For the Crust:
- 2 ½ cups all-purpose flour, plus more for dusting
- 1 teaspoon salt
- 1 cup (2 sticks) unsalted butter, very cold and cut into ½-inch cubes
- ½ cup vegetable shortening, very cold
- 6-8 tablespoons ice water
- For the Apple Filling:
- 8 medium apples (such as Honeycrisp, Granny Smith, or a mix), peeled, cored, and sliced ¼-inch thick
- ¾ cup granulated sugar
- ¼ cup all-purpose flour
- 2 tablespoons lemon juice
- 2 teaspoons ground cinnamon
- ¼ teaspoon ground nutmeg
- ¼ teaspoon ground allspice
- 2 tablespoons unsalted butter, cut into small pieces
- For the Egg Wash (Optional):
- 1 large egg
- 1 tablespoon milk or water
- For Sprinkling (Optional):
- Turbinado sugar or granulated sugar
Preparing the Pie Crust
Okay, let’s get started with the most important part – the crust! A good crust makes or breaks an apple pie, so pay close attention to these steps. Don’t be intimidated; with a little patience, you’ll nail it!
- Combine Dry Ingredients: In a large bowl, whisk together the flour and salt. This ensures the salt is evenly distributed, which is crucial for flavor.
- Cut in the Butter and Shortening: Add the cold butter and shortening to the flour mixture. Using a pastry blender (or your fingertips, if you’re feeling brave!), cut the butter and shortening into the flour until the mixture resembles coarse crumbs. You should still see small pieces of butter and shortening – that’s what creates those flaky layers! The key here is to work quickly so the butter doesn’t melt. If your kitchen is warm, you can even chill the bowl and ingredients beforehand.
- Add Ice Water: Gradually add the ice water, one tablespoon at a time, mixing gently after each addition. Use just enough water to bring the dough together. Be careful not to overmix! Overmixing develops the gluten in the flour, resulting in a tough crust. The dough should be shaggy but hold together when you pinch it.
- Divide and Chill: Divide the dough in half, flatten each half into a disc, wrap tightly in plastic wrap, and refrigerate for at least 2 hours, or preferably overnight. This chilling time is essential! It allows the gluten to relax, making the dough easier to roll out and preventing it from shrinking during baking.
Preparing the Apple Filling
While the crust is chilling, let’s get that delicious apple filling ready. The aroma alone will make your kitchen smell amazing!
- Prepare the Apples: Peel, core, and slice the apples into ¼-inch thick slices. I like to use a mix of apple varieties for a more complex flavor, but you can use your favorite.
- Combine Filling Ingredients: In a large bowl, combine the sliced apples, granulated sugar, flour, lemon juice, cinnamon, nutmeg, and allspice. Toss everything together until the apples are evenly coated. The flour helps to thicken the filling as it bakes, and the lemon juice prevents the apples from browning and adds a touch of brightness.
- Let it Sit: Let the apple mixture sit for about 15-20 minutes. This allows the apples to release some of their juices, which will create a more flavorful and saucy filling.
Assembling and Baking the Pie
Now for the fun part – putting it all together and baking our masterpiece!
- Preheat Oven: Preheat your oven to 425°F (220°C). Place a baking sheet on the lower rack of the oven. This will help to catch any drips from the pie and prevent the bottom crust from getting soggy.
- Roll Out the Bottom Crust: On a lightly floured surface, roll out one of the dough discs into a 12-inch circle. Gently transfer the dough to a 9-inch pie plate. Trim the edges of the dough, leaving about a 1-inch overhang. Crimp the edges of the dough using your fingers or a fork to create a decorative border.
- Add the Filling: Pour the apple filling into the prepared pie crust. Dot the top of the filling with the small pieces of butter. This adds richness and flavor to the filling.
- Roll Out the Top Crust: On a lightly floured surface, roll out the second dough disc into a 12-inch circle. There are a few options for the top crust:
- Full Crust: Carefully place the rolled-out dough over the filling. Trim the edges, leaving about a 1-inch overhang. Crimp the edges together with the bottom crust to seal. Cut several slits in the top crust to allow steam to escape during baking. This prevents the crust from puffing up and cracking.
- Lattice Crust: Cut the dough into strips. Weave the strips over and under each other to create a lattice pattern on top of the filling. Trim the edges and crimp them to seal.
- Streusel Topping: If you’re not a fan of a top crust, you can make a streusel topping instead. Combine flour, butter, sugar, and spices in a bowl and crumble it over the filling.
- Egg Wash (Optional): In a small bowl, whisk together the egg and milk or water. Brush the top crust with the egg wash. This will give the crust a beautiful golden-brown color.
- Sprinkle with Sugar (Optional): Sprinkle the top crust with turbinado sugar or granulated sugar for added sweetness and sparkle.
- Bake: Bake the pie for 15 minutes at 425°F (220°C). Then, reduce the oven temperature to 375°F (190°C) and bake for another 45-50 minutes, or until the crust is golden brown and the filling is bubbly. If the crust starts to brown too quickly, you can cover the edges with aluminum foil.
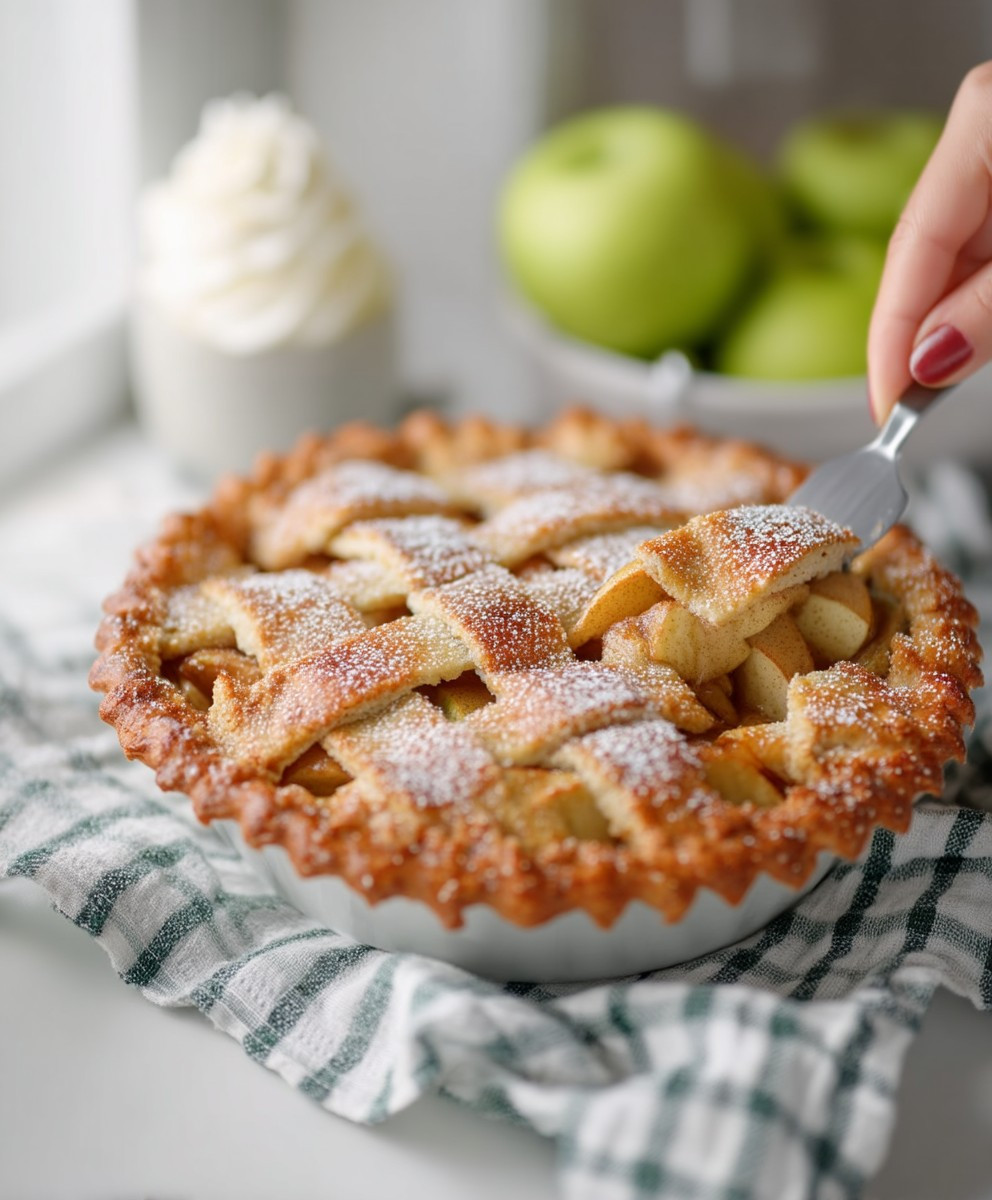
- Cool: Let the pie cool completely on a wire rack before slicing and serving. This is important! If you cut into the pie while it’s still hot, the filling will be runny. Cooling allows the filling to set and thicken.
Tips for Success:
- Keep everything cold! Cold butter and shortening are essential for a flaky crust.
- Don’t overmix the dough! Overmixing develops the gluten and results in a tough crust.
- Chill the dough! Chilling allows the gluten to relax and prevents the crust from shrinking during baking.
- Use a mix of apple varieties! This adds complexity and depth of flavor to the filling.
- Don’t be afraid to experiment! Add your own personal touch to the recipe by using different spices or toppings.
Serving Suggestions:
- Serve warm with a scoop of vanilla ice cream or a dollop of whipped cream.
- Pair with a cup of coffee or tea.
- Enjoy as a dessert for any occasion!
Conclusion:
And there you have it! This isn’t just any apple pie recipe; it’s a journey back to simpler times, a warm hug on a chilly day, and a guaranteed crowd-pleaser all rolled into one delicious dessert. From the perfectly spiced apple filling, bursting with the flavors of cinnamon, nutmeg, and a hint of lemon, to the flaky, golden-brown crust that practically melts in your mouth, this apple pie is truly something special. I’ve poured my heart and soul into perfecting this recipe, and I genuinely believe it’s the best you’ll ever taste.
But why is this recipe a must-try? It’s more than just the sum of its parts. It’s the feeling of accomplishment you get from creating something beautiful and delicious from scratch. It’s the joy of sharing it with loved ones and seeing their faces light up with every bite. It’s the comforting aroma that fills your home, creating a warm and inviting atmosphere. And, let’s be honest, it’s the sheer, unadulterated pleasure of indulging in a slice of homemade apple pie.
Serving Suggestions and Variations
Now, let’s talk about how you can take this apple pie to the next level. While it’s absolutely divine on its own, a scoop of vanilla ice cream or a dollop of freshly whipped cream elevates it to pure dessert perfection. For a touch of sophistication, try pairing it with a sharp cheddar cheese – the salty and sweet combination is surprisingly delightful.
Feeling adventurous? Here are a few variations you might want to explore:
* Caramel Apple Pie: Drizzle caramel sauce over the apples before baking for an extra layer of sweetness and richness.
* Cranberry Apple Pie: Add a cup of fresh or frozen cranberries to the apple filling for a tart and festive twist.
* Dutch Apple Pie: Top the pie with a buttery streusel topping instead of a traditional crust.
* Apple Crumble Pie: Combine the best of both worlds by using a crumble topping over a bottom pie crust.
* Spiced Apple Pie: Increase the amount of cinnamon, nutmeg, and add a pinch of cloves for a warmer, spicier flavor profile.
Don’t be afraid to experiment and make this recipe your own! Try different types of apples, add nuts or dried fruit to the filling, or even use a different type of crust. The possibilities are endless!
Time to Bake!
I truly hope you’ll give this recipe a try. I’m confident that you’ll love it as much as I do. It’s the perfect dessert for any occasion, from a casual weeknight dinner to a special holiday gathering. And remember, baking is all about having fun and creating something delicious, so don’t be afraid to get your hands dirty and enjoy the process.
Once you’ve baked your own masterpiece, I’d absolutely love to hear about your experience! Share your photos and stories in the comments below. Did you make any variations? What did your family and friends think? Your feedback is invaluable, and it helps me continue to improve and share even more delicious recipes with you. So, go ahead, preheat your oven, gather your ingredients, and get ready to bake the best apple pie of your life! Happy baking!
Apple Pie: The Ultimate Guide to Baking the Perfect Pie
Classic homemade apple pie with a flaky, buttery crust and a sweet, spiced apple filling. Perfect for any occasion!
Ingredients
Instructions
Recipe Notes
- Keep everything cold! Cold butter and shortening are essential for a flaky crust.
- Don’t overmix the dough! Overmixing develops the gluten and results in a tough crust.
- Chill the dough! Chilling allows the gluten to relax and prevents the crust from shrinking during baking.
- Use a mix of apple varieties! This adds complexity and depth of flavor to the filling.
- Don’t be afraid to experiment! Add your own personal touch to the recipe by using different spices or toppings.
- Serve warm with a scoop of vanilla ice cream or a dollop of whipped cream.
- Pair with a cup of coffee or tea.
- Enjoy as a dessert for any occasion!
Leave a Comment