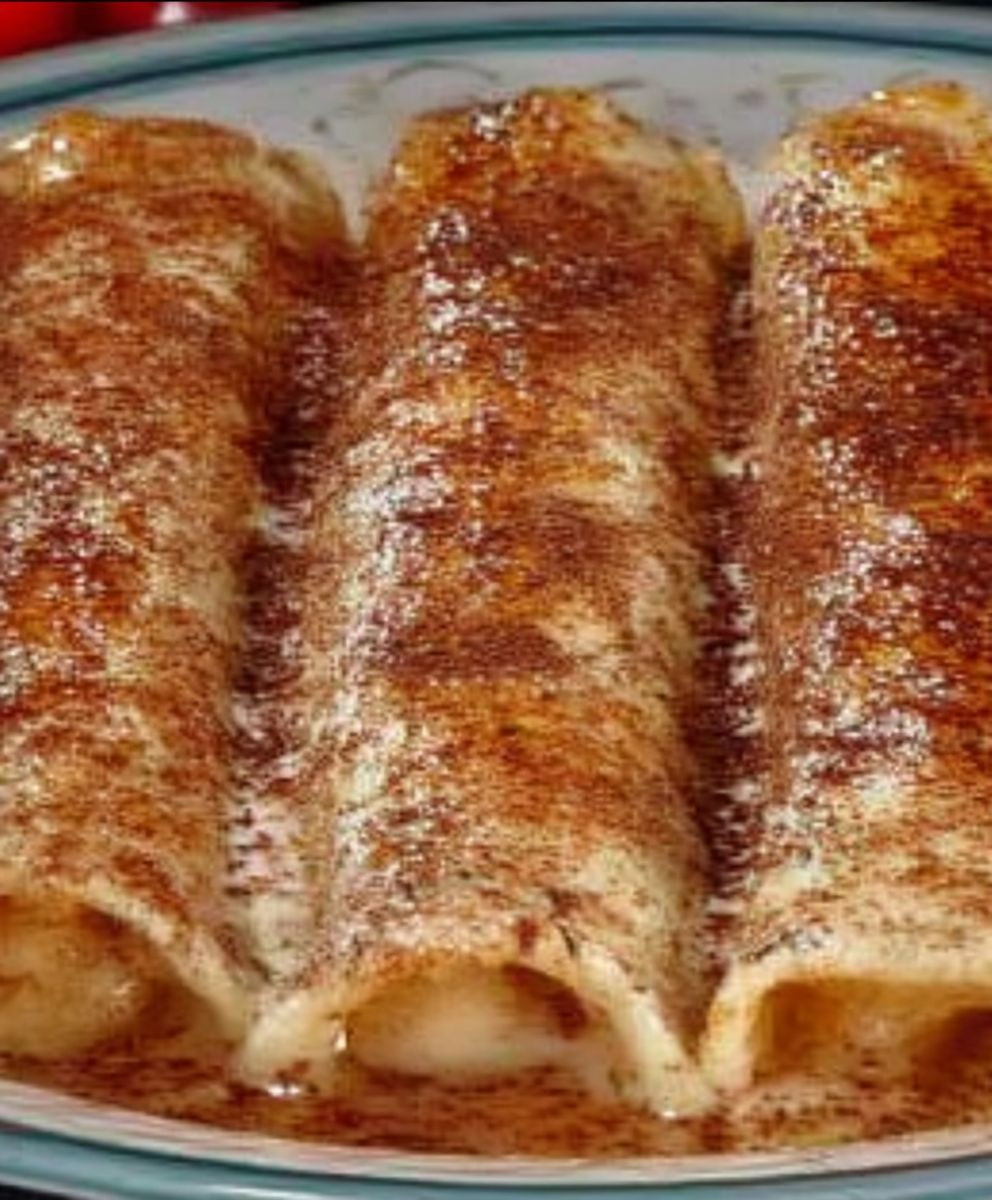
Apple Enchiladas: Prepare to be amazed! Imagine biting into a warm, cinnamon-spiced apple filling, nestled inside a soft tortilla, and drizzled with a creamy, sweet sauce. Sounds divine, right? This isn’t your typical savory enchilada; it’s a dessert sensation that will redefine your perception of Mexican-inspired cuisine.
While the exact origins of Apple Enchiladas are debated, many believe this delightful treat emerged as a fusion of traditional Mexican flavors and American apple pie traditions. Think of it as a delicious cultural exchange, resulting in a dessert that’s both comforting and exciting.
What makes these enchiladas so irresistible? It’s the perfect balance of textures and tastes. The tender apples, infused with warm spices, provide a comforting sweetness, while the soft tortillas offer a pleasant chewiness. The creamy sauce adds a touch of richness that elevates the entire experience. Plus, they’re surprisingly easy to make, making them perfect for a weeknight dessert or a crowd-pleasing treat for your next gathering. Get ready to experience a dessert that’s both familiar and refreshingly unique!
Ingredients:
- 8 large Granny Smith apples, peeled, cored, and sliced into 1/4-inch thick pieces
- 1/2 cup granulated sugar
- 1/4 cup packed light brown sugar
- 2 tablespoons all-purpose flour
- 1 teaspoon ground cinnamon
- 1/2 teaspoon ground nutmeg
- 1/4 teaspoon ground cloves
- 1/4 cup water
- 1 tablespoon lemon juice
- 12 (6-inch) flour tortillas
- 1 cup heavy cream
- 1/2 cup milk
- 1/4 cup butter, melted
- 1/4 cup packed light brown sugar (for sauce)
- 1 teaspoon vanilla extract
- Pinch of salt
- Optional: Caramel sauce, chopped pecans, whipped cream for serving
Preparing the Apple Filling:
Okay, let’s get started with the heart of our apple enchiladas – the delicious apple filling! This is where all the magic happens, and trust me, your kitchen will smell absolutely divine.
- Combine the Apples and Sugars: In a large bowl, gently toss together the sliced apples, granulated sugar, and brown sugar. Make sure the apples are evenly coated with the sugars. This will help them release their juices and create a lovely, syrupy base for the filling.
- Add the Spices and Flour: Now, sprinkle the flour, cinnamon, nutmeg, and cloves over the apple mixture. Again, gently toss everything together until the apples are evenly coated. The flour will help thicken the filling as it cooks, and the spices will give it that warm, comforting apple pie flavor we all love.
- Cook the Apple Mixture: Pour the water and lemon juice into a large skillet or pot. Add the apple mixture to the skillet. Cook over medium heat, stirring occasionally, until the apples are tender and the sauce has thickened. This usually takes about 15-20 minutes. You’ll know it’s ready when the apples are easily pierced with a fork and the sauce is nice and glossy. Be careful not to overcook the apples, as you don’t want them to become mushy. We want them to hold their shape a bit.
- Let it Cool Slightly: Remove the skillet from the heat and let the apple filling cool slightly while you prepare the tortillas and the cream sauce. This will make it easier to handle the filling when you’re rolling the enchiladas.
Rolling the Enchiladas:
Now comes the fun part – assembling our apple enchiladas! This is where we transform those simple tortillas into something truly special.
- Preheat Oven: Preheat your oven to 350°F (175°C). This will ensure that the enchiladas bake evenly and the tortillas become nice and golden brown.
- Lightly Warm the Tortillas: You can lightly warm the tortillas in a microwave for about 15-20 seconds, or wrap them in a damp paper towel and microwave for a few seconds. This will make them more pliable and easier to roll without tearing.
- Fill the Tortillas: Spoon about 1/3 cup of the apple filling down the center of each tortilla. Don’t overfill them, or they’ll be difficult to roll and might burst open during baking.
- Roll the Enchiladas: Carefully roll up each tortilla tightly and place it seam-side down in a greased 9×13 inch baking dish. Arrange the enchiladas snugly in the dish.
Making the Cream Sauce:
The cream sauce is what really elevates these apple enchiladas to the next level. It adds a rich, creamy sweetness that perfectly complements the apple filling.
- Combine Ingredients: In a medium bowl, whisk together the heavy cream, milk, melted butter, brown sugar (for sauce), vanilla extract, and salt. Make sure everything is well combined and the sugar is dissolved.
- Pour Over Enchiladas: Pour the cream sauce evenly over the rolled enchiladas in the baking dish. Make sure the sauce covers all of the enchiladas.
Baking the Enchiladas:
Almost there! Now it’s time to bake our apple enchiladas to golden perfection.
- Bake: Bake in the preheated oven for 25-30 minutes, or until the enchiladas are golden brown and the sauce is bubbly. Keep an eye on them, as baking times may vary depending on your oven.
- Let Cool Slightly: Remove the baking dish from the oven and let the enchiladas cool slightly before serving. This will allow the sauce to thicken a bit and prevent you from burning your mouth!
Serving and Enjoying:
Finally, the moment we’ve all been waiting for – serving and enjoying our delicious apple enchiladas! This is where you can get creative and add your own personal touch.
- Serve Warm: Serve the apple enchiladas warm. They’re best enjoyed fresh out of the oven.
- Optional Toppings: Drizzle with caramel sauce, sprinkle with chopped pecans, or top with a dollop of whipped cream. These are all fantastic additions that will take your apple enchiladas to the next level. A scoop of vanilla ice cream is also a wonderful choice!
- Enjoy! Dig in and enjoy the warm, comforting flavors of these apple enchiladas. They’re perfect for a cozy night in, a holiday gathering, or any time you’re craving a sweet treat.
Tips and Variations:
Spice it up!
Add a pinch of cayenne pepper to the apple filling for a little kick.
Different Apples:
Feel free to experiment with different types of apples. Honeycrisp or Fuji apples would also work well.
Add Oats:
For a more textured filling, add 1/2 cup of rolled oats to the apple mixture.
Cream Cheese Filling:
Mix 4 ounces of softened cream cheese with 1/4 cup of powdered sugar and spread it on the tortillas before adding the apple filling for an extra creamy and tangy flavor.
Make Ahead:
You can assemble the enchiladas ahead of time and store them in the refrigerator for up to 24 hours before baking. Just add a few extra minutes to the baking time.
Freezing:
Baked apple enchiladas can be frozen for up to 2 months. Let them cool completely before wrapping them tightly in plastic wrap and then foil. Thaw in the refrigerator overnight before reheating in the oven.
Nut Allergy Alternative:
If you have a nut allergy, you can substitute the pecans with toasted sunflower seeds or omit them altogether.
Vegan Option:
To make these apple enchiladas vegan, use vegan butter, plant-based milk, and vegan heavy cream. You can also use agave nectar or maple syrup instead of brown sugar.
Gluten-Free Option:
Use gluten-free tortillas to make these enchiladas gluten-free.
Individual Servings:
Use smaller tortillas and bake the enchiladas in individual ramekins for a more elegant presentation.
Caramel Apple Enchiladas:
Use caramel candies instead of brown sugar in the apple filling for a caramel apple flavor.
Conclusion:
And there you have it! These Apple Enchiladas are truly a dessert revelation, a symphony of warm spices, tender apples, and comforting sweetness all wrapped up in a soft tortilla. I genuinely believe this recipe is a must-try because it’s more than just a dessert; it’s an experience. It’s the perfect balance of familiar flavors with a unique twist, making it a guaranteed crowd-pleaser for any occasion, from a cozy family dinner to a festive holiday gathering. The ease of preparation also makes it incredibly appealing – you don’t need to be a master baker to whip up these delightful treats.
But the best part? The versatility! While I’ve shared my go-to recipe, feel free to get creative and personalize it to your liking.
Serving Suggestions and Variations:
* Ice Cream Dream: Serve these warm Apple Enchiladas with a generous scoop of vanilla bean ice cream. The contrast between the warm enchiladas and the cold ice cream is simply divine. A drizzle of caramel sauce wouldn’t hurt either!
* Nutty Delight: Sprinkle some chopped pecans or walnuts over the enchiladas before baking for added texture and a nutty flavor. Toasted almonds would also be a fantastic addition.
* Spice It Up: If you’re a fan of a little heat, add a pinch of cayenne pepper to the apple filling for a subtle kick. It complements the sweetness beautifully.
* Cream Cheese Frosting: Instead of the cinnamon-sugar topping, consider a light cream cheese frosting for a richer, more decadent dessert.
* Caramel Apple Extravaganza: Drizzle with homemade or store-bought caramel sauce after baking and sprinkle with sea salt for a sweet and salty treat.
* Breakfast Enchiladas: Believe it or not, these can even be enjoyed for breakfast! Serve with a dollop of Greek yogurt and a sprinkle of granola for a satisfying and slightly healthier start to your day.
* Different Apples: Experiment with different apple varieties! Granny Smith apples will provide a tart contrast to the sweetness, while Honeycrisp apples offer a balanced flavor.
* Dairy-Free Option: Use dairy-free butter and a plant-based cream cheese alternative for the filling to make this recipe vegan-friendly.
I’m confident that once you try these Apple Enchiladas, they’ll become a staple in your dessert repertoire. They’re the perfect comfort food, easy to make, and endlessly customizable. I poured my heart into perfecting this recipe, and I truly believe it showcases the best of fall flavors.
So, what are you waiting for? Gather your ingredients, preheat your oven, and get ready to experience the magic of these incredible Apple Enchiladas. I can’t wait to hear what you think! Don’t forget to share your creations with me – tag me in your photos on social media and let me know what variations you tried. I’m always looking for new and exciting ways to enjoy this delightful dessert. Happy baking, and enjoy every delicious bite! I hope you find this **apple enchilada** recipe as delightful as I do!
Apple Enchiladas: A Delicious & Easy Dessert Recipe
Warm apple enchiladas filled with spiced apples and topped with a creamy sauce. Perfect for a cozy dessert!
Ingredients
Instructions
Recipe Notes
- Spice it up! Add a pinch of cayenne pepper to the apple filling for a little kick.
- Different Apples: Feel free to experiment with different types of apples. Honeycrisp or Fuji apples would also work well.
- Add Oats: For a more textured filling, add 1/2 cup of rolled oats to the apple mixture.
- Cream Cheese Filling: Mix 4 ounces of softened cream cheese with 1/4 cup of powdered sugar and spread it on the tortillas before adding the apple filling for an extra creamy and tangy flavor.
- Make Ahead: You can assemble the enchiladas ahead of time and store them in the refrigerator for up to 24 hours before baking. Just add a few extra minutes to the baking time.
- Freezing: Baked apple enchiladas can be frozen for up to 2 months. Let them cool completely before wrapping them tightly in plastic wrap and then foil. Thaw in the refrigerator overnight before reheating in the oven.
- Nut Allergy Alternative: If you have a nut allergy, you can substitute the pecans with toasted sunflower seeds or omit them altogether.
- Vegan Option: To make these apple enchiladas vegan, use vegan butter, plant-based milk, and vegan heavy cream. You can also use agave nectar or maple syrup instead of brown sugar.
- Gluten-Free Option: Use gluten-free tortillas to make these enchiladas gluten-free.
- Individual Servings: Use smaller tortillas and bake the enchiladas in individual ramekins for a more elegant presentation.
- Caramel Apple Enchiladas: Use caramel candies instead of brown sugar in the apple filling for a caramel apple flavor.


Leave a Comment