
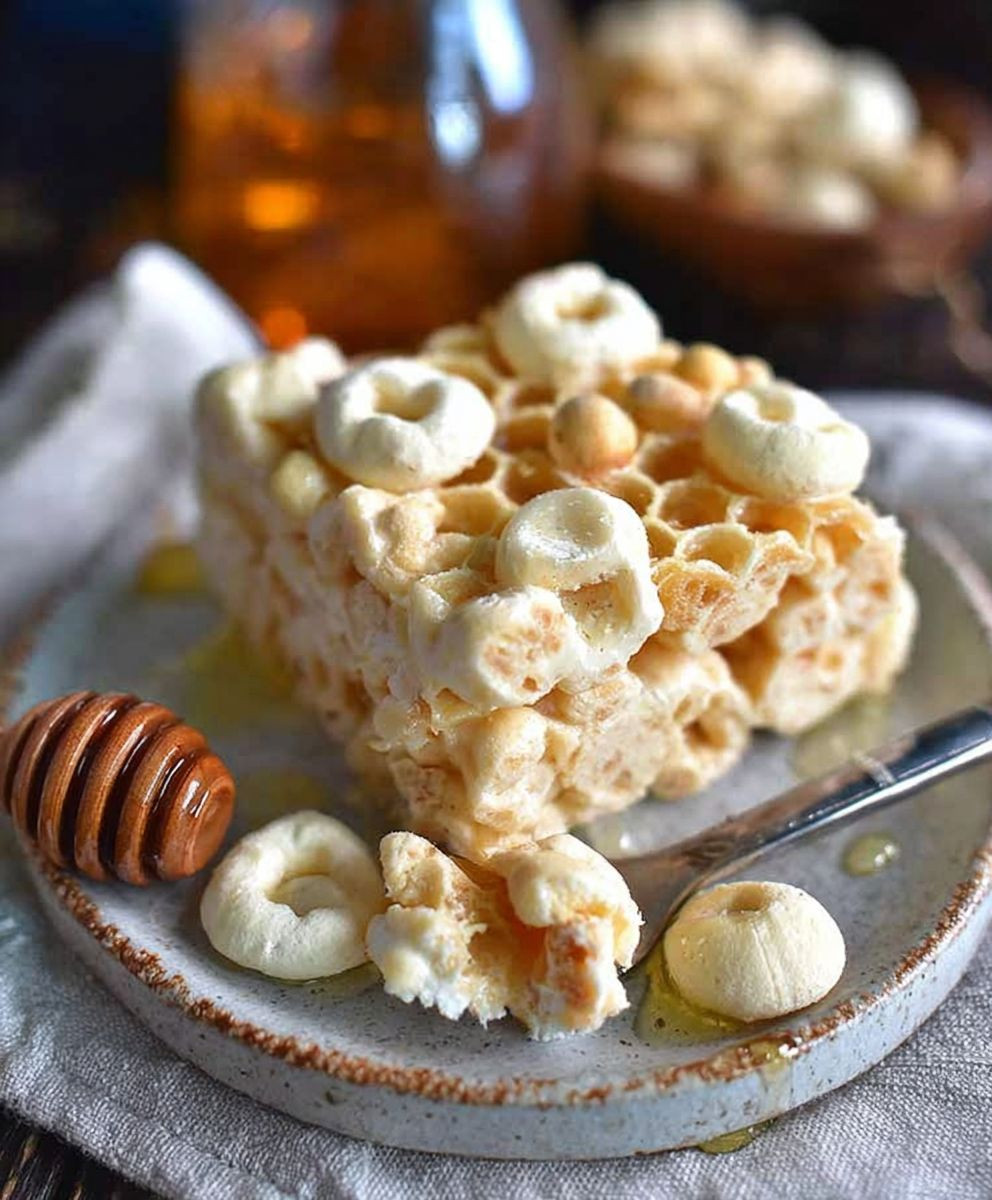
Honeycomb Marshmallow Treats: Prepare to be transported back to childhood with a grown-up twist on a classic favorite! Remember the satisfying crunch and melt-in-your-mouth sweetness of honeycomb candy? Now imagine that delightful flavor combined with the gooey, comforting goodness of marshmallow treats. This isn’t just a dessert; it’s a nostalgic journey in every bite.
Honeycomb candy, also known as seafoam candy or cinder toffee, has a fascinating history, with variations popping up in different cultures around the world. Its airy, bubbly texture and caramelized sugar flavor have captivated sweet tooths for generations. The unique texture comes from the chemical reaction between baking soda and sugar, creating those signature air pockets that make it so irresistible.
What makes these Honeycomb Marshmallow Treats so special? It’s the perfect balance of textures and flavors. The soft, chewy marshmallows provide a comforting base, while the crunchy honeycomb adds a delightful contrast. The caramelized sugar notes of the honeycomb elevate the classic marshmallow treat to a whole new level of sophistication. Plus, they’re incredibly easy to make, requiring minimal ingredients and effort. Whether you’re looking for a fun baking project with the kids or a quick and impressive dessert for a party, these treats are guaranteed to be a crowd-pleaser. Get ready to experience a symphony of sweetness and crunch!

Ingredients:
- 1/2 cup (1 stick) unsalted butter
- 1 package (10 oz) large marshmallows
- 6 cups crispy rice cereal
- 1 cup honeycomb cereal, crushed (plus extra for topping, optional)
- 1/4 teaspoon sea salt
- Vegetable oil spray, for greasing
Preparing the Marshmallow Mixture
Okay, let’s get started! The key to perfect Honeycomb Marshmallow Treats is getting that marshmallow mixture just right. It needs to be gooey, smooth, and perfectly melted. Trust me, I’ve made my fair share of sticky messes, so I’ve learned a few tricks along the way.
- Melt the Butter: In a large, heavy-bottomed saucepan, melt the butter over medium-low heat. Make sure you keep a close eye on it! You don’t want it to brown or burn. We’re aiming for melted and luscious.
- Add the Marshmallows: Once the butter is melted, add the entire package of marshmallows to the saucepan. Stir continuously with a spatula or wooden spoon. This is important! Constant stirring prevents the marshmallows from sticking to the bottom of the pan and burning.
- Melt the Marshmallows Slowly: Continue stirring until the marshmallows are completely melted and smooth. This might take a few minutes, so be patient. The mixture should be glossy and stretchy. If you’re finding it difficult to melt the marshmallows evenly, you can lower the heat even further. A low and slow approach is always best.
- Stir in the Salt: Once the marshmallows are fully melted, stir in the 1/4 teaspoon of sea salt. The salt helps to balance the sweetness of the marshmallows and adds a subtle depth of flavor. Don’t skip this step! It makes a big difference.
Combining the Cereals
Now for the fun part – adding the cereal! This is where the magic happens, and those classic marshmallow treats start to take shape. We’re using a combination of crispy rice cereal for that familiar texture and crushed honeycomb cereal for a burst of sweet, honey flavor.
- Remove from Heat: Take the saucepan off the heat. It’s important to do this before adding the cereal, as the residual heat will be enough to coat everything evenly without making the cereal soggy.
- Add the Crispy Rice Cereal: Pour the 6 cups of crispy rice cereal into the saucepan with the melted marshmallow mixture.
- Add the Crushed Honeycomb Cereal: Add the 1 cup of crushed honeycomb cereal to the saucepan as well. Make sure you crush the honeycomb cereal into smaller pieces before adding it. This will ensure that the honeycomb flavor is evenly distributed throughout the treats.
- Mix Thoroughly: Using a spatula or wooden spoon, gently but thoroughly mix the cereal and marshmallow mixture together. You want to make sure that all of the cereal is evenly coated with the marshmallow mixture. Be careful not to overmix, as this can make the treats tough. We’re aiming for a light and airy texture.
Pressing and Setting the Treats
Almost there! Now it’s time to press the mixture into a pan and let it set. This is where you can really customize the treats to your liking. You can make them thick or thin, depending on your preference. And don’t forget the optional honeycomb topping for an extra touch of sweetness and crunch!
- Prepare the Pan: Lightly grease a 9×13 inch baking pan with vegetable oil spray. This will prevent the marshmallow treats from sticking to the pan and make them easier to remove later. You can also line the pan with parchment paper, leaving an overhang on the sides, for even easier removal.
- Transfer the Mixture: Pour the cereal and marshmallow mixture into the prepared baking pan.
- Press Evenly: Using a spatula or your hands (lightly greased with vegetable oil spray), gently press the mixture evenly into the pan. You want to create a uniform layer of treats. Be careful not to press too hard, as this can make the treats dense.
- Add Optional Topping: If desired, sprinkle additional crushed honeycomb cereal over the top of the treats. This adds a nice visual appeal and an extra burst of honeycomb flavor.
- Let Set: Let the marshmallow treats set at room temperature for at least 30 minutes, or until they are firm to the touch. You can also speed up the setting process by placing the pan in the refrigerator for about 15-20 minutes.
Cutting and Serving
The moment we’ve all been waiting for – cutting and serving those delicious Honeycomb Marshmallow Treats! This is the final step, and it’s all about presentation and enjoying the fruits of your labor.
- Remove from Pan: Once the treats are set, remove them from the baking pan. If you lined the pan with parchment paper, simply lift the treats out using the overhang. Otherwise, you may need to loosen the edges with a spatula before inverting the pan.
- Cut into Squares: Using a sharp knife, cut the marshmallow treats into squares. You can cut them into any size you like, depending on your preference. I usually cut them into 2-inch squares, but feel free to get creative!
- Serve and Enjoy: Serve the Honeycomb Marshmallow Treats immediately and enjoy! These treats are best enjoyed fresh, but they can also be stored in an airtight container at room temperature for up to 2 days.
Tips for Success
- Don’t Overcook the Marshmallows: Overcooked marshmallows will result in hard, chewy treats. Keep the heat low and stir constantly to prevent burning.
- Use Fresh Marshmallows: Stale marshmallows won’t melt as smoothly and can affect the texture of the treats.
- Grease Everything: Greasing the pan, spatula, and your hands will prevent the marshmallow mixture from sticking and make the process much easier.
- Customize Your Treats: Feel free to add other mix-ins, such as chocolate chips, sprinkles, or nuts, to customize your treats to your liking.
Variations
- Chocolate Honeycomb Treats: Add 1/2 cup of chocolate chips to the marshmallow mixture for a chocolatey twist.
- Peanut Butter Honeycomb Treats: Stir in 1/4 cup of peanut butter to the marshmallow mixture for a nutty flavor.
- Sprinkled Honeycomb Treats: Decorate the top of the treats with colorful sprinkles for a festive look.
Conclusion:
So, there you have it! These Honeycomb Marshmallow Treats are truly something special, and I genuinely believe you need to experience the delightful crunch and chewy sweetness for yourself. They’re more than just a dessert; they’re a conversation starter, a nostalgic trip, and a guaranteed crowd-pleaser all rolled into one incredibly easy-to-make package.
Why is this recipe a must-try? Well, beyond the sheer deliciousness, it’s the unique textural contrast that sets it apart. The airy, melt-in-your-mouth marshmallow is perfectly complemented by the satisfying snap of the honeycomb candy. It’s a symphony of textures that will keep you coming back for more. Plus, let’s be honest, who can resist a treat that requires minimal effort but delivers maximum flavor? This recipe is perfect for those busy weeknights when you crave something sweet but don’t have hours to spend in the kitchen. It’s also a fantastic option for potlucks, bake sales, or even a fun activity to do with kids. They’ll love helping you crush the honeycomb and mix everything together!
But the best part? The possibilities are endless! While the original recipe is fantastic on its own, feel free to get creative and experiment with different variations. For a richer, more decadent treat, try using dark chocolate instead of milk chocolate. Or, if you’re feeling adventurous, add a sprinkle of sea salt to enhance the sweetness and create a delightful salty-sweet combination. You could also incorporate other mix-ins like chopped nuts, dried cranberries, or even mini chocolate chips.
Serving Suggestions: These treats are delicious served as is, but you can also elevate them with a few simple additions. Try drizzling them with melted white chocolate or dusting them with powdered sugar for a more elegant presentation. They also pair perfectly with a scoop of vanilla ice cream or a warm cup of coffee. For a fun twist, cut them into smaller squares and use them as toppings for cupcakes or brownies.
Variations to Explore:
* Peanut Butter Honeycomb Treats: Swirl in some peanut butter into the melted marshmallow mixture for a nutty and delicious twist.
* Salted Caramel Honeycomb Treats: Add a drizzle of salted caramel sauce on top of the finished treats for an extra layer of indulgence.
* Spiced Honeycomb Treats: Incorporate a pinch of cinnamon or nutmeg into the marshmallow mixture for a warm and cozy flavor.
* White Chocolate Raspberry Honeycomb Treats: Use white chocolate and add freeze-dried raspberries for a fruity and vibrant variation.
I’m so excited for you to try this recipe and discover the magic of Honeycomb Marshmallow Treats for yourself. I truly believe it will become a new favorite in your household.
So, what are you waiting for? Gather your ingredients, put on some music, and get ready to create something truly special. And most importantly, don’t forget to share your creations with me! I’d love to see your photos and hear about your experiences. Tag me on social media and let me know what variations you tried and how much you enjoyed them. Happy baking (or should I say, no-baking)! I can’t wait to see what you come up with! Let me know if you have any questions, and happy treat-making!
Honeycomb Marshmallow Treats: A Delicious & Easy Recipe
Crispy, gooey Honeycomb Marshmallow Treats! A fun twist on classic rice cereal treats with crushed honeycomb cereal for extra sweetness and crunch.
Ingredients
Instructions
Recipe Notes
- Don’t Overcook the Marshmallows: Overcooked marshmallows will result in hard, chewy treats. Keep the heat low and stir constantly to prevent burning.
- Use Fresh Marshmallows: Stale marshmallows won’t melt as smoothly and can affect the texture of the treats.
- Grease Everything: Greasing the pan, spatula, and your hands will prevent the marshmallow mixture from sticking and make the process much easier.
- Customize Your Treats: Feel free to add other mix-ins, such as chocolate chips, sprinkles, or nuts, to customize your treats to your liking.
Leave a Comment