
Reeses Peanut Butter Earthquake Cake: Prepare to have your dessert world rocked! Imagine a cake so decadent, so intensely peanut buttery, that it practically quakes with deliciousness. This isn’t your average bake sale offering; this is a showstopper, a conversation starter, and a guaranteed crowd-pleaser all rolled into one irresistible dessert.
While the exact origins of Earthquake Cake remain a bit of a sweet mystery, the concept of a “dump cake” – where ingredients are layered rather than mixed – has been around for generations. This particular variation, with its rich chocolate base, creamy peanut butter swirl, and gooey, molten center, elevates the humble dump cake to a whole new level of indulgence. It’s a testament to the enduring love affair between chocolate and peanut butter, a flavor combination that has captivated taste buds for decades.
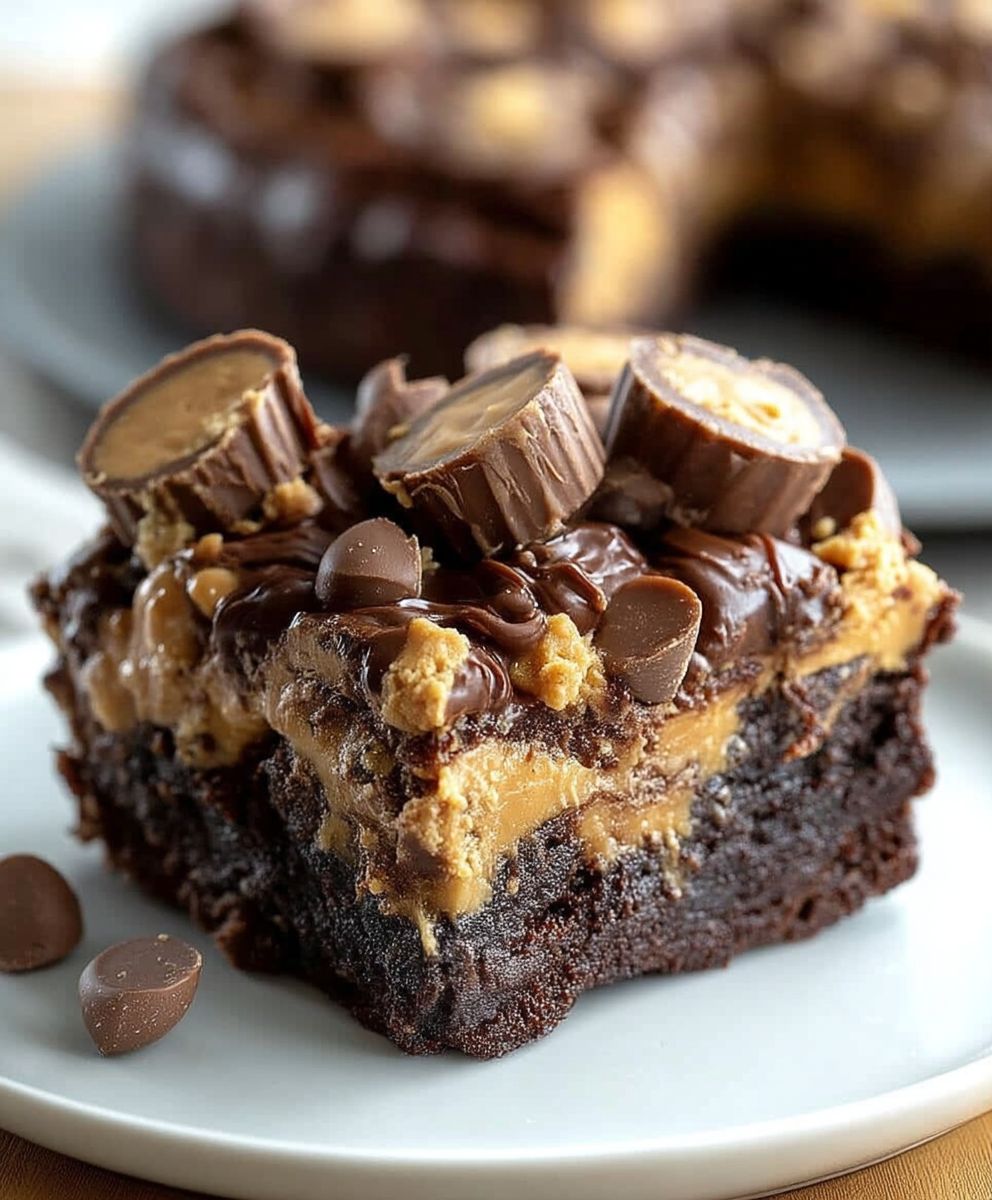
What makes this Reeses Peanut Butter Earthquake Cake so beloved? It’s the symphony of textures and tastes. The moist, fudgy cake base provides a comforting foundation, while the pockets of melted peanut butter chips and the creamy, cheesecake-like filling create an explosion of flavor in every bite. Plus, let’s be honest, the sheer ease of preparation is a major draw. With minimal effort and readily available ingredients, you can whip up a dessert that tastes like it took hours to create. It’s the perfect recipe for busy weeknights, potlucks, or any occasion that calls for a truly unforgettable treat. Get ready to experience a dessert that’s as fun to make as it is to devour!
Ingredients:
- 1 box (18.25 ounces) chocolate cake mix
- 1 cup water
- 1/2 cup vegetable oil
- 3 large eggs
- 1 cup creamy peanut butter
- 1 1/2 cups powdered sugar
- 8 ounces cream cheese, softened
- 1/2 cup butter, softened
- 1 teaspoon vanilla extract
- 1 jar (12 ounces) hot fudge topping
- 1 cup Reese’s Peanut Butter Cups, coarsely chopped
Preparing the Cake Batter:
- First, preheat your oven to 350°F (175°C). Grease and flour a 9×13 inch baking pan. This will prevent the cake from sticking and make it easier to remove after baking. I like to use a baking spray that contains flour for extra insurance.
- In a large mixing bowl, combine the chocolate cake mix, water, vegetable oil, and eggs. Use an electric mixer to beat the ingredients together until well combined. Start on low speed to prevent the dry ingredients from flying everywhere, then increase to medium speed and beat for about 2 minutes. The batter should be smooth and lump-free.
- Pour the cake batter into the prepared baking pan, spreading it evenly. Set aside while you prepare the peanut butter mixture.
Making the Peanut Butter Filling:
- In a separate large mixing bowl, combine the peanut butter, powdered sugar, cream cheese, softened butter, and vanilla extract. Use an electric mixer to beat these ingredients together until the mixture is smooth and creamy. This may take a few minutes, so be patient and scrape down the sides of the bowl as needed to ensure everything is well incorporated.
- Once the peanut butter mixture is ready, drop spoonfuls of it over the top of the chocolate cake batter in the pan. Try to distribute the peanut butter mixture evenly across the surface of the batter.
- Now comes the fun part! Use a knife or a skewer to swirl the peanut butter mixture into the chocolate cake batter. Don’t overmix; you want to create a marbled effect, not completely blend the two mixtures together. The goal is to create those “earthquake” cracks and crevices that give the cake its name.
Baking the Earthquake Cake:
- Carefully place the baking pan in the preheated oven and bake for 35-40 minutes, or until a wooden skewer inserted into the center of the cake comes out with moist crumbs attached. Keep an eye on it, as baking times can vary depending on your oven.
- Once the cake is done, remove it from the oven and let it cool completely in the pan. This is important because the cake needs to set before you add the toppings. Cooling it completely will prevent the hot fudge from melting too much and making the cake soggy.
Adding the Toppings:
- After the cake has cooled completely, warm the hot fudge topping according to the package directions. This usually involves microwaving it for a short period of time. Be careful not to overheat it, as it can splatter.
- Pour the warmed hot fudge topping over the cooled cake, spreading it evenly. Make sure to cover the entire surface of the cake with a generous layer of hot fudge.
- Finally, sprinkle the coarsely chopped Reese’s Peanut Butter Cups over the hot fudge topping. The peanut butter cups add a delicious peanut butter flavor and a nice textural contrast to the cake.
- If you want to get extra fancy, you can drizzle some melted peanut butter over the top as well. Just melt a small amount of peanut butter in the microwave and drizzle it over the cake in a decorative pattern.
Serving and Storing:
- Cut the cake into squares and serve. This cake is rich and decadent, so a small piece is usually enough.
- Store any leftover cake in an airtight container in the refrigerator. The cake will stay fresh for up to 3-4 days.
- You can also freeze the cake for longer storage. Wrap individual slices in plastic wrap and then place them in a freezer-safe bag or container. The cake can be frozen for up to 2-3 months. Thaw the cake in the refrigerator before serving.
Tips and Variations:
- Cake Mix Options: While chocolate cake mix is the classic choice for this recipe, you can experiment with other flavors. Devil’s food cake mix, chocolate fudge cake mix, or even a yellow cake mix would all work well.
- Peanut Butter Variations: If you prefer chunky peanut butter, you can use that instead of creamy peanut butter in the filling. The added texture will give the cake a bit more crunch.
- Nut Allergies: If you have nut allergies, you can substitute the peanut butter with sunflower seed butter or another nut-free alternative. Just be sure to check the ingredients of all the products you use to ensure they are safe for your dietary needs.
- Adding Chocolate Chips: For an extra dose of chocolate, you can add chocolate chips to the cake batter or sprinkle them on top of the hot fudge topping along with the Reese’s Peanut Butter Cups.
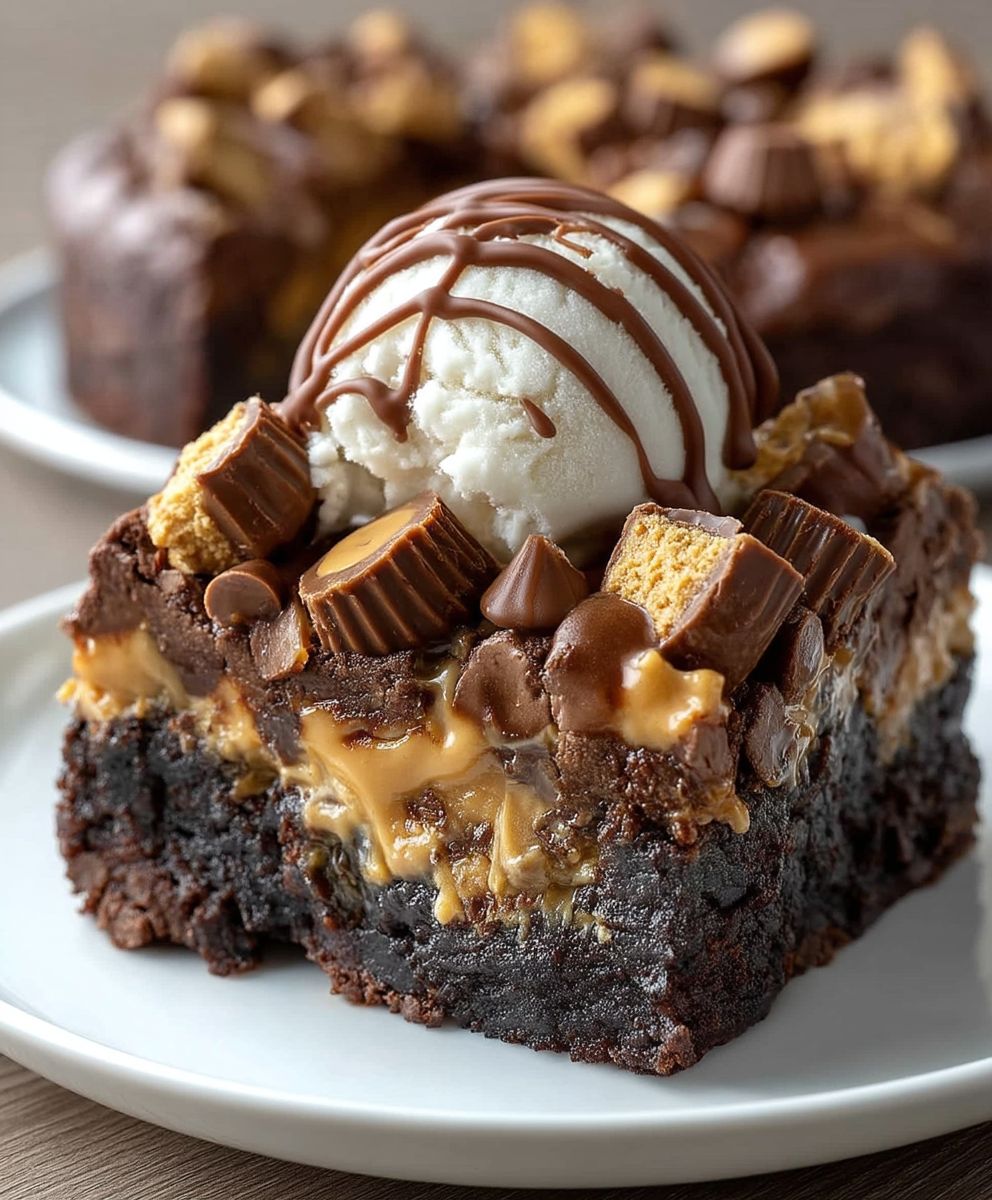
- Ice Cream Pairing: This cake is delicious on its own, but it’s even better when served with a scoop of vanilla ice cream or peanut butter ice cream. The cold ice cream complements the warm cake perfectly.
- Caramel Drizzle: A drizzle of caramel sauce over the top of the cake adds another layer of flavor and sweetness.
- Whipped Cream: A dollop of whipped cream on top of each slice of cake makes it even more decadent and indulgent.
- Make it Gluten-Free: Use a gluten-free chocolate cake mix to make this recipe gluten-free. Be sure to check the labels of all the other ingredients to ensure they are also gluten-free.
- Make it Dairy-Free: Use dairy-free cream cheese and butter substitutes to make this recipe dairy-free. You can also use a dairy-free hot fudge topping.
Enjoy your delicious Reese’s Peanut Butter Earthquake Cake!
Conclusion:
This Reese’s Peanut Butter Earthquake Cake isn’t just a dessert; it’s an experience. The fudgy, decadent base, the creamy peanut butter swirls, and the irresistible pockets of melted Reese’s cups create a symphony of flavors and textures that will have everyone begging for seconds. Trust me, this is one cake that lives up to its name – it’s an absolute earthquake of deliciousness in your mouth!
I know what you’re thinking: “Another cake recipe?” But believe me, this one is different. It’s incredibly easy to make, even for novice bakers, and the results are simply spectacular. The combination of the rich chocolate cake with the salty-sweet peanut butter is a classic for a reason, and this recipe elevates it to a whole new level. The best part? It’s a guaranteed crowd-pleaser, perfect for potlucks, birthday parties, or just a cozy night in.
But don’t just take my word for it! You absolutely must try this recipe for yourself. Imagine the look on your family’s faces when you present this masterpiece. Picture the satisfied sighs as they take their first bite. This cake is more than just a dessert; it’s a memory in the making.
And the fun doesn’t stop there! Feel free to get creative with your serving suggestions and variations. A scoop of vanilla ice cream or a dollop of whipped cream is the perfect complement to the rich cake. For an extra touch of decadence, drizzle some melted chocolate or peanut butter over the top. You could even add a sprinkle of chopped peanuts for added crunch.
Here are a few other ideas to customize your Reese’s Peanut Butter Earthquake Cake:
* Chocolate Lover’s Dream: Use a dark chocolate cake mix and add chocolate chips to the batter for an even richer chocolate experience.
* Peanut Butter Overload: Increase the amount of peanut butter swirl for an even more intense peanut butter flavor. You could even use different types of peanut butter, like crunchy or natural.
* Mini Earthquake Cakes: Bake the batter in muffin tins for individual servings. This is perfect for portion control or for a fun party treat.
* Caramel Craze: Drizzle caramel sauce over the top of the cake after it’s baked for a sweet and salty combination.
* Pretzel Perfection: Sprinkle crushed pretzels over the top of the cake for a salty and crunchy contrast to the sweetness.
No matter how you choose to serve it, I’m confident that this cake will be a hit. It’s the perfect combination of easy, delicious, and impressive.
So, what are you waiting for? Grab your ingredients, preheat your oven, and get ready to bake the most amazing cake you’ve ever tasted. I promise you won’t regret it.
And once you’ve made it, I’d love to hear about your experience! Share your photos and comments on social media using the hashtag #ReesesEarthquakeCake. Let me know what variations you tried and how much everyone loved it. I can’t wait to see your creations! Happy baking!
Reeses Peanut Butter Earthquake Cake: Recipe, Tips, and Delicious Variations
Chocolate cake swirled with peanut butter filling, topped with hot fudge and Reese's. A rich, delicious dessert!
Ingredients
Instructions
Recipe Notes
- Cake Mix Options: Devil’s food, chocolate fudge, or yellow cake mix can be used.
- Peanut Butter Variations: Chunky peanut butter can be used.
- Nut Allergies: Substitute peanut butter with sunflower seed butter.
- Extra Chocolate: Add chocolate chips to the batter or topping.
- Ice Cream Pairing: Serve with vanilla or peanut butter ice cream.
- Caramel Drizzle: Drizzle with caramel sauce.
- Whipped Cream: Top with whipped cream.
- Gluten-Free: Use gluten-free cake mix.
- Dairy-Free: Use dairy-free cream cheese, butter, and hot fudge.
- Storage: Store leftovers in an airtight container in the refrigerator for up to 3-4 days.
- Freezing: Wrap individual slices in plastic wrap and freeze for up to 2-3 months. Thaw in the refrigerator before serving.
Leave a Comment