
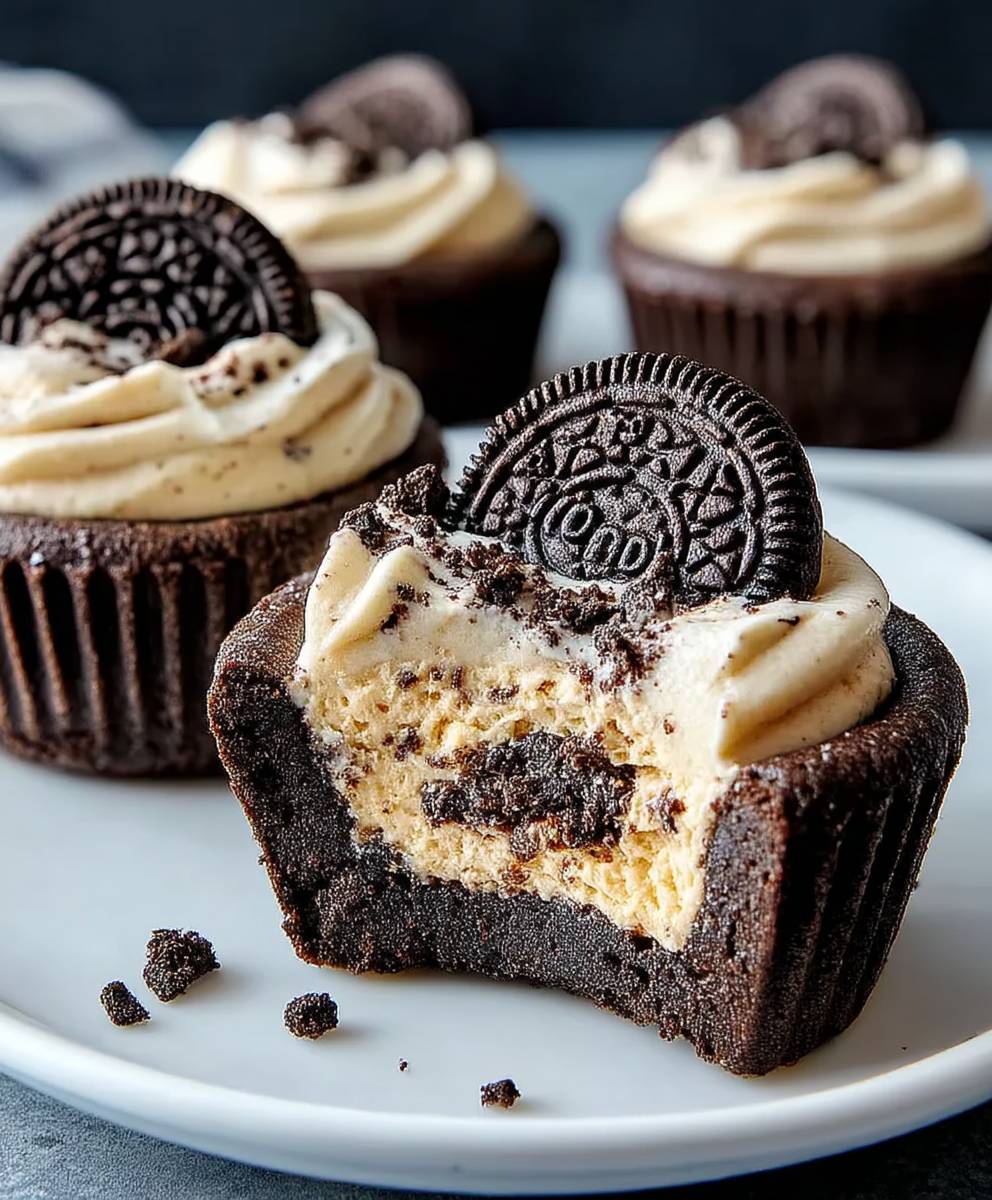
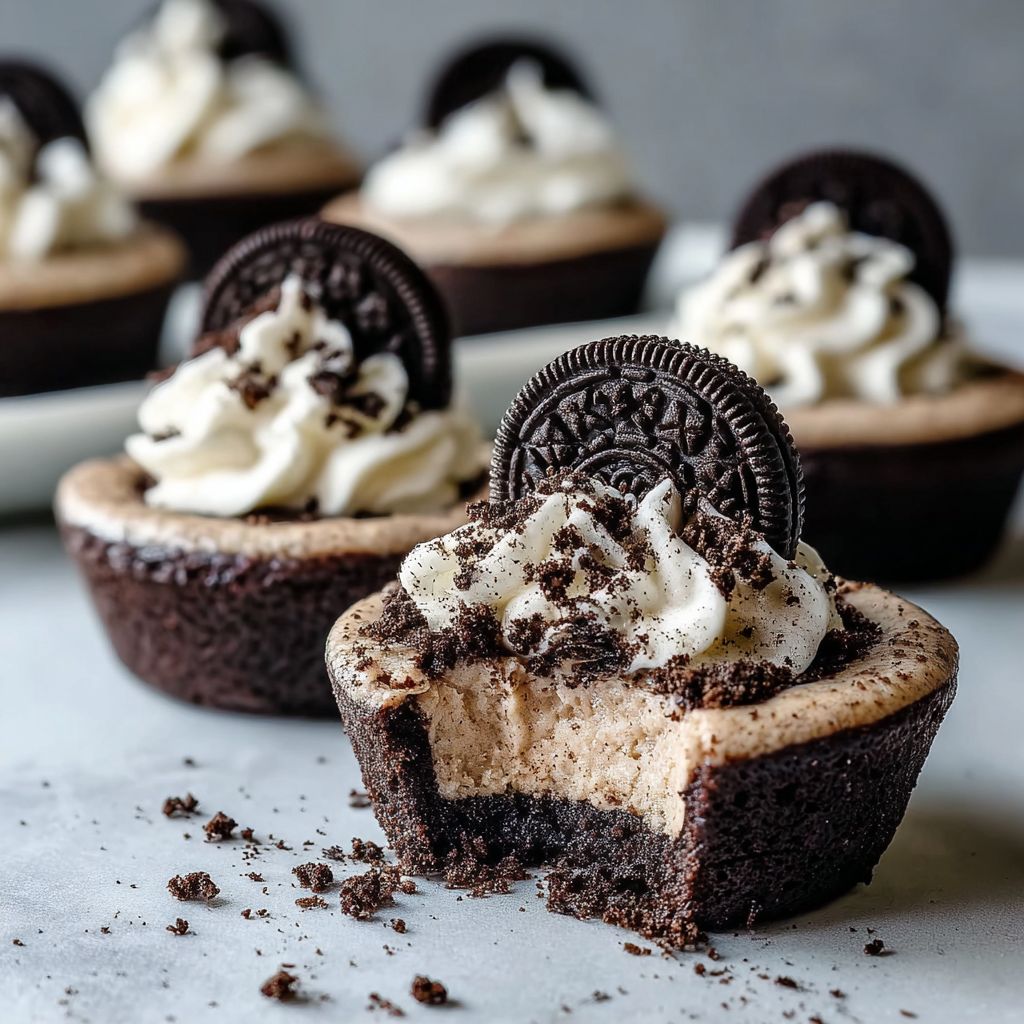
Oreo Cheesecake Cookie Cups: Prepare to be amazed! Imagine the rich, creamy decadence of cheesecake perfectly nestled inside a crisp, chocolatey Oreo cookie cup. It’s a dessert dream come true, and I’m thrilled to share this incredibly easy and utterly irresistible recipe with you.
While the exact origins of combining cheesecake and cookies in this miniature format are a bit of a modern mystery, the love for both cheesecake and Oreos is anything but! Cheesecake, with its smooth, tangy filling, has a history stretching back to ancient Greece. Oreos, on the other hand, are a relatively recent invention, but they’ve quickly become a global phenomenon, beloved for their iconic chocolate wafers and sweet cream filling.
What makes these Oreo Cheesecake Cookie Cups so popular? It’s the perfect marriage of textures and flavors. The crunchy cookie base provides a delightful contrast to the smooth, melt-in-your-mouth cheesecake filling. They’re also incredibly convenient – bite-sized and perfect for parties, potlucks, or simply a sweet treat after dinner. Plus, they’re surprisingly easy to make, requiring minimal baking time and ingredients. Get ready to impress your friends and family with these delightful little bites of heaven!
Ingredients:
- For the Oreo Cookie Base:
- 36 Oreo cookies, divided (about 1 package)
- 6 tablespoons unsalted butter, melted
- For the Cheesecake Filling:
- 2 (8 ounce) packages cream cheese, softened to room temperature
- ¾ cup granulated sugar
- 2 large eggs
- 1 teaspoon vanilla extract
- ¼ cup heavy cream
- Pinch of salt
- For the Oreo Garnish (optional):
- 6 Oreo cookies, quartered
Preparing the Oreo Cookie Base:
- Crush the Oreos: The first step is to separate 24 of the Oreo cookies. Scrape out the cream filling from these 24 cookies and set the filling aside in a small bowl. We’ll use this later! Place the cookie wafers into a food processor and pulse until they are finely ground into crumbs. If you don’t have a food processor, you can place the cookies in a large zip-top bag and crush them with a rolling pin. Just make sure they are finely crushed for the best base.
- Combine Crumbs and Butter: In a medium bowl, combine the Oreo cookie crumbs and the melted butter. Mix well until the crumbs are evenly moistened. The mixture should resemble wet sand. This is what will hold our cookie base together.
- Prepare the Muffin Tin: Line a 12-cup muffin tin with paper liners. This makes removing the cookie cups much easier and prevents them from sticking. If you don’t have paper liners, you can grease the muffin tin very well with cooking spray.
- Press the Cookie Base: Place about 1 ½ to 2 tablespoons of the Oreo crumb mixture into each muffin liner. Use the bottom of a measuring cup or a small glass to firmly press the crumbs into an even layer at the bottom of each liner. This creates a solid base for the cheesecake filling. Make sure you press firmly so the base doesn’t crumble when you take them out.
- Pre-bake the Base (Optional): For a firmer base, you can pre-bake the Oreo crusts in a preheated oven at 350°F (175°C) for about 5 minutes. This step is optional, but it helps to prevent the crust from becoming soggy. Let the crusts cool slightly while you prepare the cheesecake filling.
Making the Cheesecake Filling:
- Beat the Cream Cheese: In a large bowl, using an electric mixer (either a stand mixer or a hand mixer), beat the softened cream cheese until it is smooth and creamy. This is a crucial step! Make sure your cream cheese is at room temperature, otherwise you’ll end up with lumps in your filling. Beat it for a good 2-3 minutes until it’s light and fluffy.
- Add Sugar: Gradually add the granulated sugar to the cream cheese, beating on medium speed until well combined. Be careful not to over-beat at this stage, as it can incorporate too much air into the filling.
- Incorporate the Eggs: Add the eggs one at a time, beating well after each addition. Again, avoid over-mixing. Just beat until the eggs are fully incorporated. Over-mixing can lead to cracks in the cheesecake during baking.
- Add Vanilla and Heavy Cream: Stir in the vanilla extract, heavy cream, and the pinch of salt. Mix until just combined. The heavy cream adds richness and helps to create a smooth and creamy texture.
- Incorporate Reserved Oreo Filling: Remember that Oreo filling we set aside earlier? Now’s the time to add it to the cheesecake batter! Gently fold the reserved Oreo filling into the cheesecake batter until it’s evenly distributed. This adds extra Oreo flavor to the filling.
- Prepare Remaining Oreos: Chop the remaining 12 Oreo cookies into small pieces. Gently fold these Oreo pieces into the cheesecake batter. This will give the cheesecake filling a nice Oreo crunch and visual appeal.
Assembling and Baking the Cookie Cups:
- Fill the Muffin Liners: Spoon the cheesecake filling evenly into each muffin liner, filling them almost to the top. Don’t overfill them, as they may puff up during baking and overflow.
- Bake the Cookie Cups: Bake in a preheated oven at 325°F (160°C) for 20-25 minutes, or until the edges are set and the centers are just slightly jiggly. The baking time may vary depending on your oven, so keep a close eye on them.
- Cooling Process: Turn off the oven and crack the oven door slightly. Let the cookie cups cool in the oven for about 30 minutes. This helps to prevent them from cracking as they cool.
- Refrigerate: Remove the cookie cups from the oven and let them cool completely at room temperature. Then, transfer them to the refrigerator and chill for at least 2 hours, or preferably overnight. This allows the cheesecake filling to set completely and develop its flavor.
Garnishing and Serving:
- Garnish (Optional): Before serving, garnish the Oreo cheesecake cookie cups with quartered Oreo cookies. This adds a nice finishing touch and enhances the Oreo flavor. You can also drizzle with melted chocolate or sprinkle with Oreo crumbs.
- Serving: Carefully remove the cookie cups from the muffin liners and arrange them on a serving platter. Serve chilled and enjoy! These Oreo cheesecake cookie cups are perfect for parties, potlucks, or any occasion where you want a delicious and easy-to-eat dessert.
Tips for Success:
- Room Temperature Ingredients: Make sure your cream cheese and eggs are at room temperature for a smooth and creamy filling.
- Don’t Over-mix: Avoid over-mixing the cheesecake filling, as this can incorporate too much air and cause the cookie cups to crack during baking.
- Cooling is Key: The slow cooling process in the oven helps to prevent cracking.
- Chill Thoroughly: Chilling the cookie cups for at least 2 hours allows the filling to set completely and develop its flavor.
- Variations: Feel free to experiment with different Oreo flavors or add other toppings, such as chocolate chips, caramel sauce, or fresh berries.
Storage Instructions:
- Store leftover Oreo cheesecake cookie cups in an airtight container in the refrigerator for up to 3-4 days.
- You can also freeze the cookie cups for longer storage. Wrap them individually in plastic wrap and then place them in a freezer-safe bag or container. They can be frozen for up to 2-3 months. Thaw them in the refrigerator before serving.
Conclusion:
These Oreo Cheesecake Cookie Cups are truly irresistible, and I wholeheartedly believe they deserve a spot on your baking roster. They’re the perfect trifecta of textures and flavors: the crisp, chocolatey Oreo base, the creamy, tangy cheesecake filling, and the delightful Oreo crumble topping. What’s not to love? This isn’t just another dessert; it’s a miniature masterpiece that’s guaranteed to impress your friends, family, or even just yourself (because let’s be honest, we all deserve a little treat now and then!).
But beyond the sheer deliciousness, what makes these cookie cups a must-try is their versatility. They’re incredibly easy to customize to your liking. Feeling adventurous? Try adding a swirl of caramel or a dollop of chocolate ganache on top. Want to make them even more festive? Sprinkle some colorful sprinkles or edible glitter for a touch of sparkle. For a more sophisticated flavor profile, consider using different flavored Oreos, like peanut butter or mint. The possibilities are truly endless!
Serving Suggestions and Variations:
* For a party: These cookie cups are the perfect bite-sized treat for any gathering. Arrange them beautifully on a platter for an elegant dessert display.
* As a gift: Package them in a cute box or tin for a thoughtful and homemade gift.
* Individual desserts: Enjoy them straight from the fridge for a refreshing and satisfying dessert.
* Warm them up: For an extra indulgent experience, warm them slightly in the microwave for a few seconds. The cheesecake filling will become even creamier and more decadent.
* Add fruit: Top with fresh berries, such as strawberries, raspberries, or blueberries, for a burst of freshness and color.
* Chocolate drizzle: Drizzle with melted white or dark chocolate for an extra layer of flavor and visual appeal.
* Nutty crunch: Sprinkle with chopped nuts, such as pecans, walnuts, or almonds, for added texture and flavor.
* Seasonal variations: Adapt the recipe to different seasons by using seasonal ingredients, such as pumpkin spice Oreos in the fall or peppermint Oreos during the holidays.
I’ve poured my heart into perfecting this recipe, and I’m confident that you’ll love it as much as I do. The combination of the crunchy Oreo cookie base, the smooth and creamy cheesecake filling, and the satisfying Oreo crumble topping is simply divine. It’s a dessert that’s both easy to make and incredibly impressive, making it perfect for any occasion.
So, what are you waiting for? Grab your ingredients, preheat your oven, and get ready to bake up a batch of these amazing Oreo Cheesecake Cookie Cups. I promise you won’t regret it! And once you’ve tried them, I’d love to hear about your experience. Share your photos and comments on social media using #OreoCheesecakeCookieCups or tag me in your posts. I can’t wait to see your creations and hear what you think! Happy baking!
Oreo Cheesecake Cookie Cups: The Ultimate Dessert Recipe
Creamy cheesecake filling baked in an Oreo cookie crust. Easy to make, perfect for parties or a sweet treat.
Ingredients
Instructions
Recipe Notes
- Make sure cream cheese and eggs are at room temperature.
- Avoid over-mixing the cheesecake filling.
- The slow cooling process in the oven helps to prevent cracking.
- Chilling the cookie cups for at least 2 hours allows the filling to set completely and develop its flavor.
- Feel free to experiment with different Oreo flavors or add other toppings, such as chocolate chips, caramel sauce, or fresh berries.
- Store leftover Oreo cheesecake cookie cups in an airtight container in the refrigerator for up to 3-4 days.
- You can also freeze the cookie cups for longer storage. Wrap them individually in plastic wrap and then place them in a freezer-safe bag or container. They can be frozen for up to 2-3 months. Thaw them in the refrigerator before serving.
Leave a Comment