
Frozen Smores, a delightful twist on the classic campfire treat, are about to become your new favorite dessert! Imagine sinking your teeth into a creamy, cool, and utterly irresistible bite that perfectly captures the essence of summer. Forget the sticky fingers and smoky aroma – although we love those too! – this no-bake version offers all the nostalgic flavors of graham crackers, chocolate, and marshmallow in a refreshing, freezer-friendly package.
S’mores, as we know them, have a surprisingly recent history, with the first recorded recipe appearing in a Girl Scout guidebook in the 1920s. But the combination of roasted marshmallows and chocolate sandwiched between graham crackers quickly captured hearts and became a beloved tradition around campfires across America. Now, we’re taking that tradition to a whole new level!
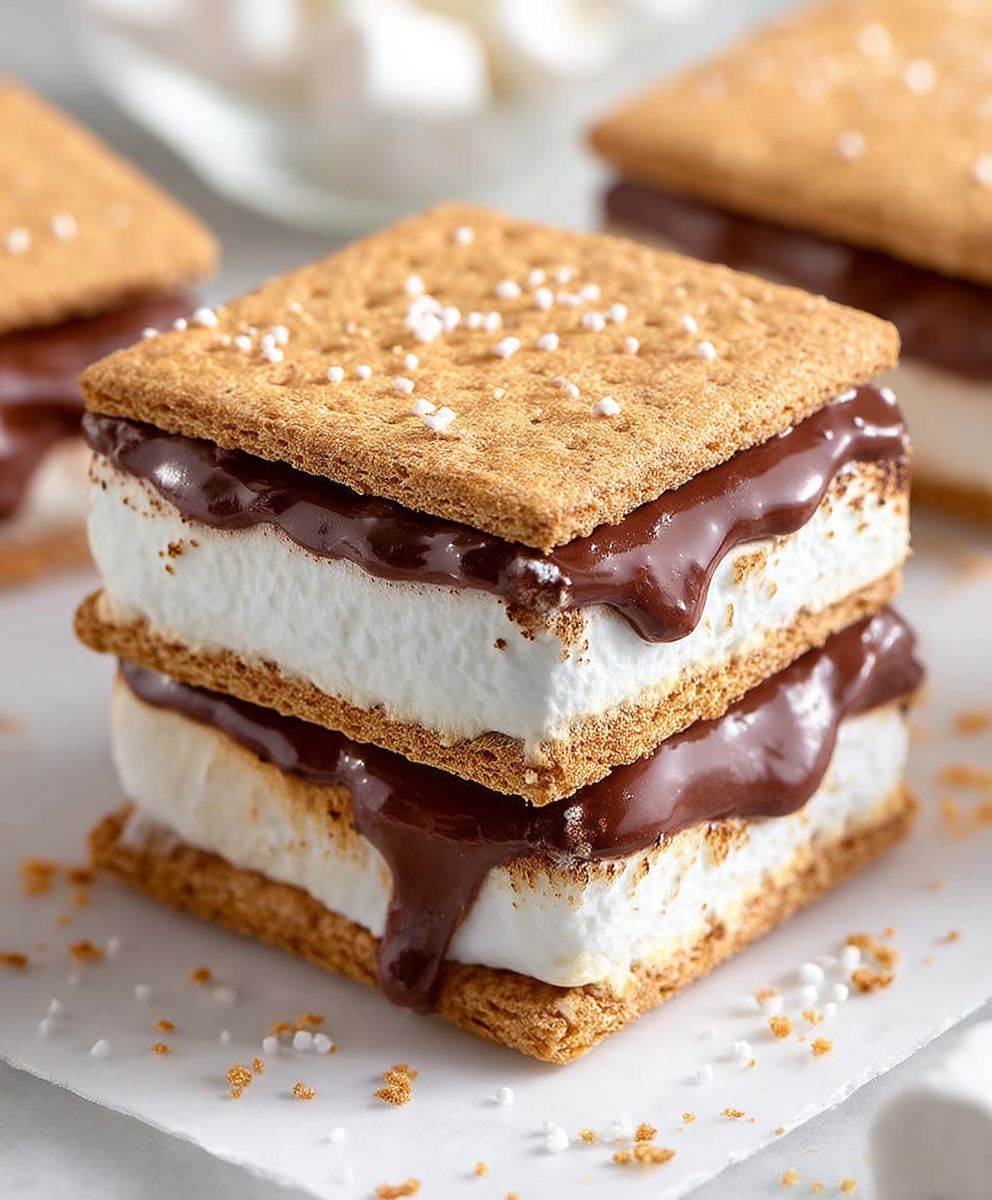
What makes Frozen Smores so irresistible? It’s the perfect marriage of textures and temperatures. The crisp graham cracker crust provides a satisfying crunch, while the creamy, marshmallow-infused filling melts in your mouth. The rich chocolate ganache adds a decadent touch that elevates this dessert from simple to sublime. Plus, they’re incredibly convenient! Make them ahead of time and have a batch ready to go whenever a sweet craving strikes. Whether you’re hosting a summer barbecue, need a quick and easy dessert for a potluck, or simply want to treat yourself, these frozen delights are guaranteed to be a crowd-pleaser. Get ready to experience s’mores in a whole new, deliciously chilled way!
Ingredients:
- 1 (14.3 ounce) package chocolate sandwich cookies, such as Oreos
- 6 tablespoons unsalted butter, melted
- 1 (16 ounce) package large marshmallows
- 2 tablespoons milk
- 1 teaspoon vanilla extract
- 1/4 teaspoon salt
- 1 (12 ounce) package semi-sweet chocolate chips
- 1/4 cup heavy cream
- Optional: Graham cracker crumbs for garnish
Preparing the Cookie Base:
Okay, let’s get started with the foundation of our Frozen S’mores – the cookie base! This part is super easy and gives us that delicious, familiar Oreo crunch.
- Crush the Cookies: First things first, we need to crush those chocolate sandwich cookies. You have a couple of options here. You can use a food processor for a really fine crumb, which is what I usually do. Just pulse them until they’re uniformly crushed. If you don’t have a food processor, no worries! Place the cookies in a large zip-top bag, seal it tightly, and use a rolling pin or even the bottom of a heavy pan to crush them into crumbs. Aim for a consistency similar to coarse sand.
- Melt the Butter: Now, melt the butter. You can do this in the microwave in a microwave-safe bowl. Just heat it in 30-second intervals, stirring in between, until it’s completely melted. Alternatively, you can melt it in a small saucepan over low heat on the stovetop. Just keep an eye on it so it doesn’t burn.
- Combine and Press: In a medium bowl, combine the crushed cookie crumbs and the melted butter. Mix them together really well until the crumbs are evenly moistened. The mixture should resemble wet sand. Now, grab an 8×8 inch baking dish. I like to line mine with parchment paper, leaving an overhang on the sides. This makes it super easy to lift the frozen s’mores out later. Press the cookie crumb mixture firmly and evenly into the bottom of the prepared baking dish. I use the bottom of a measuring cup to really pack it down. You want a nice, solid base.
- Chill the Base: Place the baking dish in the freezer while we prepare the marshmallow layer. This will help the cookie base set up and prevent it from getting soggy. We want it nice and firm!
Making the Marshmallow Filling:
Next up, the star of the show – the gooey, delicious marshmallow filling! This is where the magic happens, and it’s surprisingly simple to make.
- Melt the Marshmallows: In a large, microwave-safe bowl, combine the marshmallows, milk, vanilla extract, and salt. Microwave on high for 1 minute, then stir well. If the marshmallows aren’t completely melted, microwave for another 30 seconds, and stir again. Continue microwaving in 15-second intervals, stirring each time, until the marshmallows are smooth and completely melted. Be careful not to overheat them, as they can become hard and rubbery.
- Cool Slightly: Let the melted marshmallow mixture cool slightly for a few minutes. This will help it thicken up a bit and prevent it from melting the chocolate chips later.
- Pour and Spread: Remove the baking dish from the freezer. Pour the melted marshmallow mixture over the chilled cookie base. Spread it evenly to cover the entire base. I like to use an offset spatula for this, but a regular spoon or even a butter knife will work just fine.
- Freeze Again: Return the baking dish to the freezer and freeze for at least 2 hours, or until the marshmallow layer is firm to the touch. You want it to be solid enough to hold its shape when we add the chocolate topping.
Creating the Chocolate Ganache Topping:
Now for the final touch – the rich, decadent chocolate ganache topping! This adds that perfect chocolatey goodness that complements the marshmallow and cookie layers perfectly.
- Heat the Cream: In a small saucepan, heat the heavy cream over medium heat until it just begins to simmer. You don’t want it to boil, just gently simmer. If you prefer, you can also heat the cream in the microwave in a microwave-safe bowl. Heat it in 30-second intervals, stirring in between, until it’s hot but not boiling.
- Melt the Chocolate: Place the semi-sweet chocolate chips in a heat-proof bowl. Pour the hot heavy cream over the chocolate chips. Let it sit for about a minute to allow the heat to melt the chocolate.
- Stir Until Smooth: Gently stir the chocolate and cream together until the chocolate is completely melted and the ganache is smooth and glossy. If the chocolate doesn’t melt completely, you can microwave the mixture in 15-second intervals, stirring each time, until it’s smooth.
- Pour and Spread: Remove the baking dish from the freezer. Pour the chocolate ganache over the frozen marshmallow layer. Spread it evenly to cover the entire surface. Again, an offset spatula works great for this, but any utensil will do.
- Optional Garnish: If you want to add a little extra flair, sprinkle some graham cracker crumbs over the chocolate ganache while it’s still wet. This adds a nice textural element and reinforces the s’mores theme.
- Final Freeze: Return the baking dish to the freezer and freeze for at least 1 hour, or until the chocolate ganache is firm. This will ensure that the entire dessert is solid and easy to cut.
Cutting and Serving:
The moment we’ve all been waiting for – cutting and serving our Frozen S’mores! This is the easiest part, and the reward is well worth the wait.
- Lift and Cut: Remove the baking dish from the freezer. If you lined the dish with parchment paper, use the overhang to lift the frozen s’mores out of the dish. Place it on a cutting board. Use a large, sharp knife to cut the frozen s’mores into squares or rectangles. I usually cut them into about 2-inch squares, but you can make them any size you like. If the knife is sticking, try running it under hot water for a few seconds and then drying it before each cut.
- Serve Immediately: Serve the Frozen S’mores immediately. They’re best enjoyed straight from the freezer, while the marshmallow is still slightly soft and the chocolate is firm.
- Storage: If you have any leftovers (which is unlikely!), store them in an airtight container in the freezer. They’ll keep for several days, but they might lose some of their texture over time.
Tips and Variations:
Here are a few extra tips and ideas to customize your Frozen S’mores:
- Different Cookies: Feel free to experiment with different types of cookies for the base. Chocolate chip cookies, graham crackers, or even peanut butter cookies would all be delicious.
- Marshmallow Flavor: Use flavored marshmallows, such as strawberry or chocolate, for a fun twist.
- Chocolate Variety: Try using milk chocolate, dark chocolate, or even white chocolate for the ganache topping.
- Add-Ins: Mix chopped nuts, pretzels, or toffee bits into the marshmallow filling or sprinkle them on top of the chocolate ganache.
- Individual Servings: For individual servings, you can use muffin tins or small ramekins to make mini Frozen S’mores.
Enjoy!
I hope you enjoy making and eating these Frozen S’mores as much as I do! They’re the perfect treat for any occasion, and they’re sure to be a hit with kids and adults alike. Happy baking!
Conclusion:
Okay, friends, let’s be honest – you’ve scrolled this far because you’re intrigued, right? And I’m here to tell you, you absolutely should be! These Frozen Smores are not just a dessert; they’re an experience. They’re a nostalgic trip back to crackling campfires, sticky fingers, and pure, unadulterated joy, all without the hassle of building a fire or dealing with melty messes. Seriously, what’s not to love?
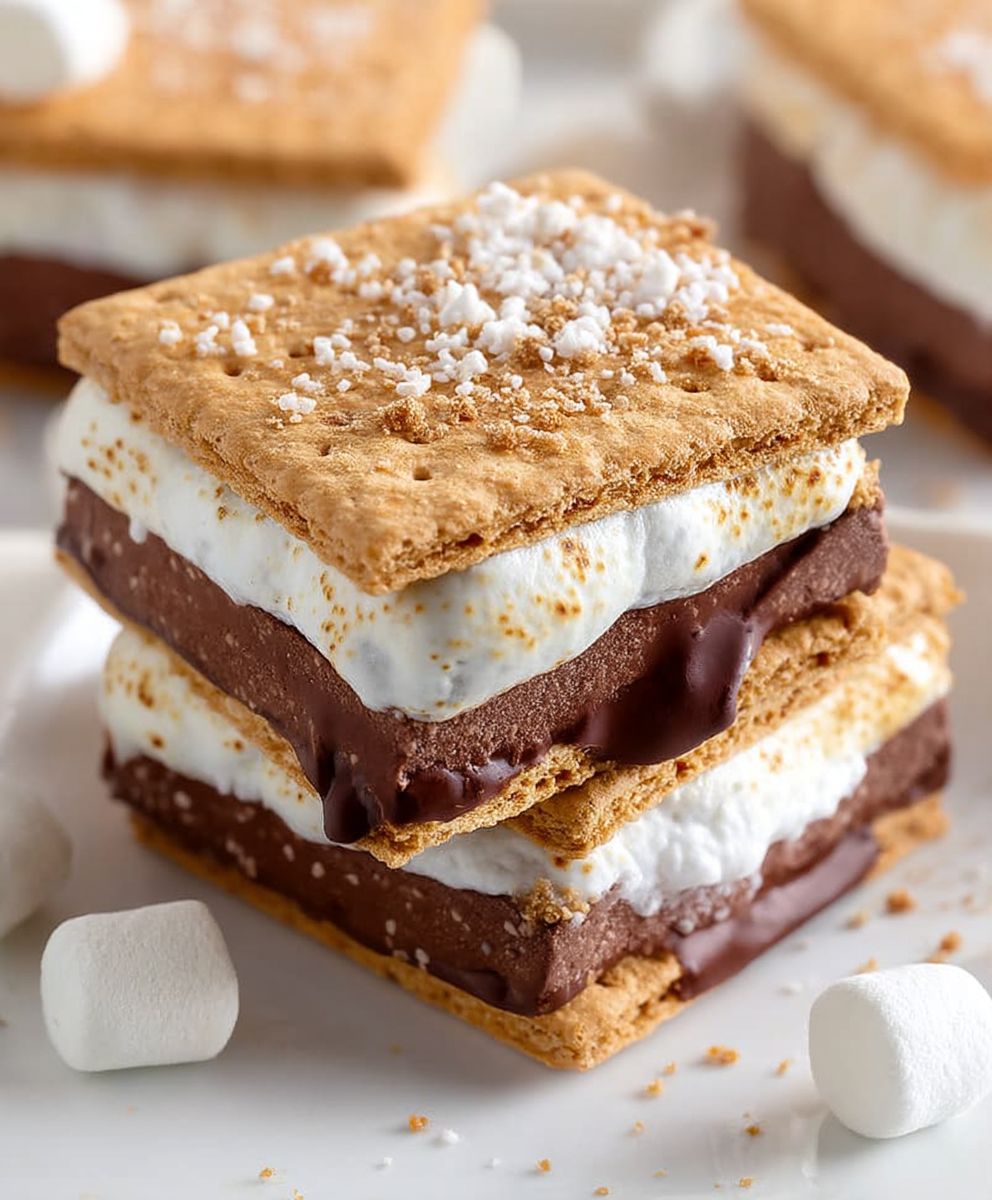
The beauty of this recipe lies in its simplicity and its sheer deliciousness. The creamy, cold ice cream perfectly complements the crunchy graham crackers and the gooey, toasted marshmallow fluff. It’s a symphony of textures and flavors that will have everyone begging for more. And the best part? It’s so incredibly easy to make! You can whip up a batch in minutes, making it the perfect dessert for impromptu gatherings, late-night cravings, or just a little something special to brighten your day.
But don’t just take my word for it! I urge you to give these Frozen Smores a try. I promise you won’t be disappointed. And while the recipe is fantastic as is, feel free to get creative and put your own spin on it.
Serving Suggestions and Variations:
- Drizzle it: Add a drizzle of chocolate sauce, caramel sauce, or even a raspberry coulis for an extra layer of decadence.
- Nutty Delight: Sprinkle chopped nuts, like pecans or walnuts, on top for added crunch and flavor.
- Flavor Infusion: Experiment with different ice cream flavors. Chocolate, coffee, or even mint chocolate chip would be amazing!
- Graham Cracker Swap: Use chocolate graham crackers for an even richer chocolate experience.
- Mini Smores: Make them bite-sized by using smaller graham crackers and cutting the ice cream into smaller squares. Perfect for parties!
- Marshmallow Upgrade: If you’re feeling ambitious, try making your own homemade marshmallow fluff! It’s surprisingly easy and takes these smores to a whole new level.
- Seasonal Twist: During the holidays, add a sprinkle of cinnamon or nutmeg for a festive touch.
I’m genuinely excited for you to try this recipe and discover just how amazing these Frozen Smores are. They’re a guaranteed crowd-pleaser, and I know you’ll love them as much as I do. So, gather your ingredients, put on some fun music, and get ready to create some delicious memories.
Once you’ve made them, I’d absolutely love to hear about your experience! Did you try any of the variations? What was your favorite part? Share your photos and stories in the comments below! Let’s spread the joy of these delightful frozen treats and inspire others to give them a try. Happy smores-making!
Don’t forget to rate the recipe and share it with your friends and family. Let’s make these Frozen Smores the dessert sensation of the summer (or any season, really!). Enjoy!
Frozen Smores: The Ultimate No-Bake Summer Dessert
No-bake dessert with Oreo crust, gooey marshmallow filling, and rich chocolate ganache. Perfect summer treat!
Ingredients
- 1 (14.3 ounce) package chocolate sandwich cookies, such as Oreos
- 6 tablespoons unsalted butter, melted
- 1 (16 ounce) package large marshmallows
- 2 tablespoons milk
- 1 teaspoon vanilla extract
- 1/4 teaspoon salt
- 1 (12 ounce) package semi-sweet chocolate chips
- 1/4 cup heavy cream
- Optional: Graham cracker crumbs for garnish
Instructions
- Crush the chocolate sandwich cookies in a food processor or zip-top bag until they resemble coarse sand.
- Melt the butter in the microwave or on the stovetop.
- In a medium bowl, combine the crushed cookie crumbs and the melted butter. Mix well and press firmly into the bottom of an 8×8 inch baking dish lined with parchment paper.
- Place the baking dish in the freezer while preparing the marshmallow layer.
- In a large, microwave-safe bowl, combine the marshmallows, milk, vanilla extract, and salt. Microwave in short intervals, stirring in between, until smooth and completely melted.
- Let the melted marshmallow mixture cool slightly for a few minutes.
- Remove the baking dish from the freezer. Pour the melted marshmallow mixture over the chilled cookie base and spread evenly.
- Return the baking dish to the freezer and freeze for at least 2 hours, or until the marshmallow layer is firm.
- In a small saucepan, heat the heavy cream over medium heat until it just begins to simmer. Alternatively, heat in the microwave.
- Place the semi-sweet chocolate chips in a heat-proof bowl. Pour the hot heavy cream over the chocolate chips and let it sit for a minute.
- Gently stir the chocolate and cream together until the chocolate is completely melted and the ganache is smooth and glossy.
- Remove the baking dish from the freezer. Pour the chocolate ganache over the frozen marshmallow layer and spread evenly.
- Sprinkle graham cracker crumbs over the chocolate ganache while it’s still wet.
- Return the baking dish to the freezer and freeze for at least 1 hour, or until the chocolate ganache is firm.
- Remove the baking dish from the freezer. Lift the frozen s’mores out of the dish using the parchment paper overhang. Cut into squares or rectangles.
- Serve the Frozen S’mores immediately.
- Store leftovers in an airtight container in the freezer.
Notes
- Line the baking dish with parchment paper for easy removal.
- Be careful not to overheat the marshmallows, as they can become hard and rubbery.
- Run the knife under hot water for a few seconds before cutting to prevent sticking.
- Experiment with different cookies, marshmallow flavors, and chocolate varieties.
- Add chopped nuts, pretzels, or toffee bits for extra flavor and texture.
- Make individual servings in muffin tins or ramekins.
Leave a Comment