
The Best Baked Mac And Cheese For Family Dinners
Okay, let’s get real for a moment. Is there anything quite as universally loved, as deeply comforting, or as guaranteed to bring smiles to the dinner table as a perfectly baked mac and cheese? I honestly don’t think so! And let me tell you, when I set out to create The Best Baked Mac And Cheese For Family Dinners, I wasn’t just aiming for good; I was aiming for unforgettable.
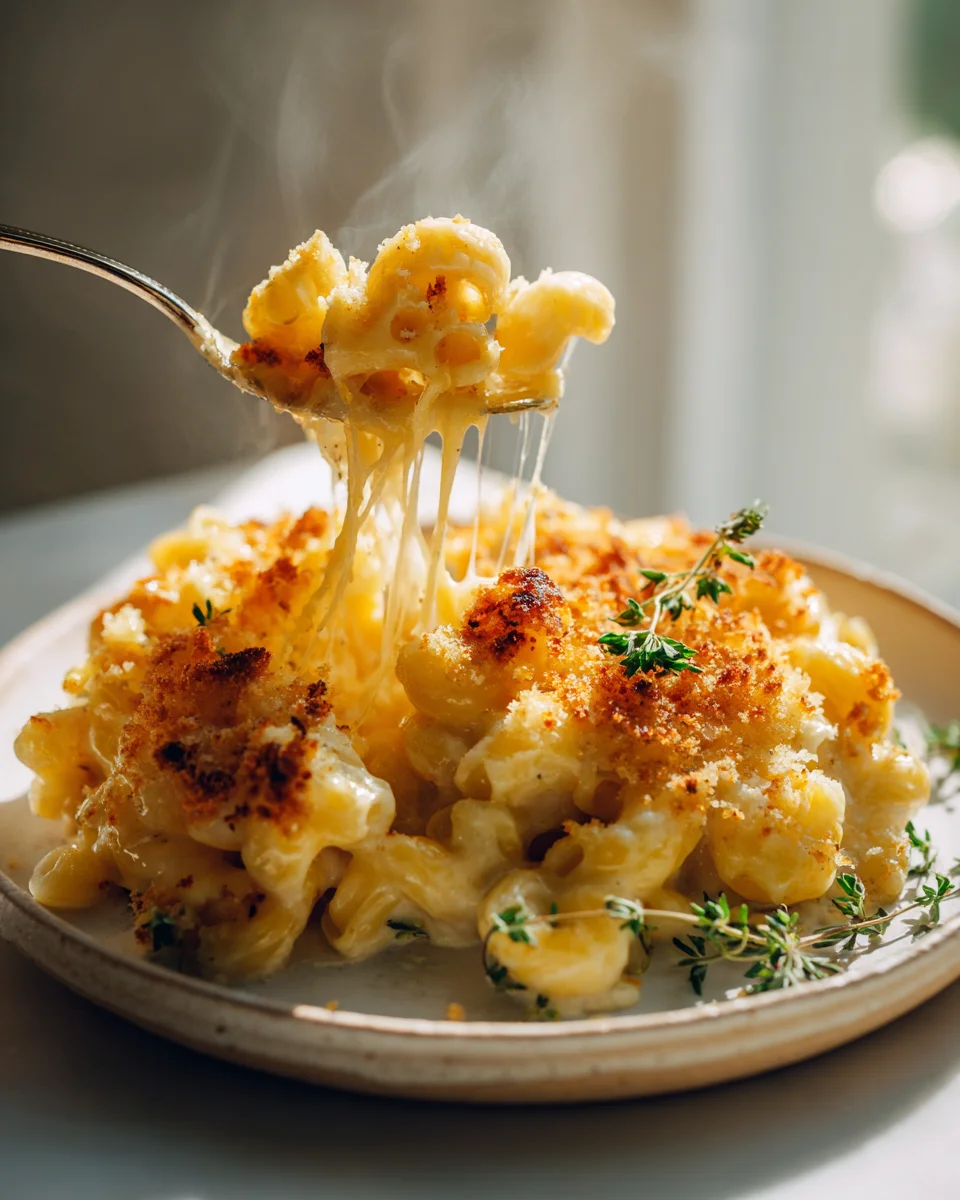
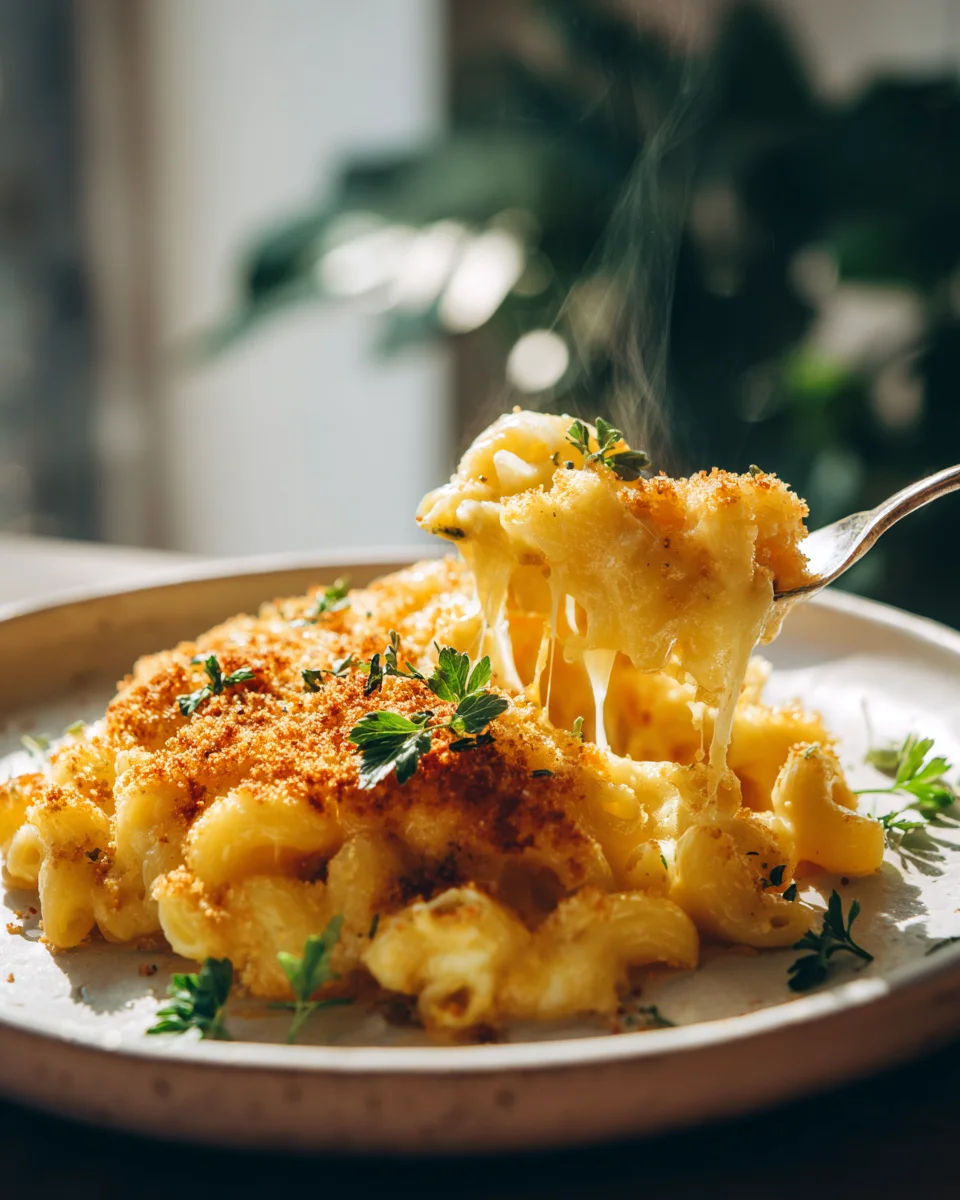
What makes this recipe so incredibly special? Well, it’s not just a box mix, that’s for sure. We’re talking about a ridiculously creamy, velvety smooth cheese sauce made from a thoughtful blend of cheeses, ensuring every bite is bursting with flavor without being overwhelming. The pasta is cooked just right, nestled in that luscious sauce, and then it’s all baked to golden, bubbly perfection with a crispy, savory topping that just begs to be dug into.
You’re going to absolutely love this recipe because it delivers on every promise of a classic, homemade mac and cheese. It’s the ultimate comfort food, perfect for those busy weeknights when you need something hearty and satisfying, or for lazy Sunday gatherings where food is the heart of the home. This isn’t just a side dish; it’s a main event, a dish that creates memories around the dinner table and leaves everyone feeling warm, full, and happy. Get ready to make this your new go-to family favorite!
Ingredient Notes
Making ‘The Best Baked Mac And Cheese For Family Dinners’ starts with choosing the right ingredients. I’ve found that a thoughtful selection makes all the difference in achieving that ultimate comfort food experience that everyone at the table will rave about. It’s about building layers of flavor and ensuring that perfect, creamy consistency we all crave.
- The Pasta: For a family-friendly dish, I always go with elbow macaroni. It’s classic, holds the sauce beautifully, and is easy for little hands (and big ones!) to manage. You could also use medium shells or cavatappi if you prefer a different shape. The key is to cook it just al dente—slightly undercooked—because it will finish cooking in the oven, preventing it from becoming mushy.
- The Cheese Blend: This is where the magic happens! I believe a blend is non-negotiable for the best flavor and melt. My go-to combination for family dinners includes:
- Sharp Cheddar: For that essential cheesy tang and robust flavor. Grate it yourself for superior melting!
- Gruyère: This adds a wonderful nutty, earthy depth that elevates the dish without being too fancy for a family meal. If Gruyère isn’t your family’s favorite, consider Fontina or even a good quality Provolone.
- Monterey Jack or Colby: These cheeses melt incredibly smoothly and add stretchiness, contributing to that irresistible gooey texture.
Substitution Tip: Always grate your own cheese from blocks. Pre-shredded cheeses often contain anti-caking agents that can make your sauce gritty.
- The Dairy: For the ultimate rich and creamy sauce, I use a combination of whole milk and heavy cream. The whole milk provides a great base, while the heavy cream adds an unparalleled luxuriousness. Skim or low-fat milk can be used, but your sauce won’t be as rich.
- The Roux Essentials: Unsalted butter and all-purpose flour are crucial for building the foundational roux that thickens our cheese sauce. I prefer unsalted butter so I can control the salt content myself.
- Seasonings: Beyond salt and freshly ground black pepper, a little dry mustard powder is my secret weapon. It doesn’t make the mac and cheese taste like mustard; instead, it amplifies the cheese flavor beautifully. A pinch of nutmeg also brings out the best in cheesy sauces, adding a subtle warmth. Garlic powder and onion powder can be added for extra savory depth if your family enjoys those flavors.
- The Topping: For that irresistible crunchy crust, I opt for panko breadcrumbs mixed with melted butter. Panko provides a wonderfully light and crispy texture that regular breadcrumbs sometimes miss. A little extra shredded cheese sprinkled on top never hurts either!
Step-by-Step Instructions
Getting ‘The Best Baked Mac And Cheese For Family Dinners’ onto the table is a straightforward process, but following these steps carefully will ensure a perfect result every time. We want that golden, bubbly, creamy goodness!
- Preheat and Prep: First things first, preheat your oven to 375°F (190°C). While the oven heats, lightly grease a 9×13-inch baking dish. This size is perfect for feeding a hungry family.
- Cook the Pasta: Bring a large pot of salted water to a rolling boil. Add your elbow macaroni and cook it according to package directions, but make sure to cook it just until al dente. It should still have a slight bite to it, as it will continue to cook in the oven. Drain the pasta thoroughly and set it aside. I often toss it with a tiny drizzle of olive oil to prevent sticking while I make the sauce.
- Start the Roux: In a large, heavy-bottomed pot or Dutch oven, melt 1/2 cup (1 stick) of unsalted butter over medium heat. Once melted, whisk in 1/2 cup of all-purpose flour. Continue whisking constantly for 1-2 minutes until the mixture forms a smooth paste and smells slightly nutty—this is your roux. It’s important to cook out the raw flour taste.
- Build the Cheese Sauce Base: Gradually, and I mean gradually, whisk in 4 cups of whole milk. Pour it in slowly, a little at a time, whisking vigorously after each addition to ensure there are no lumps. Once all the milk is incorporated, whisk in 1 cup of heavy cream. Continue to cook, stirring frequently, until the sauce thickens and comes to a gentle simmer, usually about 5-8 minutes.
- Season and Add Cheese: Remove the pot from the heat. Stir in 1 teaspoon of dry mustard, 1 teaspoon of salt, 1/2 teaspoon of freshly ground black pepper, and a pinch of nutmeg. Now, the best part: add your grated cheeses (2 cups sharp cheddar, 1 cup Gruyère, 1 cup Monterey Jack/Colby) in handfuls, stirring constantly until each batch is completely melted and smooth before adding more. Don’t rush this step; it helps create a wonderfully creamy sauce without separating. Taste and adjust seasonings if needed.
- Combine Pasta and Sauce: Add the cooked, drained pasta to the pot with the glorious cheese sauce. Stir gently but thoroughly until every piece of macaroni is lovingly coated in the rich, creamy sauce.
- Assemble and Top: Pour half of the pasta mixture into your prepared baking dish, spreading it evenly. If you want, sprinkle a little extra cheese (about 1/2 cup of cheddar or Monterey Jack) in the middle layer. Then, spoon the remaining pasta mixture over the top. In a small bowl, combine 1 cup of panko breadcrumbs with 2 tablespoons of melted butter. Sprinkle this mixture evenly over the top of the mac and cheese. If you desire, add another light dusting of cheese (about 1/4 cup) over the breadcrumbs for an extra cheesy crunch.
- Bake to Perfection: Place the baking dish in the preheated oven. Bake for 25-30 minutes, or until the mac and cheese is bubbly around the edges and the topping is golden brown and crispy.
- Rest and Serve: This is a crucial step! Once out of the oven, let the mac and cheese rest for 10-15 minutes before serving. This allows the sauce to set slightly, making it less runny and easier to serve, ensuring perfect, creamy spoonfuls for everyone at your family dinner.
Tips & Suggestions
I’ve learned a few tricks over the years to ensure ‘The Best Baked Mac And Cheese For Family Dinners’ turns out perfectly every time. These tips will help you achieve that ideal creamy texture, rich flavor, and make your family dinners a hit!
- Don’t Overcook Your Pasta (Seriously!): I can’t stress this enough. Pasta cooked beyond al dente will become mushy in the oven. Aim for slightly undercooked, as it will absorb more of that delicious cheese sauce while it bakes.
- Grate Your Own Cheese: I know it’s an extra step, but trust me, it’s worth it. Pre-shredded cheeses often contain cellulose, an anti-caking agent that can make your sauce grainy and prevent it from melting smoothly. Freshly grated cheese melts beautifully, giving you that silky, luxurious sauce.
- Keep Your Sauce Warm While Adding Cheese: Remove the pot from the heat when adding the cheese. If the sauce is too hot, the cheese can seize up or become oily. Adding it off the heat allows for a smoother, more emulsified sauce.
- Prevent a Dry Bake: If you’re concerned about your mac and cheese drying out, you can cover it loosely with foil for the first 15-20 minutes of baking, then remove the foil for the last 10-15 minutes to allow the topping to crisp up.
- Customization for Family Fun: This recipe is fantastic as is, but it’s also a great canvas for additions!
- Meat Lovers: Consider folding in some cooked, crumbled ground beef, diced cooked beef (like pot roast leftovers!), or even crispy beef bacon bits.
- Veggie Boost: Stir in some steamed broccoli florets, peas, or diced bell peppers for added nutrition and color.
- Spicy Kick: A pinch of cayenne pepper or a dash of your favorite non-alcoholic hot sauce (like Tabasco) in the cheese sauce can add a subtle warmth if your family enjoys a little heat.
- Make Ahead for Busy Dinners: You can assemble the entire dish (minus the breadcrumb topping) up to 24 hours in advance. Cover it tightly with plastic wrap and refrigerate. When ready to bake, let it sit at room temperature for about 30 minutes, then sprinkle with the breadcrumb topping and bake as directed, adding an extra 10-15 minutes to the baking time since it’s starting cold.
- Broiler for Extra Crisp: If your topping isn’t as golden and crispy as you’d like after baking, you can place the dish under the broiler for 1-2 minutes. Keep a very close eye on it, as it can go from golden to burnt quickly!
- Let It Rest: I know it’s tempting to dive right in, but allowing the mac and cheese to rest for 10-15 minutes after baking lets the sauce set and prevents it from being too runny when served.
Storage
One of the best things about ‘The Best Baked Mac And Cheese For Family Dinners’ is that it often yields wonderful leftovers. Proper storage ensures you can enjoy that comforting goodness again and again!
- Refrigeration: Once the mac and cheese has cooled completely to room temperature (this is important to prevent condensation), transfer any leftovers to an airtight container. It will keep beautifully in the refrigerator for up to 3-4 days. I often portion it out into individual containers for easy grab-and-go lunches!
- Reheating:
- Oven: My preferred method for reheating. Preheat your oven to 350°F (175°C). Place the mac and cheese in an oven-safe dish, adding a splash or two of milk (or even a little cream) over the top to help restore its creaminess and prevent it from drying out. Cover loosely with foil and bake for 20-30 minutes, or until heated through and bubbly. Remove the foil for the last 5-10 minutes if you want to crisp up the topping again.
- Microwave: For a quick individual portion, place it in a microwave-safe dish. Add a small splash of milk. Cover and microwave on medium power, stirring halfway through, until heated through. Be careful not to overheat, as this can make the sauce separate.
- Freezing: Baked mac and cheese freezes surprisingly well!
- Unbaked: You can assemble the mac and cheese (without the breadcrumb topping) in a freezer-safe aluminum baking dish. Cover tightly with plastic wrap, then foil. It will keep in the freezer for up to 2-3 months. When ready to bake, thaw overnight in the refrigerator, then add the breadcrumb topping and bake as directed, adding about 15-20 minutes to the baking time.
- Baked: Allow the baked mac and cheese to cool completely. You can freeze it in individual portions or in a larger freezer-safe container, again, covered tightly. Thaw overnight in the refrigerator and reheat following the oven instructions above, adding a bit more milk or cream.
A little tip for reheating frozen: sometimes the sauce can lose a bit of its creaminess. A splash of milk or a tiny dollop of cream during reheating helps bring it back to life!
Final Thoughts
And there you have it, folks! My absolute favorite way to create a meal that truly brings everyone together. This isn’t just any mac and cheese; this is The Best Baked Mac And Cheese For Family Dinners, and I truly believe it’s a game-changer for your weeknight meals or special gatherings. From its incredibly creamy, rich sauce to the perfectly golden, bubbly topping, every single bite is a delicious reminder of warmth and togetherness.
I crafted this recipe with your family in mind, ensuring it’s not only unbelievably flavorful but also straightforward to prepare. It’s designed to be effortlessly delicious, making it a guaranteed crowd-pleaser that allows you to spend less time fussing in the kitchen and more time enjoying those precious moments around the table with your loved ones. So go ahead, preheat your oven, gather your ingredients, and prepare to make some unforgettable memories with The Best Baked Mac And Cheese For Family Dinners. Your family will thank you, and I promise, it’ll become a beloved tradition at your table!
The Best Baked Mac & Cheese Recipe for Unforgettable Dinners

This baked mac and cheese is the ultimate comfort food, featuring a creamy cheese sauce and a crispy topping that will delight your family. Perfect for weeknight dinners or special gatherings, it’s a dish that creates lasting memories around the table.
- Prep Time: 15 mins
- Cook Time: 30 mins
- Total Time: 45 minutes
- Yield: 8 servings 1x
- Category: Dinner
- Method: Baking
- Cuisine: American
Ingredients
- 1 lb elbow macaroni
- 2 cups sharp cheddar cheese, grated
- 1 cup Gruyère cheese, grated
- 1 cup Monterey Jack or Colby cheese, grated
- 4 cups whole milk
- 1 cup heavy cream
- 1/2 cup unsalted butter
- 1/2 cup all-purpose flour
- 1 teaspoon dry mustard powder
- 1 teaspoon salt
- 1/2 teaspoon freshly ground black pepper
- Pinch of nutmeg
- 1 cup panko breadcrumbs
- 2 tablespoons melted butter
Instructions
- Preheat your oven to 375°F (190°C) and lightly grease a 9×13-inch baking dish.
- Bring a large pot of salted water to a rolling boil. Add the elbow macaroni and cook according to package directions until al dente. Drain the pasta thoroughly and set aside.
- In a large, heavy-bottomed pot or Dutch oven, melt 1/2 cup of unsalted butter over medium heat. Whisk in 1/2 cup of all-purpose flour and cook for 1-2 minutes until smooth.
- Gradually whisk in 4 cups of whole milk, stirring vigorously to avoid lumps. Once incorporated, add 1 cup of heavy cream and cook until the sauce thickens and simmers, about 5-8 minutes.
- Remove the pot from heat and stir in 1 teaspoon of dry mustard, 1 teaspoon of salt, 1/2 teaspoon of black pepper, and a pinch of nutmeg. Add the grated cheeses in handfuls, stirring until melted and smooth.
- Add the cooked pasta to the cheese sauce and stir until coated.
- Pour half of the pasta mixture into the prepared baking dish. Optionally, sprinkle 1/2 cup of extra cheese in the middle layer, then spoon the remaining pasta mixture on top.
- In a small bowl, combine 1 cup of panko breadcrumbs with 2 tablespoons of melted butter and sprinkle over the top. Optionally, add another 1/4 cup of cheese on top of the breadcrumbs.
- Bake for 25-30 minutes until bubbly and golden brown.
- Let the mac and cheese rest for 10-15 minutes before serving.
Nutrition
- Serving Size: 1 bowl
- Calories: 500
- Sugar: 5 g
- Sodium: 800 mg
- Fat: 30 g
- Saturated Fat: 18 g
- Unsaturated Fat: 10 g
- Trans Fat: 0 g
- Carbohydrates: 40 g
- Fiber: 2 g
- Protein: 20 g
- Cholesterol: 80 mg
Keywords: For best results, don't overcook the pasta. Grate your own cheese for a smoother sauce, and keep the sauce warm while adding cheese to prevent it from seizing. You can customize with meats or veggies, and make ahead for convenience.
Leave a Comment