
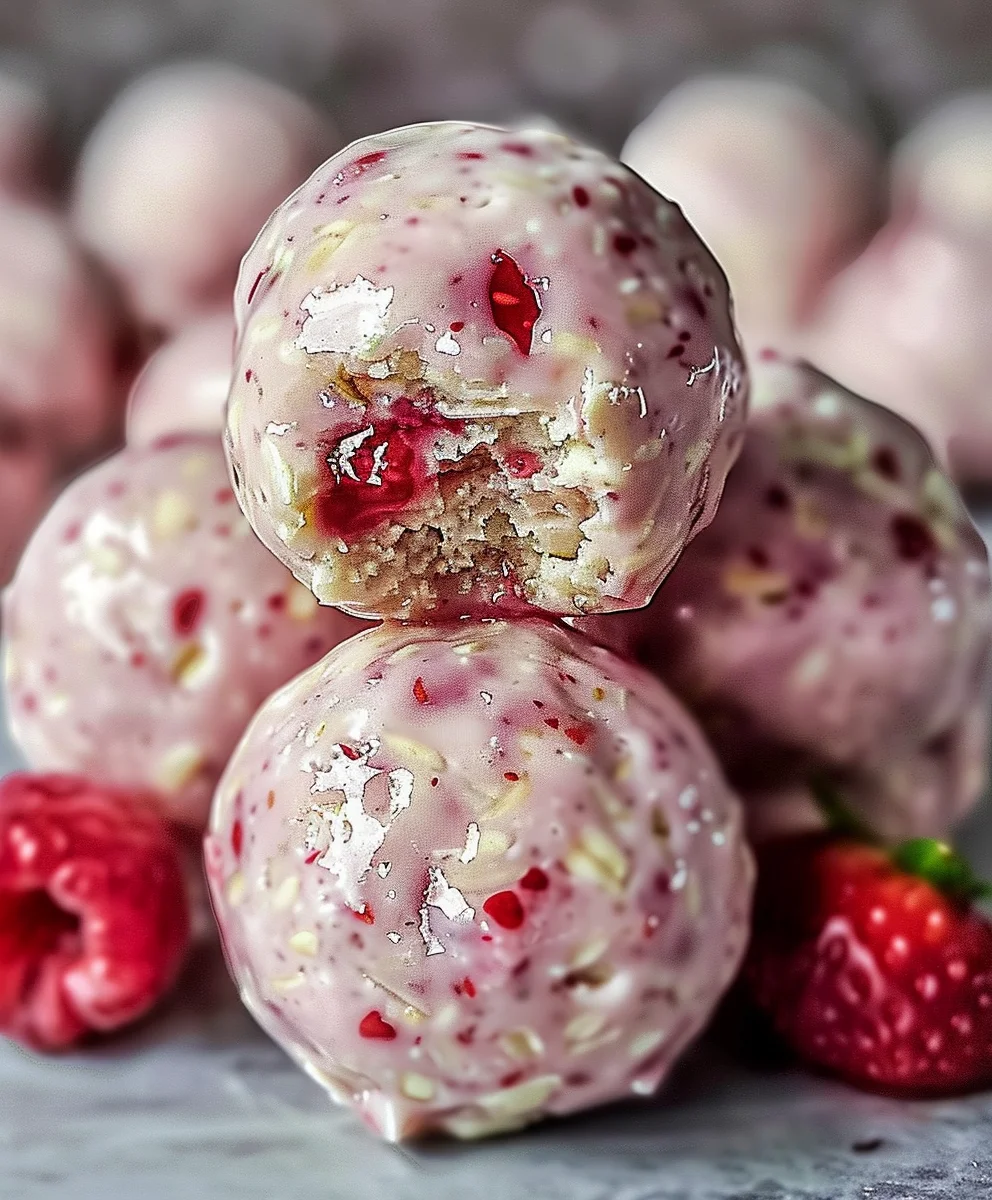
Strawberry Cheesecake Protein Balls are poised to become your new favorite healthy indulgence. Imagine savoring the delightful, creamy tang of a classic strawberry cheesecake, perfectly blended with the sweet burst of fresh berries, all concentrated into a convenient, guilt-free, protein-packed bite. Sounds almost too good to be true, doesn’t it? Well, I am absolutely delighted to share a recipe that turns that dream into a delicious reality, promising an exciting upgrade to your snack repertoire.
In our increasingly busy lives, finding snacks that are both incredibly tasty and genuinely beneficial for our well-being can often feel like an impossible quest. This is precisely where the magic of protein balls shines. Emerging from the modern wellness movement, these clever, bite-sized wonders have become a staple for those seeking nutritious, on-the-go fuel. They represent a thoughtful culinary innovation, allowing us to indulge in delightful flavors without compromising our fitness goals. People adore this dish not just for its undeniable convenience and impressive protein content, but also for its truly irresistible flavor profile and delightful, chewy texture that satisfies every time.
Whether you’re seeking a satisfying post-workout refuel, a thoughtful mid-afternoon energy boost, or simply a healthier alternative to traditional desserts, these Strawberry Cheesecake Protein Balls deliver on every front. Get ready to elevate your snacking experience with a treat that truly offers the best of both worlds: indulgent taste and wholesome nutrition, all wrapped up in one perfect little sphere.
Ingredients:
Creating these delightful Strawberry Cheesecake Protein Balls is a truly satisfying experience, and it all starts with gathering your wonderful ingredients. I always recommend using the highest quality ingredients you can find, as it truly makes a difference in the final taste and texture of your protein balls. Here’s what you’ll need for this vibrant and wholesome treat:
- For the Protein Ball Base:
- 1 ½ cups (approximately 150g) Rolled Oats: I prefer old-fashioned rolled oats because they offer a fantastic texture and a good amount of fiber, but quick oats can also work in a pinch if that’s all you have. For a gluten-free option, simply ensure you’re using certified gluten-free rolled oats.
- 1 cup (approximately 100g) Vanilla Protein Powder: This is where the “protein” in our Strawberry Cheesecake Protein Balls truly shines! I typically use a high-quality casein protein powder because it yields a thicker, more dough-like consistency, which is perfect for rolling. However, a whey blend or even a plant-based vanilla protein powder would work beautifully too. Just be aware that different protein powders absorb liquid differently, so you might need to slightly adjust the moisture later.
- ½ cup (approximately 25g) Freeze-Dried Strawberries: These are absolutely crucial for that authentic strawberry flavor and a lovely pink hue without adding excess moisture. You can find them whole or already powdered. If whole, you’ll need to crush them into a fine powder or small pieces. I often crush about ¼ cup for the base and reserve the other ¼ cup for the coating and garnish.
- 6 oz (approximately 170g) Light Cream Cheese, softened: Make sure your cream cheese is at room temperature. This is essential for achieving a smooth, lump-free mixture. I opt for light cream cheese to keep things a bit lighter, but full-fat cream cheese will give you an even richer, more decadent “cheesecake” flavor.
- ¼ cup (approximately 60ml) Maple Syrup or Honey: This provides a natural sweetness and also helps bind our protein balls together. Adjust to your sweetness preference. For a sugar-free option, you can use an equivalent amount of sugar-free liquid sweetener.
- 1 teaspoon Pure Vanilla Extract: A touch of vanilla really enhances the overall flavor profile and complements both the strawberry and cheesecake notes. Don’t skip this!
- ¼ teaspoon Sea Salt: Just a small pinch of salt helps to balance the sweetness and really brings out all the other flavors, making them pop.
- For the Creamy Cheesecake Coating:
- 4 oz (approximately 113g) Light Cream Cheese, softened: Again, room temperature is key for a silky smooth coating. This extra layer of cream cheese really drives home the “cheesecake” experience for our Strawberry Cheesecake Protein Balls.
- ¼ cup (approximately 30g) Powdered Erythritol or Powdered Sugar: I usually use powdered erythritol for a sugar-free coating, but regular powdered sugar works perfectly well if you prefer. Whichever you choose, make sure it’s powdered for a smooth texture.
- 1-2 tablespoons Milk (any kind): Start with one tablespoon and add more if needed to reach your desired consistency. Any milk works—dairy, almond, oat, soy—whatever you prefer or have on hand.
- ½ teaspoon Pure Vanilla Extract: Enhances the creamy flavor of the coating.
- Optional: ½ teaspoon Strawberry Extract: If you want to really boost that strawberry flavor in the coating, a little extract can go a long way.
- For Garnishing:
- Remaining Freeze-Dried Strawberries, crushed: I usually set aside about ¼ cup of my initial ½ cup for sprinkling over the finished protein balls. This adds a beautiful visual appeal and an extra burst of strawberry flavor and crunch.
- Optional: White Chocolate Drizzle: For an extra special touch, a drizzle of melted white chocolate (sugar-free or regular) can be absolutely divine.
Equipment You’ll Need:
Having the right tools makes the process of creating these Strawberry Cheesecake Protein Balls so much smoother and more enjoyable. Here’s a brief list of the essentials I find most helpful:
- Food Processor: This is my secret weapon for getting the oats and freeze-dried strawberries into a fine, uniform consistency. It makes the base wonderfully smooth and easy to work with. If you don’t have one, you can manually crush the strawberries and use oat flour (ground oats) instead of whole oats.
- Large Mixing Bowl: You’ll need a spacious bowl to combine all the ingredients for the protein ball base.
- Hand Mixer or Stand Mixer (for coating): While not strictly necessary for the ball base, a mixer is incredibly helpful for whipping up a truly smooth and airy cream cheese coating. You can certainly do it by hand with a whisk, but a mixer makes it much quicker and less strenuous.
- Rubber Spatula: Essential for scraping down the sides of the bowl and ensuring everything is thoroughly combined.
- Cookie Scoop (1-1.5 tablespoon size): This is invaluable for portioning out uniform balls, which ensures even chilling and a professional look.
- Baking Sheet: For placing the rolled balls before and after coating.
- Parchment Paper or Silicone Mat: Line your baking sheet to prevent sticking and make cleanup a breeze.
- Small, Shallow Bowl: Perfect for dipping the protein balls into the creamy coating and for holding the crushed freeze-dried strawberries for garnish.
Preparing Your Delicious Strawberry Cheesecake Protein Balls:
Now that we have all our ingredients and equipment ready, let’s dive into the fun part: bringing these incredible Strawberry Cheesecake Protein Balls to life! I promise you, the effort is well worth it for these satisfying, guilt-free treats.
Phase 1: Crafting the Irresistible Protein Ball Base
- Prepare Your Oats and Strawberries: If you’re starting with whole rolled oats, grab your food processor. Add the 1 ½ cups of rolled oats to the food processor and pulse until they resemble a coarse flour or fine meal. You don’t want a super-fine powder, but rather something with a bit of texture. Next, add the ½ cup of freeze-dried strawberries (if they are not already powdered) to the food processor along with the oats. Pulse again until the strawberries are crushed into small pieces or a fine powder, depending on your preference. I find that grinding them together helps integrate the flavors beautifully. Pour this mixture into your large mixing bowl.
- Combine Dry Ingredients: To the oat and strawberry mixture in your large bowl, add the 1 cup of vanilla protein powder and the ¼ teaspoon of sea salt. Use your rubber spatula or a whisk to thoroughly combine all these dry ingredients. Make sure there are no lumps of protein powder. This step ensures an even distribution of flavor and texture throughout your Strawberry Cheesecake Protein Balls.
- Prepare Wet Ingredients: In a separate, smaller bowl (or directly into the food processor if you’re quick and prefer less dishes!), combine the 6 oz of softened light cream cheese, ¼ cup of maple syrup (or your chosen sweetener), and 1 teaspoon of pure vanilla extract. Mix these ingredients together until they are smooth and well combined. If your cream cheese isn’t perfectly soft, a quick 10-15 seconds in the microwave can help, but be careful not to melt it completely!
- Bring it All Together: Now, add the wet cream cheese mixture to your bowl of dry ingredients. This is where the magic truly starts to happen! Using your rubber spatula or your clean hands, mix everything together until a thick, uniform dough forms. You want to ensure there are no dry spots remaining. It might seem a little crumbly at first, but keep pressing and folding. The warmth from your hands can also help bind it. If the mixture seems too dry and isn’t coming together, you can add an additional tablespoon of maple syrup or a tiny splash of milk until it reaches a workable dough consistency. Conversely, if it feels too sticky, a tiny bit more oat flour or protein powder can help.
- Chill the Dough (Optional but Recommended): Once your dough is well-mixed, cover the bowl and place it in the refrigerator for about 15-20 minutes. This chilling step isn’t strictly necessary, but I find it makes the dough much firmer and easier to roll into perfect balls, reducing stickiness. This is especially helpful if your kitchen is warm or your cream cheese was very soft.
Phase 2: Rolling and Shaping Your Strawberry Cheesecake Protein Balls
- Prepare Your Rolling Station: While your dough is chilling, line a baking sheet with parchment paper or a silicone mat. This will be where your beautiful Strawberry Cheesecake Protein Balls rest before their final coating and chilling.
- Scoop and Roll: Remove the chilled dough from the refrigerator. Grab your cookie scoop (I usually use a 1.5 tablespoon size for a good snack portion). Scoop out portions of the dough and roll them firmly between the palms of your hands to form smooth, round balls. Aim for uniform size so they chill and set evenly. Don’t be afraid to apply a little pressure to ensure they hold their shape. Place each finished ball onto your prepared baking sheet. This part is quite meditative, and soon you’ll have a lovely batch of these potential protein balls!
- Pre-Chill the Rolled Balls: Once all your dough has been rolled into balls, place the baking sheet back into the refrigerator for another 15-30 minutes. This helps the balls firm up even more, making them much easier to coat and ensuring they hold their shape perfectly when topped with the creamy cheesecake frosting.
Phase 3: The Decadent Cheesecake Coating & Final Touches
- Whip Up the Creamy Coating: While your protein balls are chilling, it’s time to prepare the luscious cheesecake coating. In a clean mixing bowl, combine the 4 oz of softened light cream cheese, ¼ cup of powdered erythritol (or powdered sugar), ½ teaspoon of pure vanilla extract, and the optional ½ teaspoon of strawberry extract. Using a hand mixer or stand mixer (or a whisk and some elbow grease!), beat these ingredients together until the mixture is completely smooth, light, and fluffy.
- Adjust Coating Consistency: Now, add the milk, starting with 1 tablespoon. Mix again. If the coating seems too thick and isn’t easily spreadable, add the second tablespoon of milk, a little at a time, until you reach a smooth, pourable, yet thick consistency that will adhere well to the protein balls without being too runny. You’re looking for a consistency similar to a thick, pourable glaze. This coating is what truly elevates these from simple protein balls to bona fide Strawberry Cheesecake Protein Balls!
- Prepare Garnish: Take your reserved crushed freeze-dried strawberries and pour them into a small, shallow bowl. This will be ready for dipping.
- Coat the Balls: Take your chilled protein balls out of the fridge. Using a spoon or by gently dropping each ball into the coating and rolling it around, carefully coat each protein ball with the cream cheese mixture. You can use two forks to help lift and drain any excess coating. I often use one hand to hold the ball and the other to spoon the coating over, ensuring an even layer.
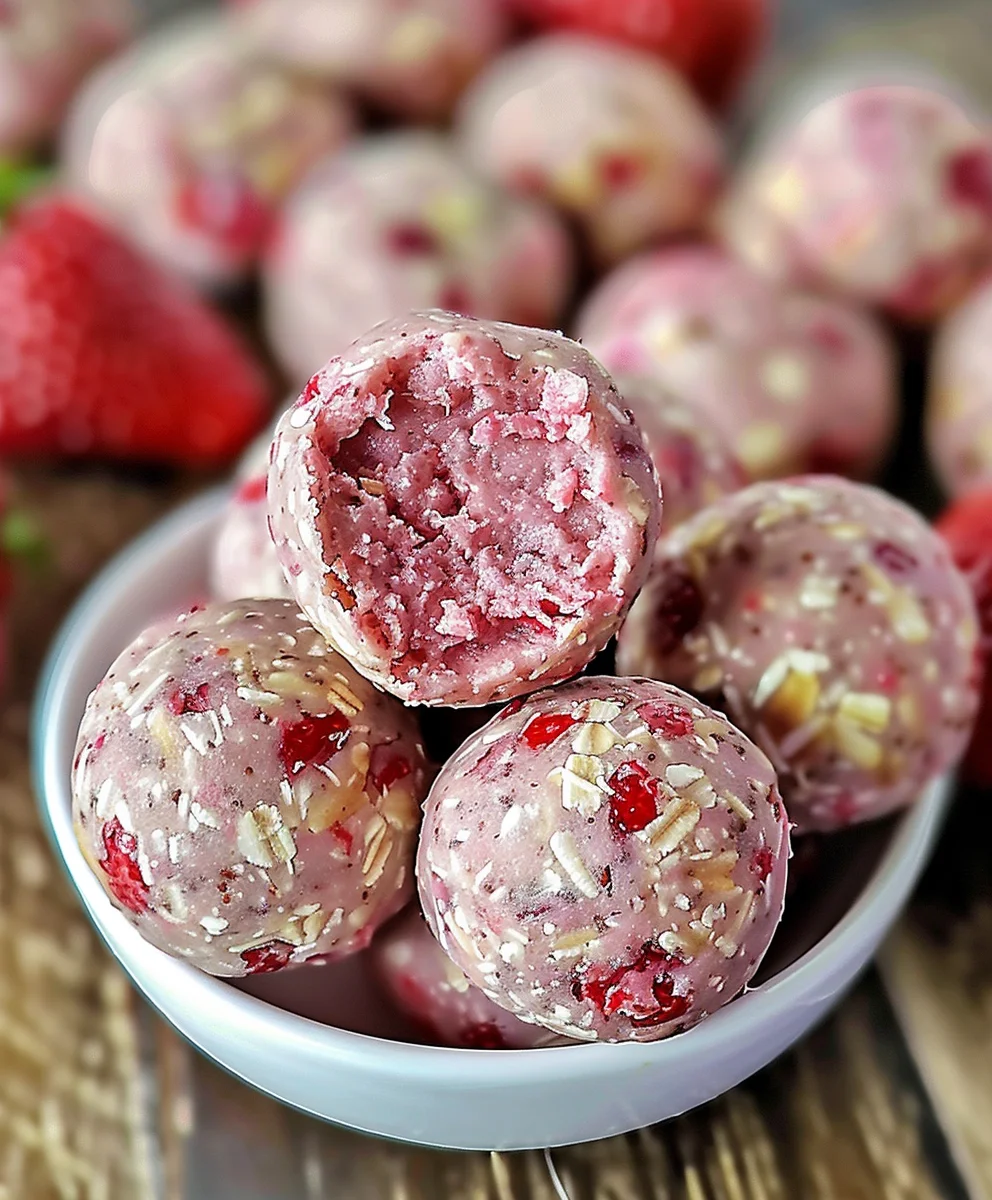
- Garnish and Finish: Immediately after coating each ball, gently roll it in the bowl of crushed freeze-dried strawberries. Press lightly to help the strawberry pieces adhere to the creamy coating. Place each beautifully coated and garnished Strawberry Cheesecake Protein Ball back onto your parchment-lined baking sheet.
- Final Chill for Perfection: Once all your protein balls are coated and garnished, return the baking sheet to the refrigerator for at least 30-60 minutes, or even longer. This final chilling step is crucial! It allows the cream cheese coating to firm up and set completely, making the protein balls easier to handle and ensuring that delightful cheesecake texture. If you’re adding an optional white chocolate drizzle, do this after the balls have chilled for at least 30 minutes, then return them to the fridge to set the chocolate.
Storage Tips:
Once set, these delightful Strawberry Cheesecake Protein Balls should be stored in an airtight container in the refrigerator. They will keep well for up to a week. For an even firmer texture or if you want to enjoy them over a longer period, you can also freeze them for up to a month. Just be sure to thaw them slightly in the refrigerator before enjoying for the best texture.
Enjoy your homemade Strawberry Cheesecake Protein Balls! They are truly a treat that combines satisfying nutrition with the indulgent flavors of your favorite dessert, making them the perfect snack or post-workout fuel.
Conclusion:
Well, my friends, we’ve come to the end of our culinary journey for today, but truly, the adventure has just begun for your taste buds! If you’ve been searching for that perfect blend of deliciousness, convenience, and health benefits, then look no further. I truly believe that my recipe for these incredible Strawberry Cheesecake Protein Balls is about to become your new favorite go-to snack, dessert, or even a delightful mini-meal replacement. Imagine biting into something that perfectly captures the creamy, tangy essence of a classic cheesecake, yet delivers a powerful punch of protein without any baking, excessive sugar, or complicated steps. That’s exactly what these little gems offer. They are an absolute game-changer for anyone with a busy lifestyle who refuses to compromise on taste or their nutritional goals. I poured so much love into perfecting this recipe because I wanted to create something genuinely satisfying that supports your wellness journey, whether you’re a fitness enthusiast, a busy parent, or simply someone who enjoys a guilt-free treat. They are cool, refreshing, and incredibly easy to whip up, meaning you spend less time in the kitchen and more time enjoying life’s other pleasures, all while nourishing your body with quality ingredients. This isn’t just another recipe; it’s a solution to those mid-afternoon slumps, those post-workout hunger pangs, and those late-night dessert cravings. Trust me, once you try them, you’ll wonder how you ever lived without them.
Now, let’s talk about how you can integrate these fantastic treats into your daily routine and how you can unleash your creativity to make them uniquely yours.
Versatile Serving Suggestions:
For me, these balls are incredibly versatile. I love popping one or two as a quick, energizing breakfast when I’m rushing out the door, perhaps alongside my morning coffee. They make an absolutely perfect post-workout recovery snack, providing that much-needed protein boost to help those muscles repair and grow, and the natural sugars from the strawberries offer a lovely energy replenishment. During those inevitable mid-afternoon slumps, when the urge to raid the biscuit tin strikes, reaching for one of these instead is a far more satisfying and beneficial choice. They’re also a fantastic light dessert alternative after dinner, offering that sweet fix without the heaviness or guilt associated with traditional desserts. And if you’re a planner like me, they are ideal for meal prepping; make a batch on Sunday, and you’ll have delicious, healthy snacks ready for the entire week! Kids adore them too, making them a brilliant addition to lunchboxes as a healthier sweet treat. They’re also great for road trips or a picnic in the park, staying fresh and delicious even when you’re on the move. I’ve even brought them to gatherings, and they disappear quicker than any other dessert on the table, often with people asking for the recipe!
Exciting Variations to Explore:
But the fun doesn’t stop there! I encourage you to see this recipe as a starting point for your own culinary adventures. Don’t be afraid to experiment!
Protein Powder Power-Ups: While I’ve recommended a specific type, feel free to swap out the vanilla protein powder for chocolate for a ‘chocolate-dipped strawberry cheesecake’ vibe, or an unflavored one if you want the strawberry and cream cheese flavors to truly shine. A berry-flavored protein powder could also amplify the fruit notes!
Berry Bliss: Instead of just strawberries, why not try a mix of raspberries and blueberries for a ‘mixed berry cheesecake’ experience? Or perhaps just raspberries for a tarter, vibrant flavor. You could even use frozen mixed berries (thawed and drained well) for convenience.
Nut Butter Nuances: If almond butter isn’t your favorite, cashew butter offers a very mild, creamy alternative, or even a seed butter like sunflower seed butter for a nut-free option. Peanut butter would give them a delicious peanut butter and jelly twist!
Texture Treasures: For an added layer of texture and flavor, I sometimes roll them in finely shredded unsweetened coconut, finely chopped pistachios, or even a dusting of cocoa powder for a sophisticated finish. Mini chocolate chips or a sprinkle of finely crushed graham crackers (for that authentic cheesecake crust feel!) can also be folded into the mixture before rolling. A touch of lemon zest could also brighten the flavors beautifully.
Shape Shifters: If rolling individual balls seems like too much work for a particular day, simply press the mixture into a parchment-lined square pan, chill thoroughly, and then cut into delicious protein bars. It’s the same great taste, just a different presentation! You could even press half the mixture into a base, then spread a thin layer of sugar-free jam, and top with the remaining mixture for a layered bar effect.
Sweetness Adjustments: Taste the mixture before rolling and adjust the level of sweetness to your personal preference. A little extra maple syrup or a pinch of stevia can go a long way. The possibilities are truly endless, and that’s what I love most about adaptable recipes like this one.
So, there you have it, my wonderful readers. I’ve shared one of my absolute favorite creations with you, and now it’s your turn. I genuinely hope you feel inspired and excited to roll up your sleeves and give these fantastic Strawberry Cheesecake Protein Balls a try in your own kitchen. I promise you, the minimal effort involved yields maximum deliciousness and satisfaction. Imagine the pride you’ll feel when you bite into one, knowing you’ve created something so wholesome, so flavorful, and so perfectly aligned with your health goals. Don’t just read about it; experience it! When you do whip up a batch, I would absolutely love to hear all about your experience. Did you stick to the original recipe? Did you get creative with any of the variations I suggested, or perhaps invent some of your own? Please, please, come back to the comments section and share your thoughts, your successes, and even your quirky adaptations. Your feedback means the world to me, and it helps our community grow with new ideas and inspiration. Tag me on social media if you share photos of your culinary masterpieces – I’d be thrilled to see your creations! Let’s make these delightful protein balls a staple in kitchens everywhere, proving that healthy eating can be incredibly indulgent and utterly joyful. Thank you for joining me on this delicious journey. Happy rolling, my friends!
Strawberry Cheesecake Protein Balls
Strawberry Cheesecake Protein Balls are poised to become your new favorite healthy indulgence. Imagine savoring the delightful, creamy tang of a classic strawberry cheesecake, perfectly blended with the sweet burst of fresh berries, all concentrated into a convenient, guilt-free, protein-packed bite. This no-bake recipe delivers on every front, offering indulgent taste and wholesome nutrition in one perfect little sphere.
Ingredients
-
½ cup rolled oats
-
1 cup almond flour
-
2 scoops vanilla protein powder
-
¼ cup cream cheese, softened
-
¼ cup freeze-dried strawberries, crushed
-
2 tbsp honey or maple syrup
-
1 tsp vanilla extract
-
1–2 tbsp milk (as needed)
Instructions
-
Step 1
In a food processor, pulse ½ cup rolled oats and half of the ¼ cup freeze-dried strawberries until they form a coarse flour. Transfer the mixture to a large mixing bowl. -
Step 2
To the bowl, add 1 cup almond flour, 2 scoops vanilla protein powder, ¼ cup softened cream cheese, 2 tbsp honey or maple syrup, and 1 tsp vanilla extract. Mix thoroughly until a thick, uniform dough forms. -
Step 3
If the dough appears too dry or crumbly, add 1–2 tbsp milk, 1 tablespoon at a time, mixing until a workable, cohesive dough consistency is achieved. -
Step 4
Cover the bowl and refrigerate the dough for 15-20 minutes to firm up, making it easier to handle. -
Step 5
Line a baking sheet with parchment paper. Scoop portions of the chilled dough (approximately 1.5 tablespoons each) and roll them firmly between your palms to form smooth, round balls. Place each ball onto the prepared baking sheet. -
Step 6
Return the baking sheet with the rolled balls to the refrigerator for another 15-30 minutes to firm them up further. -
Step 7
For an optional garnish, gently roll the chilled protein balls in the remaining crushed freeze-dried strawberries, pressing lightly to adhere the pieces. -
Step 8
Once garnished (if desired), return the protein balls to the refrigerator for a final chill of at least 30-60 minutes to ensure they are fully set before serving. Store any leftovers in an airtight container in the refrigerator for up to a week.
Important Information
Nutrition Facts (Per Serving)
It is important to consider this information as approximate and not to use it as definitive health advice.
Allergy Information
Please check ingredients for potential allergens and consult a health professional if in doubt.

Leave a Comment