
Strawberry banana pudding: just the name conjures up images of sunshine, smiles, and sweet, creamy goodness! But this isn’t just any dessert; it’s a nostalgic trip back to childhood picnics and family gatherings. Imagine layers of luscious vanilla pudding, ripe bananas, and juicy strawberries, all mingling together in perfect harmony. Are you ready to recreate this classic treat in your own kitchen?
While the exact origins of strawberry banana pudding are a bit hazy, the combination of these fruits with a creamy base has been a beloved dessert staple for generations. It’s a dish that transcends cultures, appearing in various forms around the world, each with its own unique twist. But the core appeal remains the same: a simple, satisfying, and utterly delicious dessert.
What makes this pudding so irresistible? It’s the symphony of flavors and textures! The sweetness of the strawberries perfectly complements the creamy richness of the pudding and the soft, almost melt-in-your-mouth texture of the bananas. Plus, it’s incredibly easy to make, requiring minimal effort and readily available ingredients. Whether you’re looking for a quick weeknight dessert or a crowd-pleasing treat for a special occasion, this strawberry banana pudding is guaranteed to be a hit. Let’s get started!
Ingredients:
- 1 (14 ounce) can sweetened condensed milk
- 1 ½ cups cold milk (2% or whole works best)
- 1 (3.4 ounce) package instant vanilla pudding mix
- 1 (8 ounce) container frozen whipped topping, thawed
- 1 box (11 ounces) vanilla wafers
- 3-4 ripe bananas, sliced
- 1 pound fresh strawberries, hulled and sliced
Preparing the Pudding Base
Okay, let’s get started with the creamy, dreamy pudding base. This is the foundation of our strawberry banana pudding, and it’s super easy to make. Trust me, you’ll be licking the spoon!
- Combine the Milks: In a large bowl, whisk together the sweetened condensed milk and the cold milk until they are well combined. Make sure there are no lumps of sweetened condensed milk clinging to the bottom of the bowl. A smooth mixture is key for a perfect pudding.
- Add the Pudding Mix: Pour in the instant vanilla pudding mix. Now, whisk, whisk, whisk! Keep whisking for about 2 minutes, or until the pudding mix is fully incorporated and the mixture starts to thicken slightly. You’ll notice it getting a bit heavier as you whisk.
- Let it Set: Cover the bowl with plastic wrap, pressing the wrap directly onto the surface of the pudding to prevent a skin from forming. Place the bowl in the refrigerator and let it chill for at least 5 minutes. This allows the pudding to thicken up properly. You can even chill it for longer, up to an hour, if you have the time. The longer it chills, the thicker it will be!
- Fold in the Whipped Topping: Once the pudding has chilled, remove it from the refrigerator. Gently fold in the thawed whipped topping until it is evenly distributed throughout the pudding. Be careful not to overmix, as this can deflate the whipped topping. We want to keep it light and airy! The folding motion should be gentle, lifting the pudding from the bottom and folding it over the top.
Assembling the Strawberry Banana Pudding
Now for the fun part – layering all those delicious ingredients! This is where the magic happens, and you get to create a beautiful and tasty dessert. You can use a large trifle bowl, a 9×13 inch baking dish, or individual serving cups. I personally love using a trifle bowl because it shows off all the layers.
- First Layer: Vanilla Wafers: Arrange a layer of vanilla wafers on the bottom of your chosen dish. You can break some of the wafers to fill in any gaps and create a solid base. Don’t be afraid to get creative with the arrangement! You can even crush some of the wafers and sprinkle them on the bottom for a more rustic look.
- Second Layer: Sliced Bananas: Place a layer of sliced bananas over the vanilla wafers. Try to distribute the banana slices evenly so that every bite has a bit of banana goodness. If you’re worried about the bananas browning, you can toss them with a little lemon juice before layering.
- Third Layer: Sliced Strawberries: Add a layer of sliced strawberries on top of the bananas. Again, distribute them evenly. The bright red strawberries look so beautiful against the yellow bananas!
- Fourth Layer: Pudding Mixture: Spread a layer of the pudding mixture over the strawberries. Use a spatula to smooth it out and make sure it covers all the fruit.
- Repeat Layers: Repeat the layers of vanilla wafers, bananas, strawberries, and pudding mixture until all the ingredients are used up. You can adjust the number of layers depending on the size of your dish. I usually aim for at least three layers of each ingredient.
- Final Layer: Whipped Topping (Optional): For the final layer, you can either top it with a layer of pudding or a layer of whipped topping. If you choose whipped topping, spread it evenly over the top. You can also get fancy and pipe the whipped topping on with a piping bag.
- Garnish (Optional): Garnish the top with extra sliced strawberries, banana slices, and crushed vanilla wafers. This adds a beautiful finishing touch and makes the pudding look even more appealing. You could also sprinkle on some chocolate shavings or a drizzle of caramel sauce.
Chilling and Serving
Patience is a virtue, especially when it comes to this strawberry banana pudding. Chilling it allows the flavors to meld together and the pudding to set properly. It’s worth the wait, I promise!
- Chill the Pudding: Cover the dish with plastic wrap and refrigerate for at least 4 hours, or preferably overnight. This allows the vanilla wafers to soften and the flavors to meld together beautifully. The longer it chills, the better it will taste!
- Serving: When you’re ready to serve, remove the pudding from the refrigerator. If you used a trifle bowl, you can simply scoop out portions and serve. If you used a baking dish, you can cut it into squares.
- Optional Toppings: You can serve the pudding as is, or you can add some extra toppings. Some of my favorite toppings include whipped cream, fresh strawberries, banana slices, chocolate shavings, and caramel sauce.
Tips and Variations
Want to customize your strawberry banana pudding? Here are a few tips and variations to try:
- Use Different Fruit: Feel free to experiment with other fruits, such as blueberries, raspberries, or peaches.
- Add Chocolate: For a chocolatey twist, add a layer of chocolate pudding or sprinkle chocolate shavings between the layers.
- Use Different Cookies: Instead of vanilla wafers, try using graham crackers or shortbread cookies.
- Make it Healthier: Use sugar-free pudding mix and light whipped topping to make a healthier version.
- Individual Servings: Assemble the pudding in individual cups or jars for a cute and convenient dessert.
- Banana Extract: For an extra banana flavor boost, add a teaspoon of banana extract to the pudding mixture.
- Strawberry Extract: Similarly, a touch of strawberry extract can enhance the strawberry flavor.
- Lemon Zest: A little lemon zest in the pudding mixture can add a bright, citrusy note.
- Nutella Swirl: Swirl a spoonful of Nutella into the pudding mixture for a hazelnut chocolate flavor.
- Caramel Sauce: Drizzle caramel sauce between the layers for a decadent treat.
- Toasted Coconut: Sprinkle toasted coconut on top for added texture and flavor.
- Chopped Nuts: Add chopped pecans or walnuts for a crunchy element.
- Espresso Powder: A pinch of espresso powder can enhance the flavors of the chocolate and vanilla.
- Salted Caramel: Use salted caramel sauce instead of regular caramel for a salty-sweet flavor.
- Make Ahead: This pudding is perfect for making ahead of time. It can be stored in the refrigerator for up to 3 days.
- Freezing: While you can freeze this pudding, the texture may change slightly. It’s best enjoyed fresh.
Troubleshooting
Sometimes things don’t go exactly as planned. Here are a few common problems and how to fix them:
- Pudding is too thin: Make sure you are using instant pudding mix and not cook-and-serve pudding mix. Also, make sure you are using the correct amount of milk. If the pudding is still too thin, you can add a little more pudding mix, a tablespoon at a time, until it reaches the desired consistency.
- Pudding is too thick: If the pudding is too thick, you can add a little more milk, a tablespoon at a time, until it reaches the desired consistency.
- Bananas are browning: To prevent the bananas from browning, toss them with a little lemon juice before layering.
- Vanilla wafers are soggy: This is normal, as the vanilla wafers absorb moisture from the pudding. If you prefer a crispier texture, you can add the vanilla wafers just before serving.
- Whipped topping is deflating: Be careful not to overmix the whipped topping. Gently fold it into the pudding mixture until it is just combined.
Nutritional Information (Approximate)
Please note that the following nutritional information is an estimate and may vary depending on the specific ingredients used.
- Calories: Approximately 350-400 per serving
- Fat: 15-20 grams
- Saturated Fat: 10-12 grams
- Cholesterol: 30-40 mg
- Sodium: 200-250 mg
- Carbohydrates: 50-60 grams
- Sugar: 35-45 grams
- Protein:

Conclusion:
So, there you have it! This strawberry banana pudding recipe is truly a must-try, and I’m not just saying that. It’s the perfect blend of creamy, fruity, and comforting, all in one delightful bowl. The simplicity of the recipe means you can whip it up in minutes, making it ideal for those last-minute dessert cravings or when you need a quick and easy treat for unexpected guests. But don’t let the ease fool you; the flavor is anything but simple. The sweetness of the strawberries perfectly complements the creamy banana, creating a symphony of flavors that will have everyone asking for seconds (and the recipe!).
What makes this pudding even more appealing is its versatility. Feel free to get creative with your serving suggestions and variations! For a truly decadent experience, try layering the pudding with crushed vanilla wafers or graham crackers in individual parfait glasses. This adds a delightful textural contrast and elevates the presentation. You could also top it with a dollop of whipped cream and a fresh strawberry for an extra touch of elegance.
If you’re looking to add a little something extra, consider incorporating other fruits. Blueberries, raspberries, or even a touch of mango would pair beautifully with the strawberry and banana. For a richer flavor, you could swirl in a spoonful of Nutella or peanut butter. And if you’re feeling adventurous, try adding a splash of rum or bourbon for an adult-friendly twist. The possibilities are truly endless!
Beyond the delicious taste and versatility, this strawberry banana pudding is also a crowd-pleaser. It’s a guaranteed hit at potlucks, picnics, and family gatherings. Kids love it, adults love it, and even the pickiest eaters will find something to enjoy. It’s a dessert that brings people together and creates happy memories. Plus, it’s a relatively healthy option compared to many other desserts, especially if you use low-fat milk and yogurt.
I truly believe that this recipe will become a staple in your kitchen. It’s quick, easy, delicious, and adaptable to your personal preferences. It’s the kind of recipe that you’ll find yourself making again and again, whether it’s for a special occasion or just a simple weeknight treat.
So, what are you waiting for? Grab your ingredients and get ready to experience the magic of this strawberry banana pudding. I’m confident that you’ll love it as much as I do. And once you’ve tried it, I’d love to hear about your experience! Share your photos, your variations, and your thoughts in the comments below. Let me know what you think and how you made it your own. Happy pudding making!
I can’t wait to see what delicious creations you come up with. Enjoy!
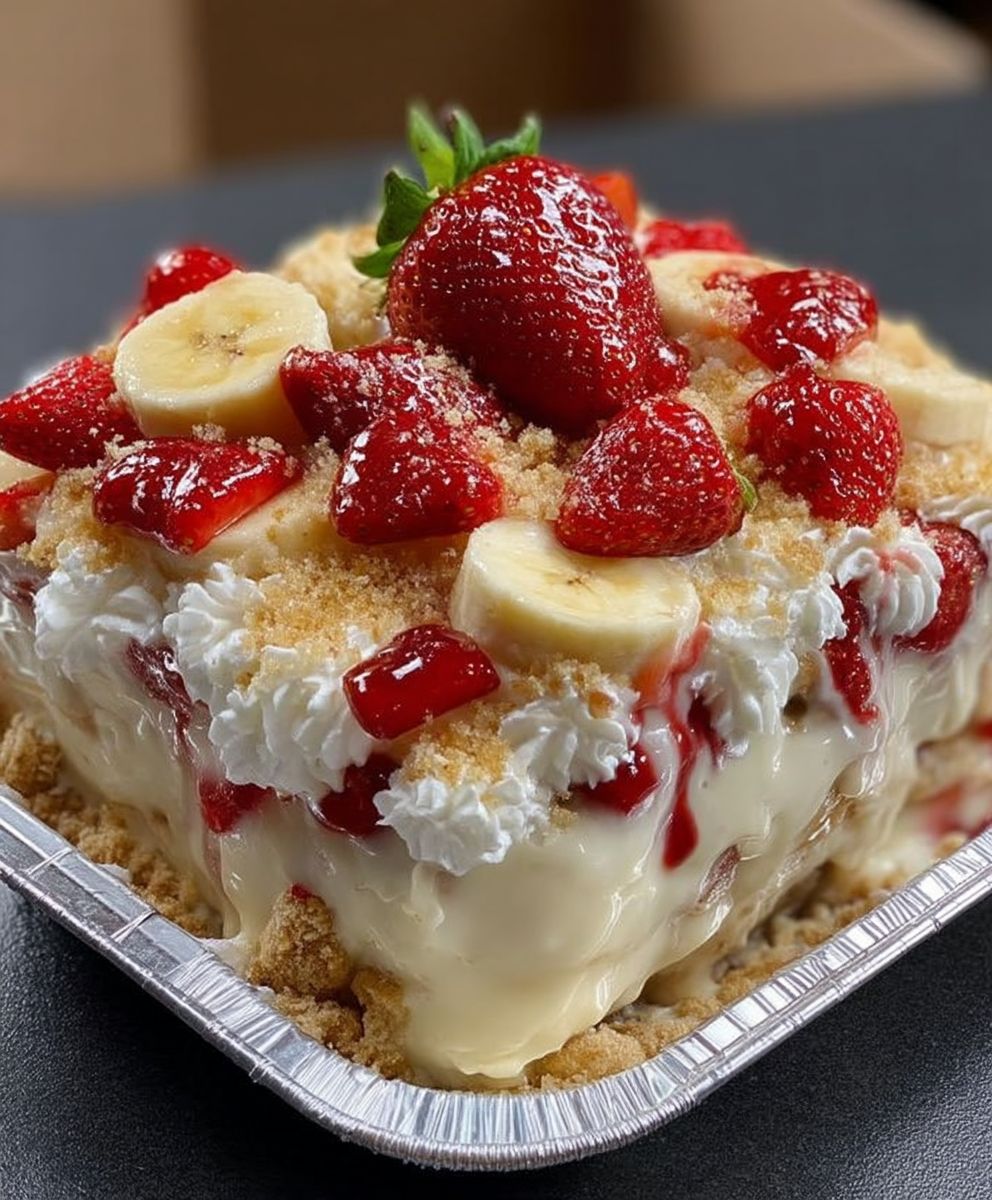
Strawberry Banana Pudding: The Ultimate Delicious & Easy Recipe
Classic Strawberry Banana Pudding with vanilla wafers, fresh fruit, and creamy vanilla pudding. Easy dessert for potlucks, parties, or any sweet treat!
By: Bluebella JuneCategory: DessertDifficulty: EasyCuisine: AmericanYield: 8-10 servingsDietary: VegetarianIngredients
Instructions
Recipe Notes
- Fruit Variations: Feel free to experiment with other fruits like blueberries, raspberries, or peaches.
- Chocolate Twist: Add a layer of chocolate pudding or sprinkle chocolate shavings between layers.
- Cookie Alternatives: Try graham crackers or shortbread cookies instead of vanilla wafers.
- Healthier Version: Use sugar-free pudding mix and light whipped topping.
- Individual Servings: Assemble in individual cups or jars.
- Preventing Browning: Toss banana slices with a little lemon juice to prevent browning.
- Make Ahead: This pudding is perfect for making ahead of time. It can be stored in the refrigerator for up to 3 days.
Frequently Asked Questions
→ How do I ensure the bread stays moist?Use fresh, ripe ingredients and avoid overmixing the batter. Store in an airtight container.→ Can I substitute ingredients?Yes, you can substitute similar ingredients while maintaining the basic ratios for best results.→ How long does this bread keep?Store tightly wrapped at room temperature for 2-3 days, or refrigerate for up to a week.→ What if I don't have all the spices?You can adjust spices to taste or substitute with similar warming spices.→ Can I freeze this bread?Yes, wrap individual slices and freeze for up to 3 months. Thaw at room temperature before serving.


Leave a Comment